


#1 Repairing Merino Wool
Photographer/Editor: Masaaki Mita
#1 Repairing Merino Wool
Photographer/Editor: Masaaki Mita
Repair diary is a collection of repair and care methods we have aqquired over the years. Most of them can be done at the comforts of your home!
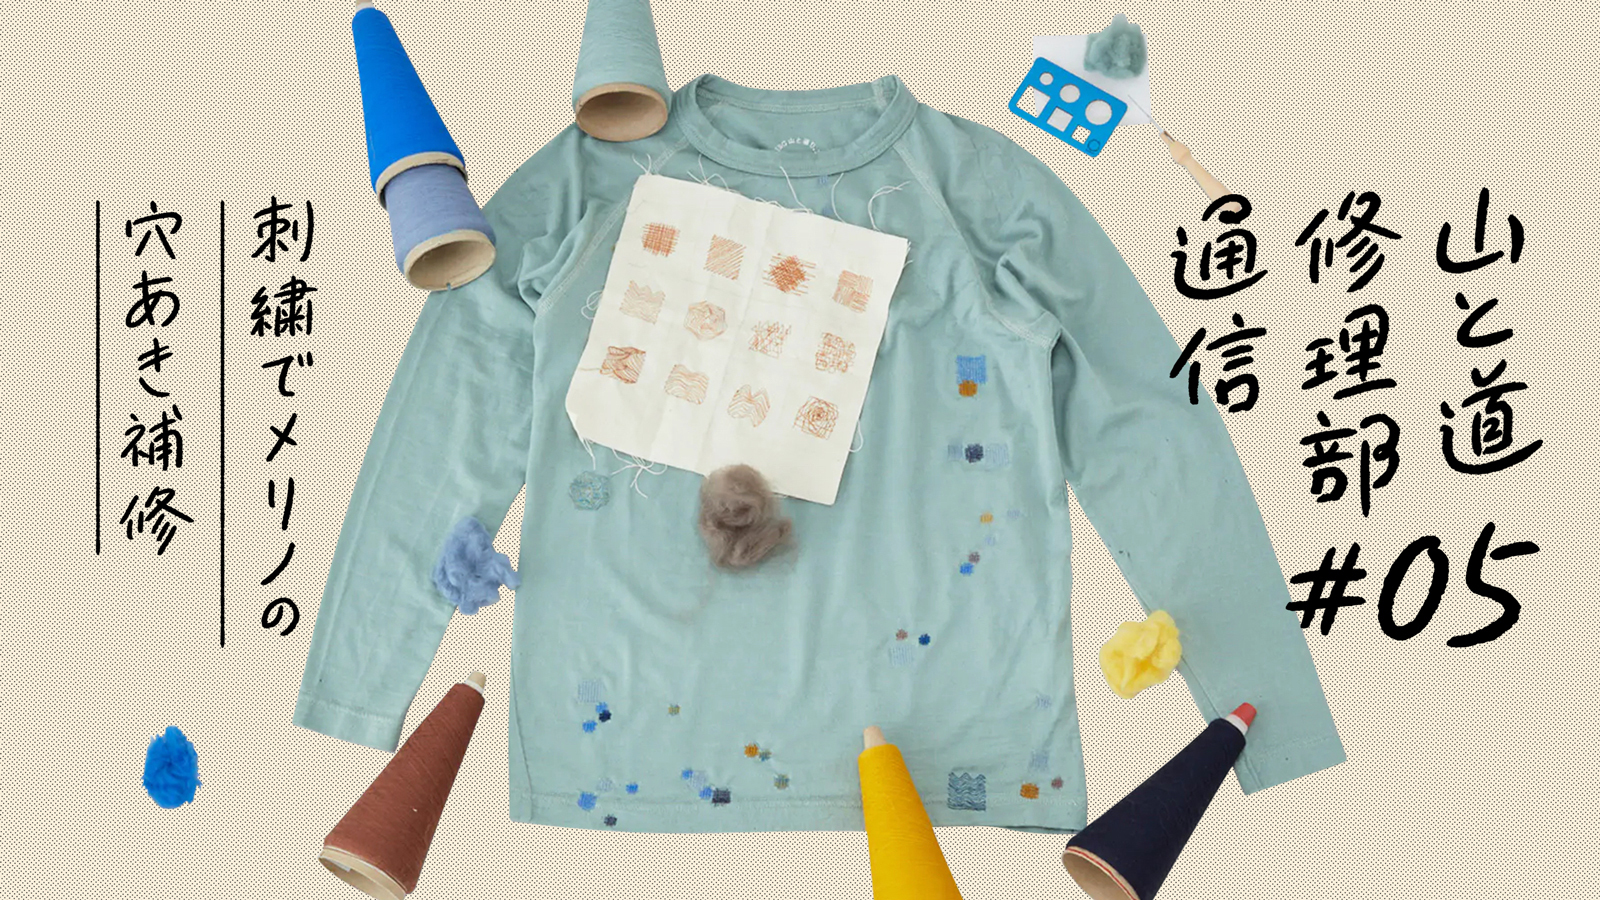
For our very first issue, we will introduce a method of repairing holes in merino wool using a technique called “felting.”
Although merino wool has excellent advantages, it is prone to holes due to insect bites and friction. Many of you must have experienced small holes in your clothes even though you thought you were taking good care of them.
But good news! Anyone can easily repair holes in merino wool with simple tools.
Hello, my name is Ichiro Kitajima, in charge of prototyping and repair at Yamatomichi.
I used to spend my days silently cutting fabrics in a corner of my atelier in Harajuku, but since I was fortunate enough to join Yamatomichi, I have been working with wonderful colleagues and appreciating being able to live surrounded by nature.
Recently, one of the inquiries we often receive from customers is about holes in our merino wool products. Merino wool, a natural fiber, has excellent properties such as excellent temperature and humidity control and deodorizing functions, but it also has the weakness of being prone to holes due to thread breakage caused by insect bites and friction.
I was very pleased with the comfort of our Light Merino T-shirt but after wearing it for about two weeks, I noticed a small hole in the shoulder. I tried to forget about it for a moment, but the hole was still there the next day.
I was shocked, but at the same time a question came to my mind. Where in the world did this hole come from? When I asked Mr. Matsumoto of our research team about the cause of the hole, he told me that it was probably insects. When had I ever lived with such insects?
I then regained my composure by thinking of the hole as “a message to remind me that I am in the cycle of nature.
The changes that occur over time as gear is fascinating. I think that through repair, we can make great use of our gear and become more attached to the piece of equipment and feel the circle of life. The holes in the merino wool gave me a chance to realize this.
Merino wool has wonderful functionality that cannot be achieved with synthetic fibers. In order to spend a longer time together, it is important to get along well with the holes. Wool, the only clothing of sheep, is filled with wisdom for living in harmony with the nature. Using the natural characteristics of wool, there is a fun way to repair holes in merino wool. We hope you will find it useful as one way to deal with holes.
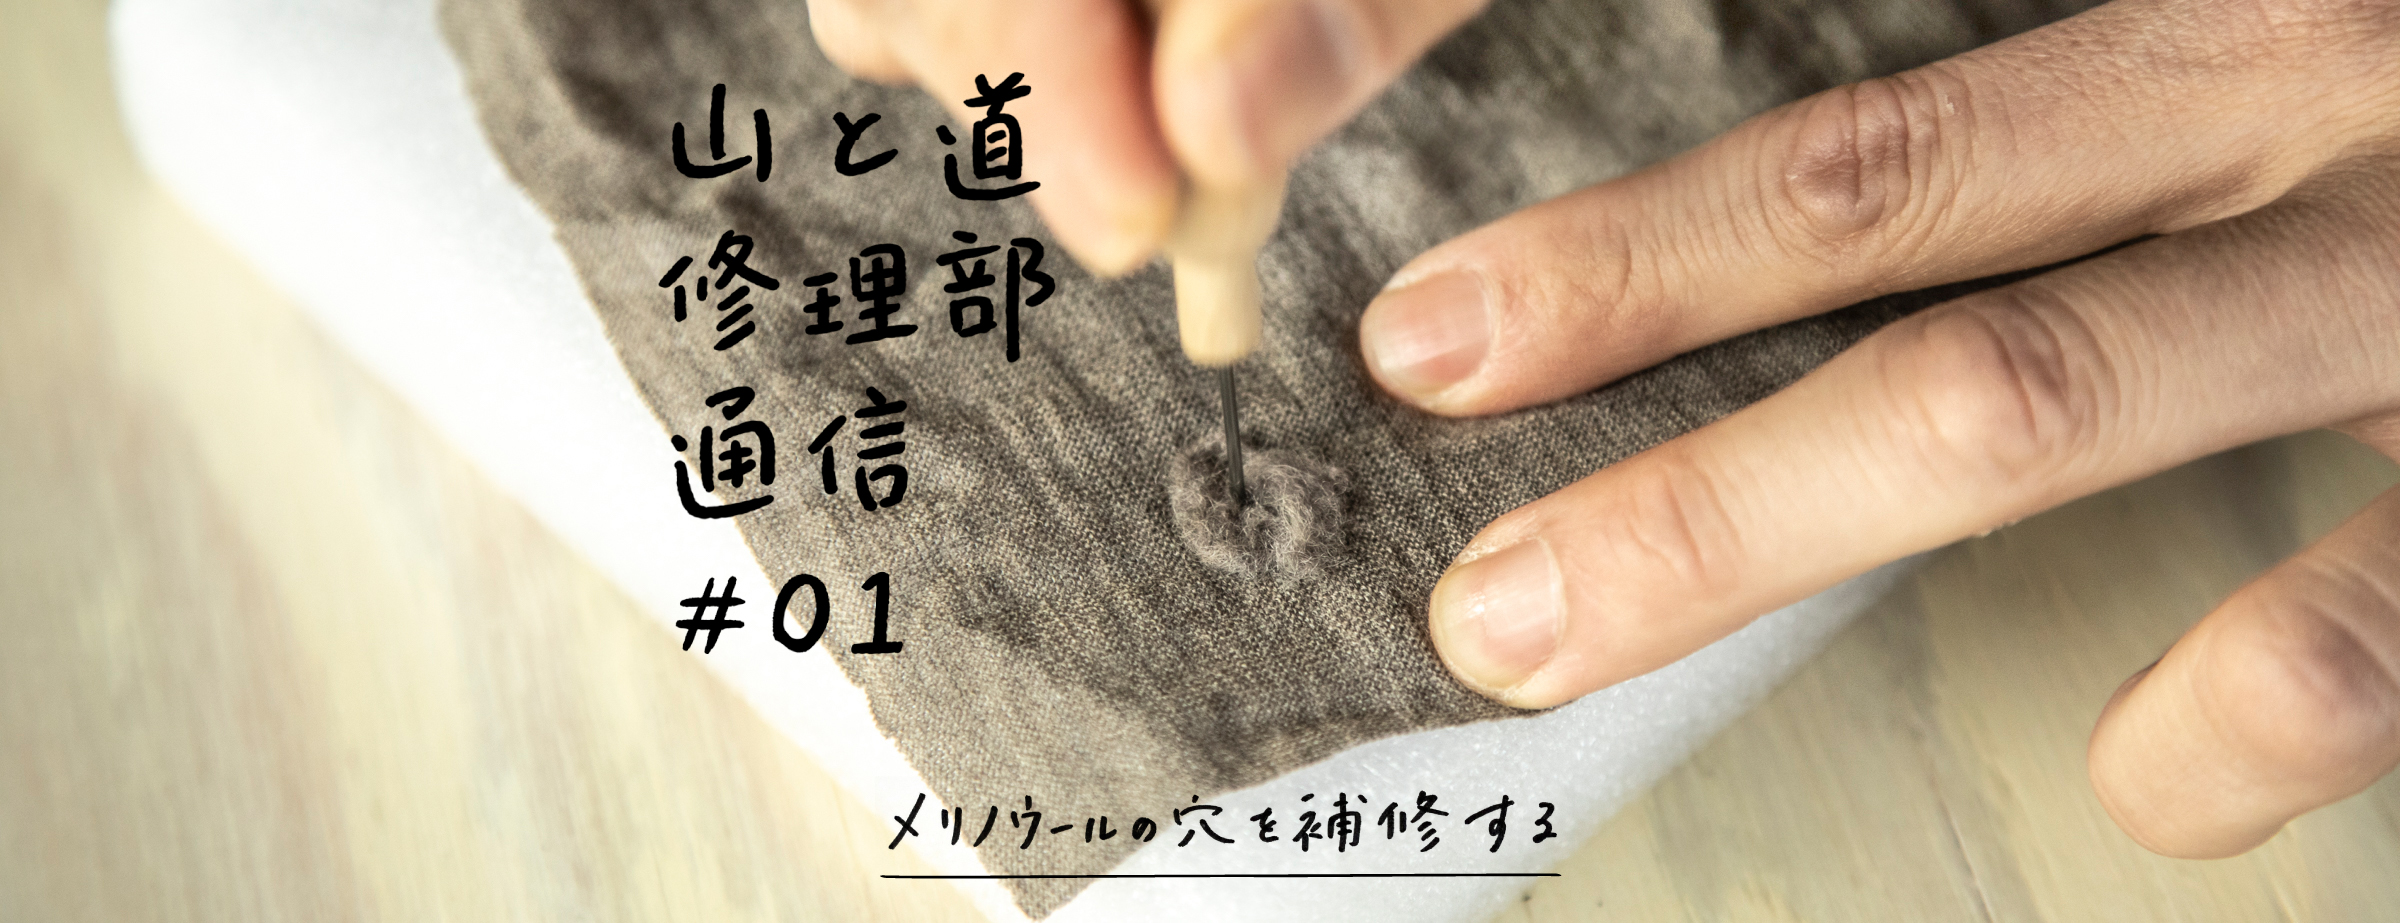
Hole Repair by Felting Wool
Raw wool is covered with scales, and when heat, pressure, or vibration is applied, the scales interlock with each other and become entangled and cannot be separated, a phenomenon known as “felting.”
Holes in merino wool knit products such as the Light Merino T-Shirts series and 100% Merino Half Zip Hoody can be repaired by felting, a technique in which the raw wool is pierced together with a felting needle and then hardened.
July 2023 Update
For 100% Merino series products and 100% Light Merino series products after 2021, more careful work is required because the yarn structure has been changed from *ply-yarn to single yarn. If you are confident in performing this work on your own, please contact our Repair Department for repairs.
*Single yarn is a single spun yarn, while ply-yarn is made by twisting two single yarns together.
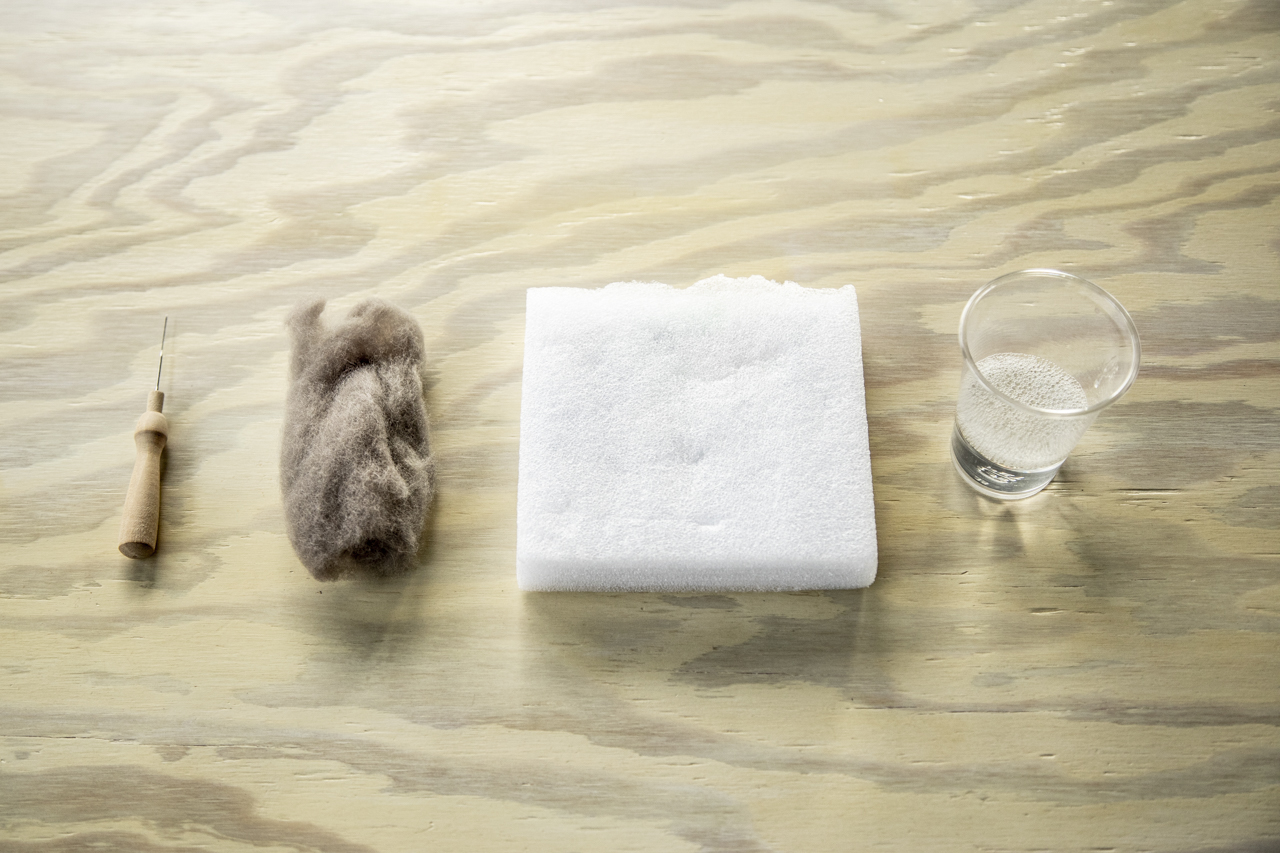
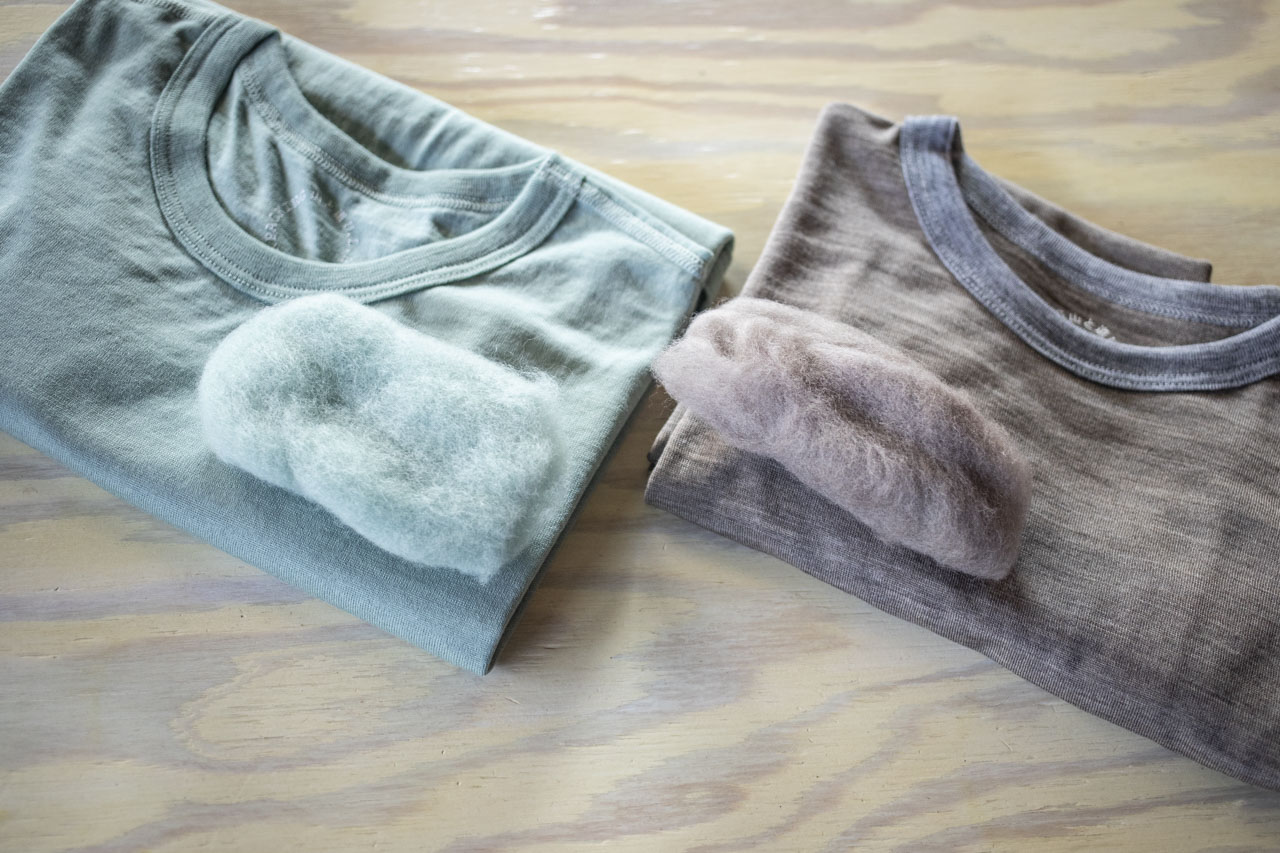
What to prepare
– Raw wool
– Felting needle
– Sponge
– Soap water (1-2 drops of detergent in a glass)
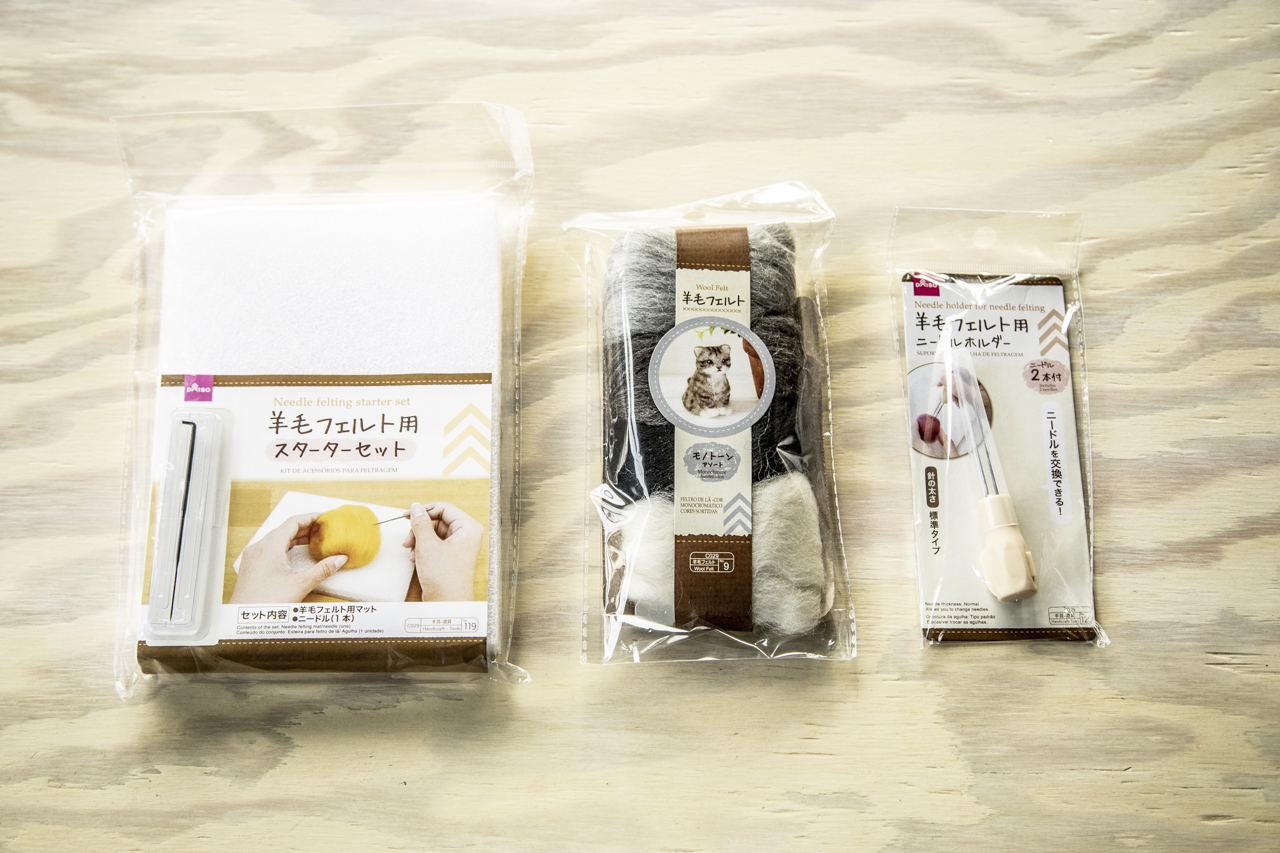
If you do not have the above items, you can find felt starter kits at handicraft stores.
How to felt
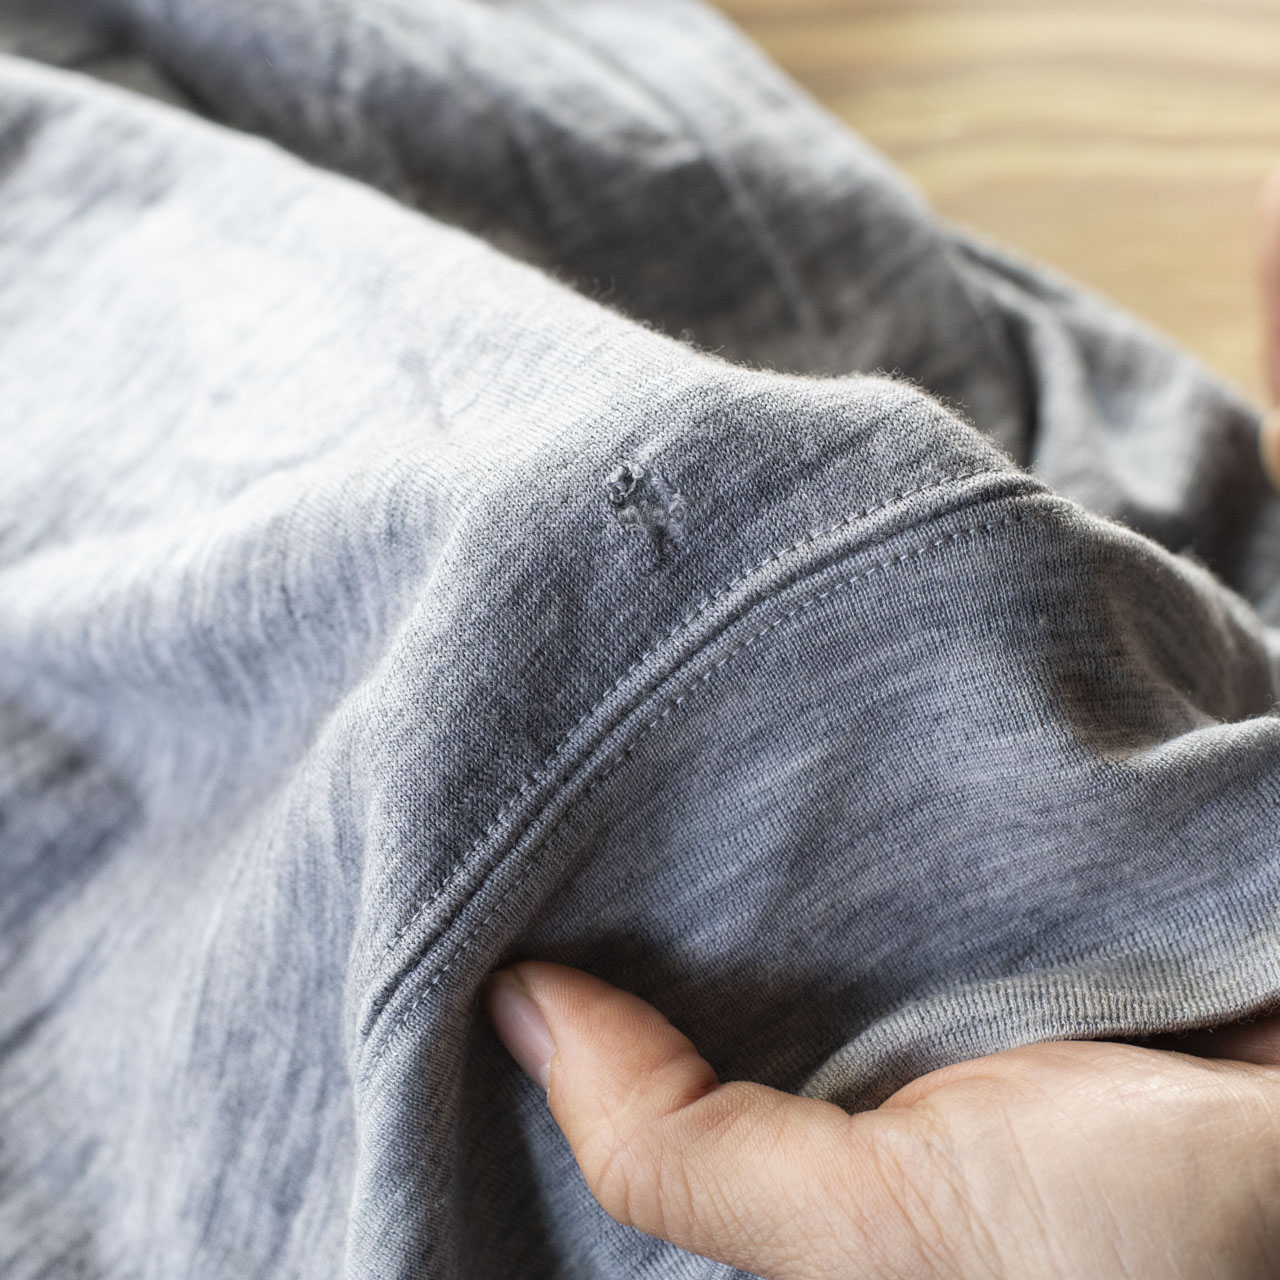
1.
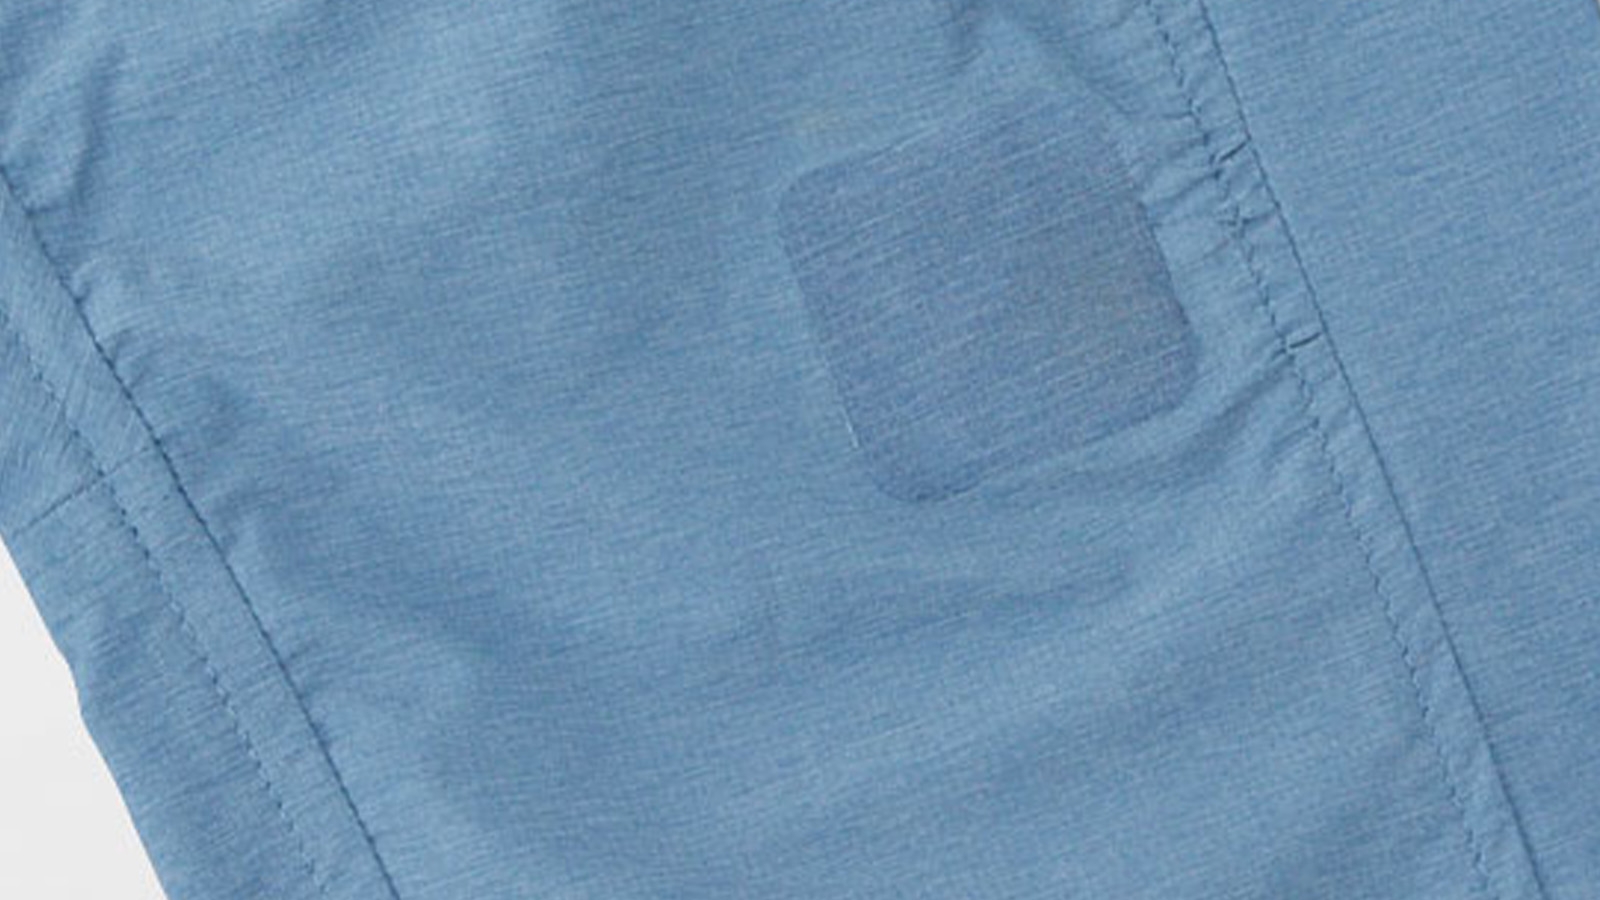
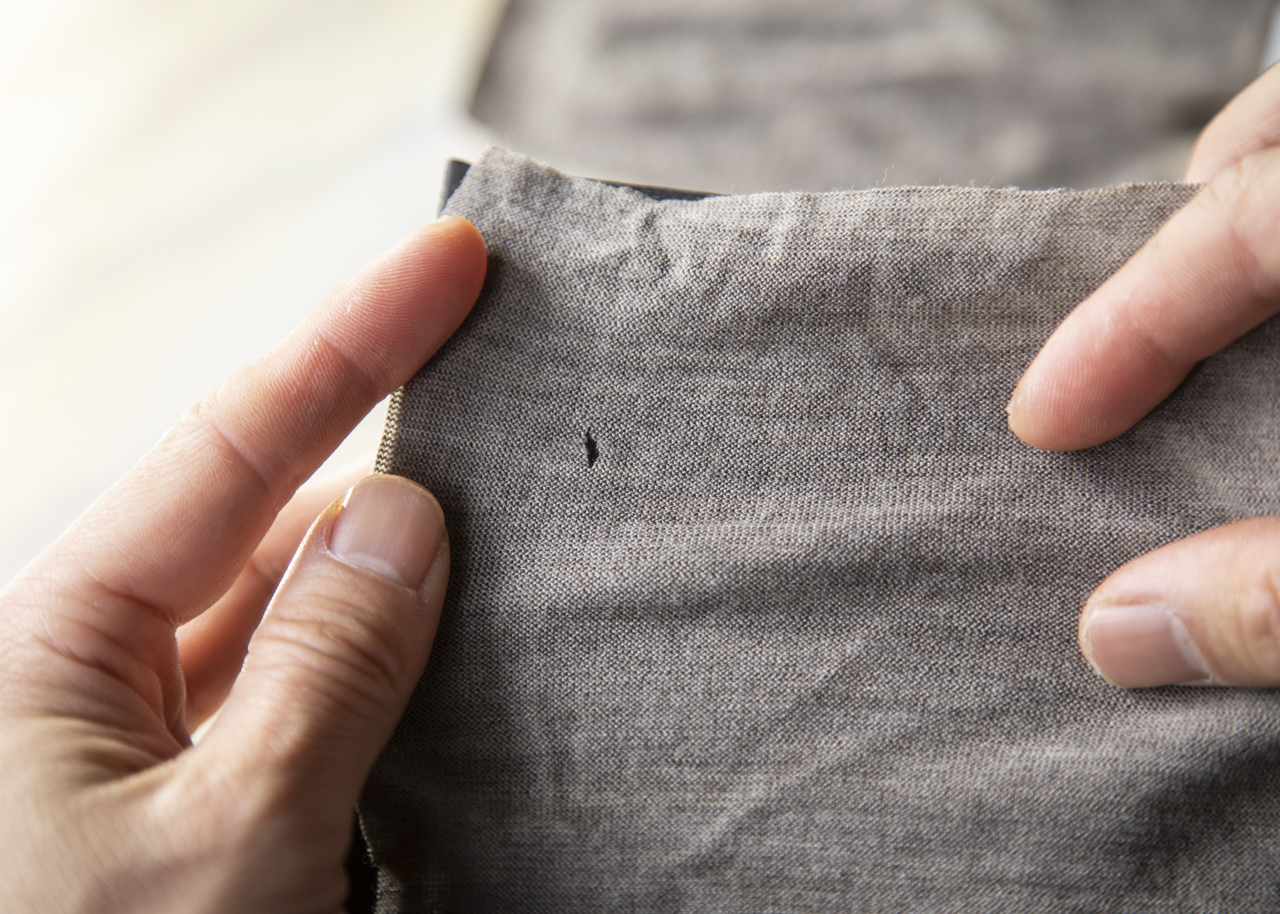
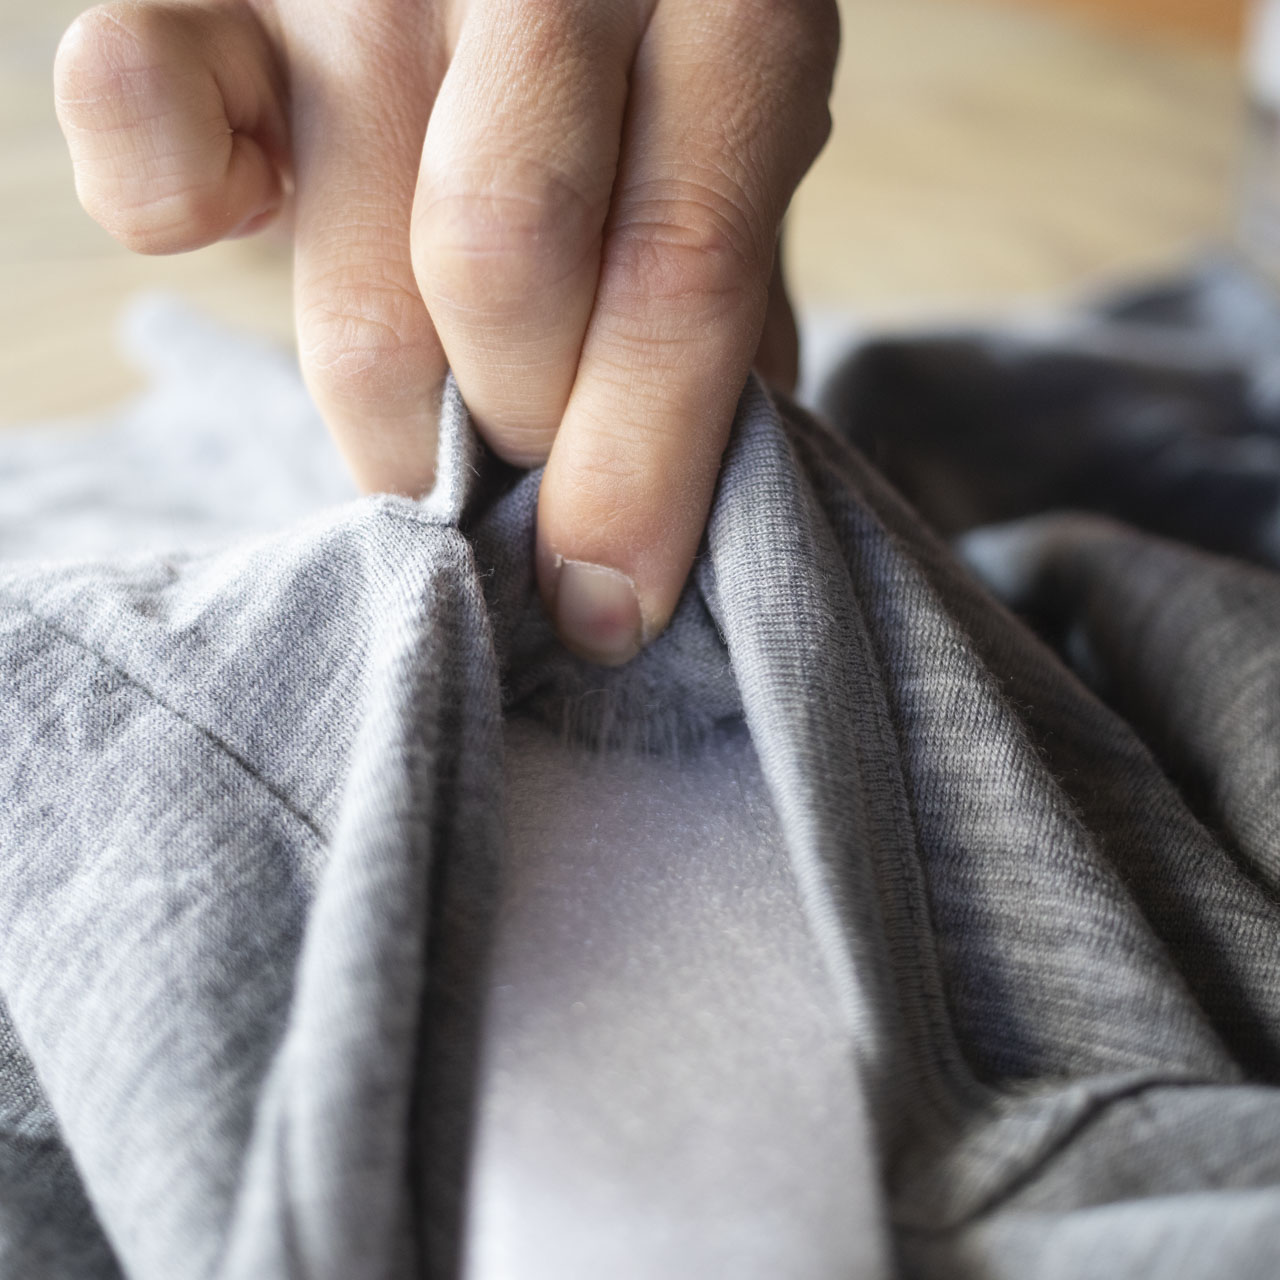
This is a hole in the pocket of 100% Merino Half Zip Hoody. Knit merino wool fabrics are prone to this kind of condition due to thread tearing and insect bites.
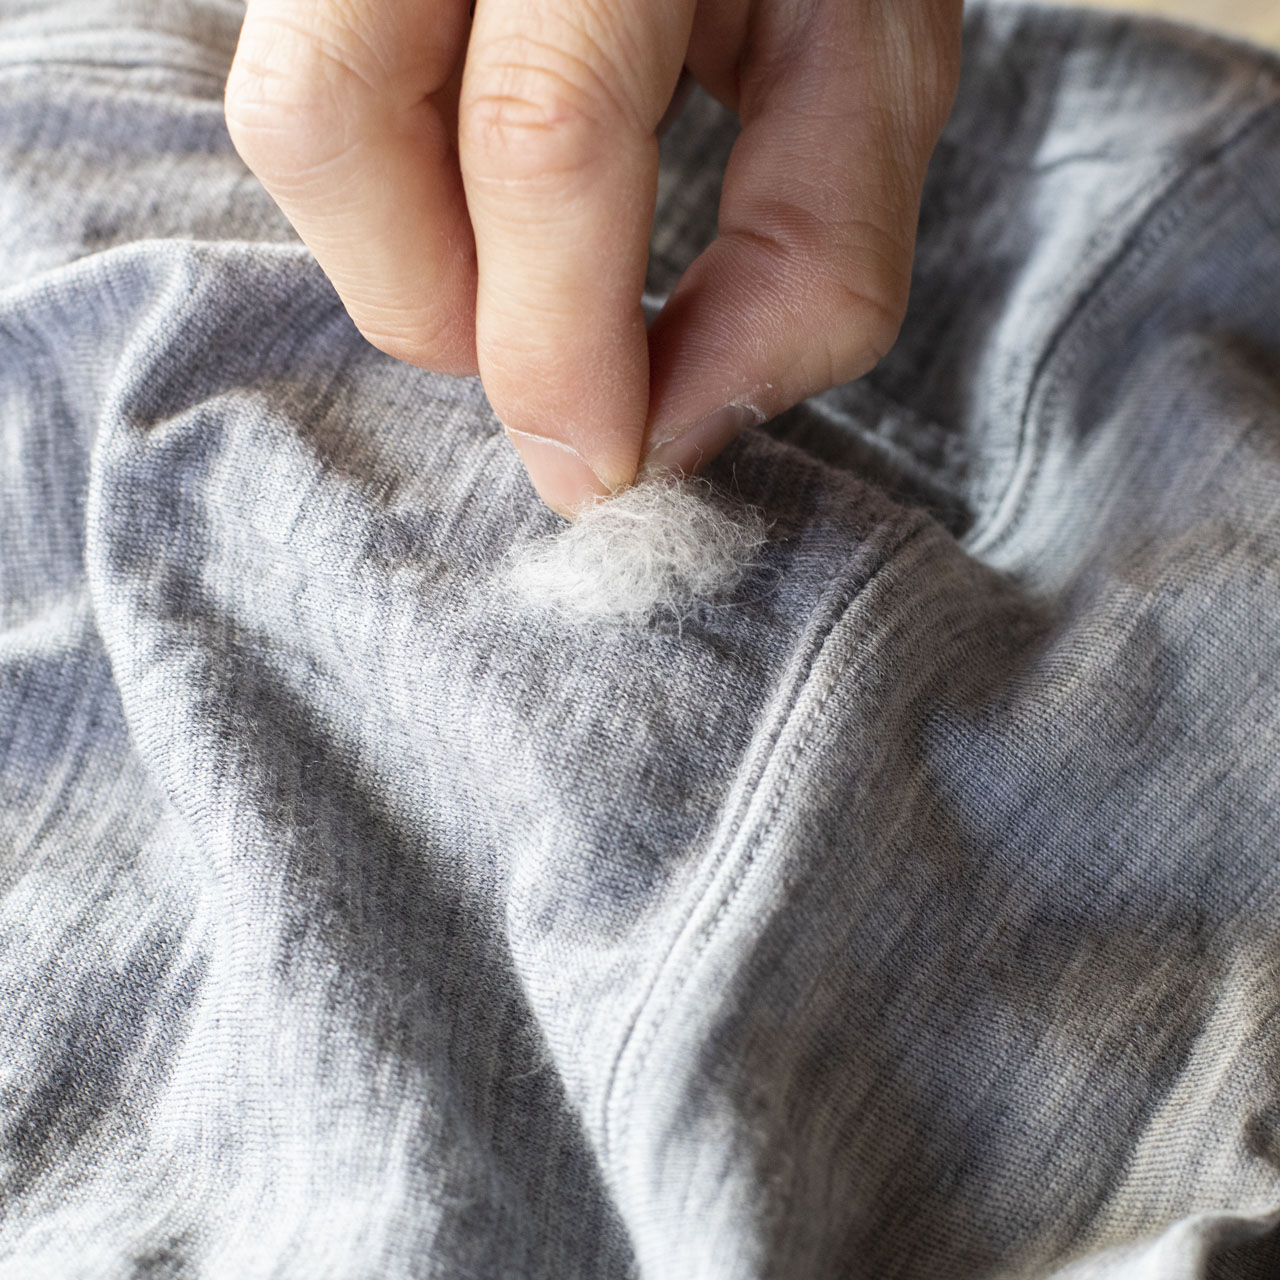
2.
Tear a piece of raw wool larger than the hole, knead lightly by hand, and place the ball over the hole. If you think you didn’t get enough wool, thats okay, you can always add more later.
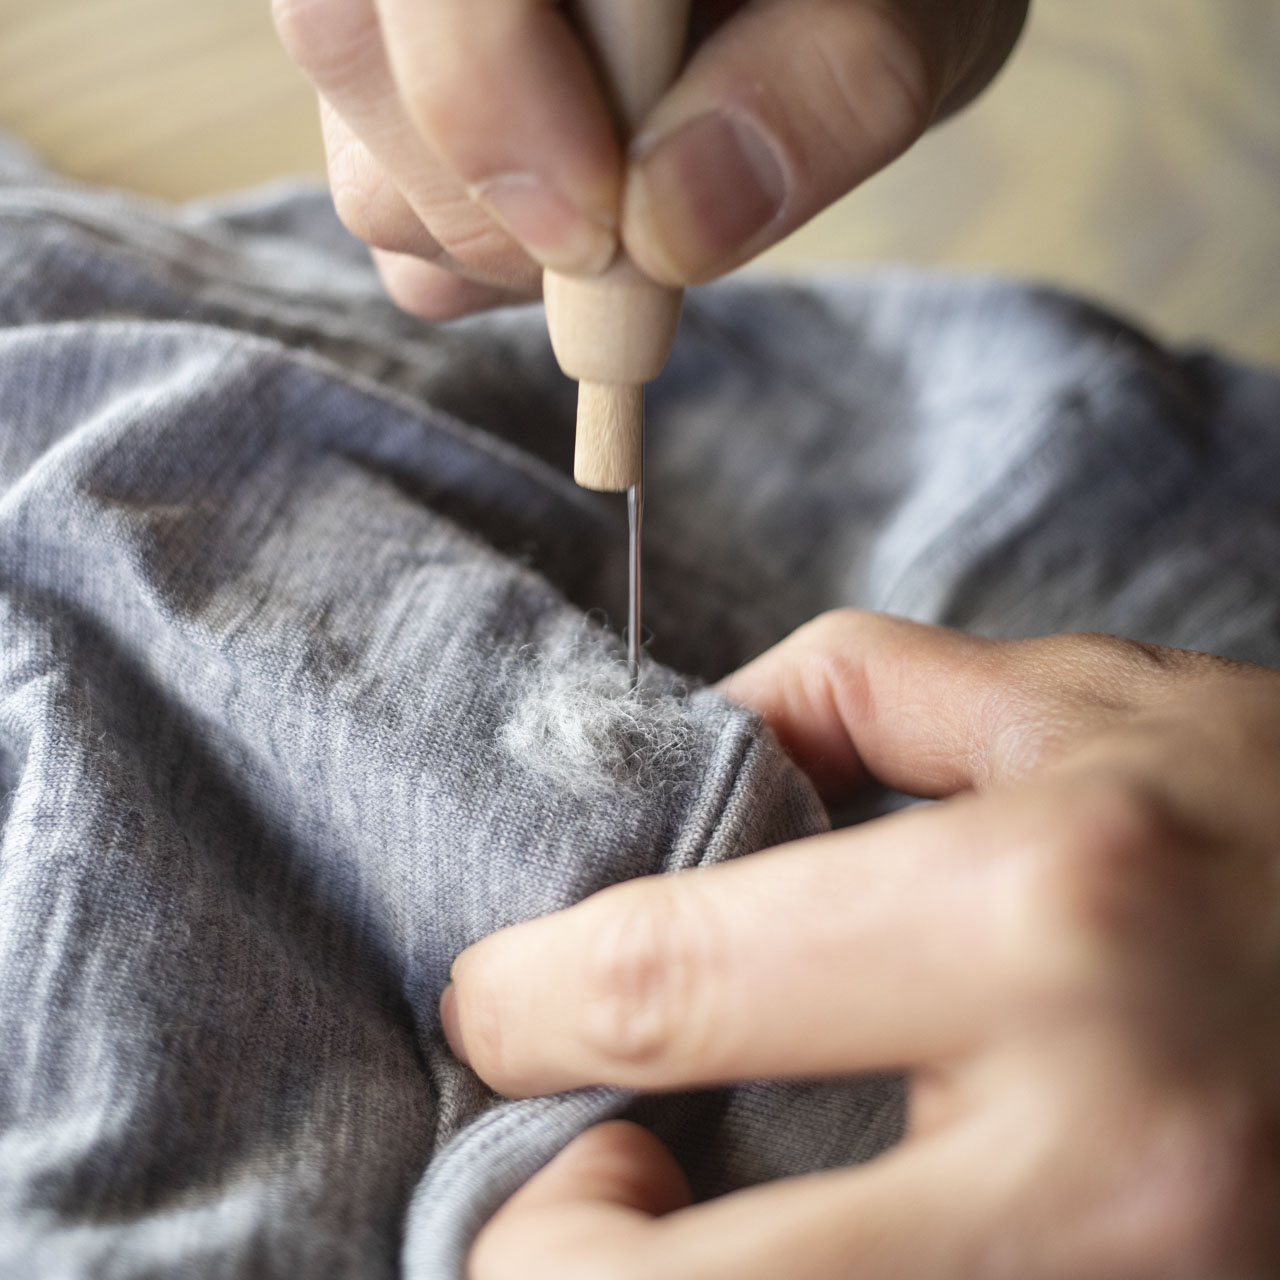
3
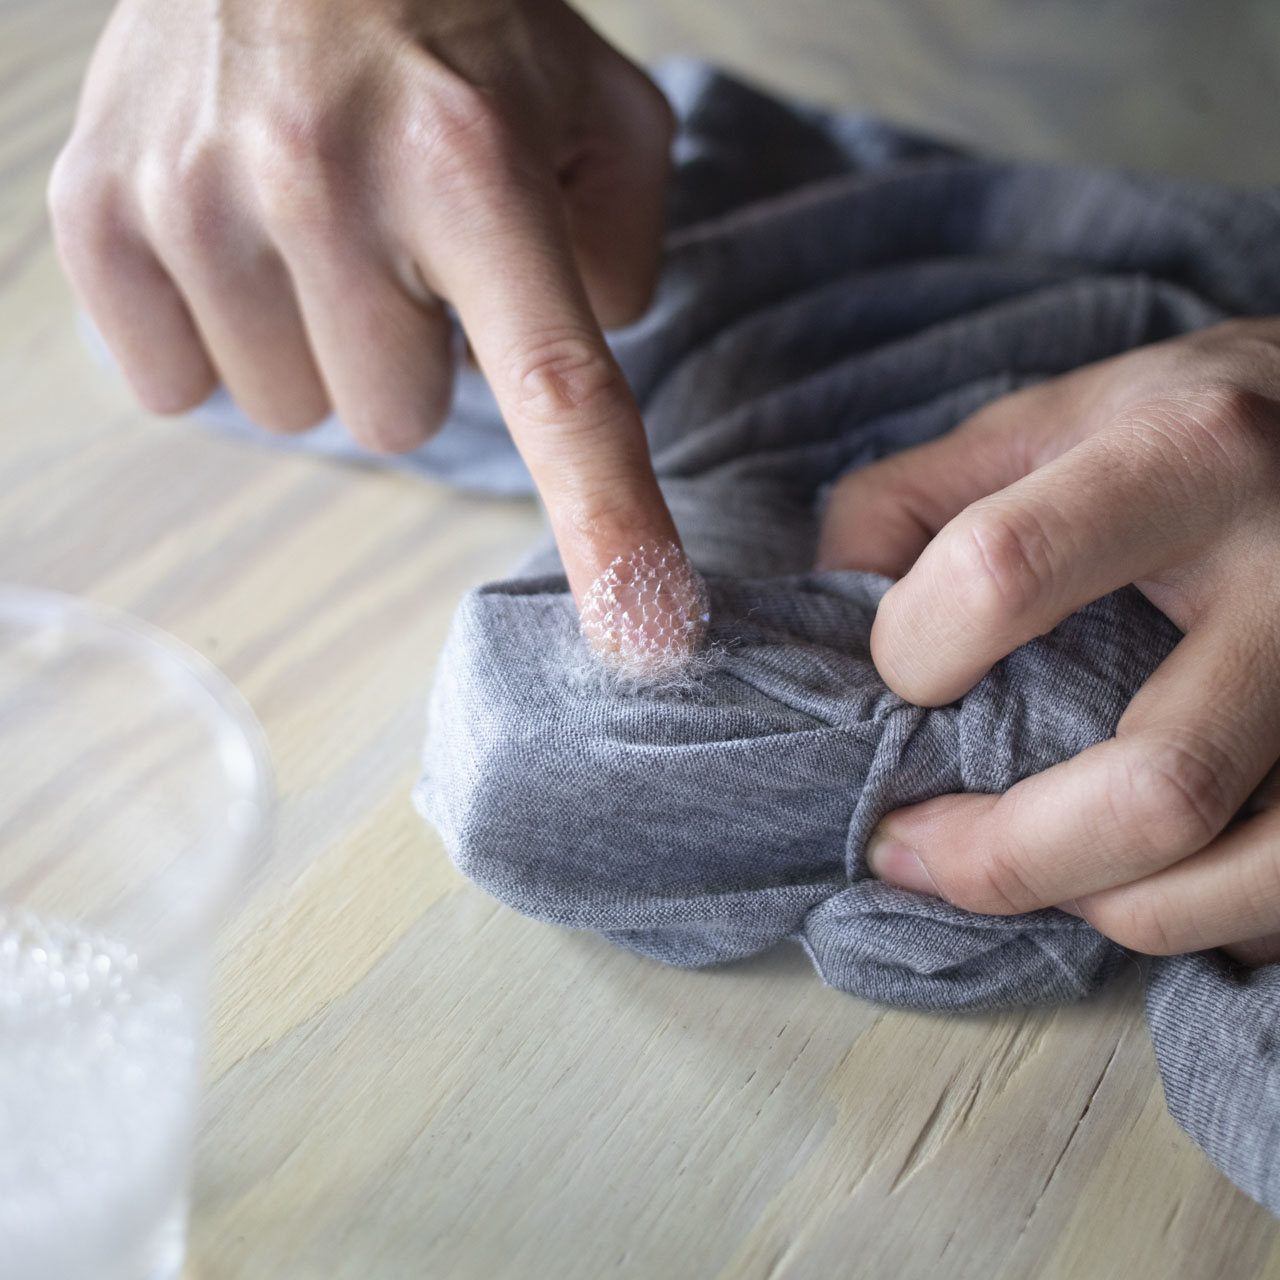
Place the felting sponge under the hole and start by lightly stabing the perimeters making a outline for the patch. Once the outline is established, work your way towards the center. (See the video below to see how hard to stab.)
4
After stabbing for 1-3 minutes until the raw hairs floating on the surface are blended to some extent, turn it over. Make sure to extract the raw wool hairs imbeded in the sponge when flipping it over.
5.
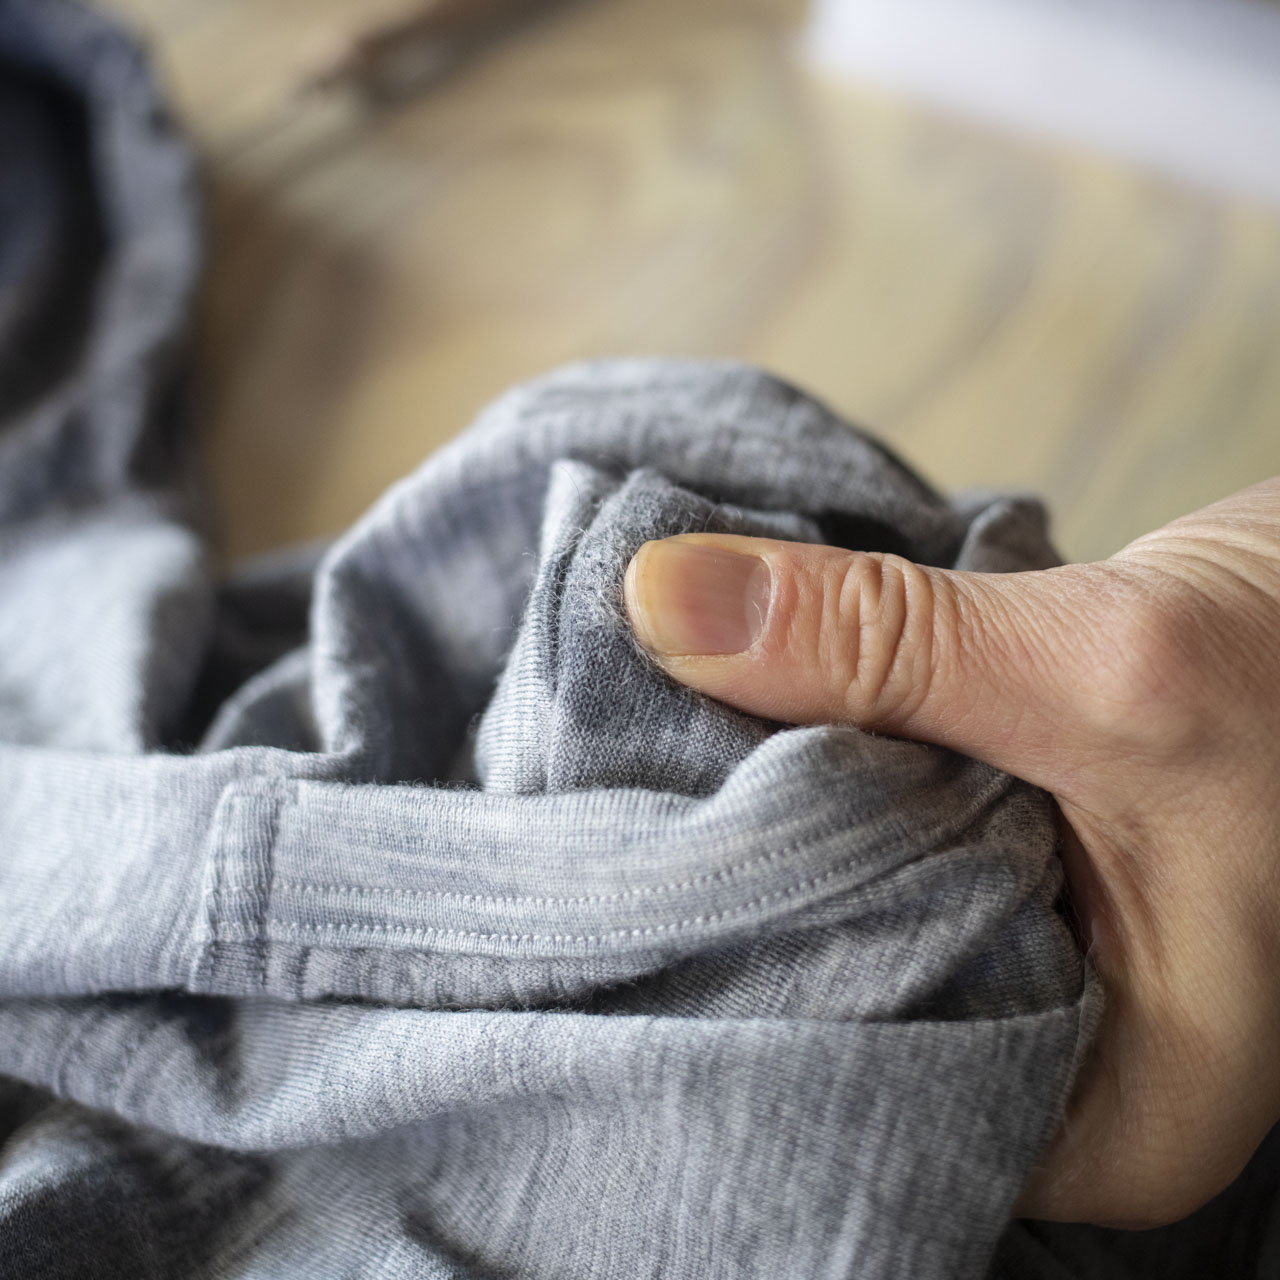
Stab the back side the same way and rub with soap water with your fingers to make the raw hairs blend in and felt.
6
Repeat stabbing the front and back 3-4 times to harden. When it has assimilated with the fabric to some extent, blend the repaired area by rubbing in with your fingers to finsih.
7
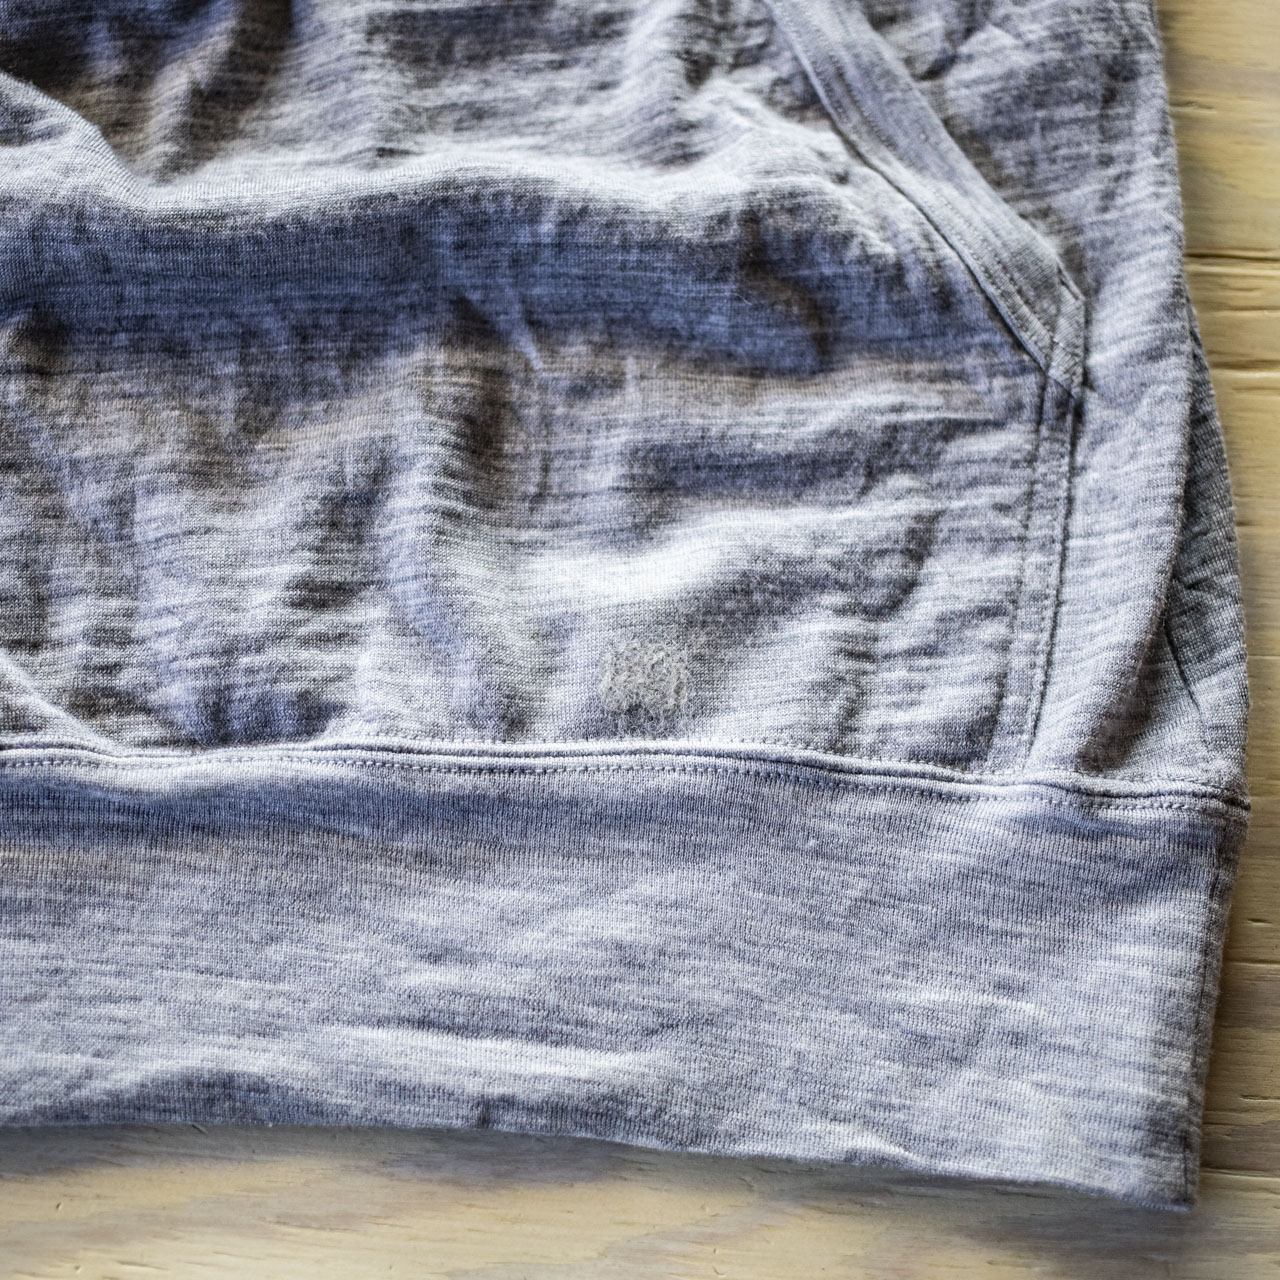
Done. Repeated washing will increase felting and make it more durable.
1.
This is a hole in the pocket of 100% Merino Half Zip Hoody. Knit merino wool fabrics are prone to this kind of condition due to thread tearing and insect bites.
2.
Tear a piece of raw wool larger than the hole, knead lightly by hand, and place the ball over the hole. If you think you didn’t get enough wool, thats okay, you can always add more later.
3
Place the felting sponge under the hole and start by lightly stabing the perimeters making a outline for the patch. Once the outline is established, work your way towards the center. (See the video below to see how hard to stab.)
4
After stabbing for 1-3 minutes until the raw hairs floating on the surface are blended to some extent, turn it over. Make sure to extract the raw wool hairs imbeded in the sponge when flipping it over.
5.
Stab the back side the same way and rub with soap water with your fingers to make the raw hairs blend in and felt.
6
Repeat stabbing the front and back 3-4 times to harden. When it has assimilated with the fabric to some extent, blend the repaired area by rubbing in with your fingers to finsih.
7
Done. Repeated washing will increase felting and make it more durable.
Applications
Using the felting technique, yu can easily add embroidery to repair holes in wool knit products.
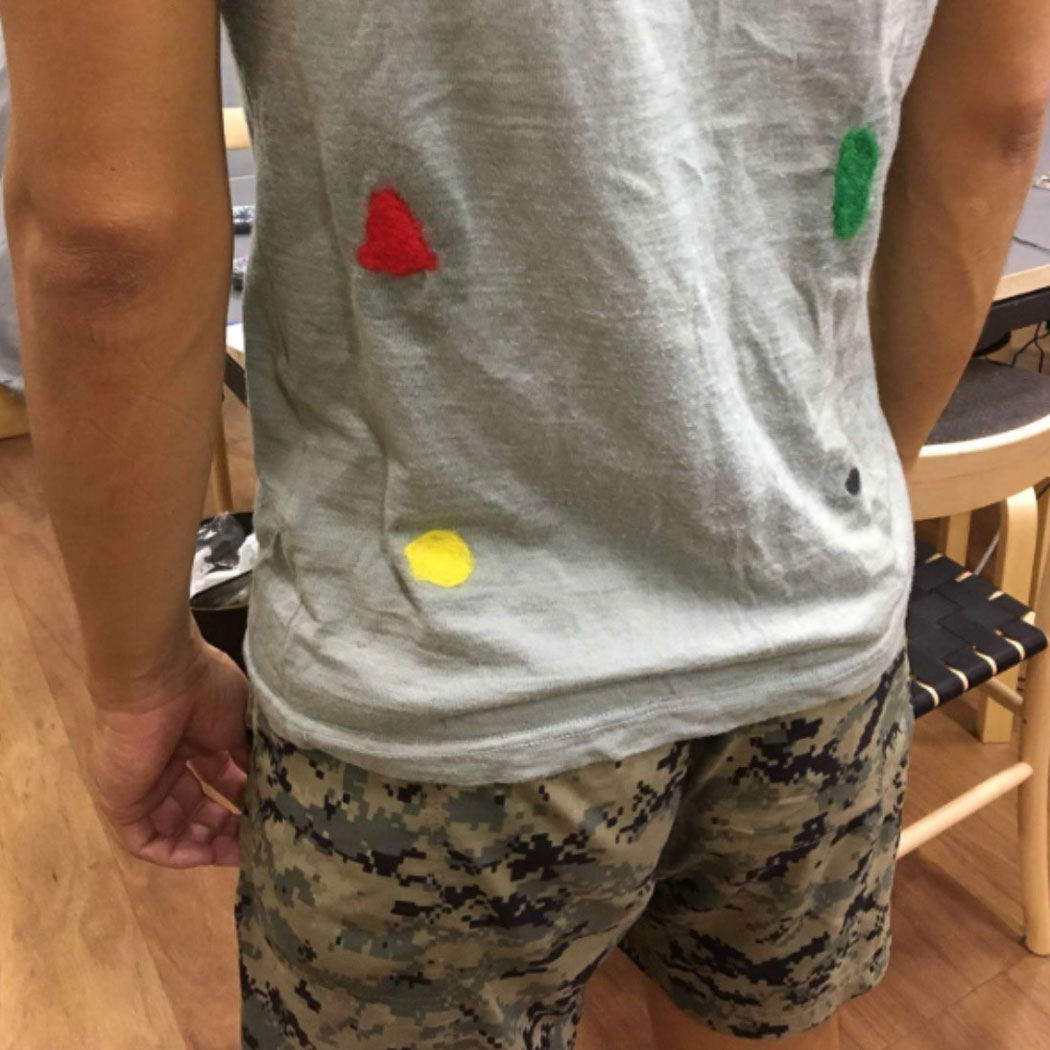
When our staff member Kimura participated in a 95-km mountain race wearing 100% Light Merino Pocket T-shirt, he found a hole where he had attached his bib with a pin.
He repaired it with the felting technique using different colors. The result was a more personal piece of gear that is filled with memories of his race.
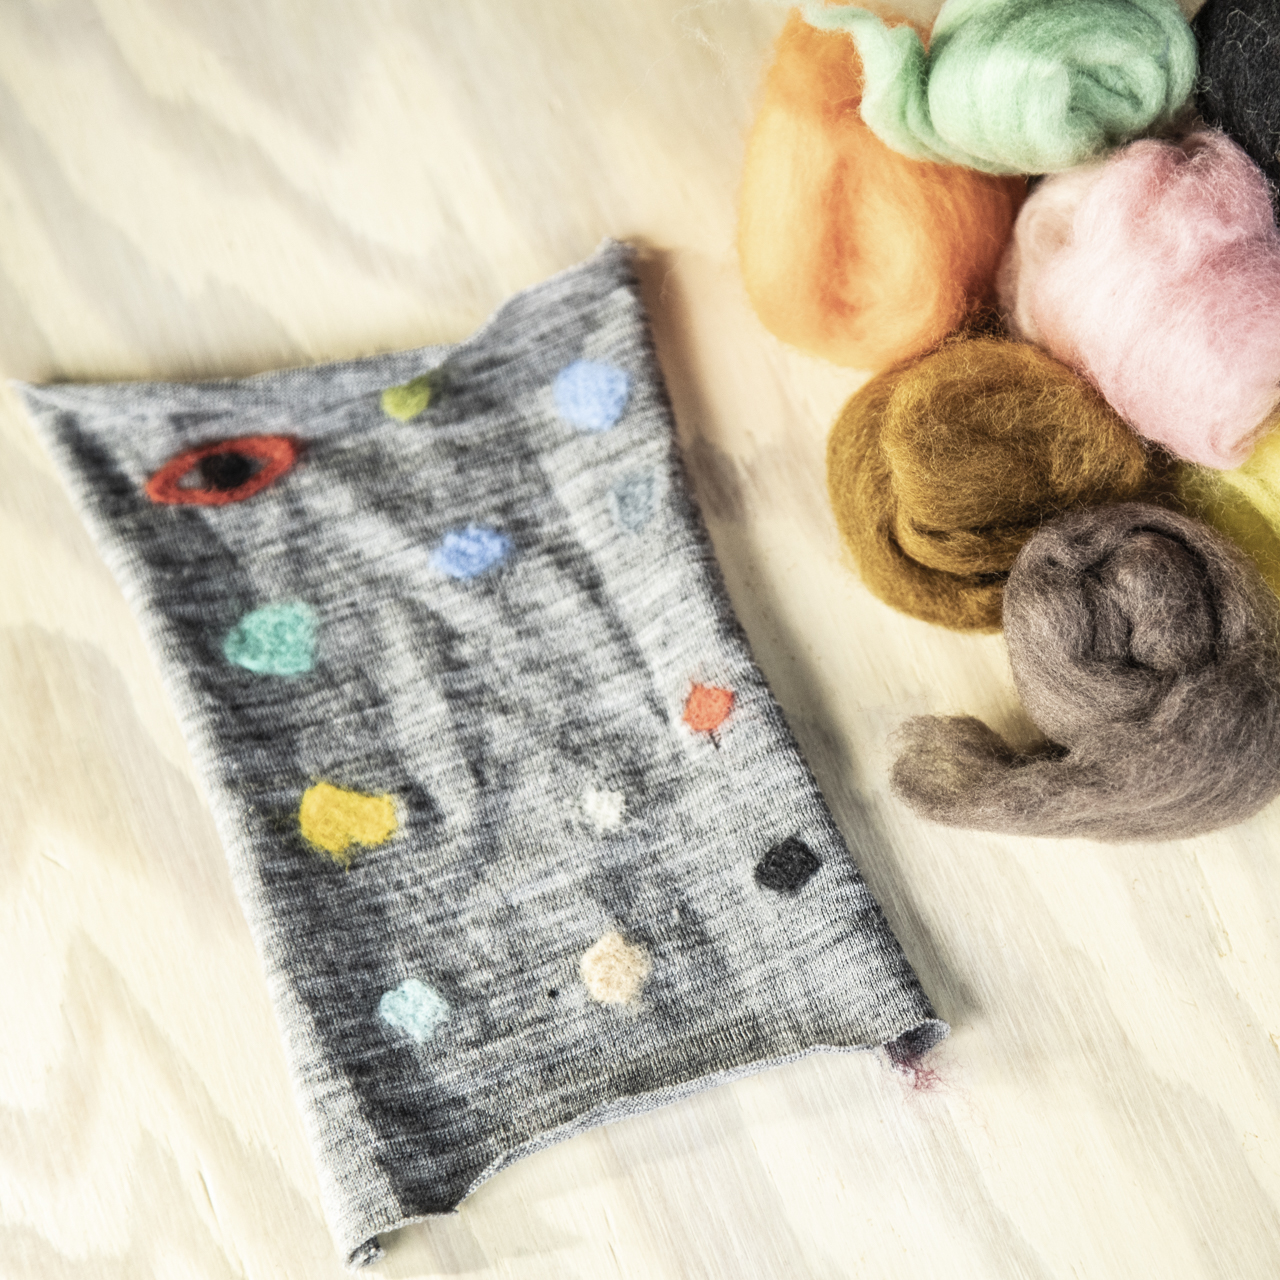
It interesting to repair with vivid-colored raw wool instead of the same color.
This is an example of the repair work done by staff member Kimura shown above. It was put together in his favorite rasta color.

You can also use felting to add a single embroidery-like point.

Holes in knit products can be repaired like..
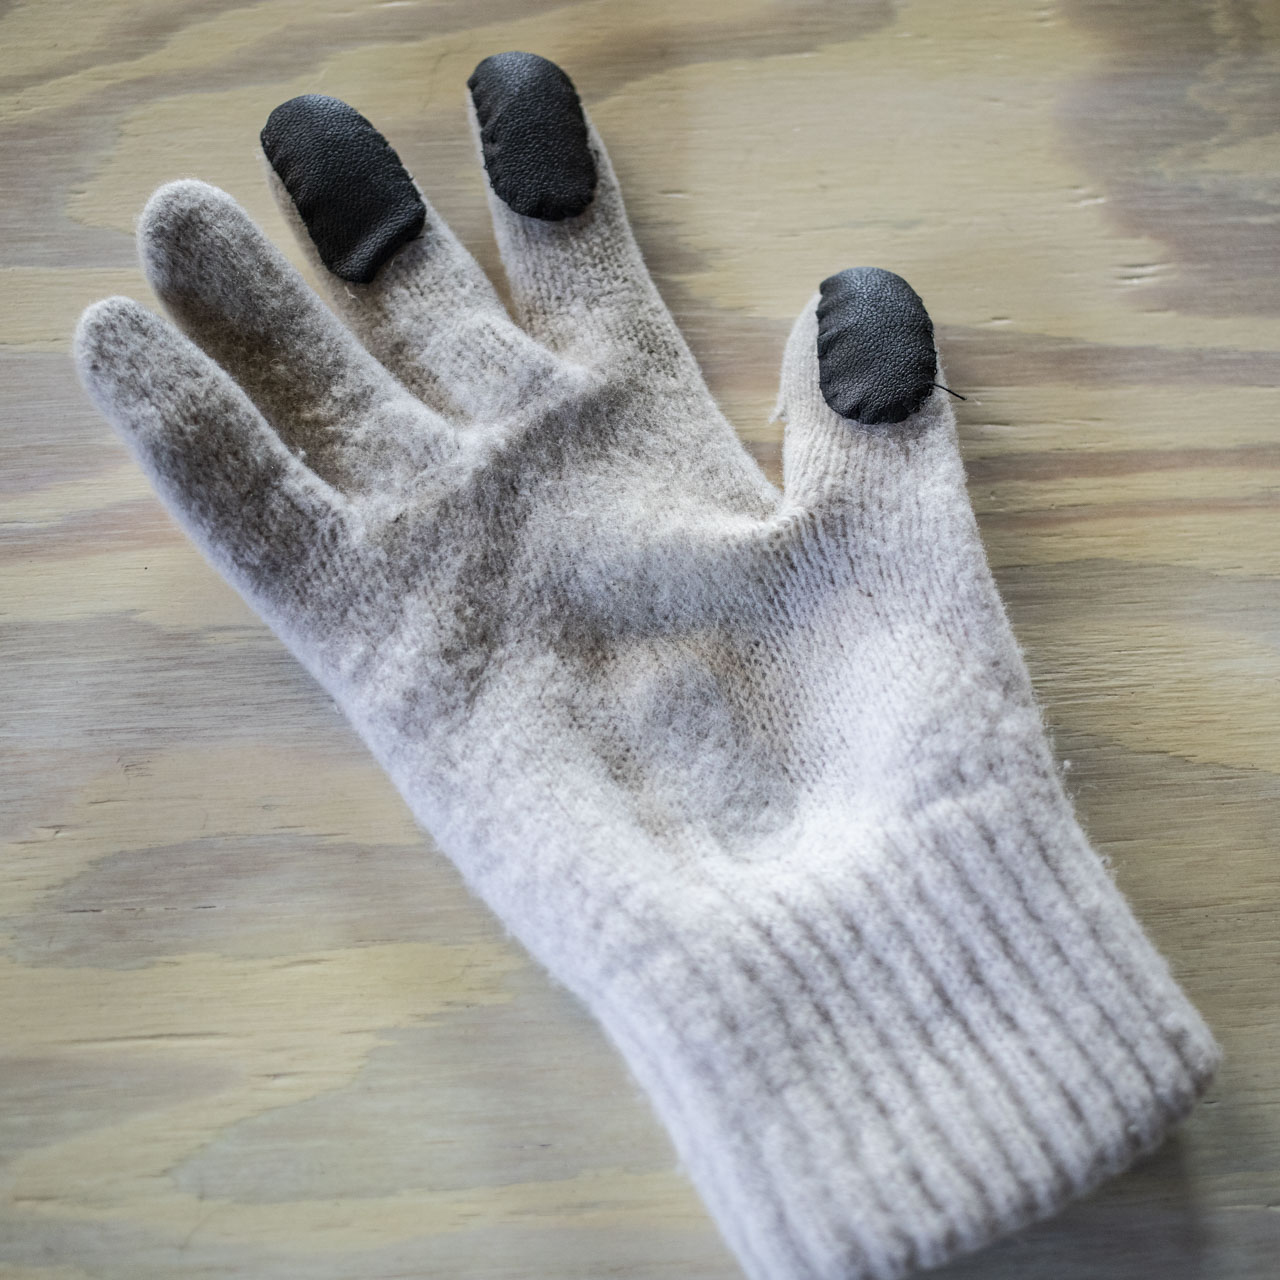
This!
It interesting to repair with vivid-colored raw wool instead of the same color.
This is an example of the repair work done by staff member Kimura shown above. It was put together in his favorite rasta color.
You can also use felting to add a single embroidery-like point.
Holes in knit products can be repaired like..
This!
Hole repair for Merino at our Yamatomichi Repair Department
We offers repairs with wool dyed in the same color as our products.
We repair for ¥500 (per hole) + tax + round-trip shipping.
Please refer to About Repair found below for furthur information.
July 2023 Update
In addition to felting repairs, we now offer embroidery machine repairs. We especially recommend embroidery machines repairs for 100% Merino series and 100% Light Merino series products after 2021. The updated fabric is harder to work with and embroidery machines are more effective and efficient. Please contact us for repair information.
How to arrange a repair
1. Contact us
Please contact us from the SUPPORT page. Please include the product name, the nature of the damage, and the date of purchase.
*If you purchased the product from our online store, please include your order number.
2. Instrcutions by e-mail
After confirming the contents of your inquiry, we will send you information about the repair method, labor charges, and delivery date. Please send the product to us with the shipping fee prepaid. After confirming the payment for labor, we will start the repair.
*Depending on the repair, it takes approximately 2 to 6 weeks to complete the repair.
3. Comepletion
We will ship the repaired product as soon as the repair is completed.
The customer is responsible for shipping costs for the repaired product.

Repair Team
After graduating from highschool with a engineering degree, Ichiro’s career in craftsmanship started in a video equipment manufacturer. After that he worked as a pattern cutter for 11 years at a sewing factory that handledhandles various brands. During his search for a lifestyle closer to nature, he encountered Yamatomichi and was profoundly moved by its philosophy, that led him to embark on a new challenge in his life. He is currently in charge of repairs. He has a passion for craftsmanship and nature, and his dream is to achieve a complete self-sufficiency lifestyle someday.