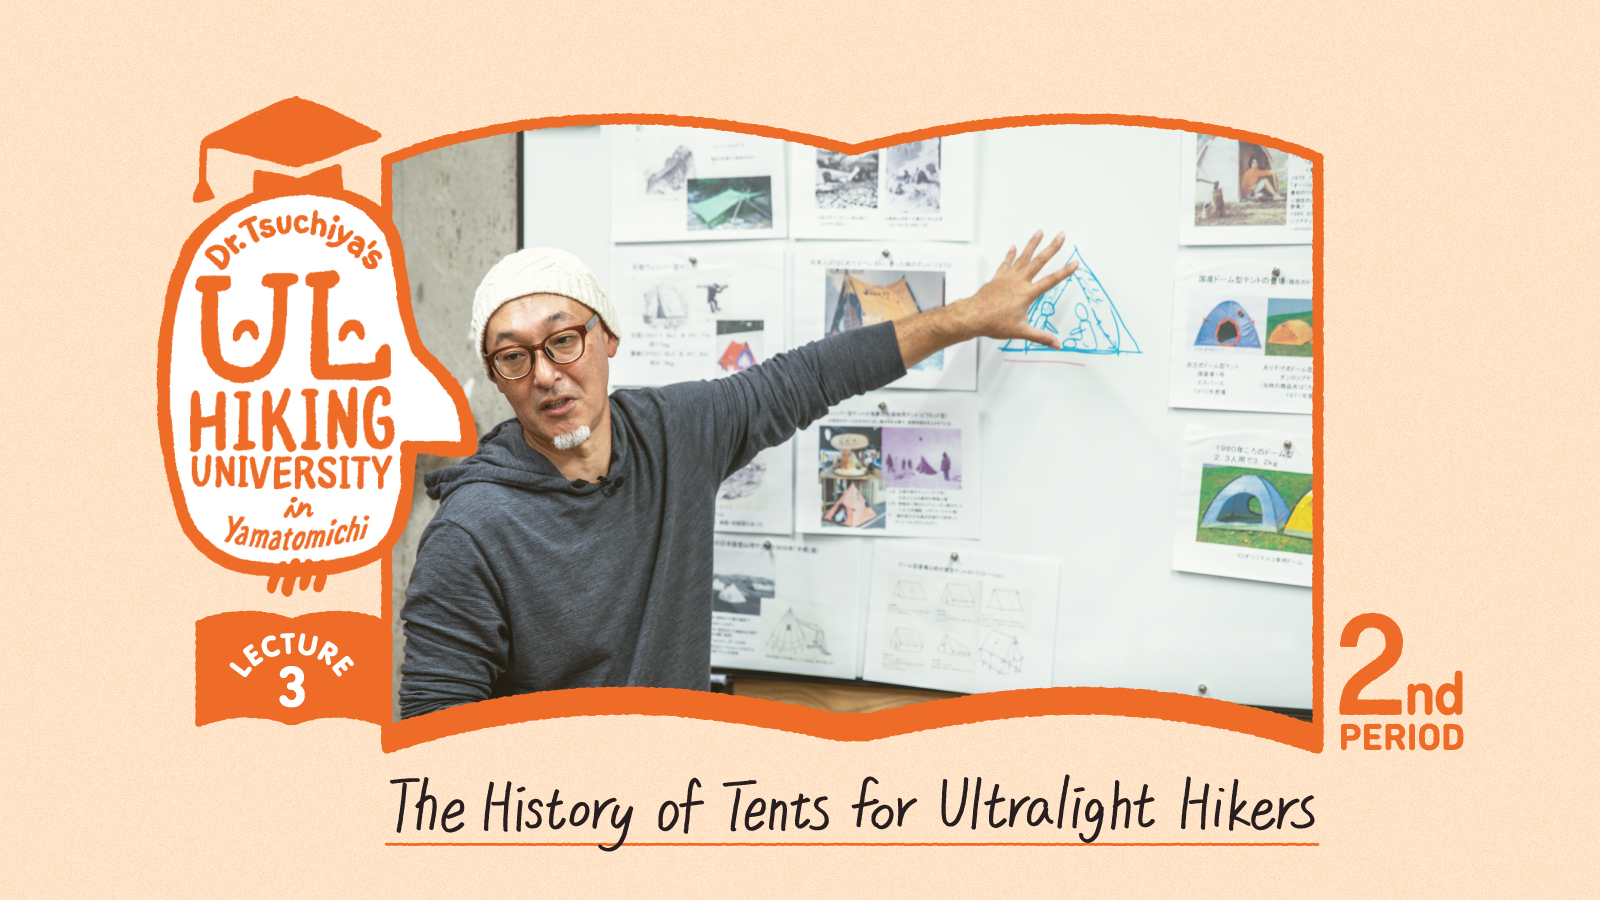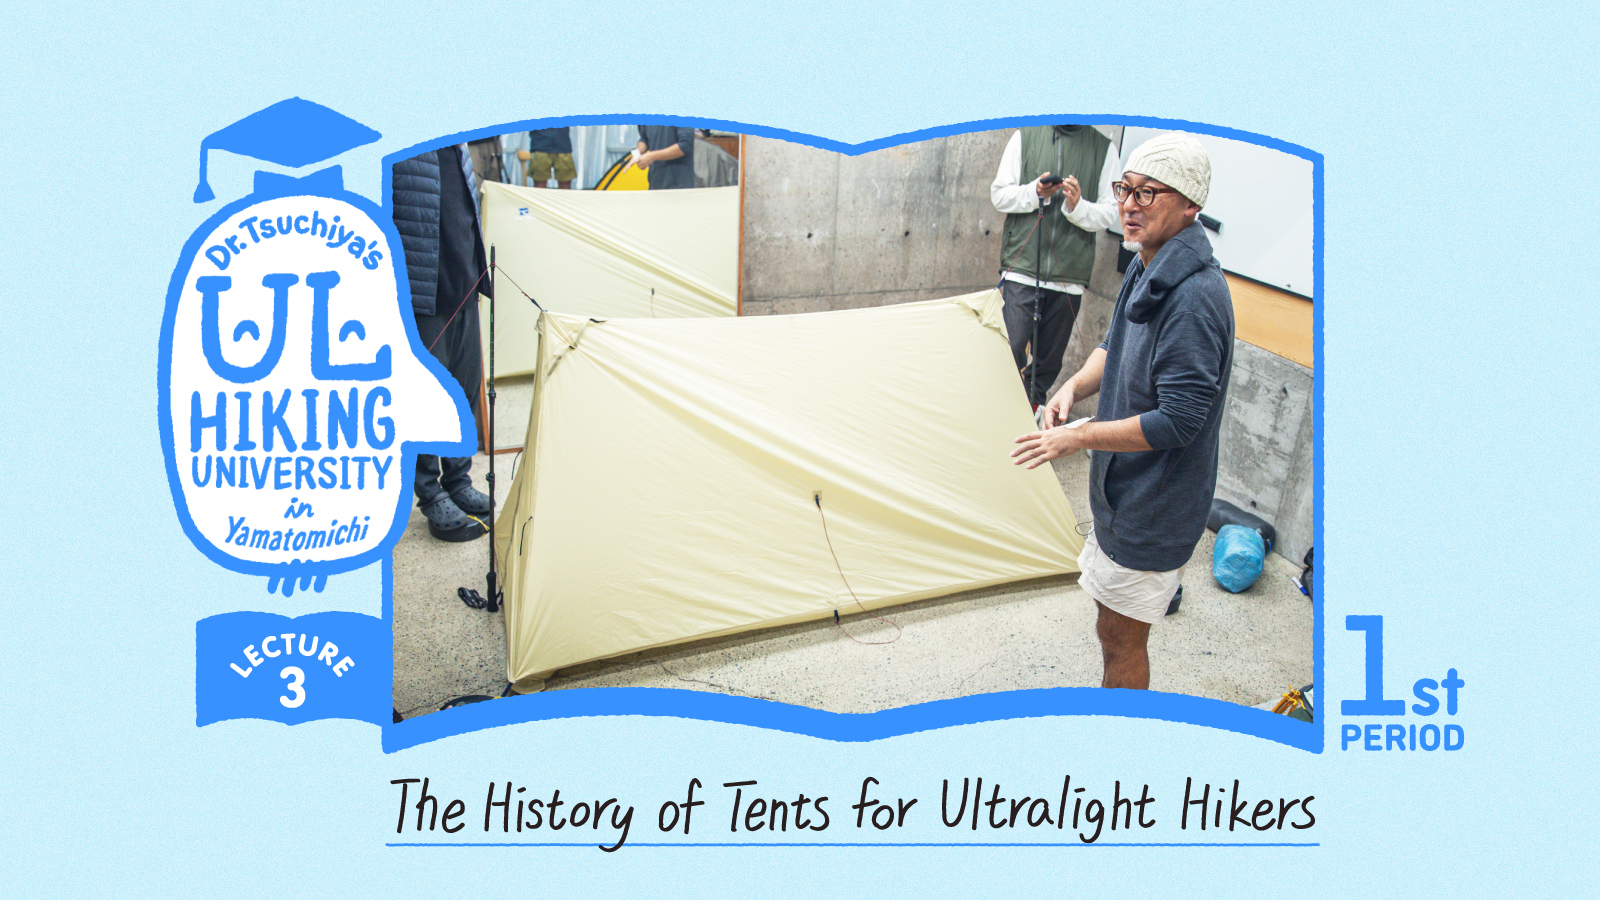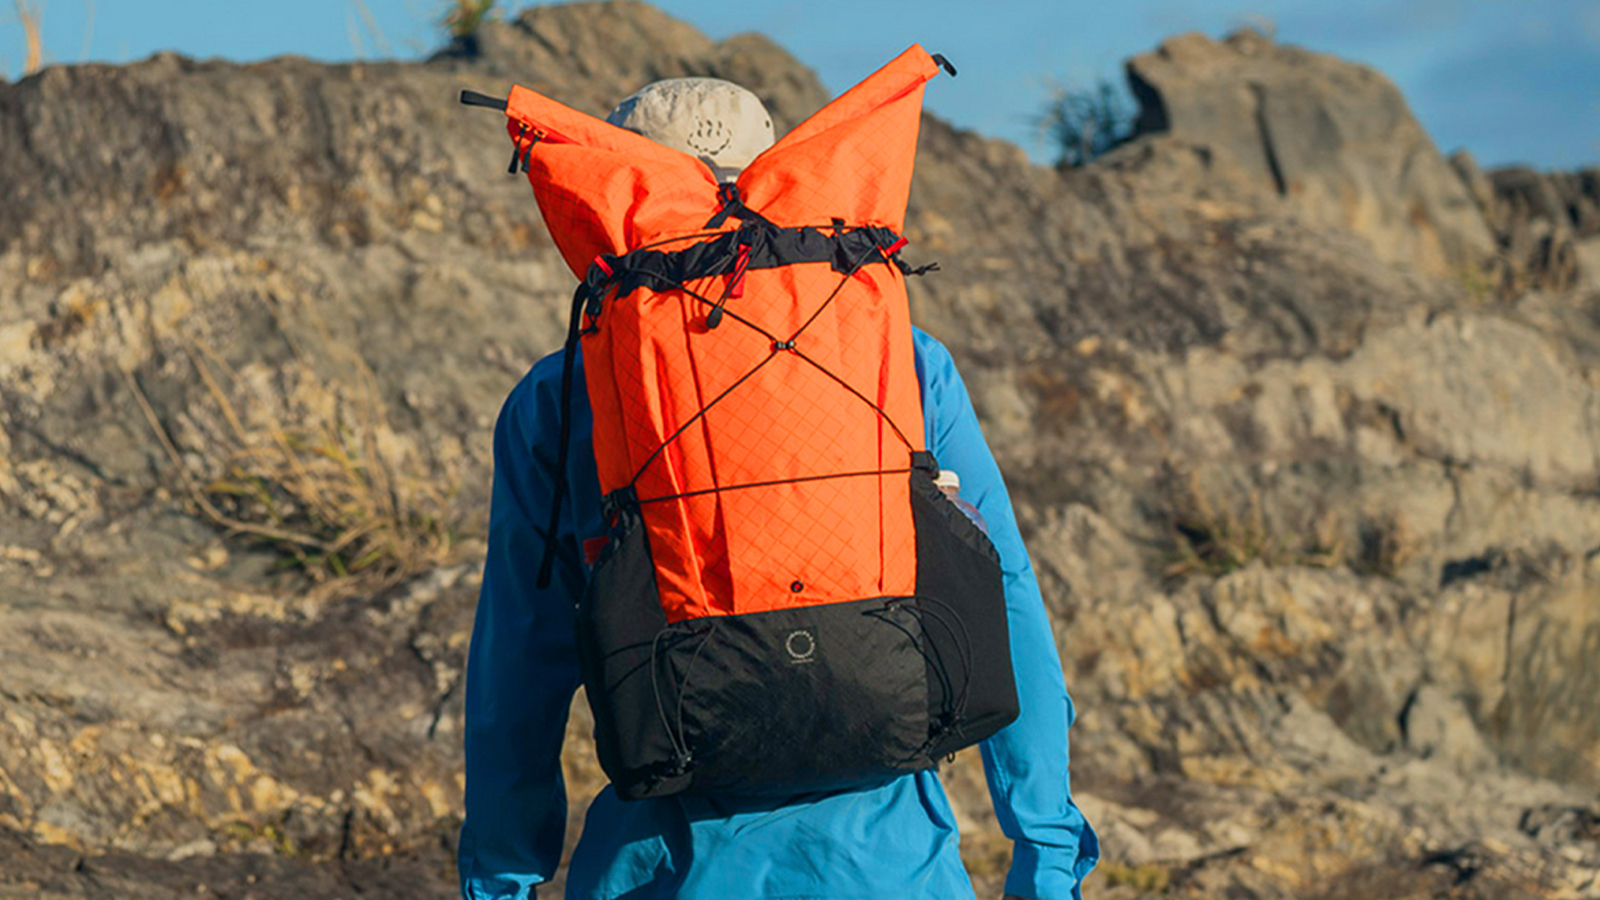
Lecture 4: Sleeping Bags and Ultralight “Sleeping Systems”
Photos: Masaaki Mita
Photos (gear): Go Kakizaki
Lecture 4: Sleeping Bags and Ultralight “Sleeping Systems”
Photos: Masaaki Mita
Photos (gear): Go Kakizaki
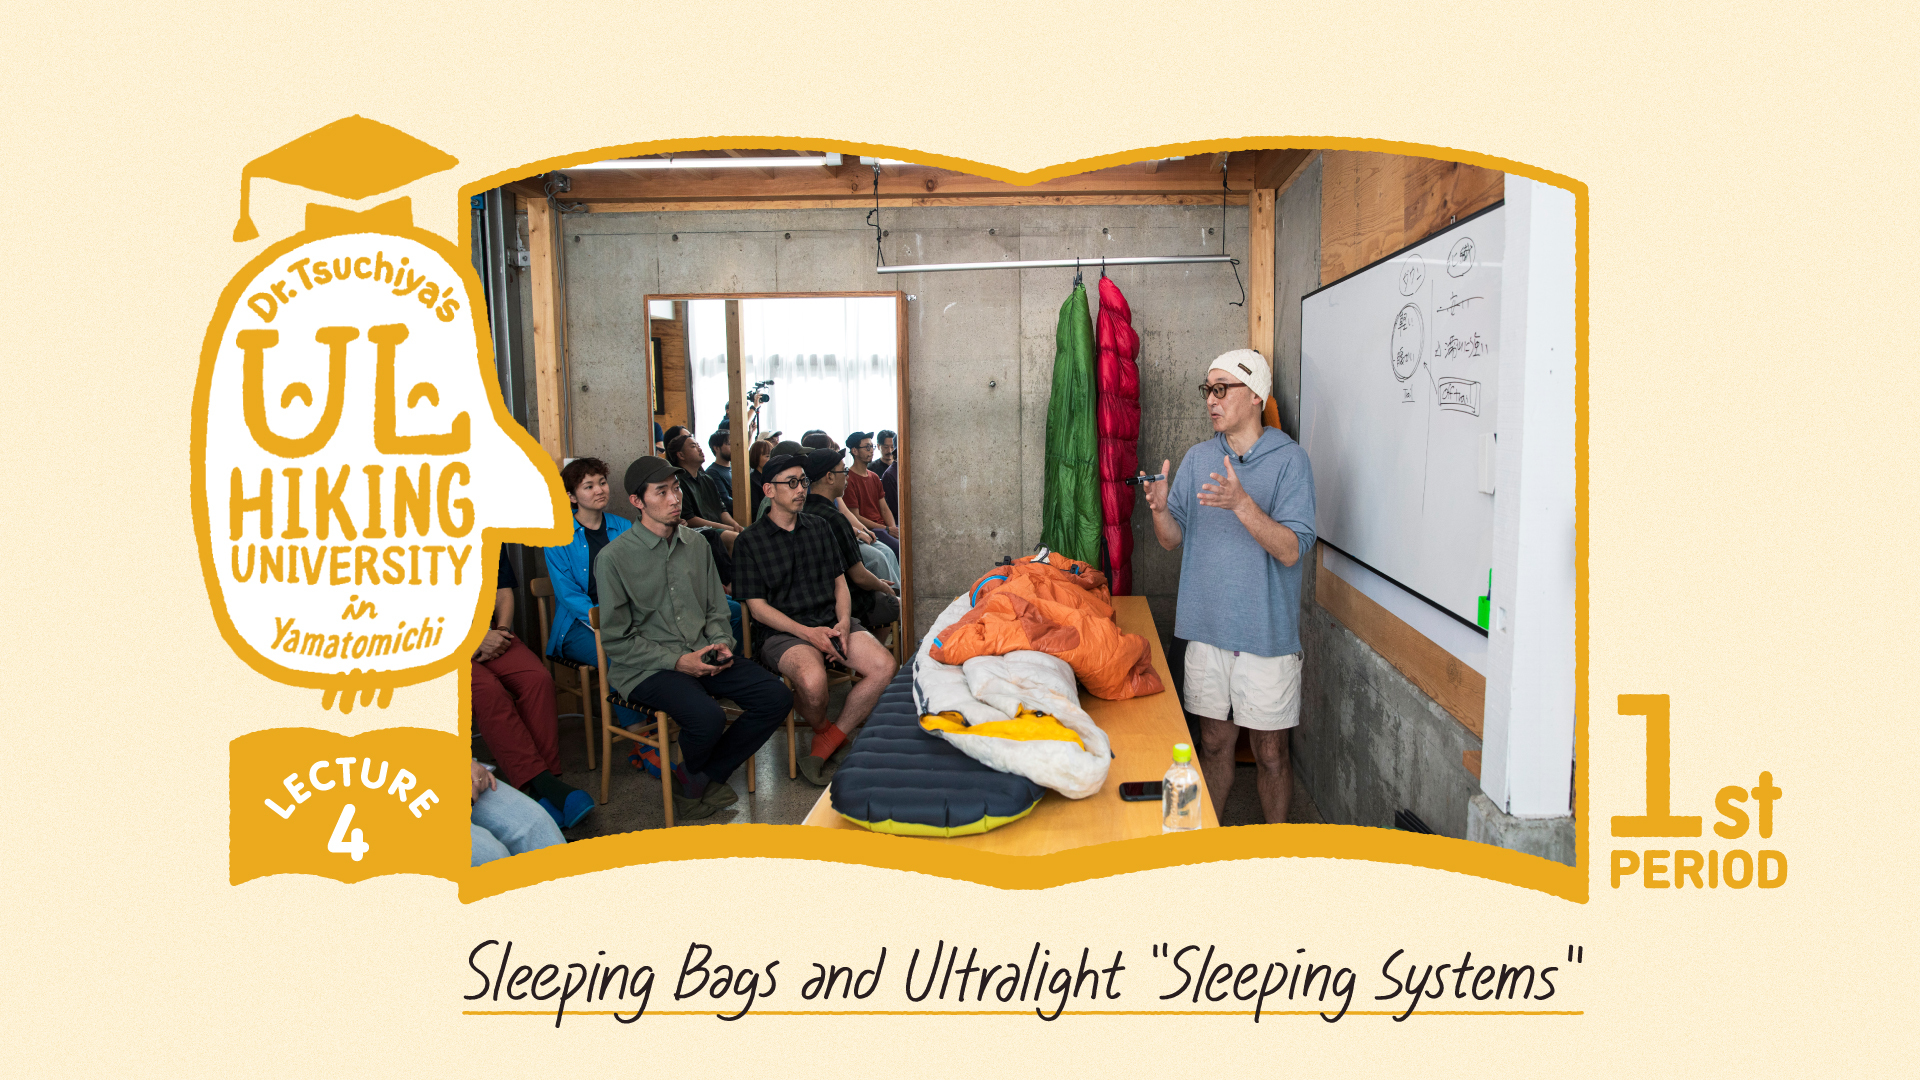
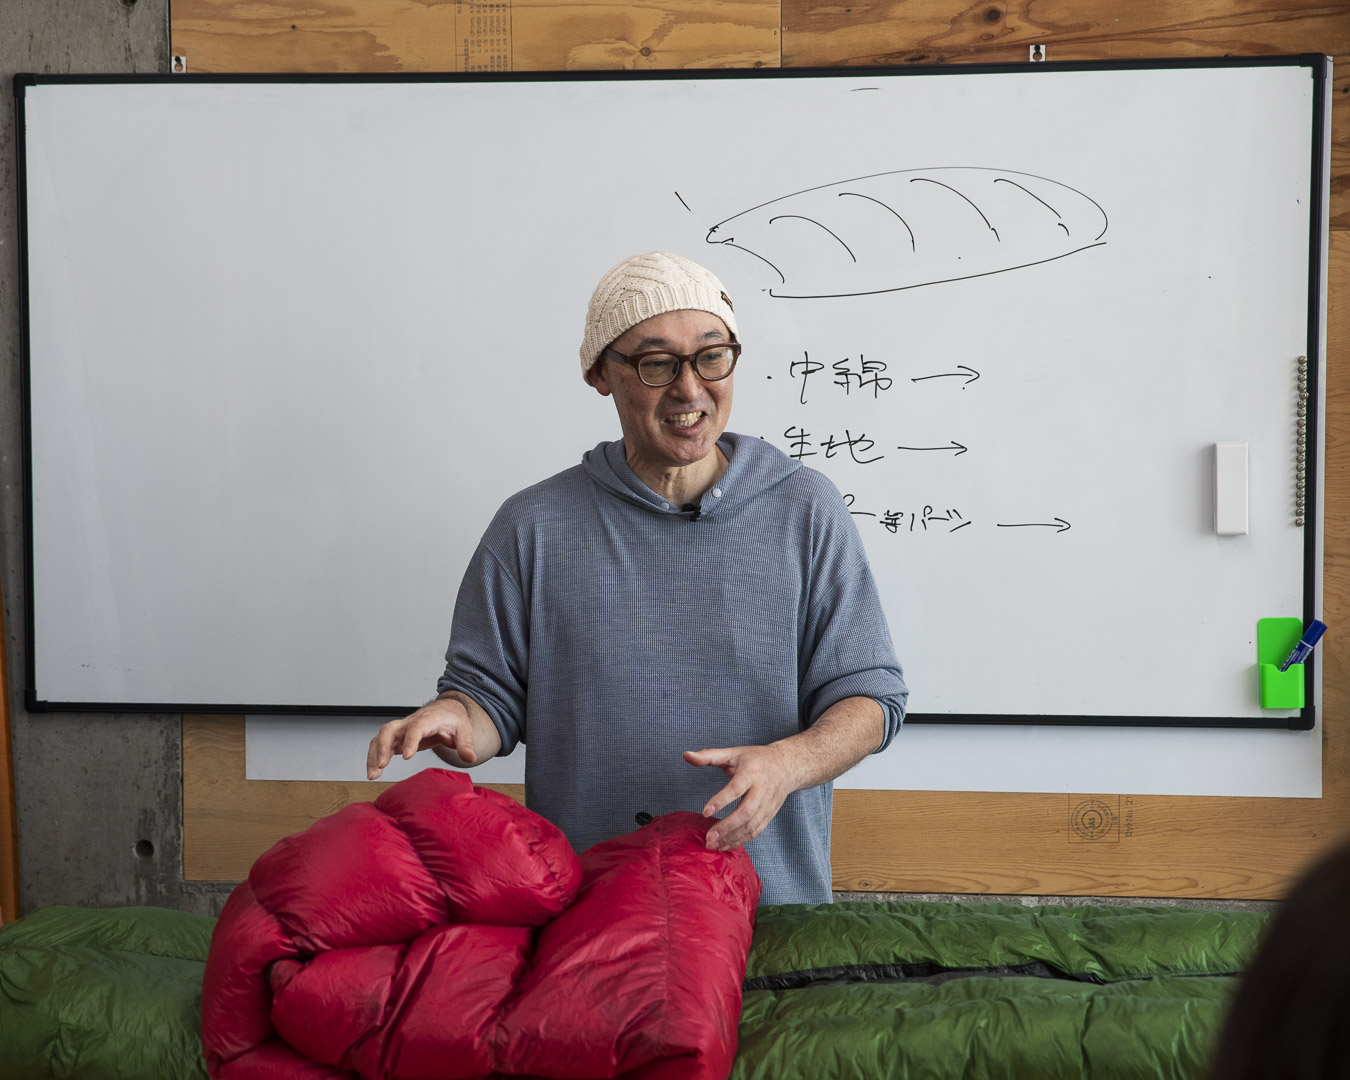
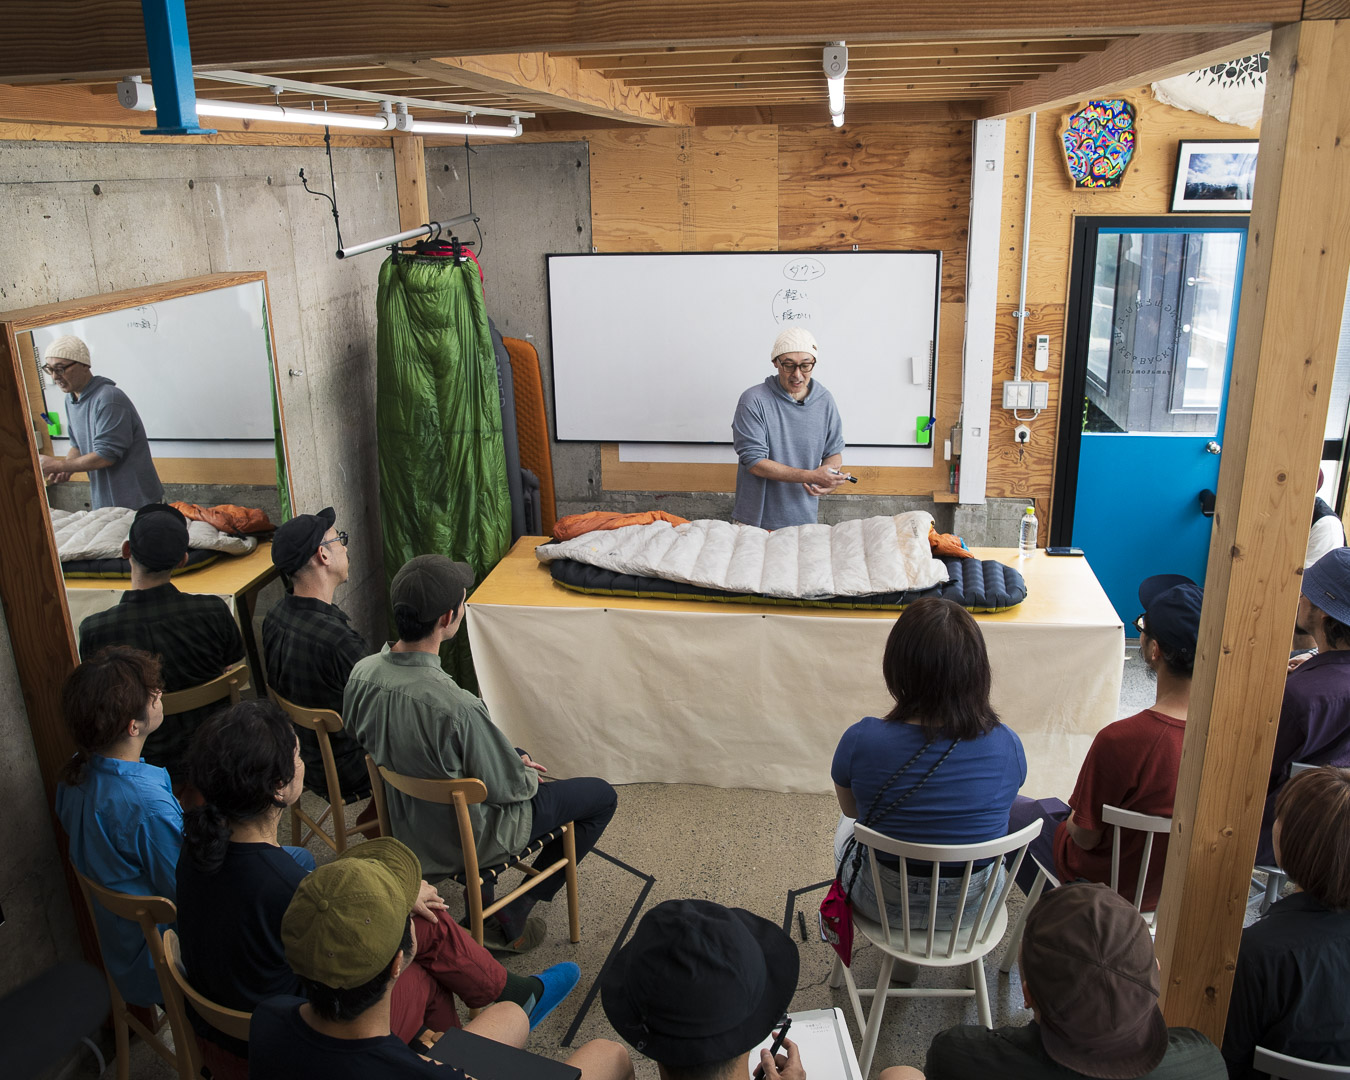
Tomoyoshi Tsuchiya, owner of Hiker’s Depot in Tokyo and one of Japan’s ultralight hiking pioneers, is the author of Ultralight Hiking (2011) and a frequent Yamatomichi collaborator. Every few months, Tsuchiya hosts a lecture at Yamatomichi’s Laboratory, in Kamakura, covering the history of ultralight hiking and the evolution of its practitioners’ gear. In past lectures, he's discussed ultralight hiking backpacks, footwear and tents. In this fourth lecture series, he takes us into the debates surrounding sleeping bags. This period, Tsuchiya delves into the essential elements to consider when devising your own “sleeping system” — his term for a flexible approach to staying warm while sleeping. He explains the differences between down and synthetic insulation, the role of quilts as ultralight bedding, the meaning of “comfort” and “limit” temperature ratings and the potential pitfalls of combining sleeping bags with bivy sacks or insulated clothing.
UL Hiking University: From big picture to details
Welcome to the fourth lecture in the UL Hiking University series. So far, we’ve talked about backpacks, shoes and tents. This time, we’ll focus on sleeping bags and sleeping pads ー the essentials for getting a good night’s rest on the trail.
While UL Hiking University centers around ultralight gear, we put a lot emphasis on understanding the concepts behind each type of equipment, rather than diving straight into the technical details. Ultralight gear often looks quite different from traditional hiking gear ー minimal in design and made of specialized, innovative materials. That novelty is part of what drew many of us to ultralight gear in the first place. As a result, people tend to focus on the details. But a lot of people don’t understand how everything fits together.
For people who were hiking before ultralight came on the scene, the difference between traditional backpacking and ultralight hiking is something they grasp instinctively ー even if they’ve never tried to define it. But anyone who got into hiking within the last decade is likely to think of ultralight gear as mainstream ー or has only ever known ultralight hiking. Without a point of comparison, it can be hard for them to fully grasp the pros and cons of ultralight gear solely based on firsthand use.
These days, many people turn to social media for information. While that’s a great way to discover tools and techniques, the posts that get the most attention are often about specific items ー what’s amazing, what’s new, what’s ultralight. It’s easy to get pulled into those deep dives.
There’s a lot of value in that kind of detailed information, and people are building a real knowledge base. Even so, we still get a lot of questions from customers. “Which one should I choose?” “How should I make sense of all this?”
That’s why, in these UL Hiking University lectures, while we absolutely do cover the technical minutiae, we always try to start with the big picture; to think conceptually about the category of whatever it is we are talking about.
You could think of it like a university’s core curriculum ー the fundamental courses you take before you specialize. Once you have that foundation, it becomes easier to understand and engage with the more niche or technical discussions later. I hope you’ll approach this lecture with that mindset.
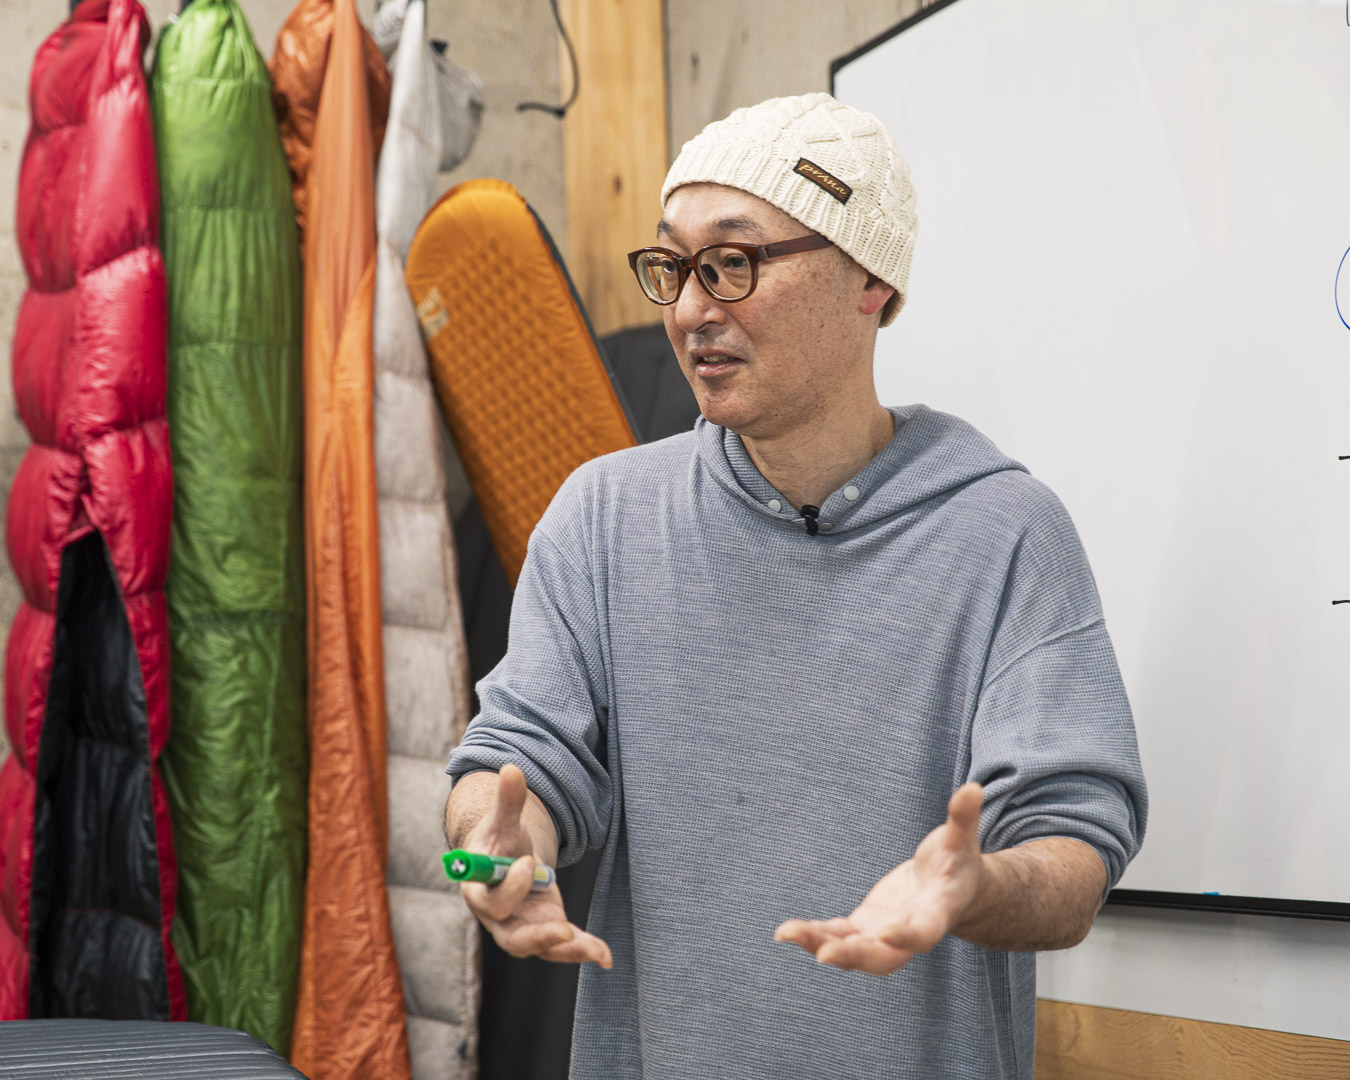
Tomoyoshi Tsuchiya ー owner of Hiker’s Depot in Tokyo, author of Ultralight Hiking (2011), Japanese ultralight hiking pioneer ー speaks with Yamatomichi staff at the Yamatomichi Laboratory In Kamakura, Kanagawa prefecture.
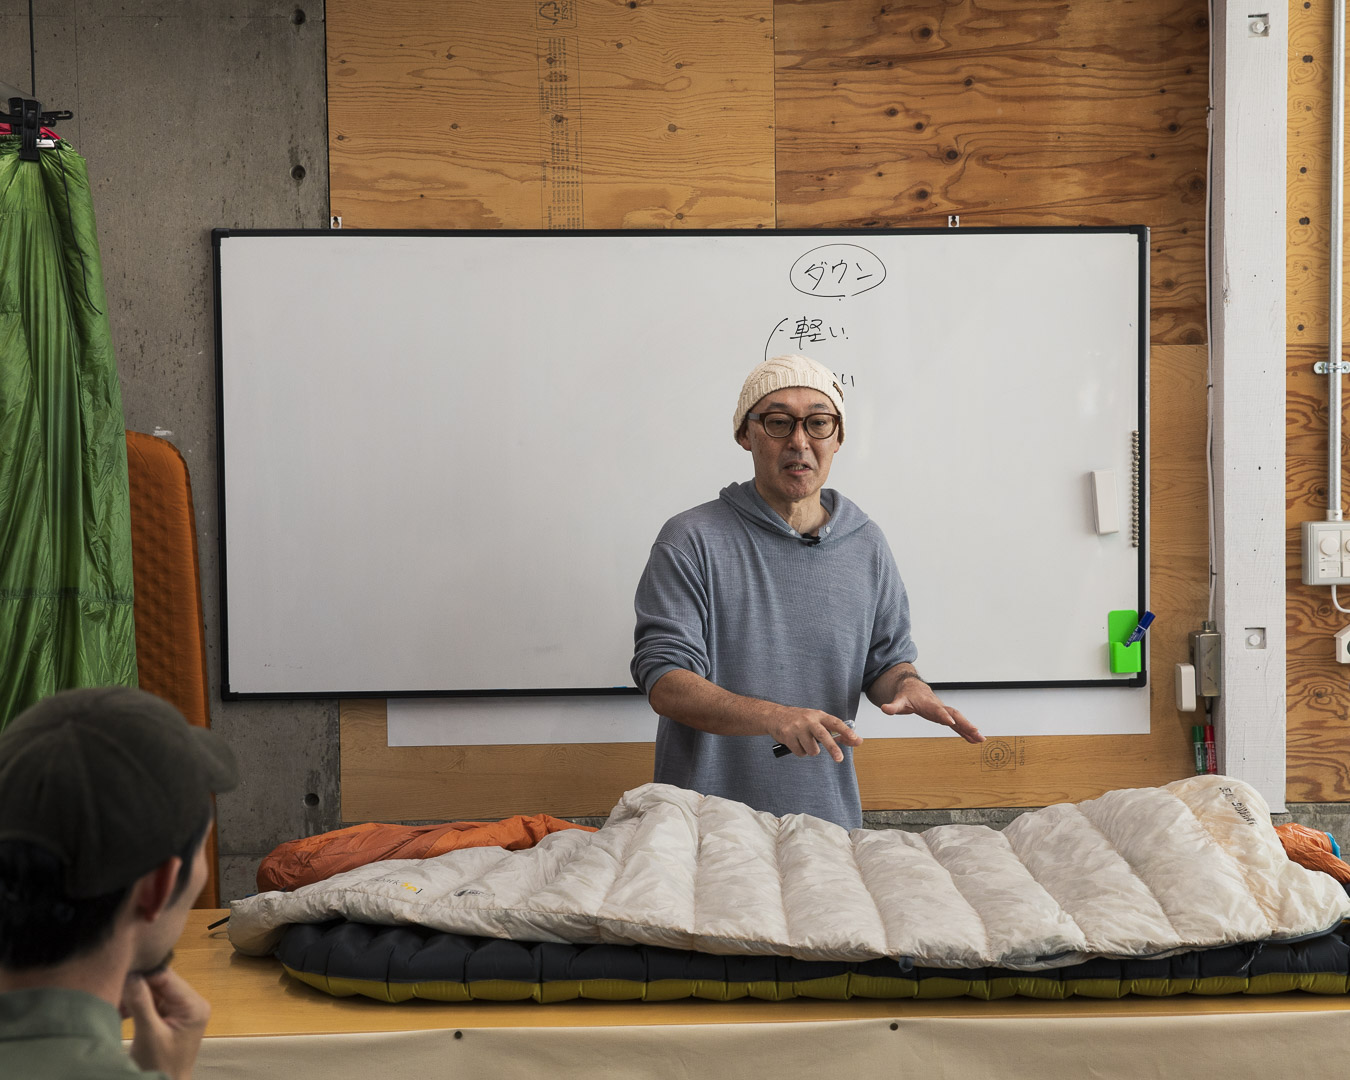
Sleeping bag basics: down versus synthetic
Let’s start with sleeping bags. A sleeping bag is essentially a quilted structure made by wrapping insulation in a fabric shell ー so unlike backpacks or shoes, there’s relatively little variation in terms of design or construction. Because of that, many customers aren’t sure what criteria to use when choosing one.
It’s also not something that’s often seen by others, so picking a sleeping bag based on design or appearance isn’t really an option, either.
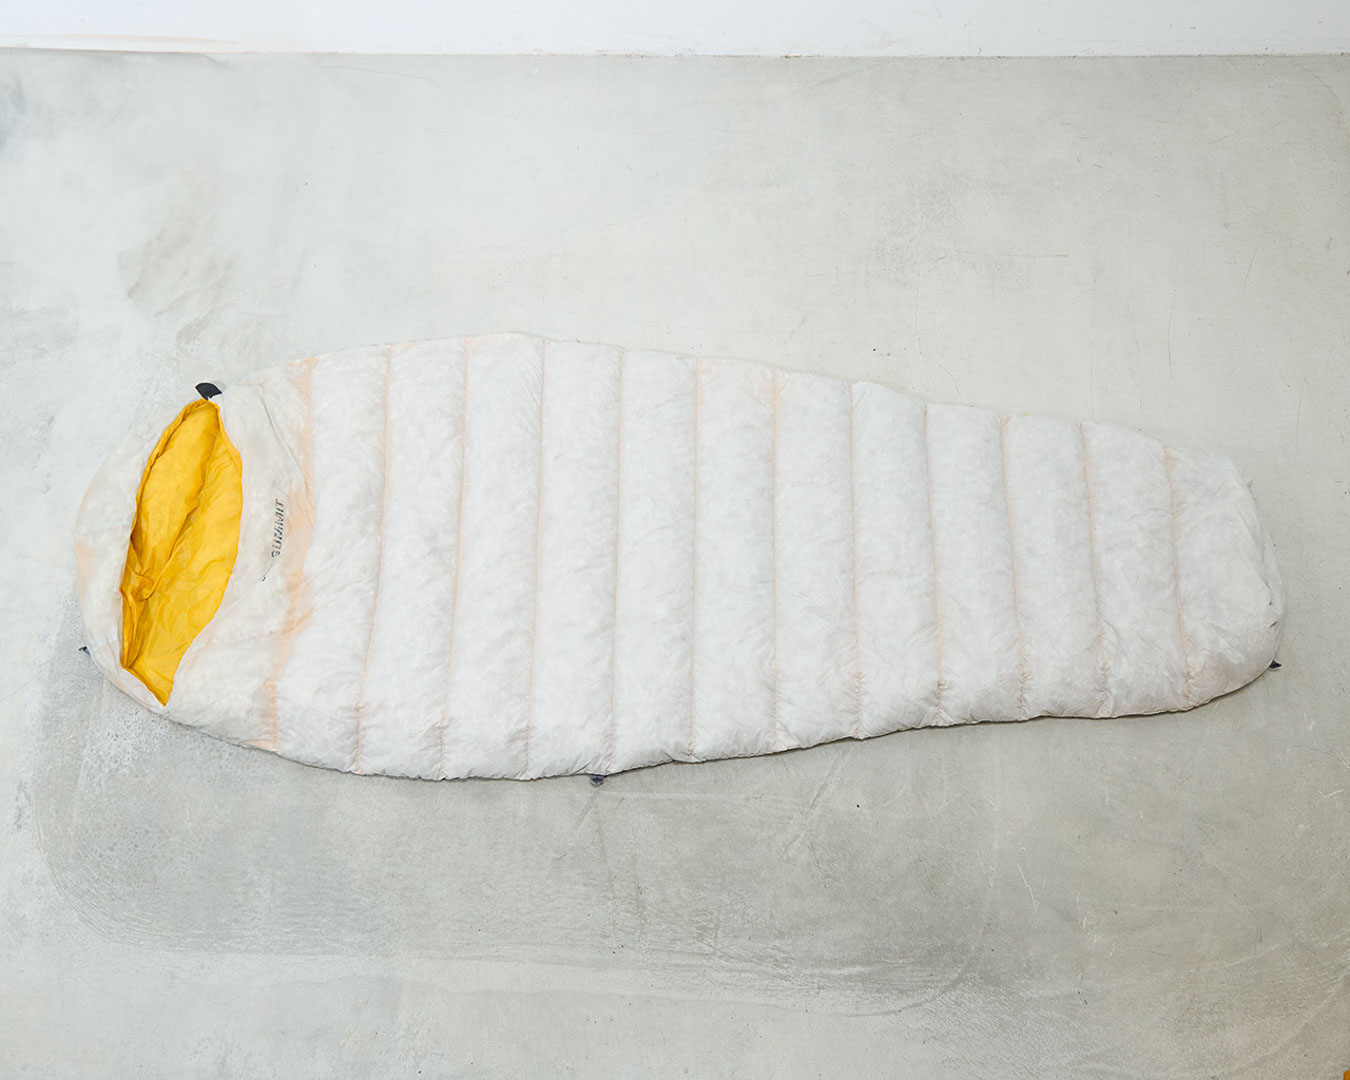
A standard mummy-style sleeping bag, with a tapered shape, sculpted footbox, hood and zipper. (Sea to Summit’s Spark Sp1 ultralight model)
A sleeping bag’s basic components are the insulated fabric ー filled both front and back ー and a hood. What differentiates one from another is insulation: down versus synthetic.
The key advantages to down are its light weight and warmth. Down has evolved significantly since I was a student 30 years ago. Back then, a fill power (FP) ー a measure of loft ー of 500 was considered high-performance. Today, 800 FP and higher is the standard for high-end down. If you compare down and synthetic insulation of equal weight, down is indisputably warmer. And if you have two sleeping bags with the same level of warmth, the one with down will weigh less.
Down also regulates moisture and doesn’t trap heat to a stifling extreme. It warms up quickly and has many small advantages that have made it the go-to insulation for cold-weather gear.
On the other hand, synthetic fill was known ー about 20 years ago ー for two major strengths: better performance when wet and lower cost. If someone couldn’t afford a down sleeping bag, they were often recommended to get one with synthetic filling.
Synthetic filling really shines when a sleeping bag gets soaked. Let’s say you’re on a packrafting trip and your gear gets swept away. You thought your sleeping bag was safely packed in a dry bag, but the seal wasn’t tight. Now the bag is wet and needs to be wrung out. A sleeping bag with synthetic filling can be squeezed out and laid out to dry fairly easily. But a bag with down that’s soaked — the feathers clumped and flattened ー is a lot harder to revive in the field. Drying and fluffing it up takes serious effort, so it’s not very practical to deal with on the spot. That’s why a bag with synthetic filling is recommended for times when you might get wet.
That said, synthetic insulation isn’t cheap anymore, either. In recent years, water-repellent down has become more common, so when there’s condensation inside a tent, down can now hold its own. As a result, the advantage of synthetic insulation in wet conditions is now limited mostly to when your sleeping bag gets drenched.
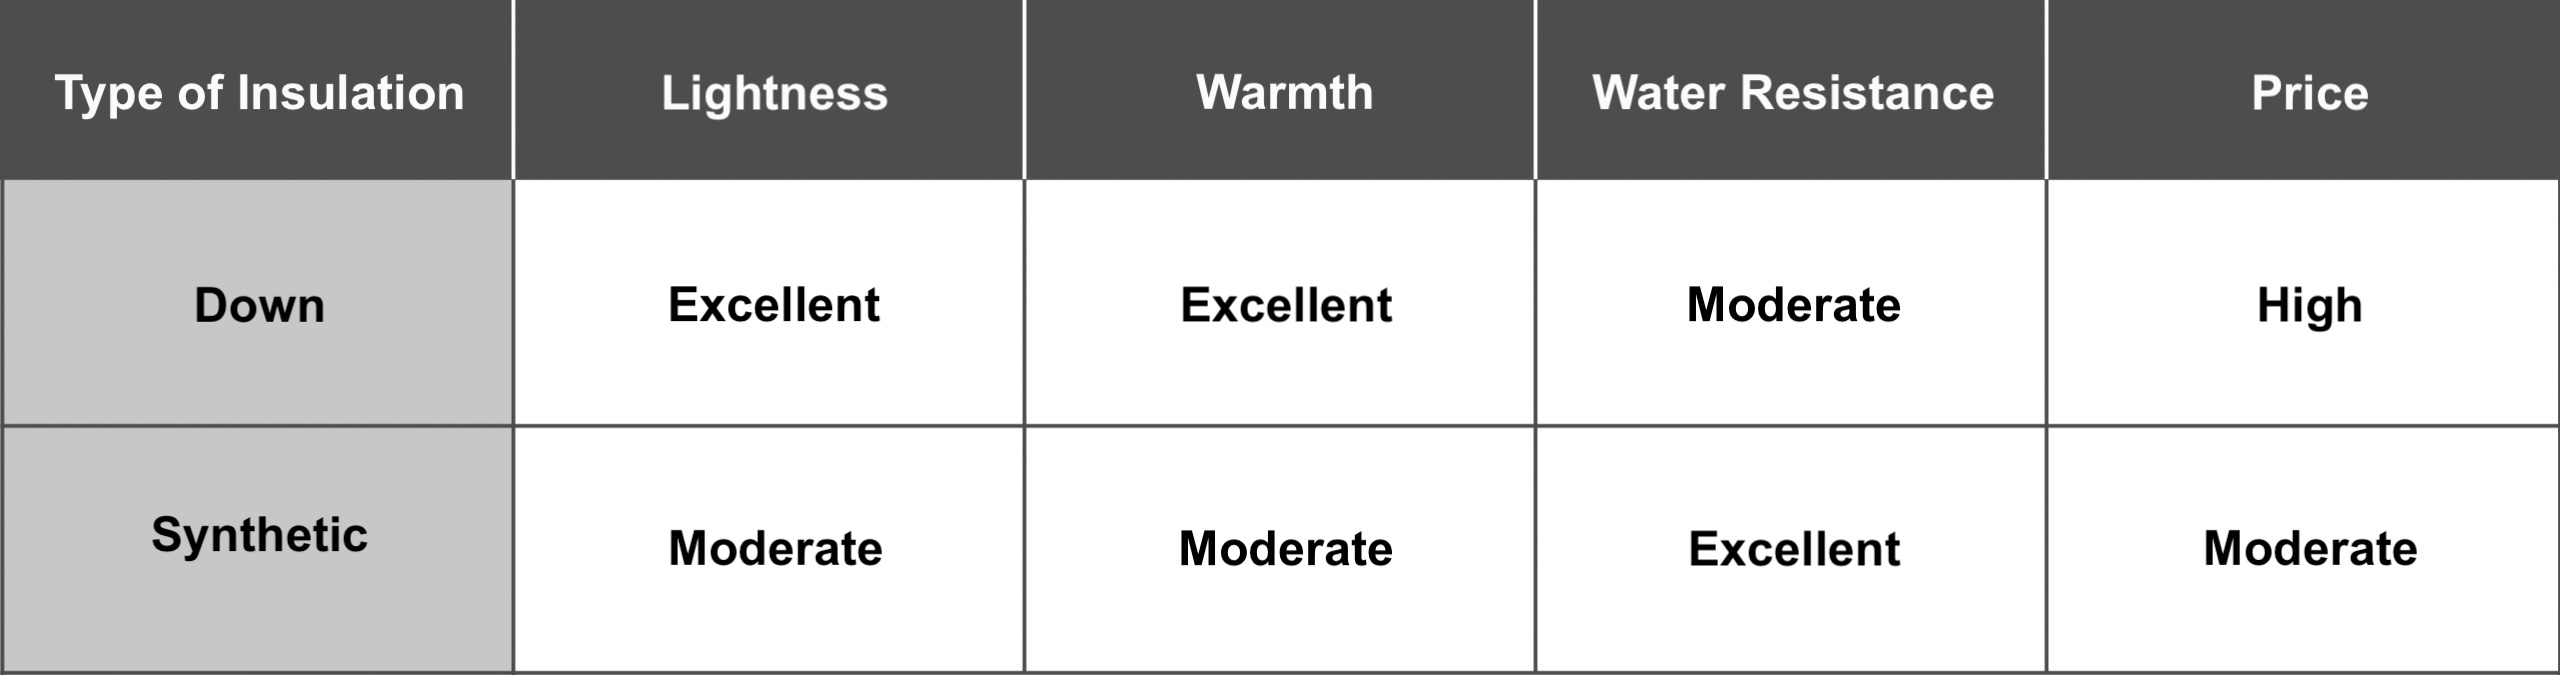
Another advantage of synthetic insulation is that it doesn’t scatter if damaged.
While using a stove inside a tent is risky and generally discouraged, many people do so in winter or when it’s raining. There have been cases of people accidentally burning a hole in a sleeping bag, or slicing through the shell fabric with a knife while cooking or climbing. If it’s a bag with down insulation, the feathers will spill out. But since synthetic insulation is often a solid sheet that’s sealed inside, the insulation will stay in place even if there’s a hole in the outer fabric. Which is why synthetic bags are suited for off-trail activities ー stream climbing (sawanobori), alpine climbing or backcountry skiing ー where gear has to withstand rough treatment.
On the other hand, for on-trail hiking, your sleeping bag is less likely to get damaged, so you can prioritize the weight and warmth of down.

You can’t simply say one insulation is better for all conditions. There’s no one-size-fits-all answer. But it helps to consider the conditions and environment you’ll be using it in. The same arguments apply when choosing insulated clothing. With that basic understanding of the materials, let’s move on to the ultralight perspective.
Quilts: pros and cons
To make sleeping bags even lighter, ultralight hikers developed what’s now a well-recognized alternative: the quilt-style sleeping bag.
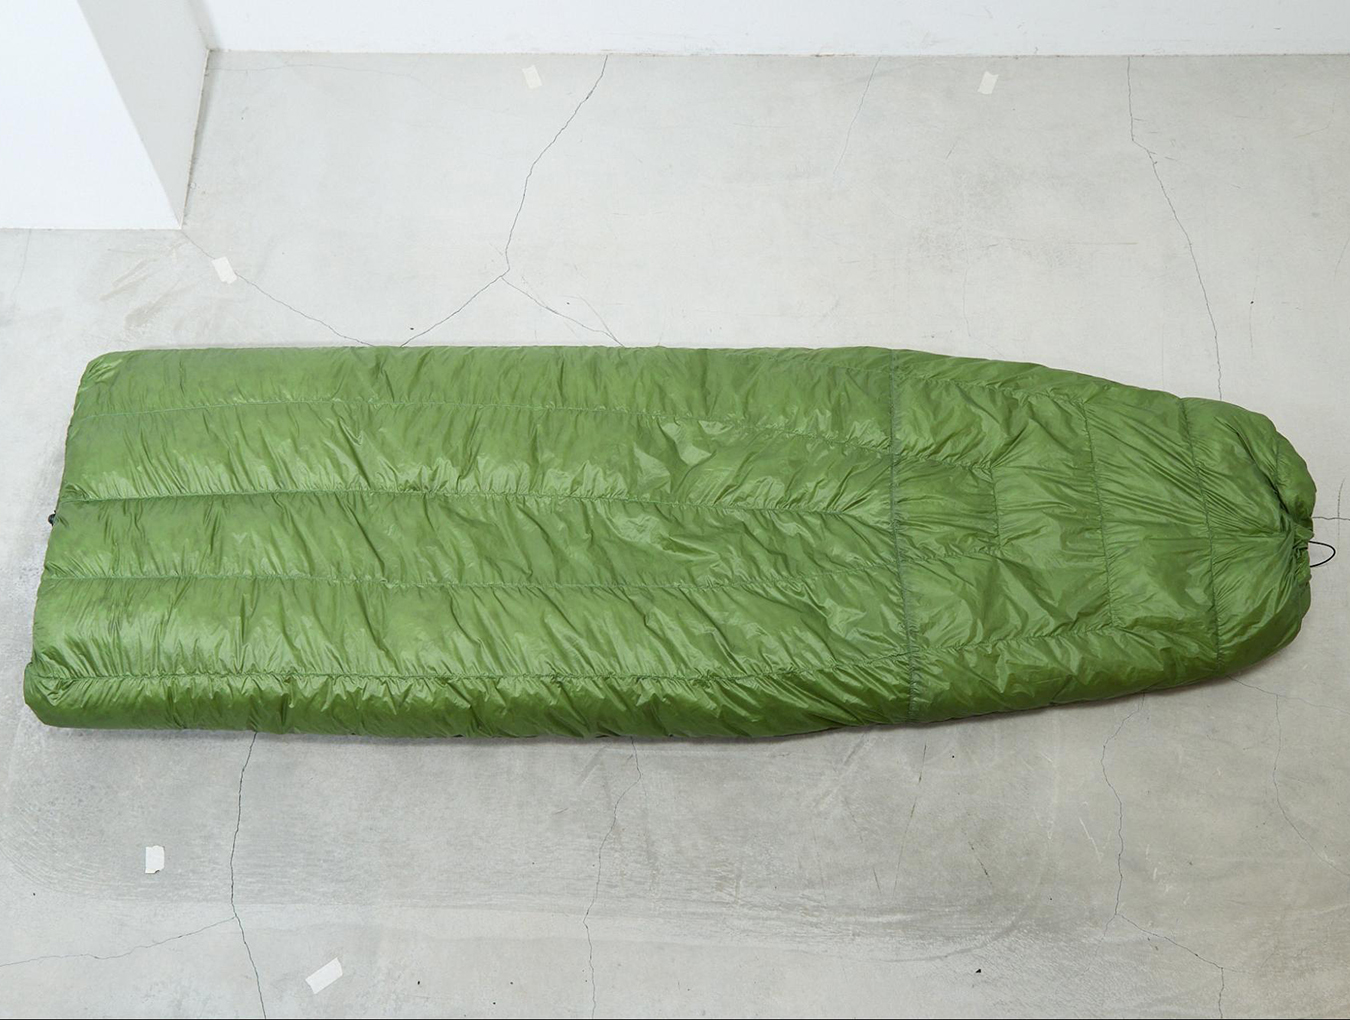
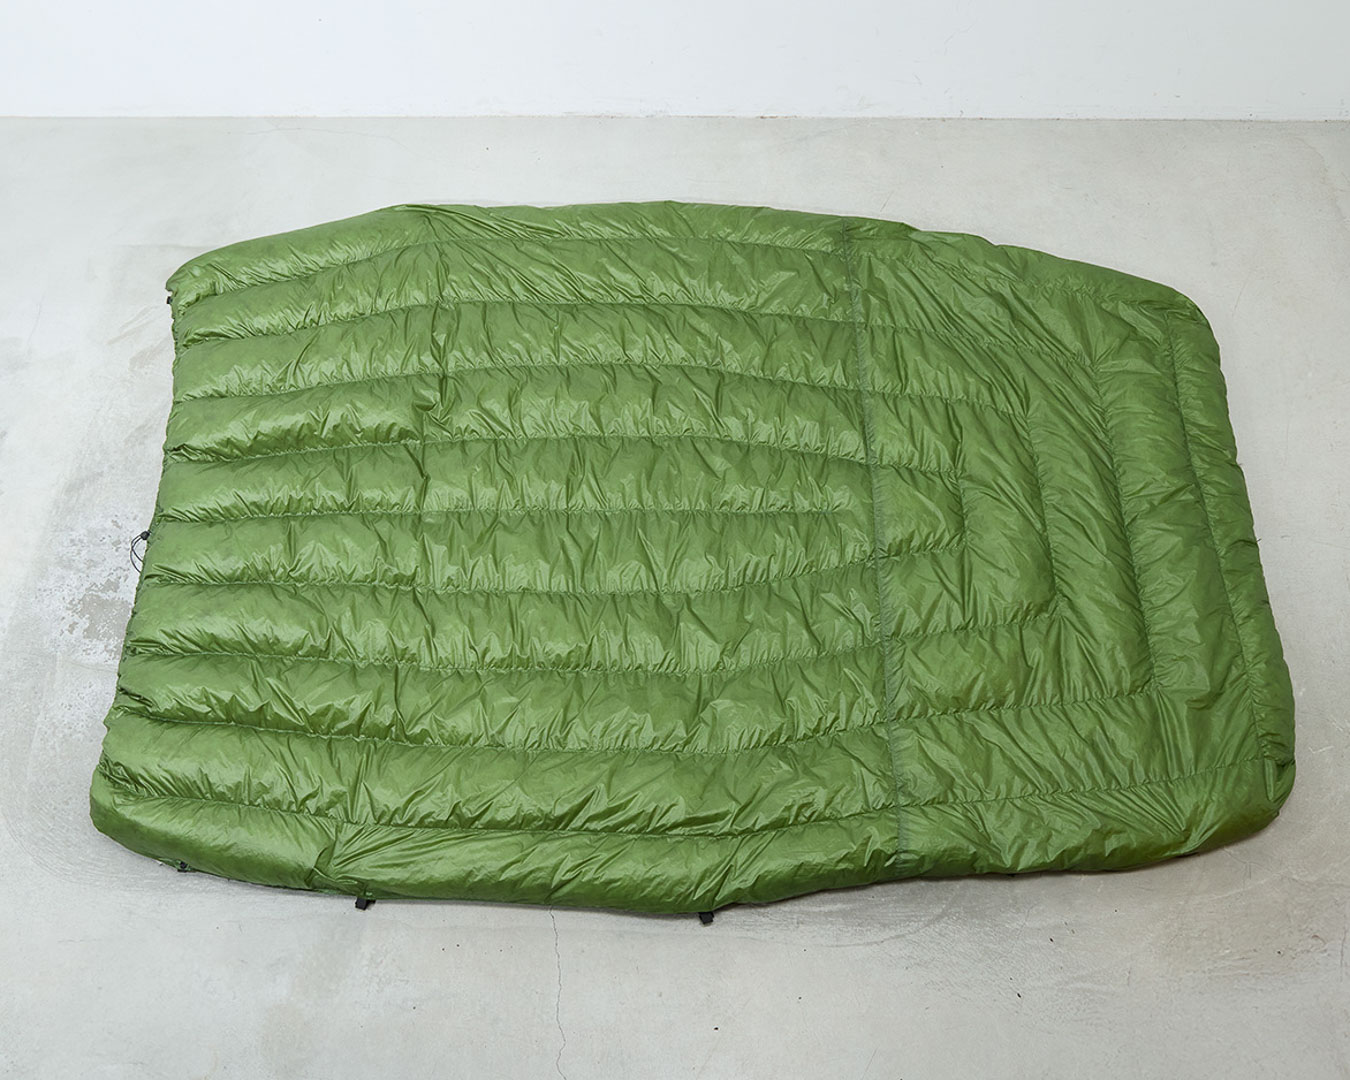
A quilt-style sleeping bag: Enlightened Equipment’s Revelation Sleeping Quilt (850 FP, 30 degrees Fahrenheit, Down).
A typical sleeping bag is made up of insulation, shell fabric and components such as zippers and drawcords. To reduce weight, people have tried switching to down insulation, choosing lighter fabrics that still offer durability, opting for smaller zippers, or using thinner drawcords. All of these are earnest efforts ー in the end, they only make a marginal difference.
Generally, when your gear has a lot of components, shaving weight from each one can add up. But sleeping bags have very few structural elements to begin with, so the weight savings you can achieve are inherently limited. That’s why it’s often more effective to remove components altogether.
For example, you might decide that you don’t need a hood, or that you can eliminate the underside insulation, since it gets compressed under your body while sleeping and doesn’t provide much warmth anyway. What really matters for insulation from below is your sleeping pad. Once you remove the underside, there’s no need for a zipper either, which further reduces weight.
This kind of thinking is what led to the development of the quilt.
The Revelation Sleeping Quilt’s backside fully opens, and the zipper is only near the feet. A bungee cord cinches the quilt.
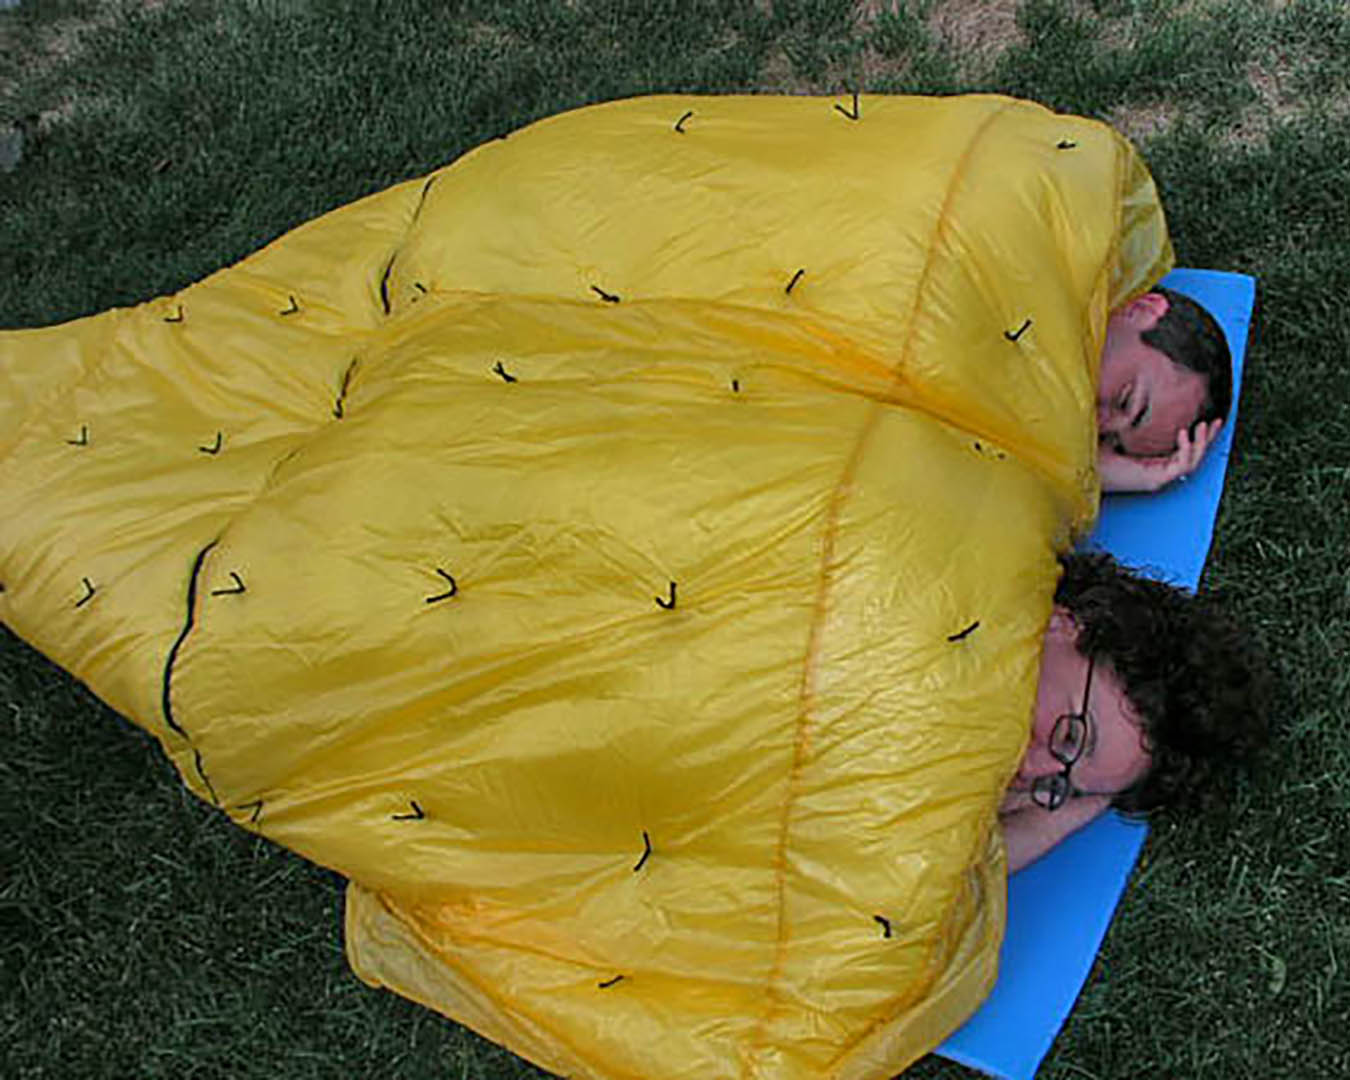
Quilts emerged in the 1990s thanks to Ray Jardine, an ultralight pioneer (read Lecture 1 on ultralight backpacks). As part of his Ray-Way philosophy, he made and used a quilt-style sleeping bag for two people, which he shared with his wife. Rather than sleep in separate bags, they shared a quilt ー like a blanket ー because it meant they could use just one piece of gear, which weighed less overall. Plus, their combined body heat made it warmer.
That was the starting point for ultralight hiking quilts.
A two-person Ray-Way quilt. (photo credit: http://www.rayjardine.com)
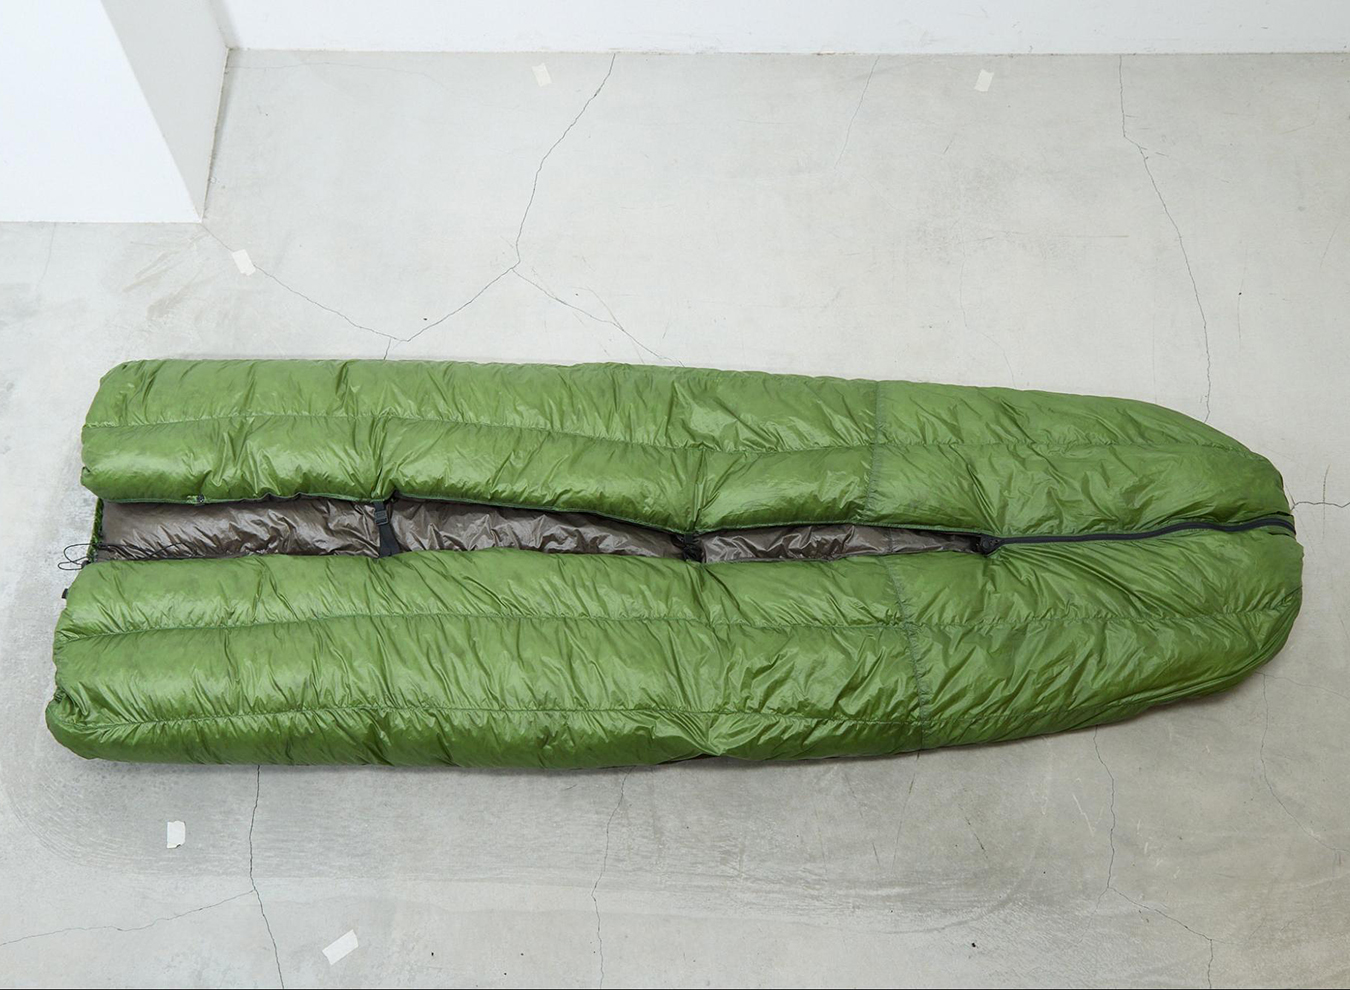
In short, a quilt is essentially a blanket: It has no back panel and rests on top of the body. Many quilts now have a zipper or bungee cord at the foot area to close it off ー unzip it and it becomes a blanket.
When the foot zipper is opened, the Revelation Sleeping Quilt spreads like a blanket.
A similar concept was seen in the late 1980s, when UK brand Rab released a sleeping bag with a mesh back panel designed to hold a sleeping pad in place.
Lightweight, blanket-like sleeping bags have been around for a long time. But they never really caught on ー mainly because they’re just not as warm as traditional sleeping bags.
Think about it: in winter, when you wake up to answer the call of nature at night, by the time you return your blanket has gone cold, right? Sleeping bags are designed to retain warmth by using insulation that prevents the warm air inside from escaping. A blanket, on the other hand, can easily be flipped open, exposing the inside materials to cold air and letting out the warmth. And people naturally toss and turn in their sleep, which allows warm air to escape.
A quilt that’s wide enough to prevent shifting while sleeping will add weight, which defeats the point of removing components to trim weight. This is why quilts never became as mainstream as traditional sleeping bags.
In fact, when I speak with customers at the store, I often get asked, “If a quilt shifts off at night, won’t you get cold?” The answer is: Yes. That’s a real drawback, and one you absolutely need to be aware of. If quilts were perfect, everyone would use them, and major manufacturers would have already switched to them, but that’s not the case.
Like many other pieces of ultralight gear, quilts come with clear pros and cons, and they demand a certain level of trade-off and commitment from the user. Yes, quilts do reduce weight. But they also come with inherent weaknesses that standard sleeping bags don’t have. For example, in three-season conditions, when temperatures fall to near-freezing (around 0 degrees Celsius or 32 degrees Fahrenheit), you might sleep comfortably in a quilt but someone else might not.
If your goal is to carry as little weight as possible, quilts are something you can’t really ignore. But you need to understand that you can’t expect the same level of performance or comfort as a regular sleeping bag.
The same principle applies to ultralight backpacks — there’s an unspoken rule: the rest of your gear needs to be lightweight too. Frameless, minimally padded packs aren’t for everyone; they demand physical strength and a dialed-in, lightweight setup to work well.
I’ve spent a lot of time making my own quilts, trying to address those weaknesses ー adding panels to prevent heat loss from the back when turning over, tweaking the shape and structure. But the more I tried to fix the problems, the more the quilt became less simple and morphed into a weird hybrid. So rather than awkwardly patching together a stripped-down design, it’s better to understand the limitations of quilts when using them.
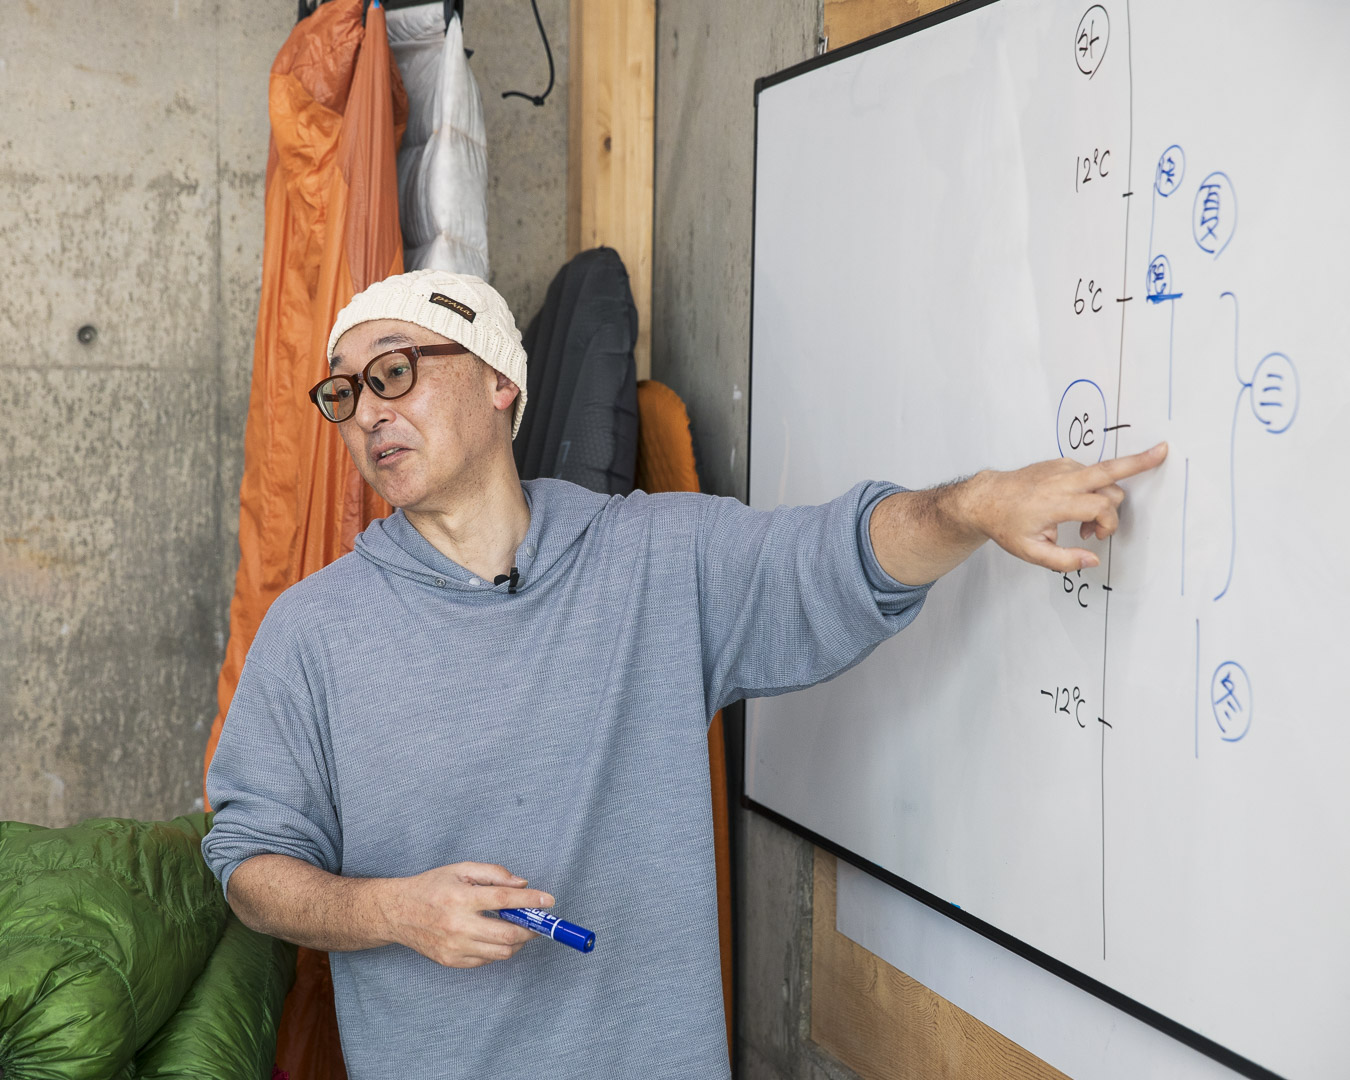
Temperature ratings: thinking in 6-degree increments
For this lecture, I want to focus on how to think about sleeping bag temperature ratings. When buying a sleeping bag, a lot of people struggle with this question: What temperature rating should I choose?
With a backpack, you can imagine how much volume or weight it will carry. But sleeping bags mostly look the same. It’s hard to see what distinguishes one from another. Yes, the amount of insulation determines the bag’s warmth, but you can’t decide on that alone. Most people aren’t even aware of temperature as a factor when choosing gear ー which is the root of the problem.
In recent years, there’s been a trend of people attaching thermometers to backpacks to record the outdoor temperature ー the idea being that they’ll recognize how they feel in different temperatures. In reality, most people who hang a thermometer from their packs don’t go that far. My point is this: Even if a sleeping bag has detailed temperature specs, most people don’t know what the numbers mean.
So, I have a simple way of understanding temperature zones for sleeping bags. My method isn’t foolproof ー it’s based on my own experience comparing and using an array of bags. There will be exceptions and some people may disagree. That said, it’s useful as a starting framework.
Sleeping bags come rated for a wide range of temperatures. My suggestion is to start by using 0 degrees Celsius (32 degrees Fahrenheit) as your reference point and then think in 6 degrees Celsius increments.
Why 6 degrees Celsius? Because most manufacturers list both a comfort temperature and a limit temperature, and in nearly every case, the difference between those two values is around 6 degrees Celsius. The three major Japanese sleeping bag manufacturers ー Montbell, Nanga and Isuka ー also use a temperature difference of around 6 degrees Celsius as their standard.
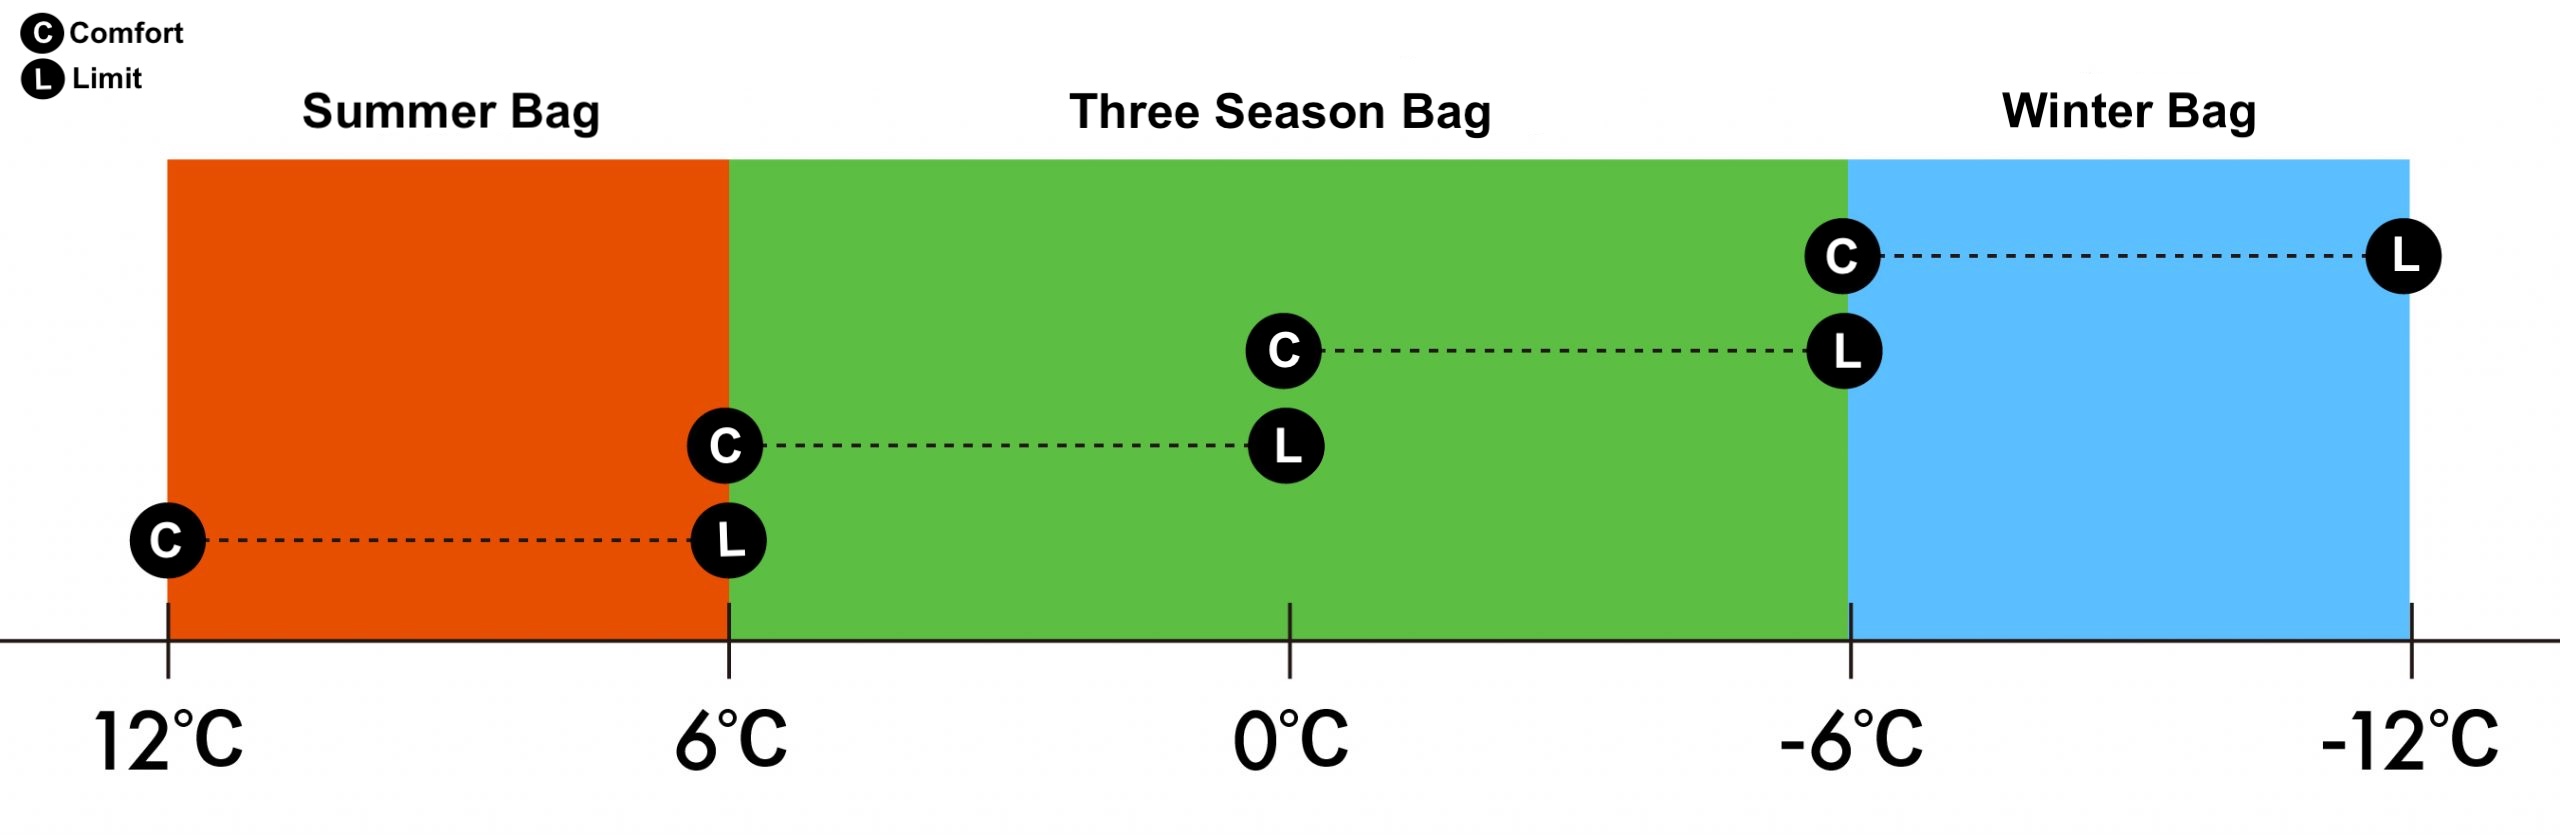
When only one temperature rating is given, it usually represents a sleeping bag’s limit temperature.
Based on my method, a sleeping bag with a limit temperature of 6 degrees Celsius will be comfortable down to about 12 degrees Celsius, while one with a limit temperature of 0 degrees Celsius will be comfortable down to around 6 degrees Celsius. Often, people focus on the limit temperature because they want a sleeping bag that’s as light as possible.
At a sleeping bag’s limit temperature, it’s possible to get sleep ー but you will wake up repeatedly from the cold. You’ll think that it’s too cold to sleep but will manage to doze off. After a couple of hours, you’ll wake up cold again. On the other hand, at the comfort temperature, you can sleep in a T-shirt and shorts, or whatever you wore during the day.
The difference of 6 degrees Celsius is quite significant. Consider how much adjusting your air conditioner by just 1 degree Celsius matters.
Another thing to keep in mind: Temperature ratings for sleeping bags assume that you’re wearing only underwear or base layers ー not down jackets or other insulated clothing.
Highland Design sleeping bags sold at Hiker’s Depot are manufactured by Nanga. Nanga has its own standards and ratings: Prototypes are tested by staff, their acquaintances and cold-sensitive women, and the data goes into determining the brand’s ratings.
In reality, the actual comfort temperature varies from one person to the next. Even so, there has to be some kind of reference for choosing sleeping bags, so it’s best to understand how comfort and limit temperature differ.
Three-season sleeping bags: 0 degrees Celsius as a baseline
When choosing a sleeping bag, 0 degrees Celsius works as a key reference point. That’s because in Japan’s mountains, even in the snow-free season, the outside temperature can easily drop to 0 degrees Celsius.
When I mention this 0 degrees Celsius baseline, people who are new to hiking ー they go on day hikes and stay at mountain huts and want to try tent camping ー often say they won’t go out in cold weather or wintry conditions.
But temperatures can easily dip to 0 degrees Celsius. Experienced hikers will know that this is common in the Northern Alps in September. It might be warm during the day, but at night it gets cold. Especially around mid-October during the foliage season, temperatures at dawn are usually around 0 degrees Celsius or sometimes even lower.
Generally, there are four categories for sleeping bags: summer, three-season, winter and extreme-winter.
Summer sleeping bags tend to have a limit temperature of 6 degrees Celsius and a comfort temperature of 12 degrees Celsius. Winter bags have comfort temperatures around minus 6 degrees Celsius and limit temperatures below minus 12 degrees Celsius. Extreme winter bags go even lower.
What’s tricky is the 6 degrees Celsius to minus 6 degrees Celsius range. How do you define the term three-season? Among three-season sleeping bags, there is a big difference between those with 0 degrees Celsius as their limit temperature and those with 0 degrees Celsius as their comfort temperature.
In the mountains during autumn foliage season, it’s still too early for snow, but it’s cold enough for needle ice (also known as shimobashira, or frost columns) to form. (This happens if water in the soil is drawn towards the surface by capillary action, which resembles how a sponges absorbs liquid, and the temperature of the soil is above 0 degrees Celsius but the surface is below freezing.) The sky is clear, the insects are gone ー good conditions for sleeping. But when the temperature reaches 0 degrees Celsius, people tend to choose sleeping bags with a 0 degrees Celsius limit temperature rating.
Sleeping bags with a 0 degrees Celsius limit temperature typically have around 260g to 280g of down and weigh 550g. Those with a 0 degrees Celsius comfort temperature have around 400g of down and weigh 750g.
Given the choice, most people go with a bag that weighs less and takes up less space. Even people who are sensitive to the cold assume that they’ll be fine if they wear more clothes. But when they head to the mountains, they end up cold and unable to sleep.
In the past, it was common to go into the mountains in groups. People often slept tightly packed inside a single tent. Like a crowded room that feels warm during a party, a tent with several people will stay warm. Even sleeping bags with lower temperature ratings were sufficient. Decades ago, when I was a student, admitting that you were cold felt like admitting weakness, and carrying a thick sleeping bag was embarrassing.
Things have changed since the COVID-19 pandemic. It’s become more common for people to sleep alone in a tent on camping trips. Inside a solo tent, it gets cold if you are your only heat source ー to the point where the temperature difference with the outside is usually less than 5 degrees Celsius.
In the past, people joined mountaineering clubs and built up their technical skills by climbing mountains in winter and attempting ascents in the Himalayas. Nowadays, few people venture into the mountains in winter. One of the biggest changes over the past 40 years is how comfortable people expect to be when they sleep. That’s the result of the diversifying mindset of mountaineers.
To be honest: The harder the climb, the less you can care about sleep quality. You might think that good sleep is vital to staying healthy on tough climbs. The reality is that many alpinists have to cut weight on food and sleeping gear, which explains why some use a two-person sleeping bag or order a bag customized for a trio.
There was a time when a 0 degrees Celsius limit temperature meant a three-season sleeping bag. These bags contained less down and were lightweight. They worked in cold weather if several people crowded into one tent.
These days, it’s natural for people to think they need a sleeping bag rated for 0 degrees Celsius comfort temperature and minus 6 degrees Celsius limit temperature. Not being able to sleep would go against the idea that they’re supposed to be enjoying themselves in the mountains. Alpinists in mountaineering clubs might still choose bags with a 0 degrees Celsius limit temperature. But for casual hikers, choosing a three-season sleeping bag with a 0 degrees Celsius comfort temperature is a good guideline.
When I talk with customers who are looking to buy a three-season sleeping bag, I usually recommend one with a 0 degrees Celsius comfort temperature and minus 6 degrees Celsius limit temperature — a standard for today’s hikers. For the cold-tolerant, a bag rated 0 degrees Celsius limit is fine.
So, when you attach a thermometer to your backpack, it’s important to jot down or make a mental note of how you feel when it’s 0 degrees Celsius, 6 degrees Celsius and 12 degrees Celsius outside. Get into the habit of checking the temperature before you sleep and after you wake up. Using 0 degrees Celsius as a baseline and thinking in increments of 6 degrees Celsius, adjust your perception to determine what sleeping bag temperature rating best suits you.
Pitfalls of a combined “sleeping system”
The last thing I want to discuss is something I call a “sleeping system”. The term refers to taking a holistic approach to what you’ll be sleeping in. In my book Ultralight Hiking, I wrote about including your insulating clothing in your “sleeping system” and how it can help reduce weight. I believe most people take that into consideration. But there’s a downside to doing this.
It’s tempting to think you can save weight by using a lighter sleeping bag and compensating with extra clothing. But in practice, this often leads to carrying more than you planned.
If your goal is to reduce weight, don’t add more insulating clothing to make up for a lighter sleeping bag. It defeats the purpose.
If you’re worried about the cold and want to add more insulating clothing, choose a warmer sleeping bag instead ー it will be warmer and you’ll carry less weight. Here’s why: Adding more insulating clothing means more down and more shell fabric. On the other hand, switching to a warmer sleeping bag only adds more down ー no additional shell fabric.
It’s the same when considering adding a bivy sack to your sleeping bag for extra warmth. Even a lightweight bivy weighs around 200g. Instead, the warmer option is to get a sleeping bag with more down. Also, bivy sacks are essentially in the same category as tents. They are originally designed to be used alone without a tent or shelter. Using them inside a tent or shelter for extra warmth means you don’t gain much in terms of weight efficiency.
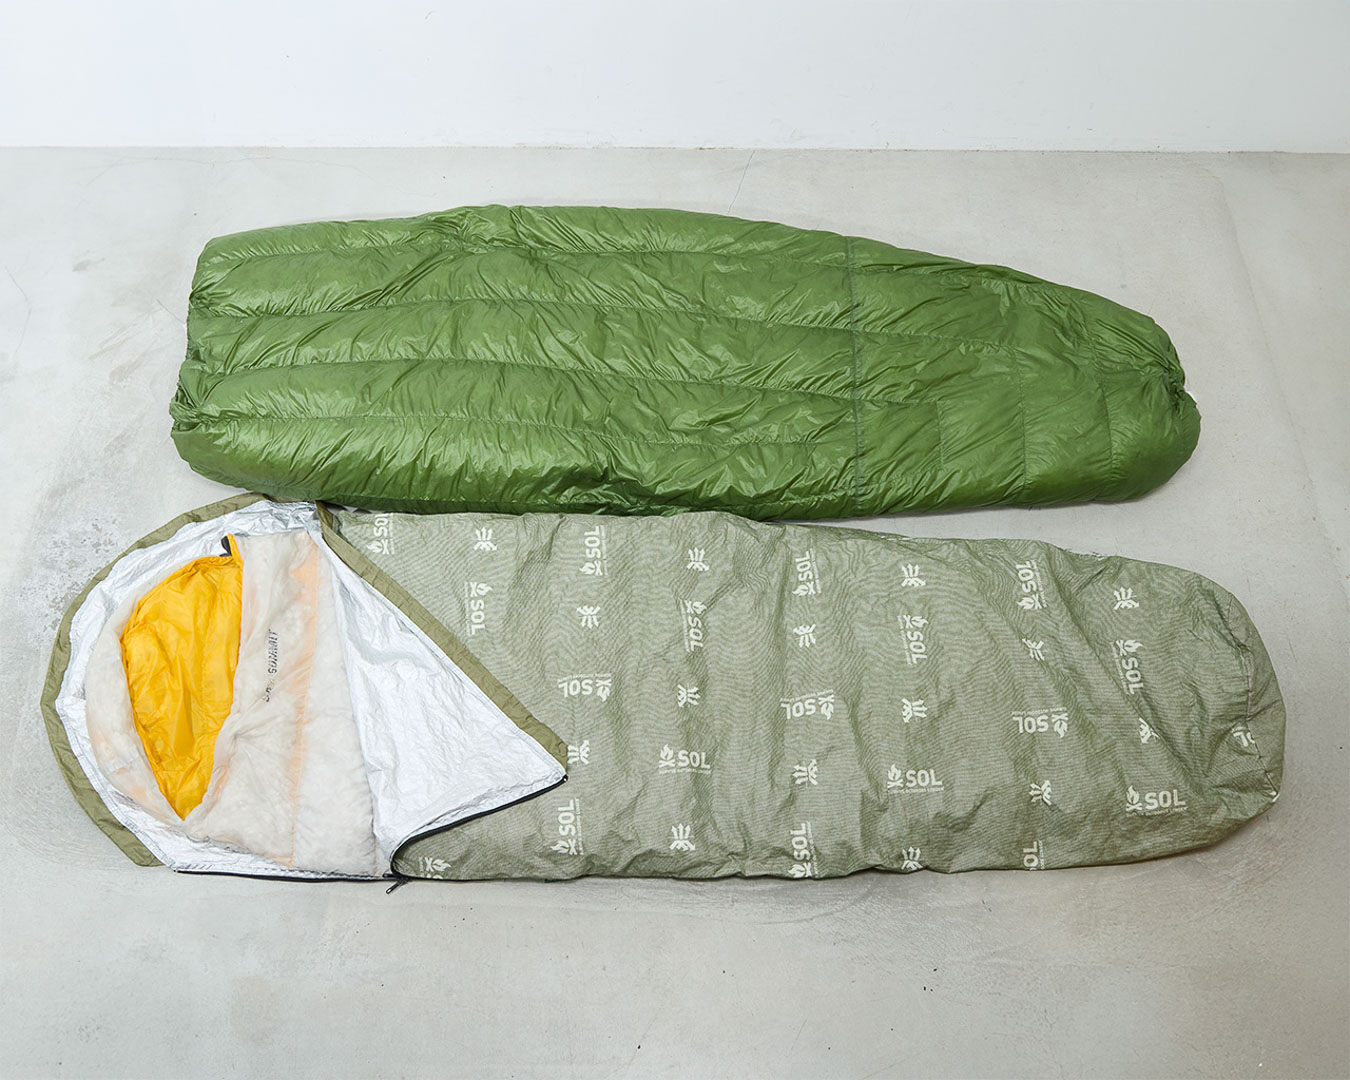
Enlightened Equipment’s Revelation Sleeping Quilt (top), with 365g of down and a total weight of 545g, versus a combination of Sea to Summit’s Spark Sp1 (bottom) with 180g down weighing 345g plus the SOL Escape Bivy weighing 240g. Although the total weight is 585g, the Revelation is warmer.
In that case, it’s better to increase the amount of down. Generally, adding about 50g of down raises the temperature rating by approximately 2 degrees Celsius. Of course, this varies depending on the quality of the down, but for down with a fill power of 800FP or higher, adding 50g tends to increase the temperature rating by around 2 degrees Celsius; adding 100g raises it by about 4 degrees Celsius.
When sleeping inside a tent, adding 200 to 300g of a bivy sack is less effective for warmth per weight than simply adding more down to your sleeping bag. Adding an extra insulating layer ー even a lightweight down jacket ー adds around 200g of weight. Instead of either of those options, it’s better to choose a sleeping bag with 50 to 100g more down.
But when I say this, people often argue that insulating clothing is better because they can wear it. The fact is, when you’re hiking, you usually don’t wear insulating layers ー you get too hot. Of course, sometimes it’s cold at the start of an early morning hike, or temperatures can suddenly drop. But you rarely need insulating clothing ー a down jacket, for instance ー when hiking. Even wearing rain gear can make you hot. Nowadays, some people use active insulation layers without shells ー Yamatomichi’s products with Polartec Alpha Direct, for example — for a balance of breathability and warmth. But synthetic insulation jackets can also cause overheating while hiking. Usually, you put on insulating clothing after you arrive at the campsite. To save weight, you can simply wrap your sleeping bag around your body. It looks odd, but ultralight ideas like this are also in Ray Jardine’s books.
So, when devising your own “sleeping system”, opt for simplicity. It will be easier to manage.
In Ultralight Hiking, I discussed the idea of incorporating insulating clothing into your sleep system. However, this often leads hikers to take more layers than necessary. A better approach is to rely on the insulating layers you already plan to carry and simply opt for a warmer sleeping bag. This not only keeps your total pack weight lower but also makes your sleep system simpler and more efficient. That said, gear enthusiasts love mixing gear for new functions, and that’s part of the fun, too. There’s no right answer. Just keep in mind that more complex systems tend to get heavier. With that in mind, enjoy experimenting!
Here’s a common question that I hear: “If you combine a sleeping bag with 260g of down with a down jacket or pants having 140g of down, does that equal the warmth of a 400g down sleeping bag?”
I can’t say for sure whether the two are the same. A down jacket has a fabric shell, which reduces heat transfer. So, even if you have the same amount of down in a jacket-sleeping-bag combination, a 400g down sleeping bag on its own will probably be warmer.
That said, it might be a different story if the fabric is treated with titanium or aluminum sputtering (which would help improve its heat conductivity). Differences in weave and fabric density can also affect warmth. Wearing a down jacket would make for a tighter fit around the neck, which would help retain heat. The upper body is more sensitive to cold than the lower body, so wearing a down jacket boosts insulation where it’s most needed. Even without a hood, a collar can cover the neck and shoulders. That might end up being warmer. Thinking about all of these details is what makes gear debates interesting. For that reason, some hikers might reasonably choose a 140g down jacket with a 260g sleeping bag, even if it’s a bit heavier.
On the other hand, if you don’t think you’ll wear a down jacket, then choosing a 400g sleeping bag will be lighter and simpler, which some hikers prefer. Again, there’s no right way. If Yamatomichi were to develop its own “sleeping system”, it might be possible to measure and analyze various models and the differences between down and synthetic insulation.
Any questions?
Q: Personally, I don’t think wearing a down jacket inside a down sleeping bag improves insulation much. If the clothing worn to sleep is active insulation, would that improve warmth?
A: Active insulation materials alone are breathable. They don’t easily create a warm insulating layer. That’s a key feature ー they’re not too hot but they also don’t warm up on their own. If you block airflow from the outside, you can get reasonably warm. And since body heat transfers easily to the sleeping bag, it might raise the perceived temperature inside the bag. I haven’t thoroughly tested this, so I can’t say for sure. But from the material properties, I’d say that wearing active insulation inside the sleeping bag might make you feel the sleeping bag warming up faster. That said, a down jacket feels warm immediately when you put it on, so it’s hard to equate active insulation with down jackets. Their insulation and characteristics are quite different.
It would be interesting to test how the temperature inside the sleeping bag changes over time if you wear something as thin as an inner down jacket compared to active insulation. You could stick a thermometer inside and see how that changes over time.
Q: What about warming yourself by wearing a down jacket before getting into the sleeping bag, then taking it off once inside?
A: That sounds warm. These kinds of ideas are great tips. Once you understand the big picture, you start thinking of different possibilities. There’s no universal answer that works for everyone, but these personal secret hacks are fun.
I used to rarely wear active insulation layers. I tried them when they first came out, but since you don’t wear them much while hiking, I thought it wasn’t necessary. For the same weight, down is warmer, so I figured a down jacket is ultimately better for retaining body heat.
But now, if I’m carrying a down jacket and a quilt, I think carrying active insulation plus a fully closable sleeping bag might let me stay warmer while sleeping. I’m testing this on hikes in late autumn or near-snow seasons when the low temperature is between minus 5 degrees Celsius and 5 degrees Celsius. I don’t have a definitive answer yet, but I feel the fully closable sleeping bag with active insulation might be better.
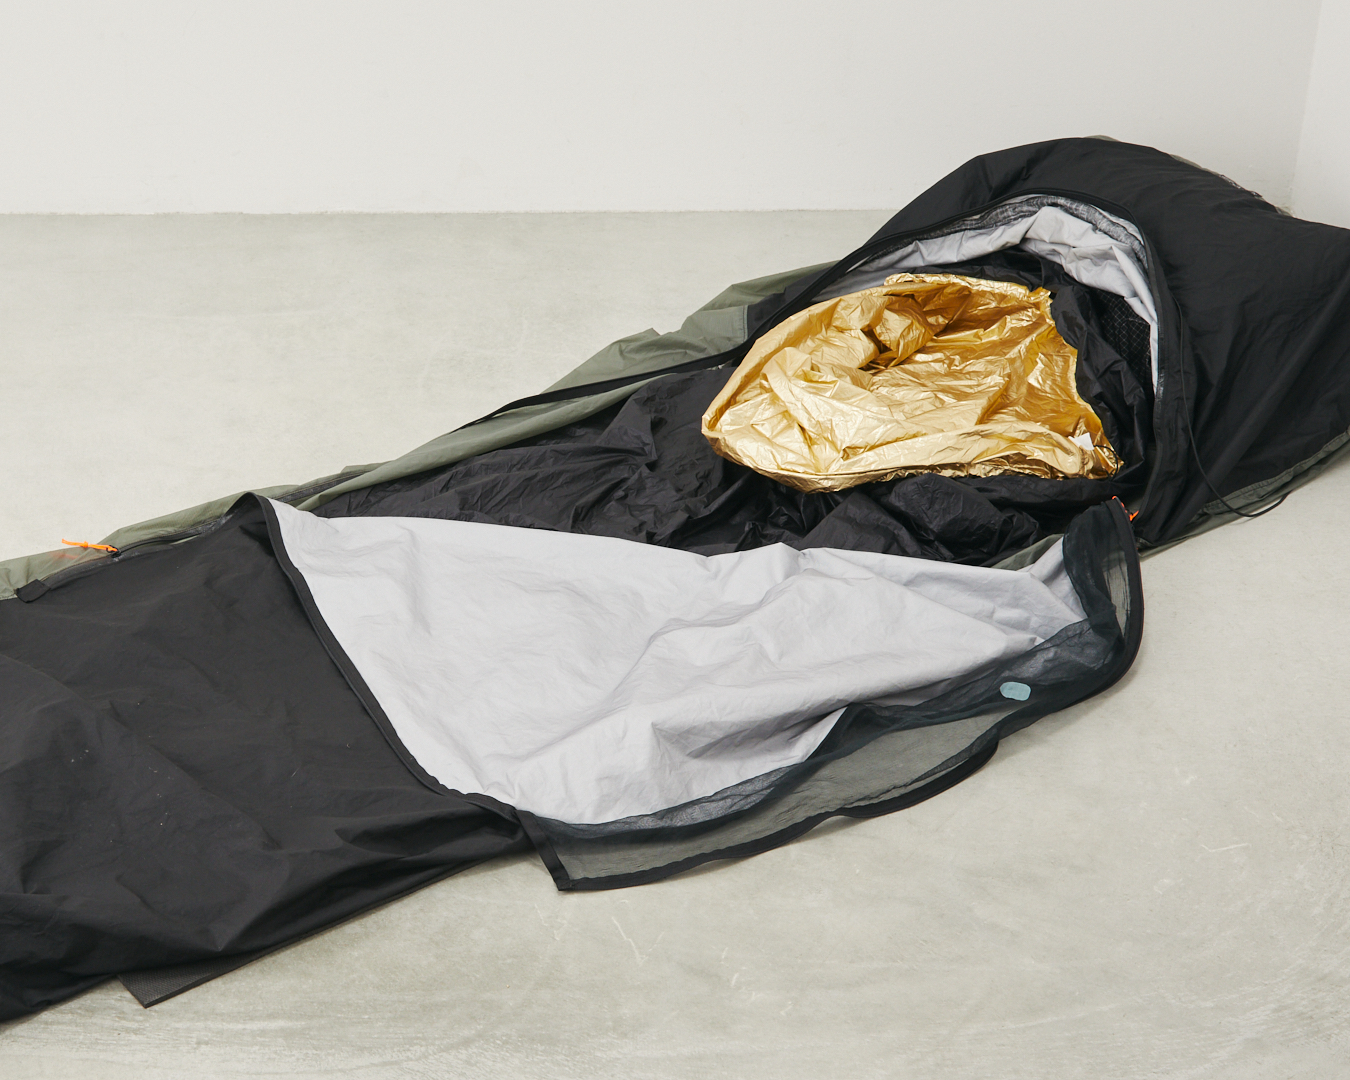
Yamatomichi staffer Taishi Sonoda’s setup: a Western Mountaineering Hot Sack VBL with a gold-colored inner coating inside of a bivy sack. By using the VBL to trap moisture and retain heat, Taishi achieves weight savings and doesn’t have to carry a down sleeping bag or jacket. His clothing inevitably becomes damp, so he wears quick-drying base layers and chooses locations and seasons that aren’t too cold.
Q: In recent years, I’ve often used a VBL (Vapor Barrier Liner) in the mountains. Down sleeping bags nowadays are treated to be water-repellent, so their loft doesn’t collapse easily, but I haven’t really felt the benefit. For example, when I get soaked in the Northern Alps, I put a VBL cover over my synthetic sleeping bag to stay warm. What do you think about VBLs?
A: VBLs were originally developed for extremely cold places like Alaska and Siberia, to prevent moisture inside sleeping bags, clothing and boots. The problem is that sweat inside the sleeping bag can crush or freeze the insulation. Also, sweaty boots left in cold conditions can freeze inside. To prevent this, a vapor barrier liner stops sweat from entering sleeping bags or boots by using a waterproof membrane over the feet or by wearing a non-permeable liner sheet.
Humans have a physiological response where if the skin surface is sealed with something impermeable like plastic wrap, sweating stops after a certain amount. This effect was used in long cold journeys to avoid freezing and wetting bedding. Essentially, you create a steamy environment inside the barrier, which also adds warmth. In Japan, VBLs are often used more for creating warmth by trapping moisture than their original purpose of preventing moisture absorption.
On cave exploration trips, I often wore a plastic-like coverall under a fleece suit. The cave’s cold and waterfalls meant I got very damp, but I stayed warm thanks to the trapped moisture. So, I’ve personally experienced this effect of moisture creating warmth.
But VBLs are tricky to use. Imagine sleeping inside a trash bag: You sweat and get damp inside the bag and your clothes get wet. Going outside wet the next day is cold. If you pack up quickly and start moving, the time that you’re cold is limited. But if the wind is strong, you need to think about how to maintain your body heat ー wearing a shell over wet clothes, drying clothes, layering strategies. Your whole setup needs to account for the VBL. So, using VBLs properly is complicated.
I think VBLs are effective mainly in hiking situations that involve long daily activity times and distances. For those who hike for about eight hours as usual and then relax at the campsite, the benefits are minimal. It just adds more tasks and complexity. We ー the first generation of Japanese ultralight hikers ー all tried VBLs at some point but every one of us gave up on them. Honestly, I’d love for someone to teach me an effective way to use VBLs.
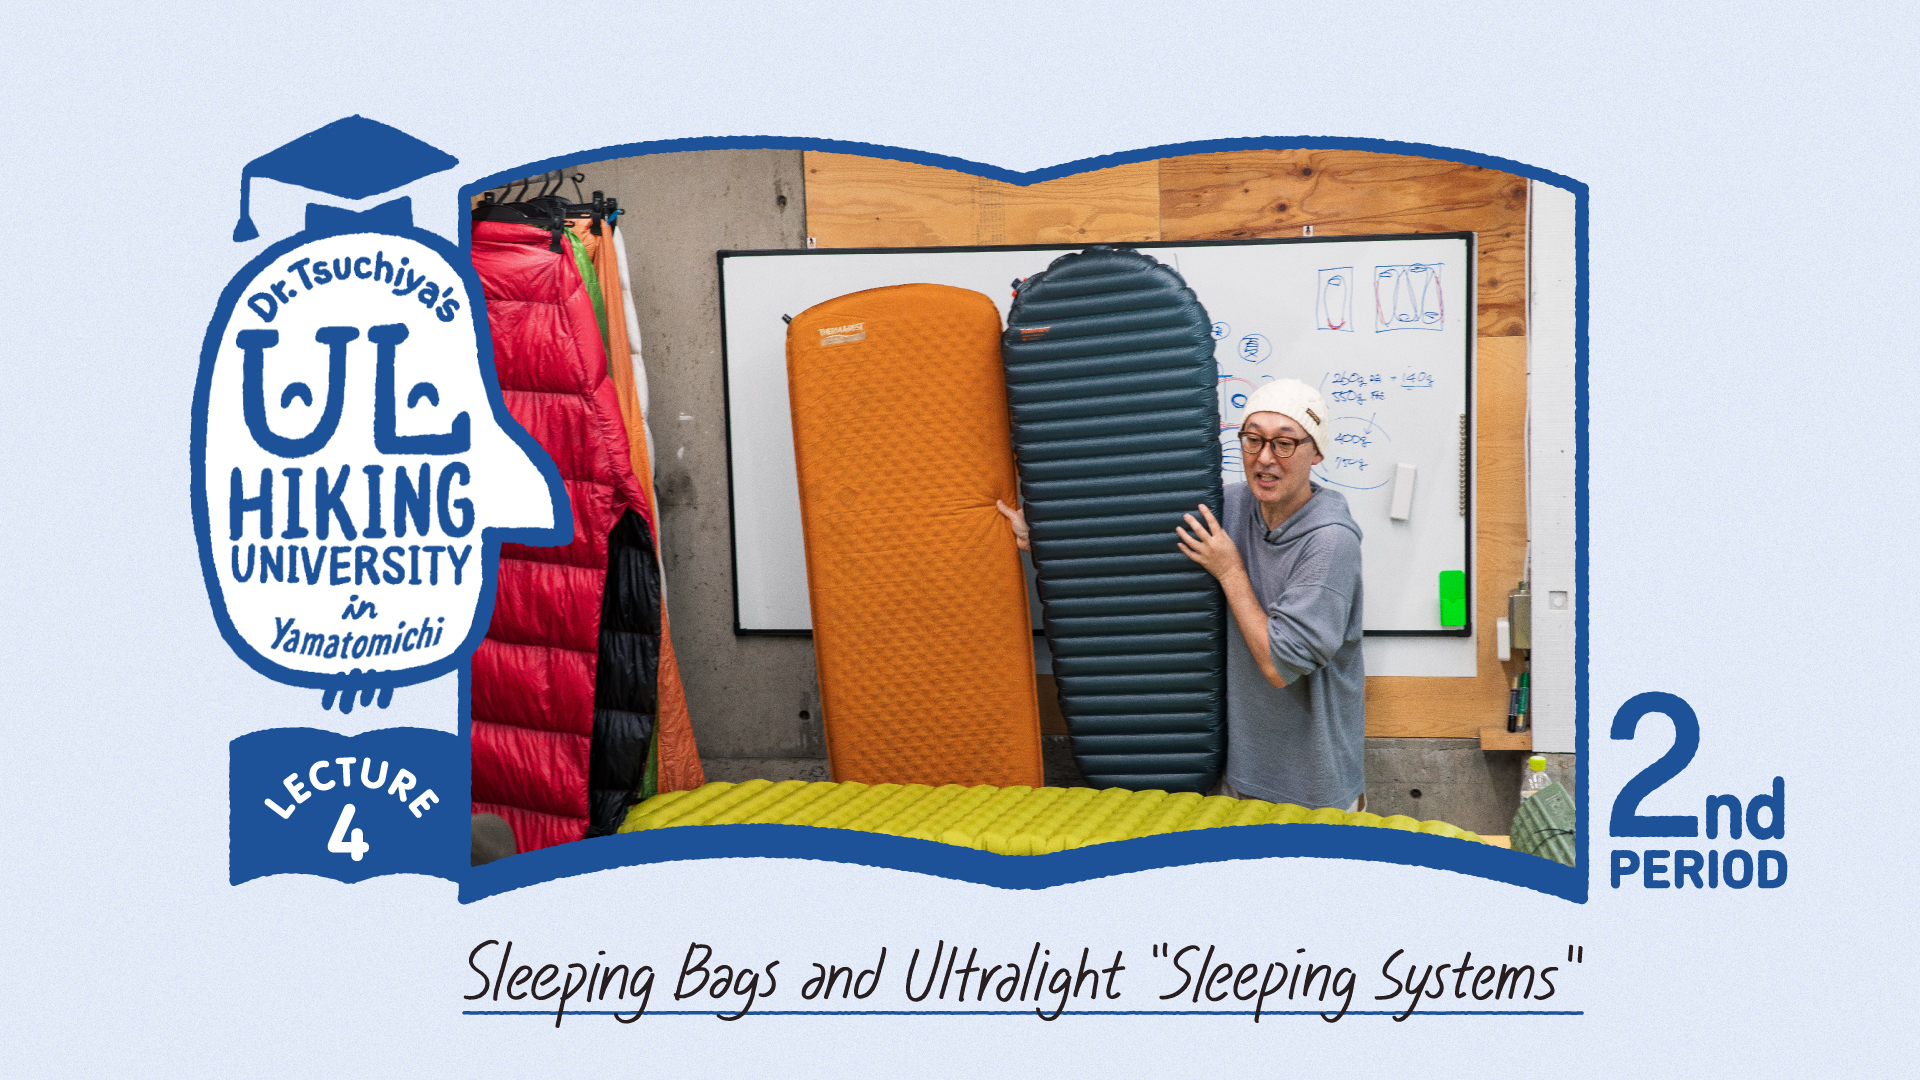
In Period 2, I’ll discuss sleeping pads.
[Continued in Period 2]
YouTube
Watch Tomoyoshi Tsuchiya’s “Lecture 4: Sleeping Bags and Ultralight ‘Sleeping Systems’” on YouTube. (English subtitles available)
Series: UL Hiking University