HLC Kita-kanto MYOG Workshop #2
HLC Kita-kanto MYOG Workshop #2
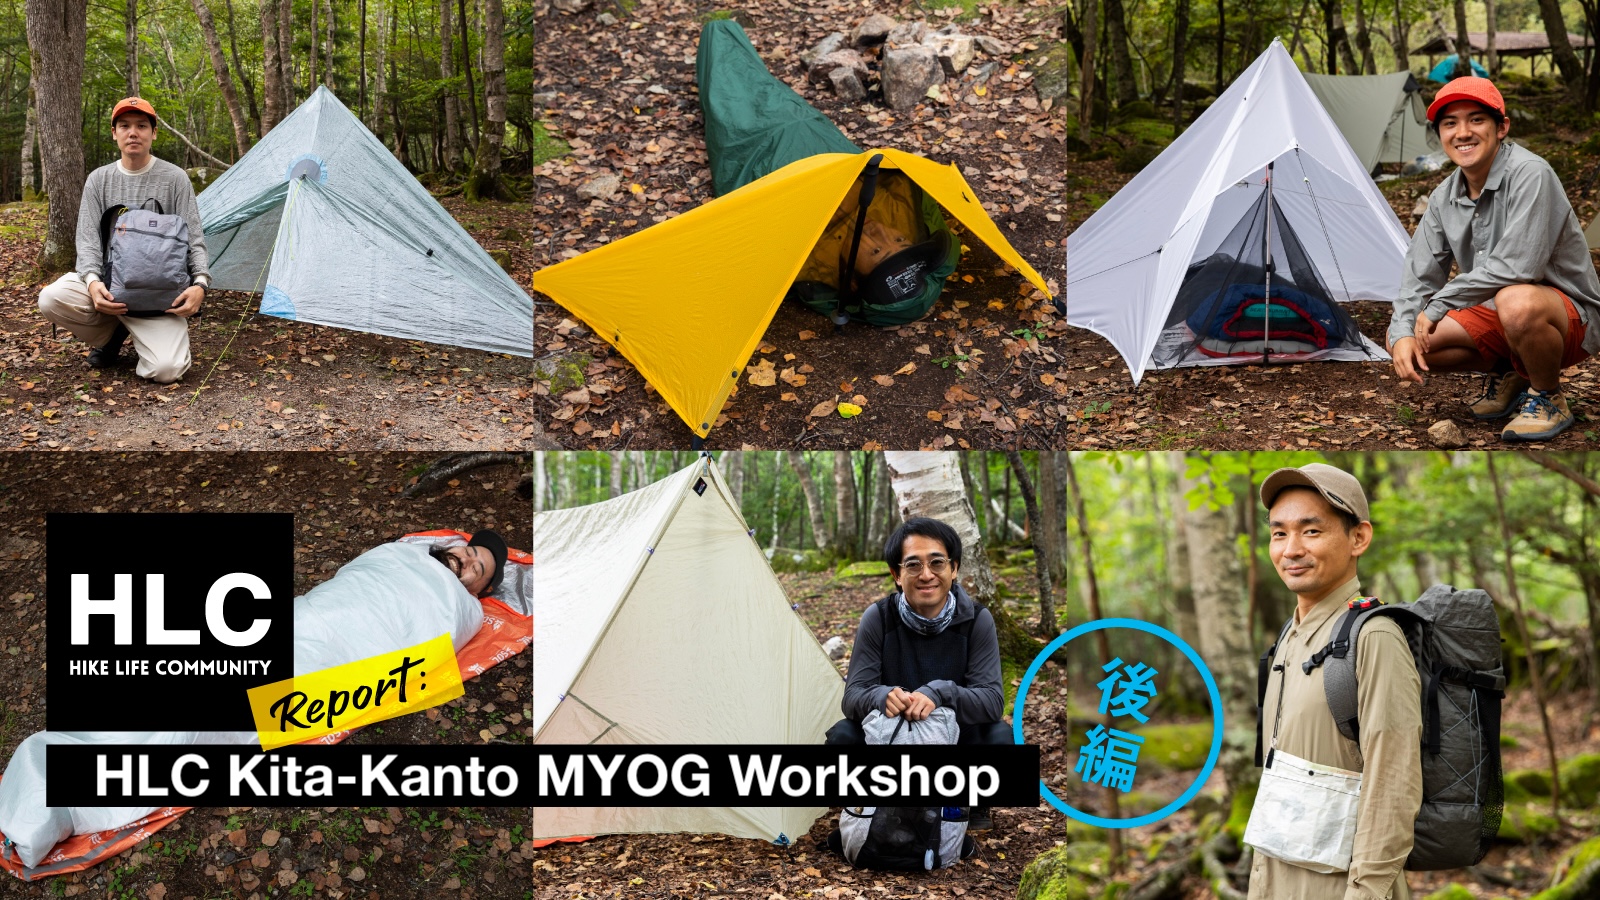
This is the second half of the report on the HLC North Kanto MYOG (Make Your Own Gear) Workshop, held last year as a three-part program. Just like in the first installment, participants gathered to present the gear they had created during the workshop, and we were there to hear their stories and capture their passion.
True to the spirit of MYOG, the results were as unique as their makers—tents, packs, tarps, and more, each piece bursting with individuality. If something here sparks your curiosity, why not start making something yourself?
Let’s MYOG!
③Tomo - tarp, backpack, pot
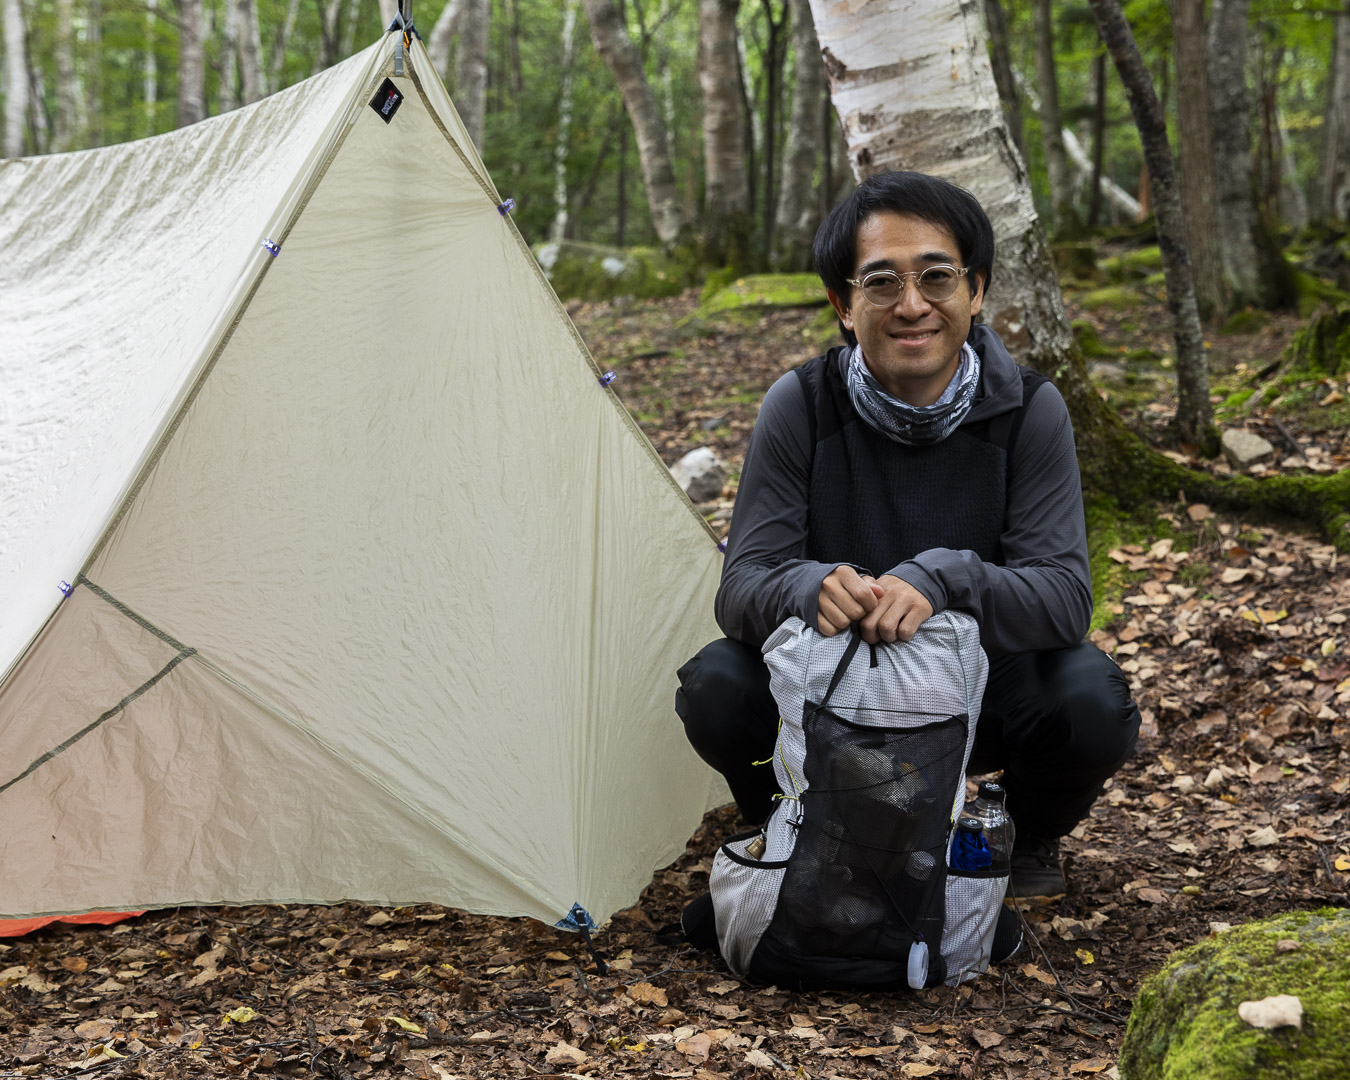
Next up is Tomo, who joined the workshop with his friend Yellow. His approach to MYOG is all about taking it slow and keeping things laid-back.
——How long have you been doing MYOG?
I started with this MYOG workshop, so it’s been about six months. Before that, I had no experience with a sewing machine at all.
——What did you make this time?
I made a backpack and a tent. In the second session of the workshop (this is the 3rd session) I made a one-person emergency style tent as practice, but after that I ended up making a tent/tarp for two.
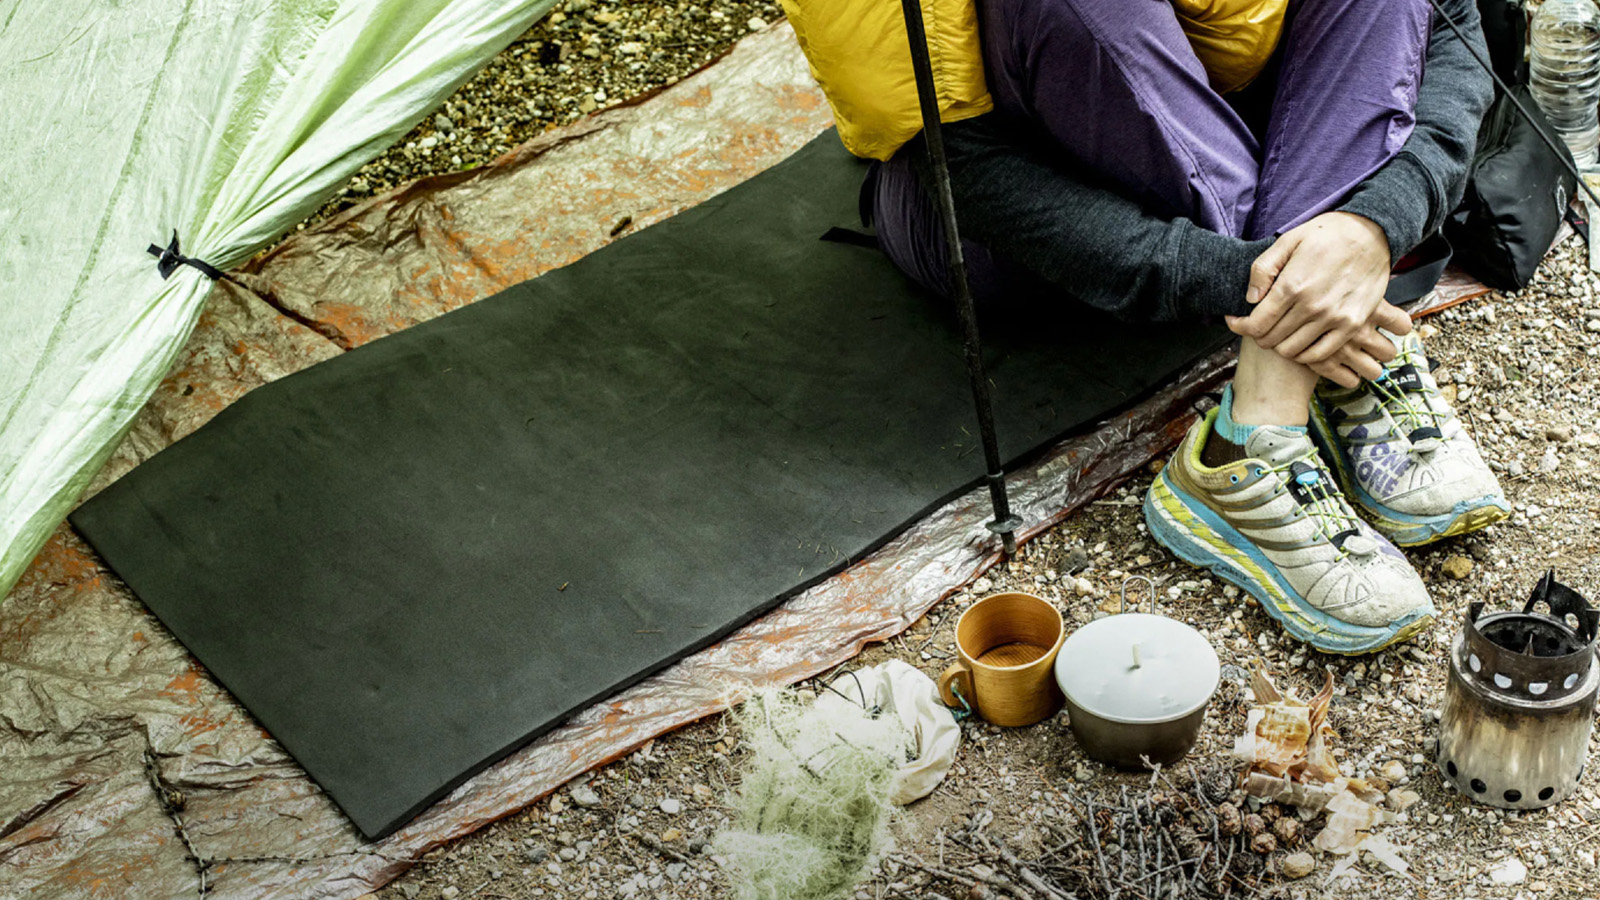
Tomo’s first emeregency style shelter. The material is Tyvek.
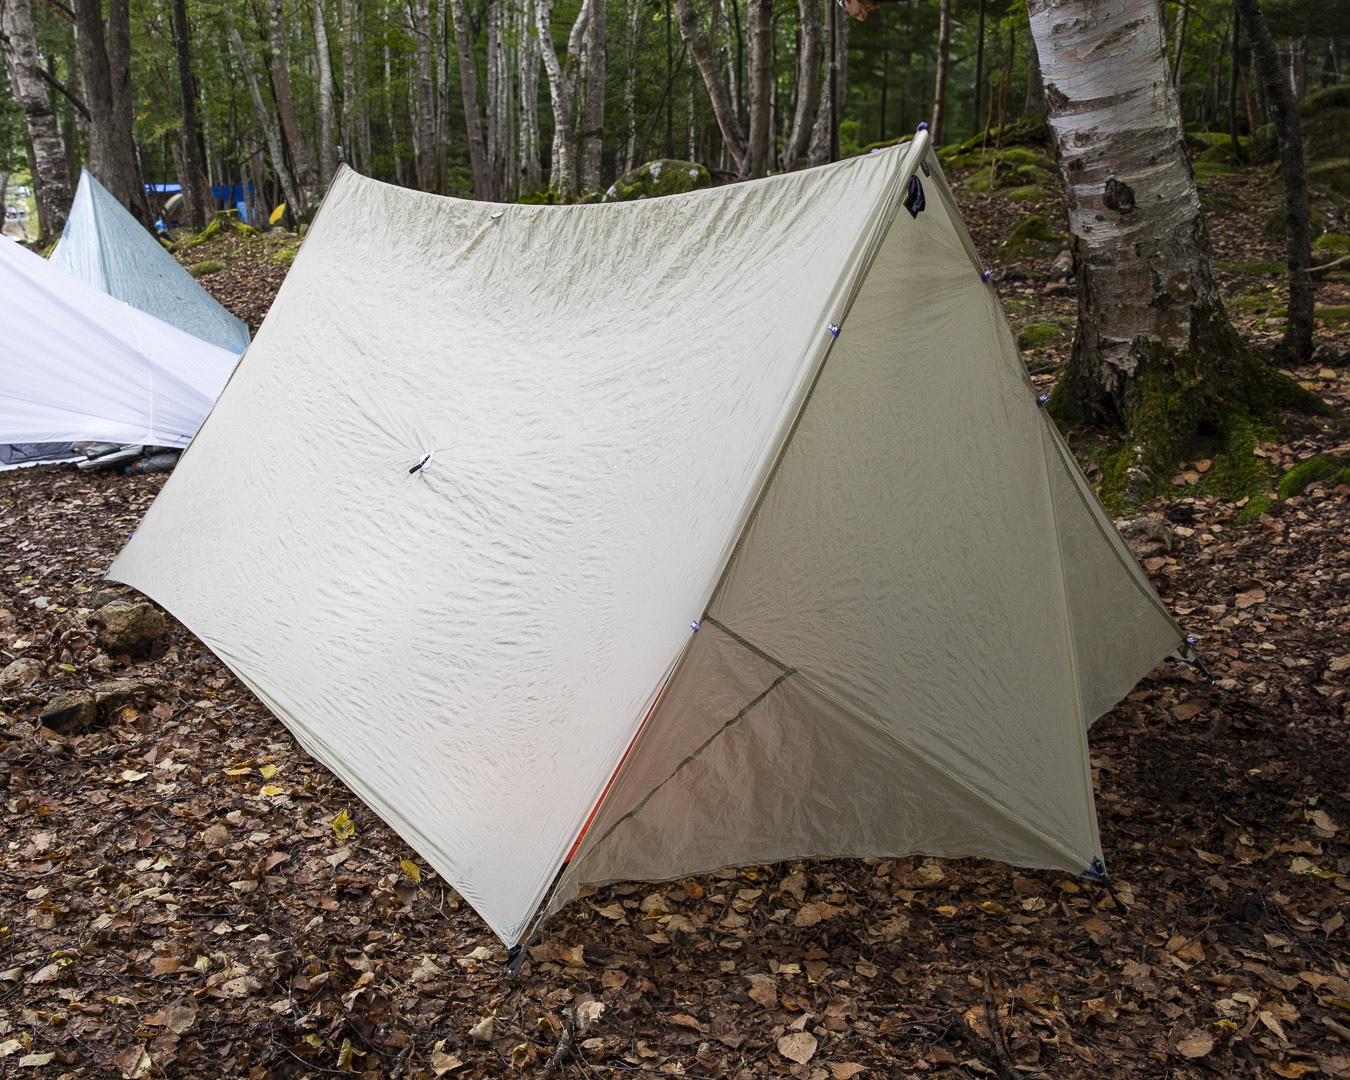
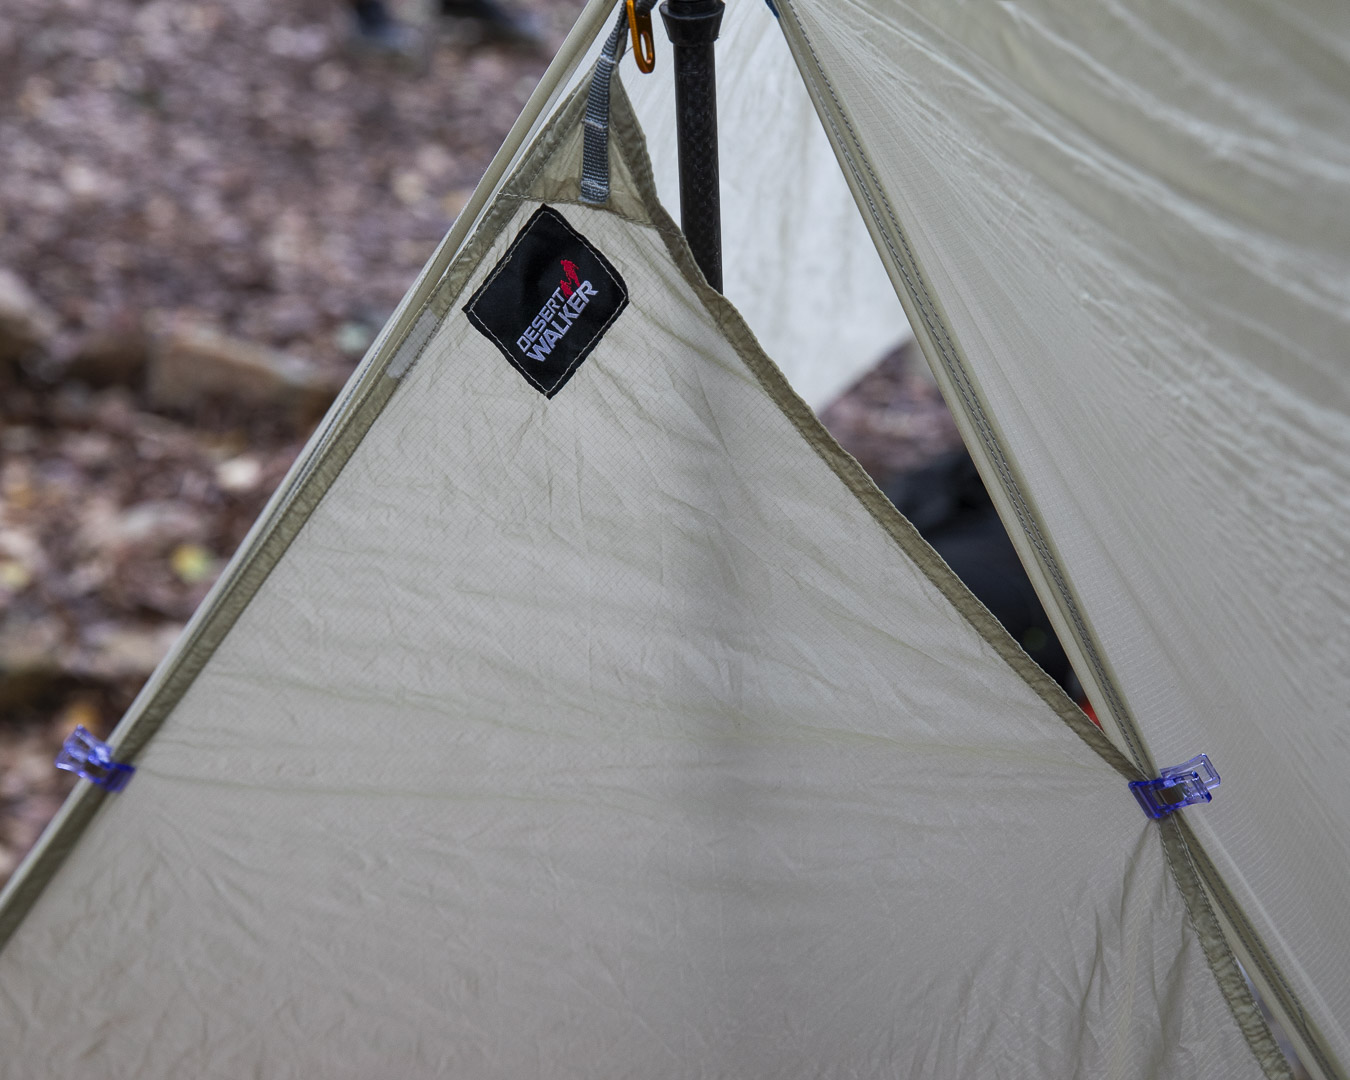
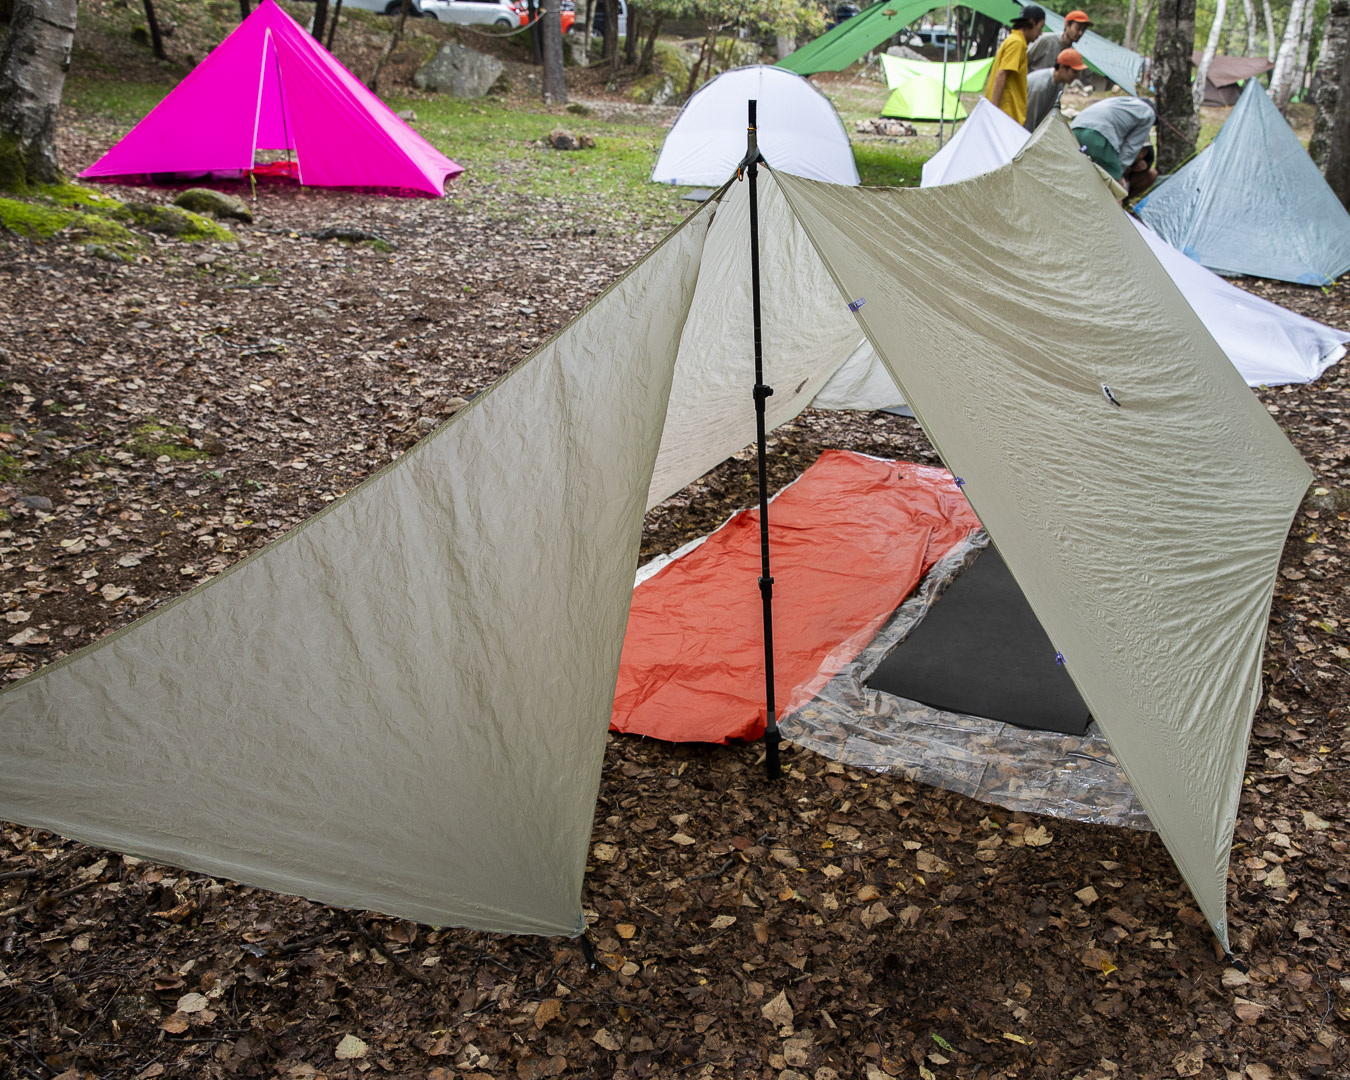
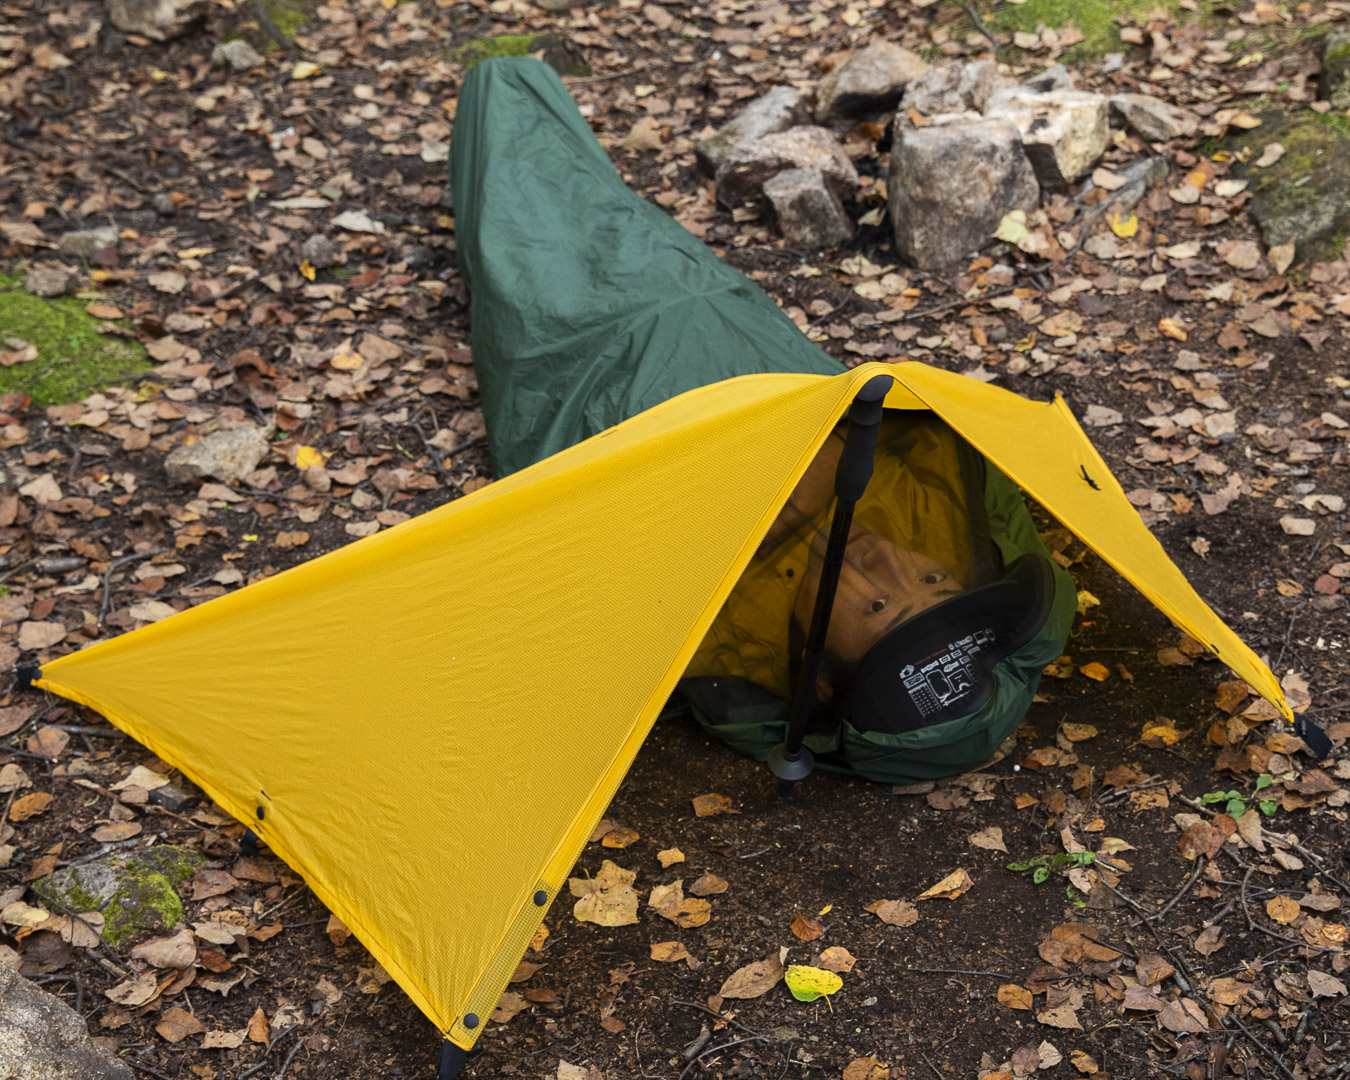
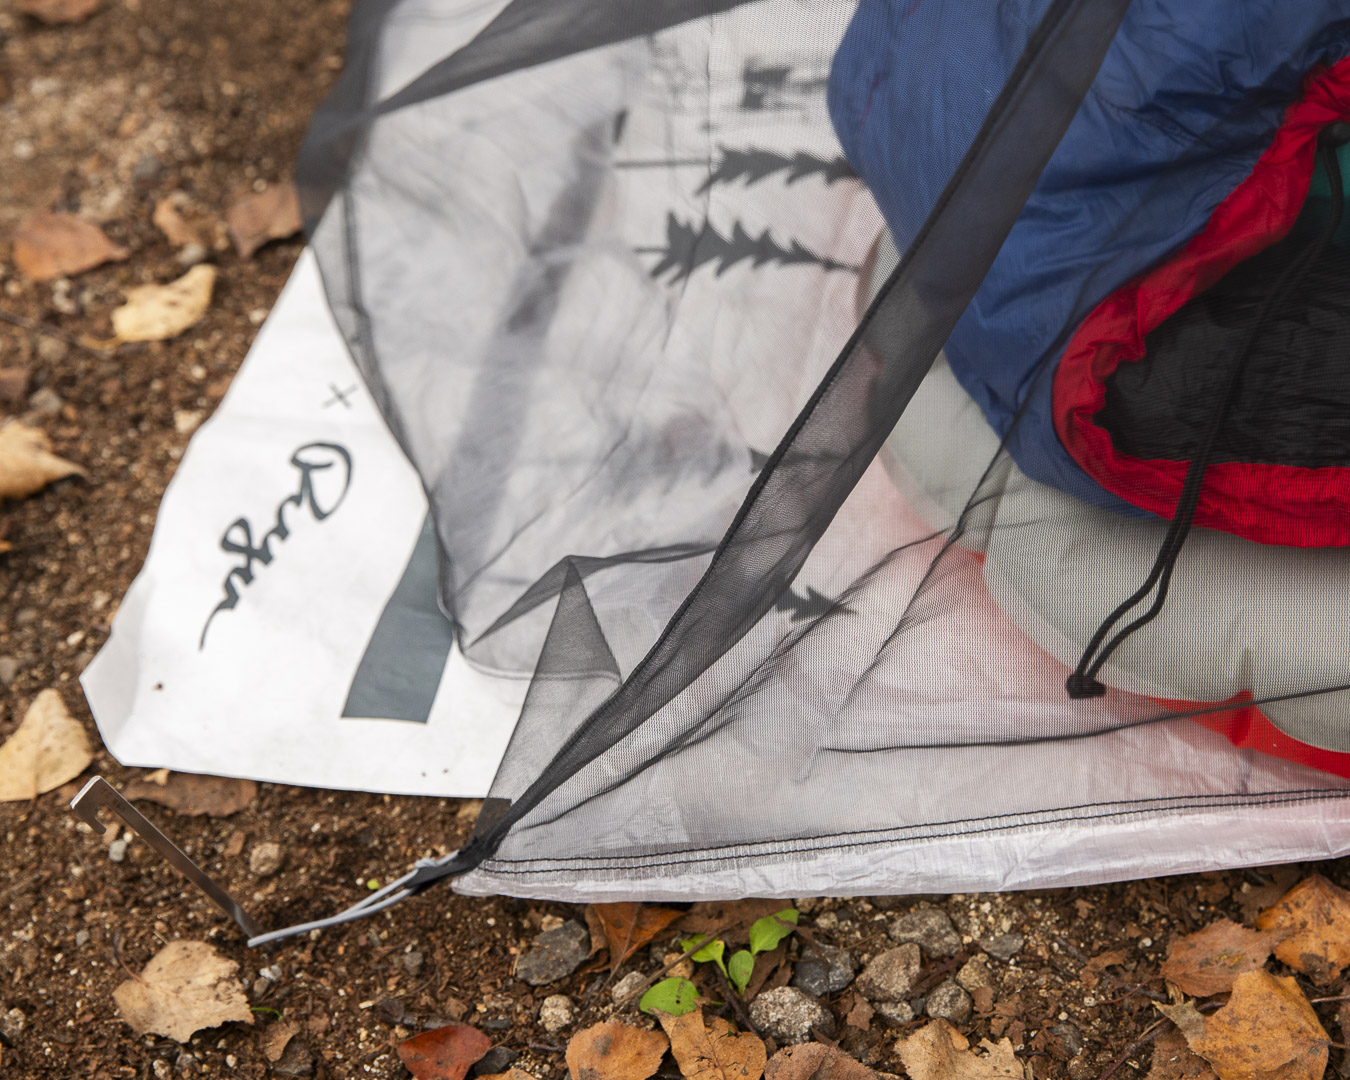
The second shelter.
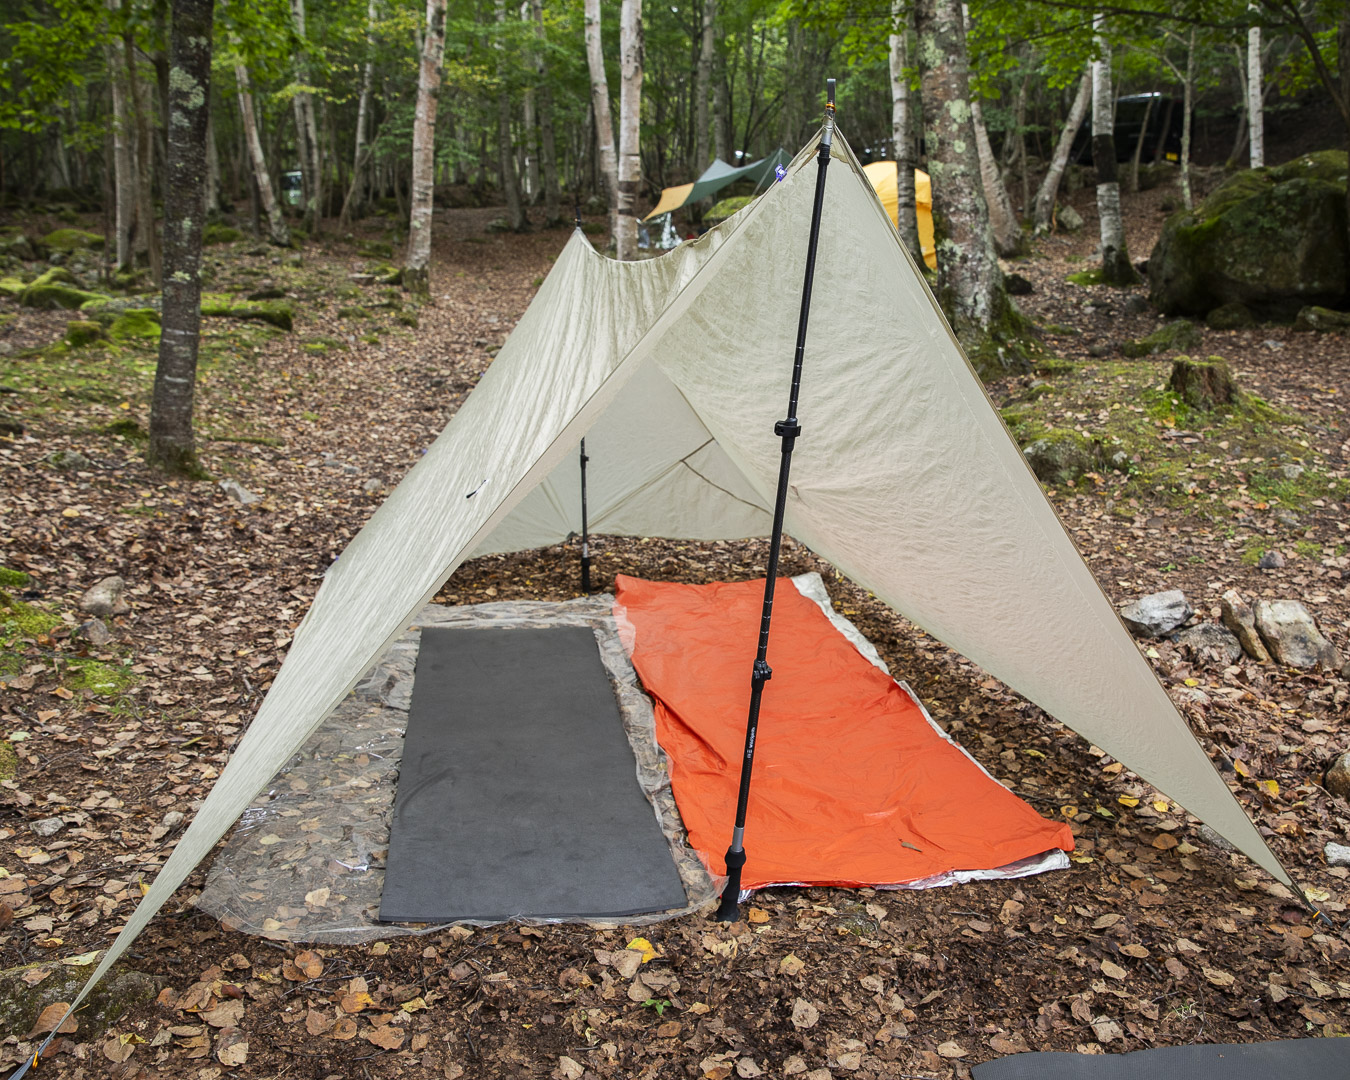
A classic tarp shape but with a removable vestibule.
——This shelter is interesting. How did you make it?
I had a cheap tarp at home, so I decided to customize it into a shelter big enough for two people. I calculated the minimum size needed for two to sleep, measured it out, cut it, and went on from there.
——What size was the original tarp?
It was 3.5m x 3m, but I cut it down to 2.5m x 3m. I then used the leftover fabric from the cut as the vestibule.
——Did you originally plan to use the leftover fabric for the entrance?
No. At first I thought I’d turn it into a rain skirt, but then the idea just came to me—since a plain tarp lets the wind blow through and it would be cold in winter, I decided to use the leftover fabric as an entrance panel.
——Have you actually used it yet?
First time using it, but I think it’ll do (laughs).
——Brilliant. What a clever idea.
While sewing, I had these clips to hold things in place and thought, “Why bother with buttons?” Gave the clips a try—and they worked really well.
——This seems way easier than making a full tent.
If I could do it, I think anyone else could too (laughs).
——I like how simple it is with no guy lines, even though it’s just a tarp.
It’s real straightforward design. The idea was inspired by the M Trail by Freelight.
——Is your sewing machine a professional one?
No, I used a base model JUKI, that costed me about ¥20,000.
——What was the hardest part?
Entry-level sewing machines struggle with really thick fabrics, so working on heavier sections can get a bit tricky. At first, seeing everyone’s perfectly clean sewing made me think I had to keep everything flawless too. But later I realized—it doesn’t need to be perfect, since I’m the one who’ll be using the gear. I decided to cut myself some slack (laughs).”
——Where did you get your information on tips for sewing?
I mainly followed the videos from Palante’s Simple Pack Kit—I downloaded the patterns and copied them. I also watched a lot of tutorial videos on YouTube.
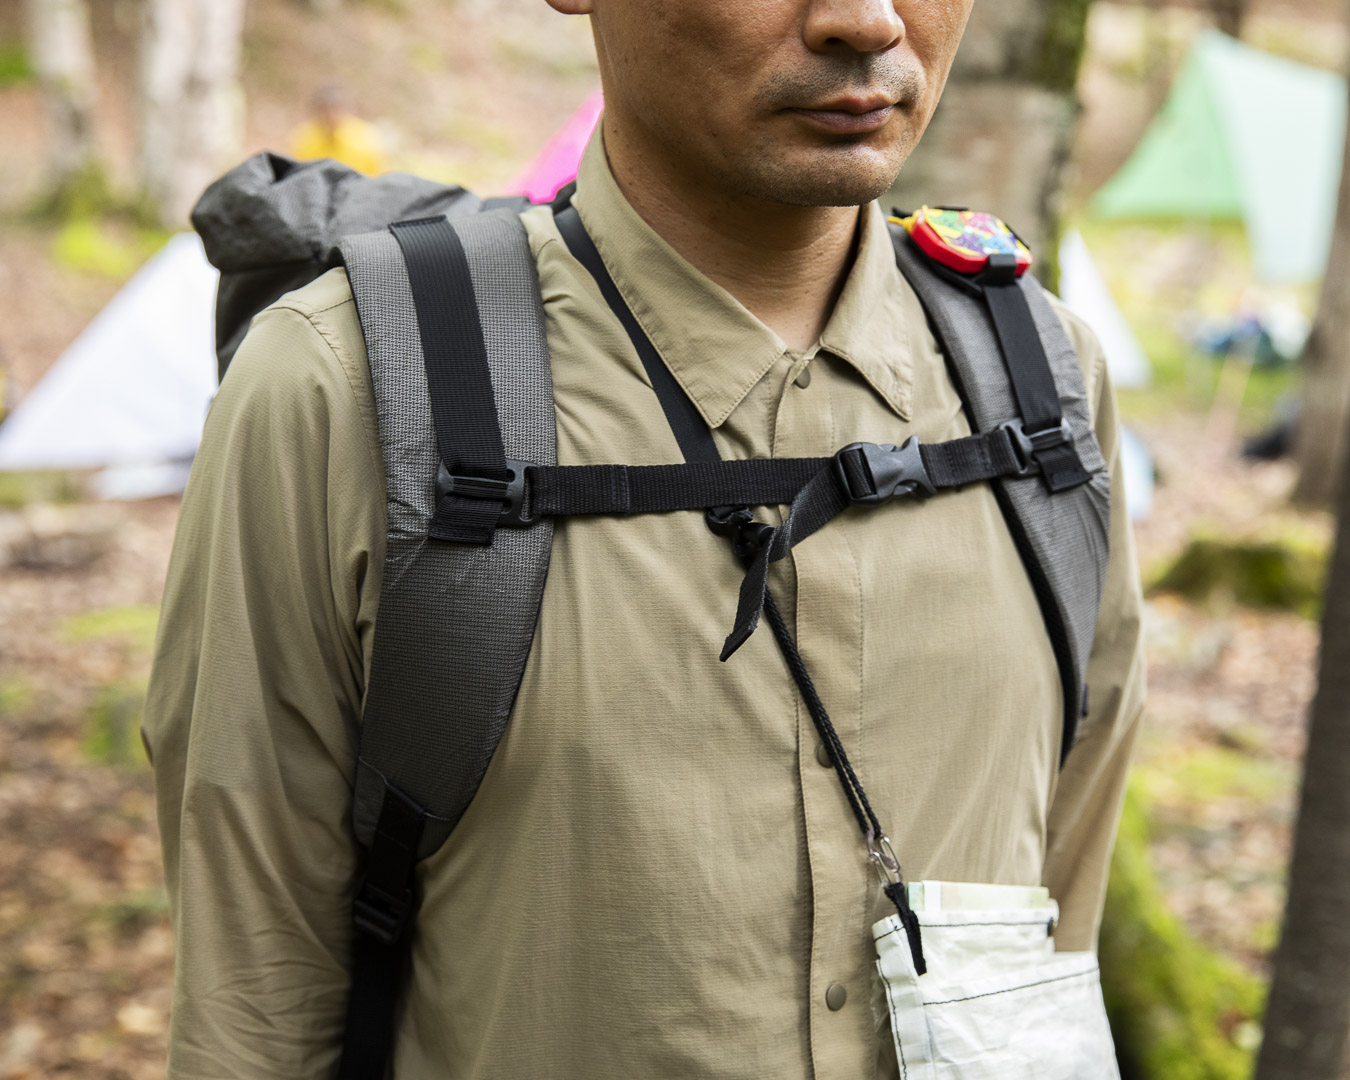
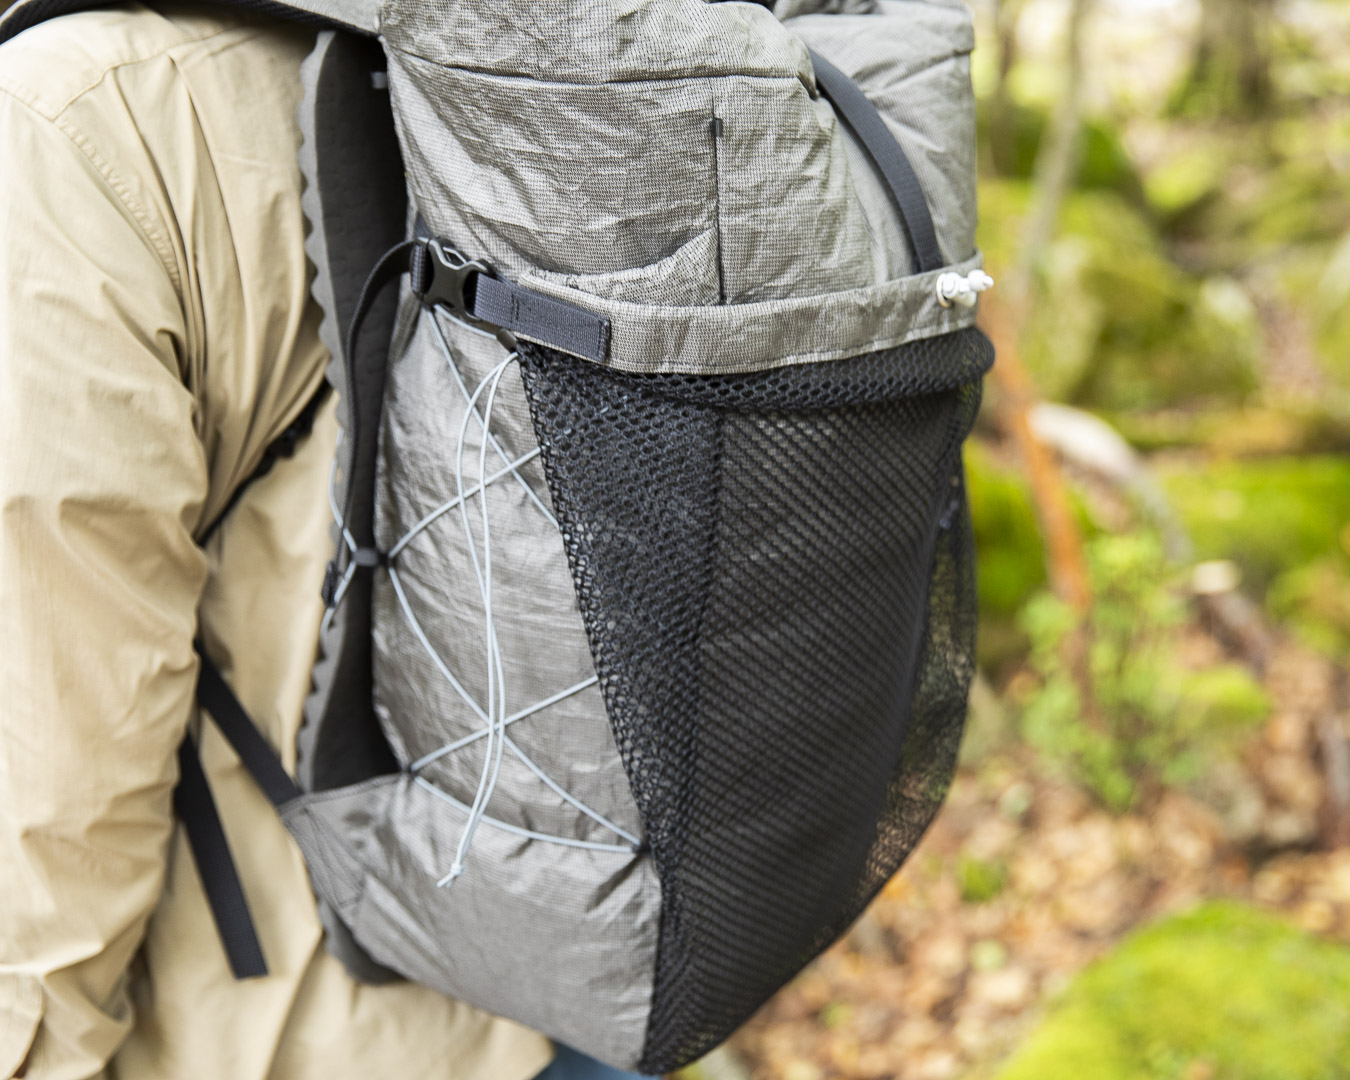
——Got it. What was your approach to making this backpack?
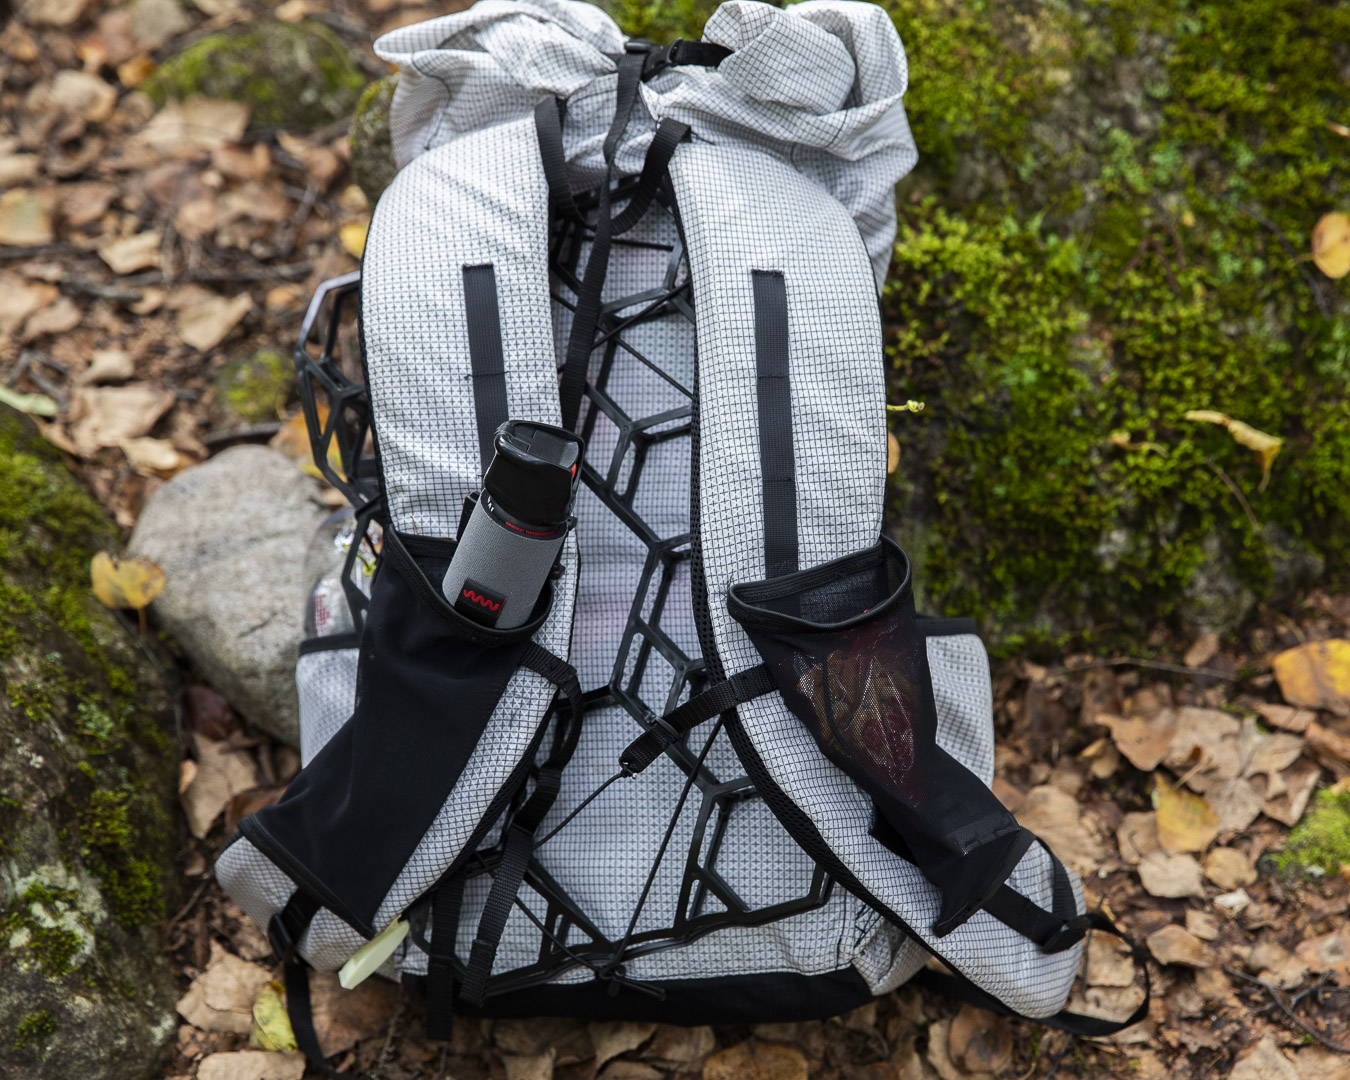
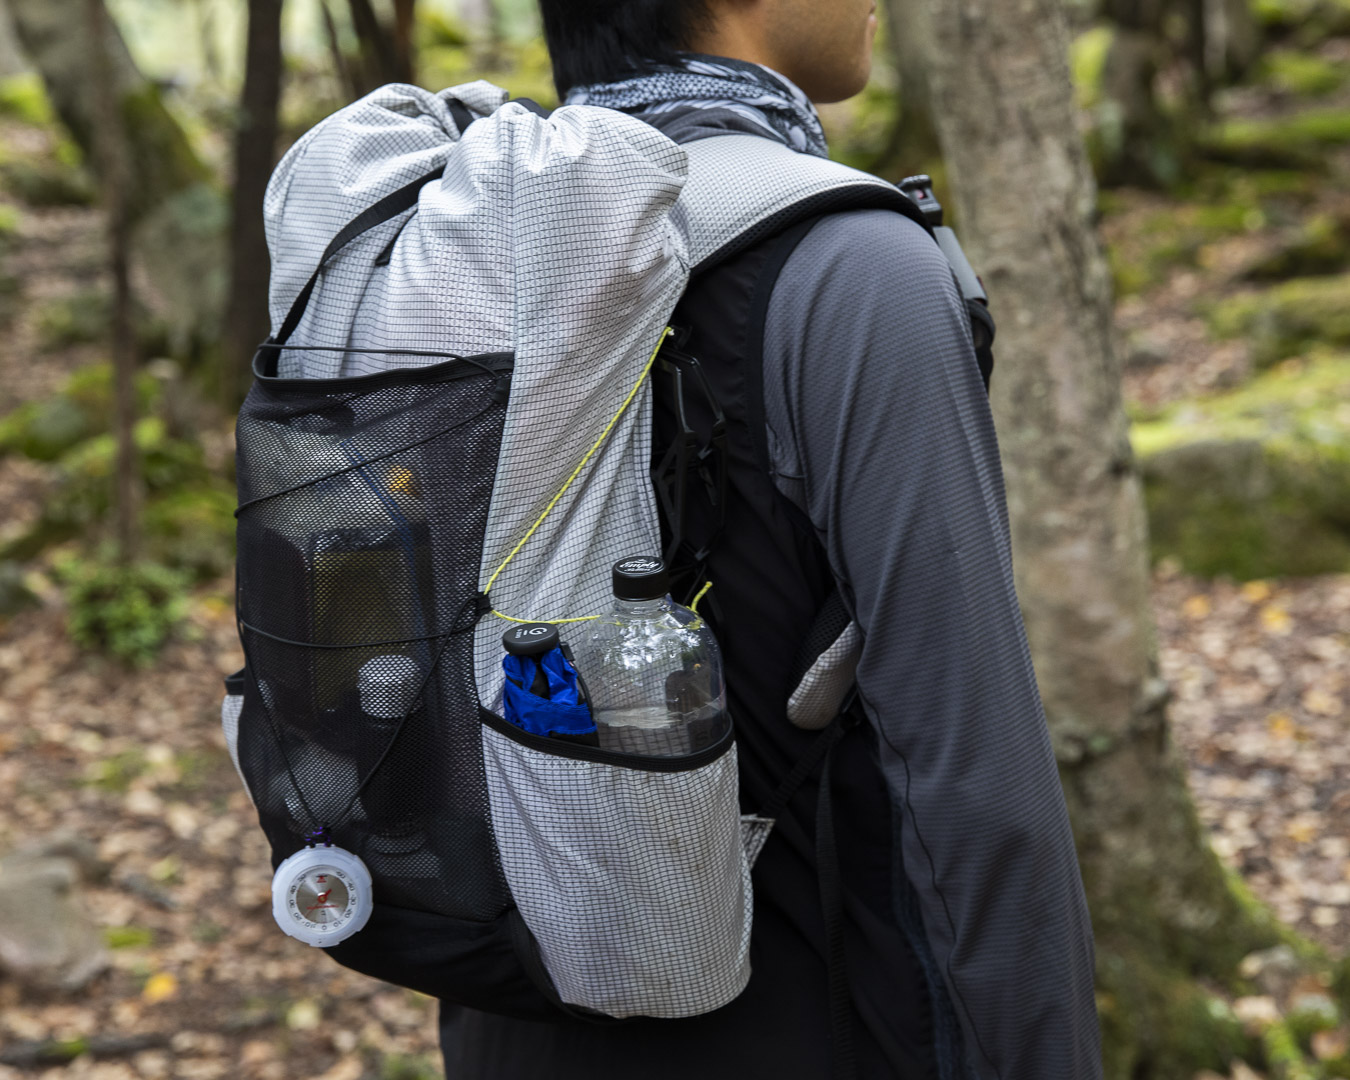
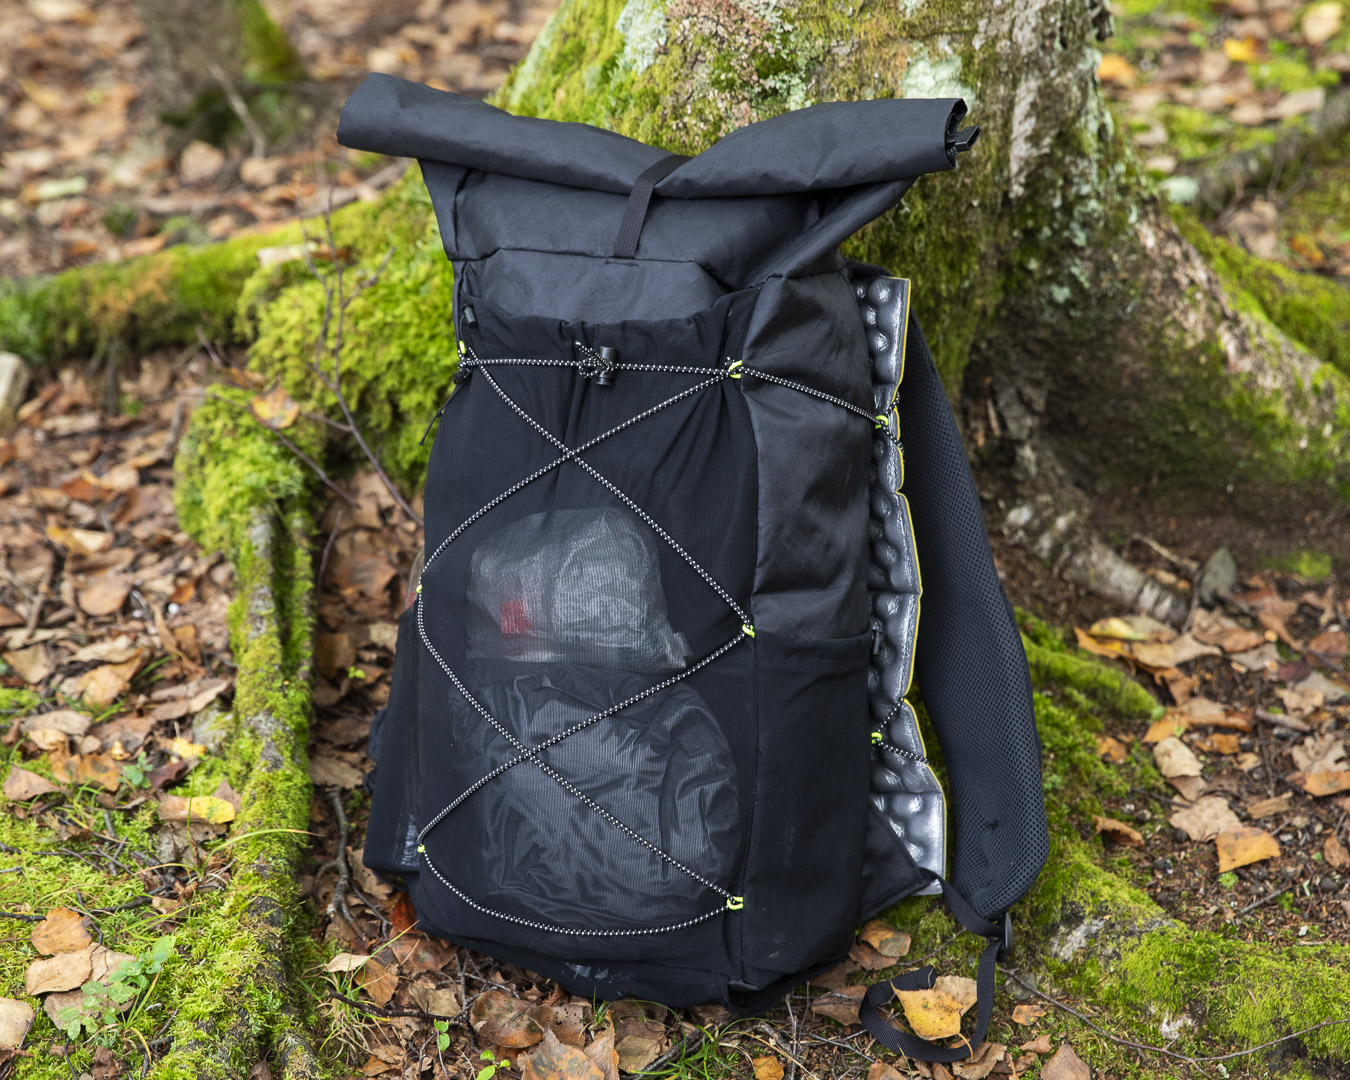
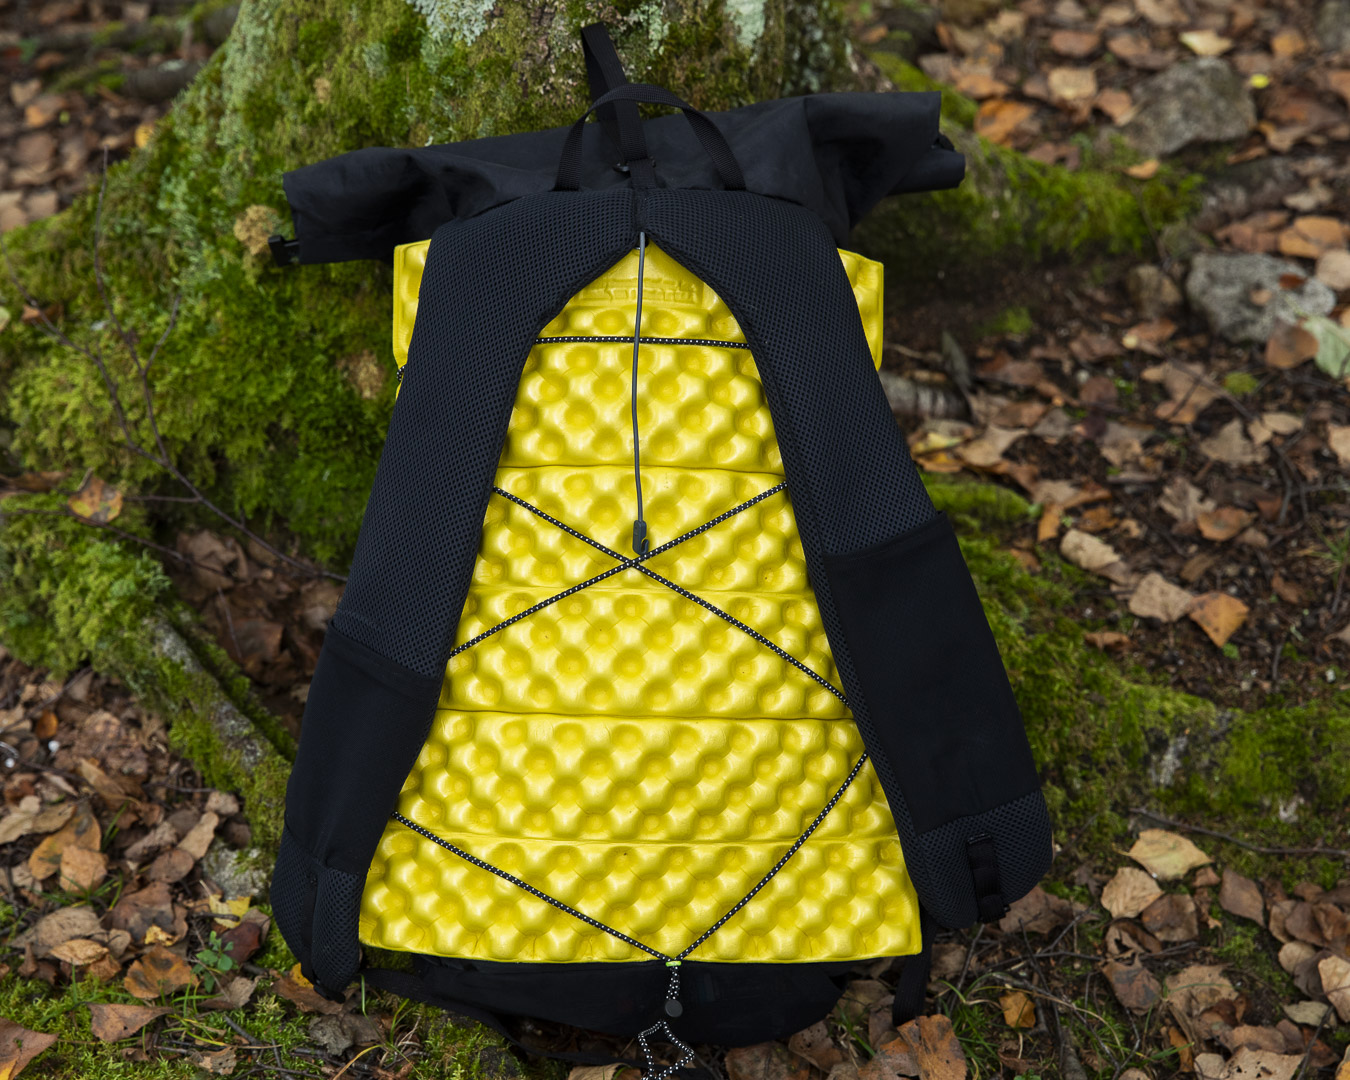
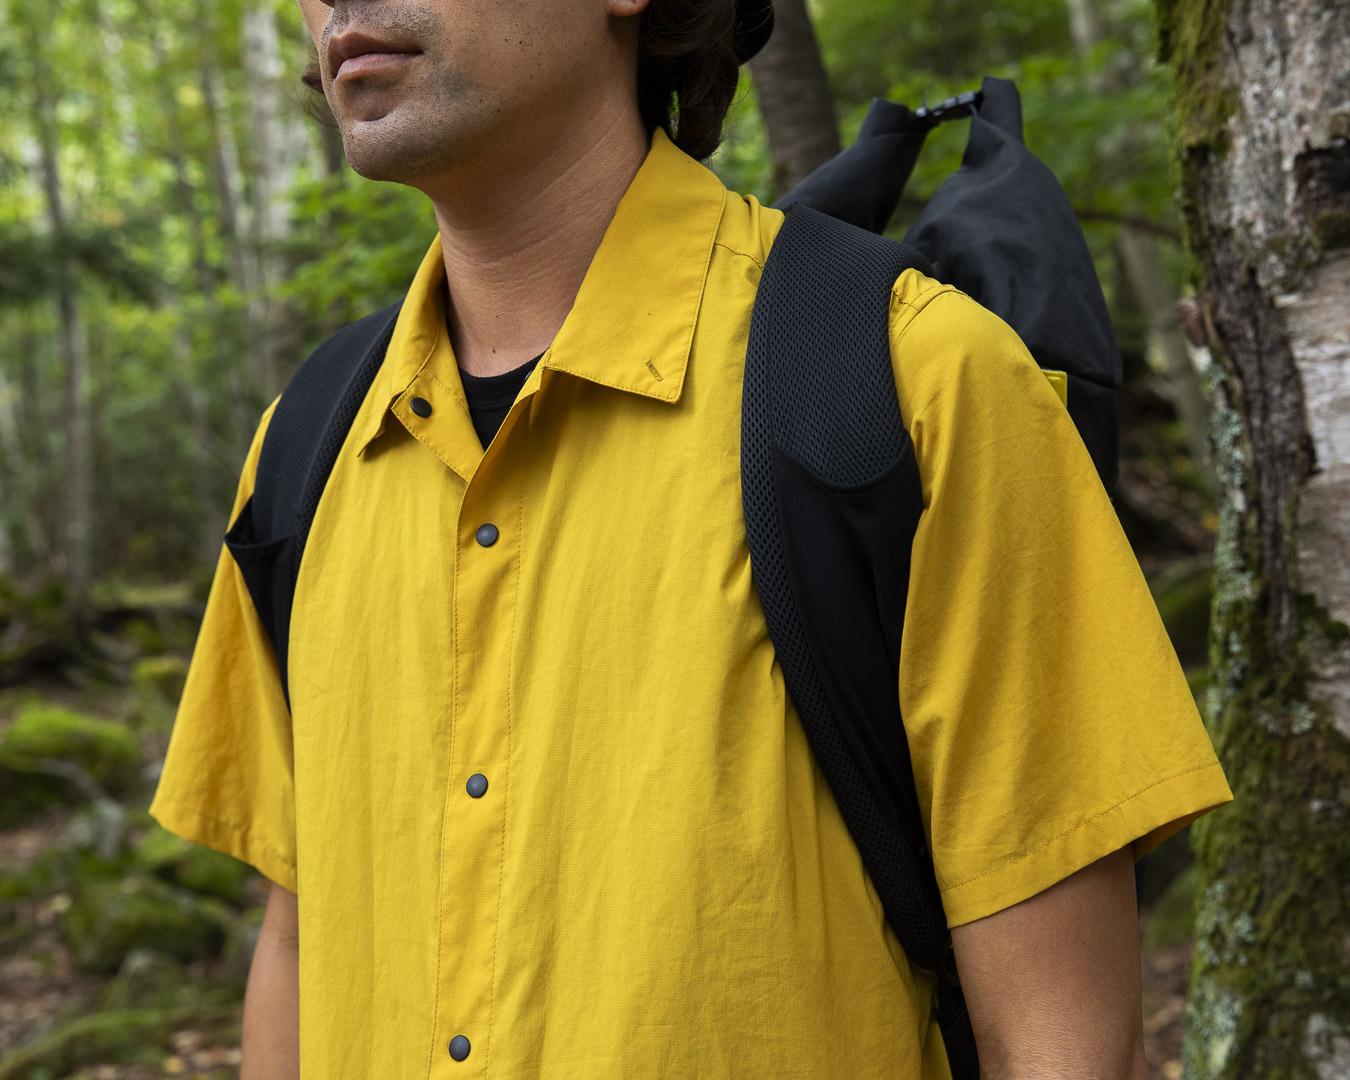
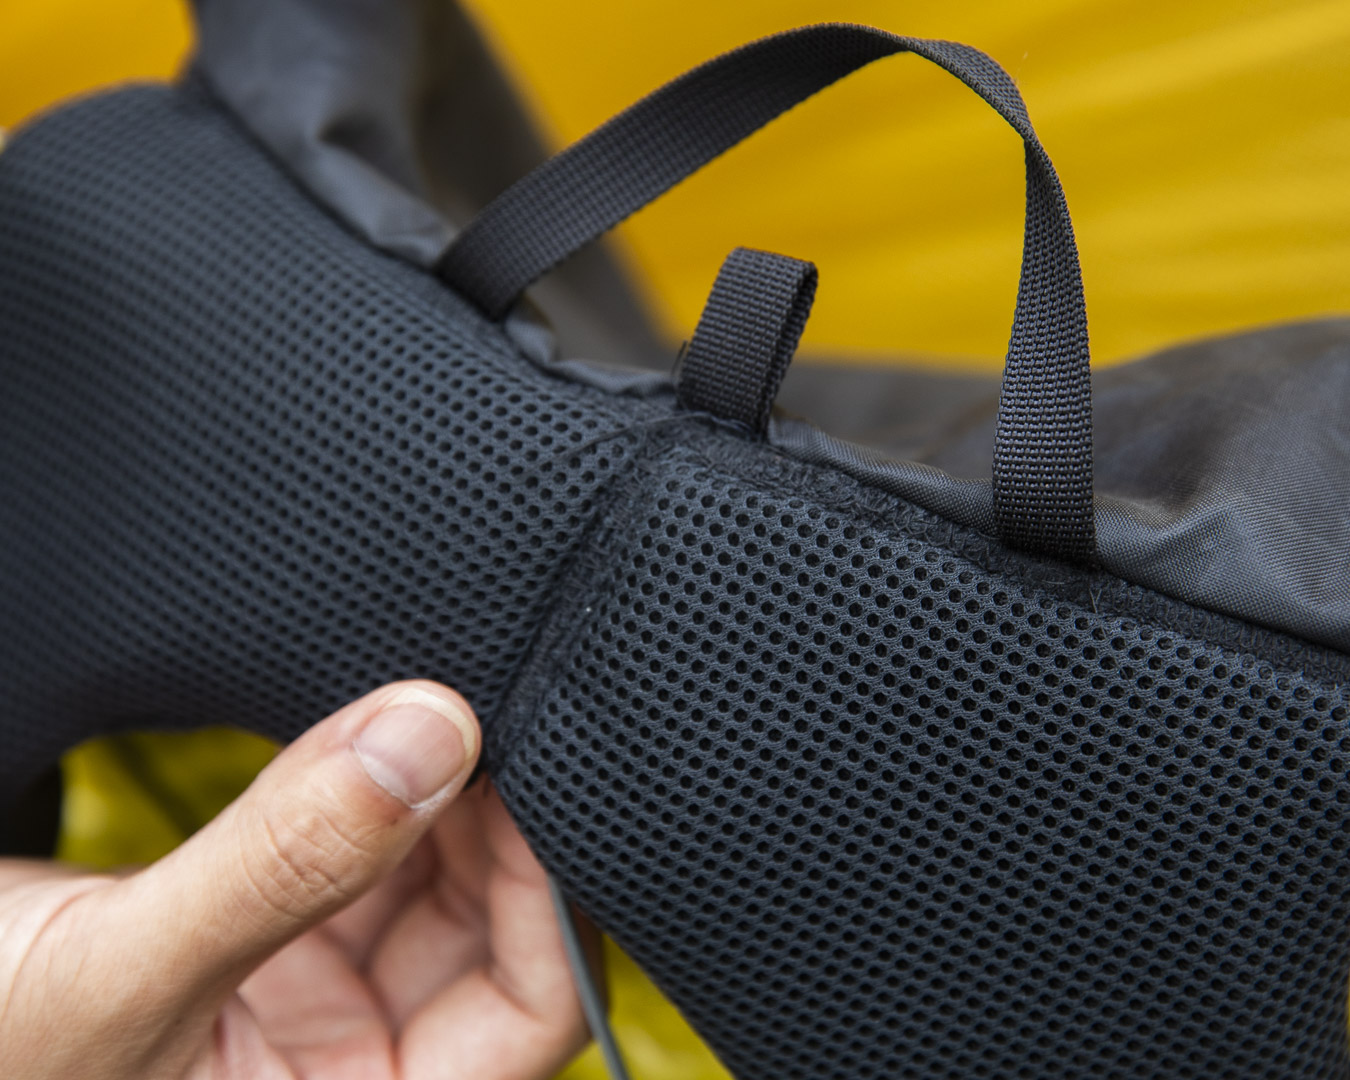
I started with the Palante kit as a base, but since my shoulders tend to get sore, I made the shoulder straps wider and thicker than the original design.
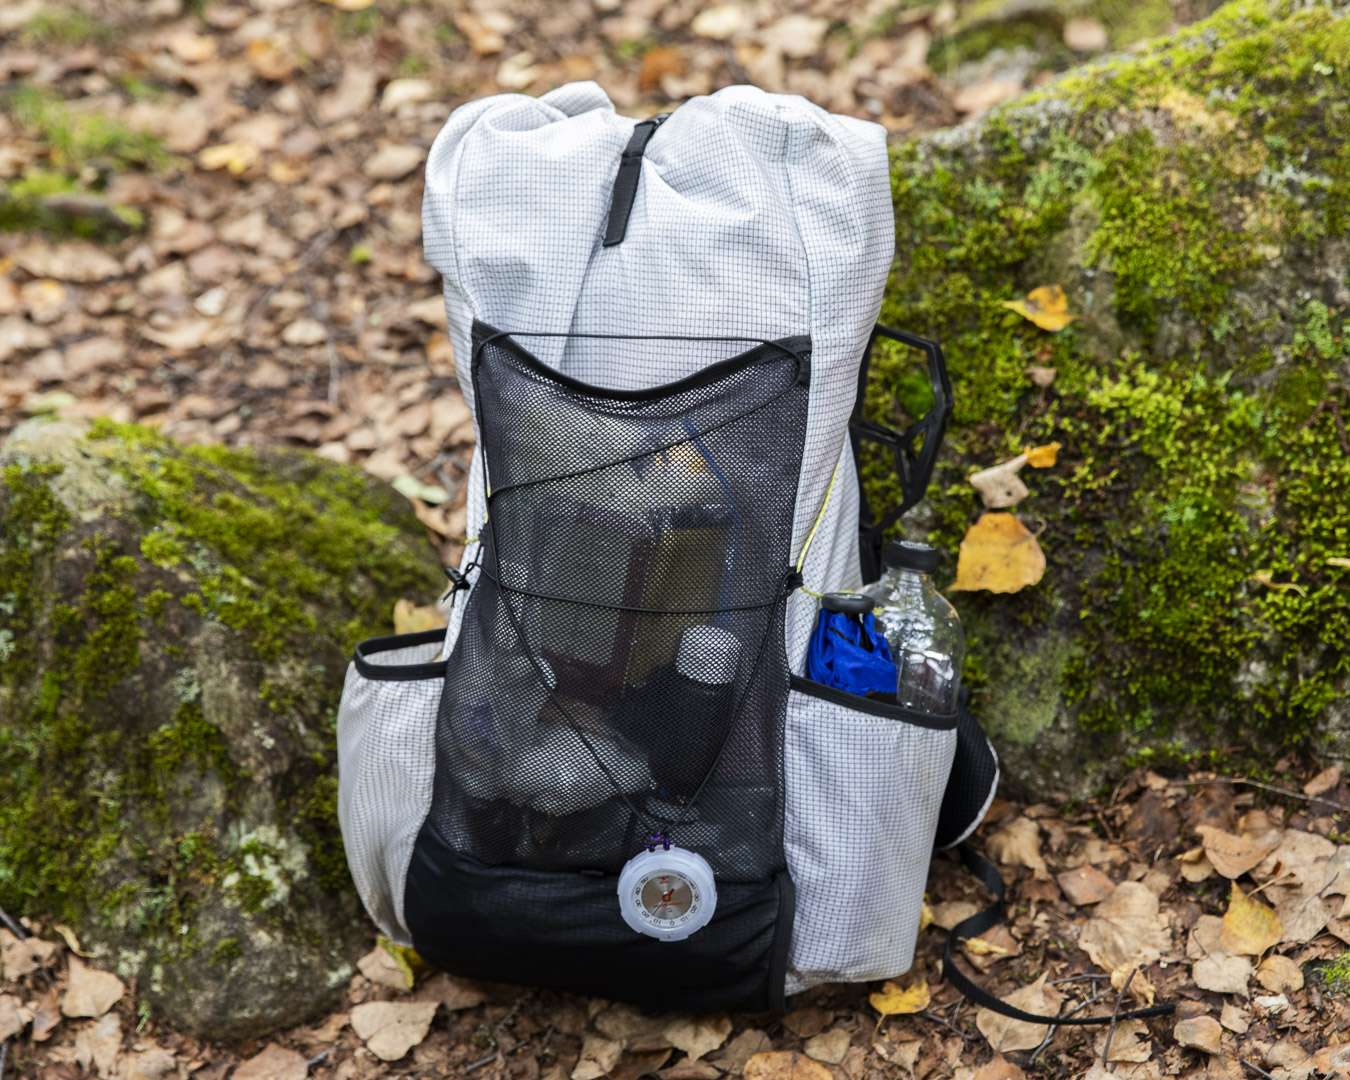
パランテのキットを元に自分好みの仕様に作り上げたバックパック。仕上がりは荒い部分があるものの、初期衝動の塊のようで眩しい。
——How does it feel?
Great! The wider, thicker straps definitely make it more comfortable.
——Anything you wish you could’ve done better?
Honestly, there’s a lot if you look closely. The mesh pockets were trickier than I expected, so I wish I’d done those a bit better.
——But you did a good job.
Looking at everyone else’s work, I can’t help but think how good they are. Next time, I’d like to borrow some of their best ideas and try them out myself.
——What’s next?
The backpack I made this time is about 35L, but I’d like something smaller, around 20L, that’s good for an overnight trip. I also want to try making a bigger waist bag, maybe around 7L, for hiking or hammock camping. And I’m thinking of making a cooking pot too.
——A pot?!
I came across a metalworking technique called uchigane. After getting the tools—a hammering base and the uchigane hammer—I’ve been practicing shaping, heating, and hammering. Now it feels like only a matter of time before I make my first aluminum cooking pot.
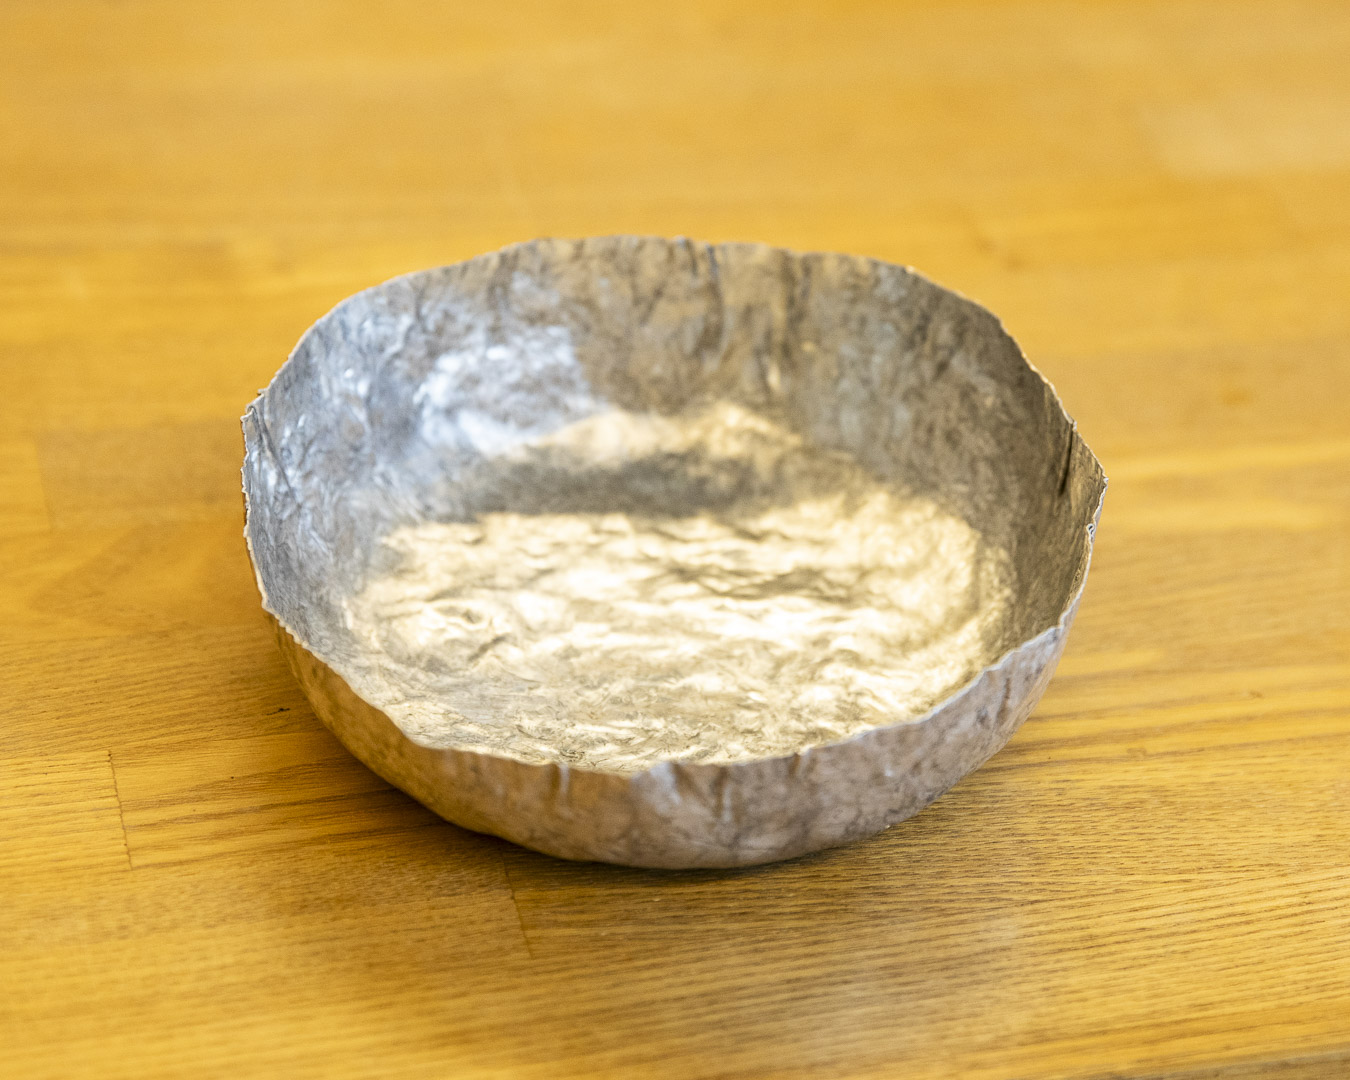
A photo of the pot Tomo made after the interview.
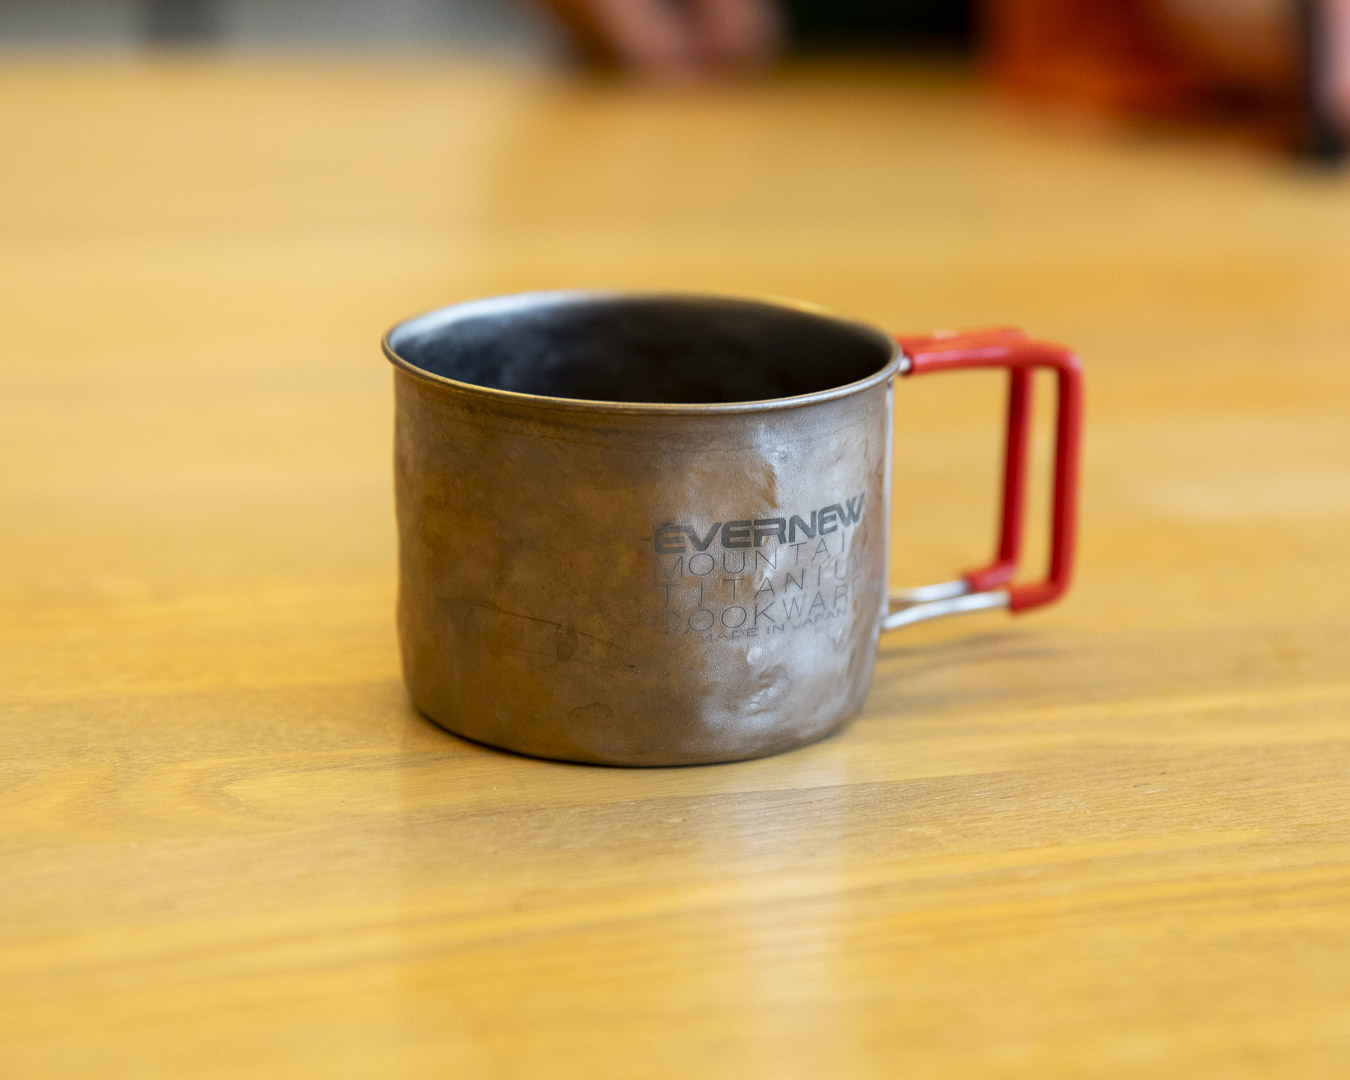
He also applied the technique to his Evernew cup.
An aluminum plate made using metalworking techniques. Even applied the same technique to an Evernew cooker for added character.
——Are there many people doing this kind of thing?
Hardly anyone else seems to be doing this kind of thing. I’ve always been drawn to industrial products, and watching metalworkers using uchigane made me realize I could give it a try myself—and even make something I could take outdoors. That spark of curiosity is what drove me to start.
——How’s it feel to start making your own gear?
Heading into the mountains with gear I built myself is far more satisfying than I ever expected. If someone as clumsy as me can pull it off, then anyone curious should dive in and try it for themselves.
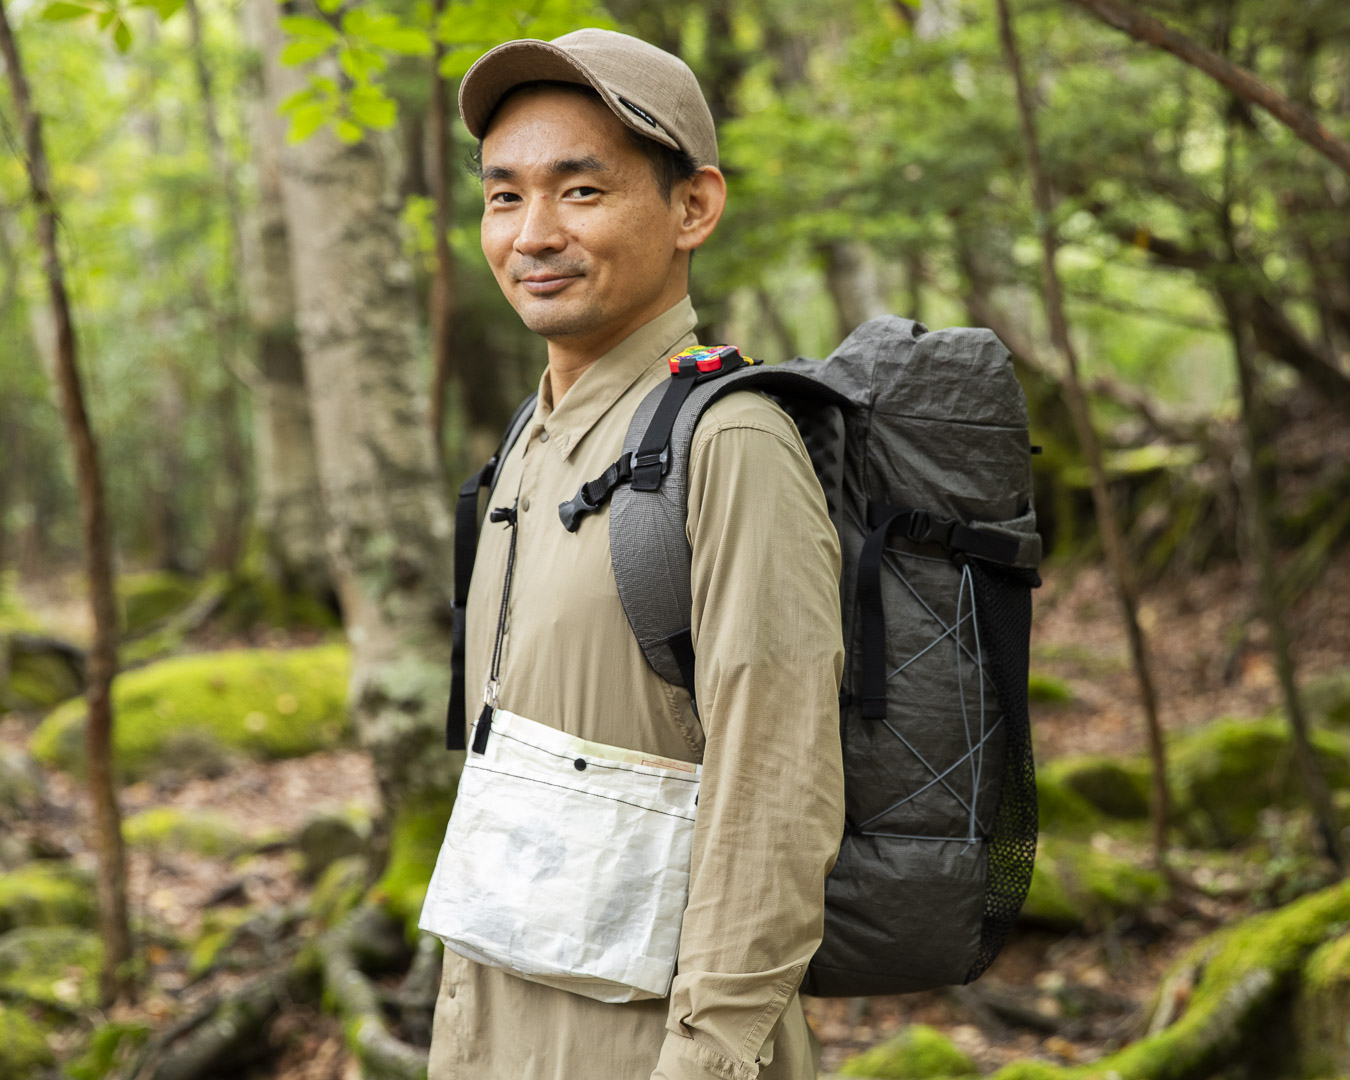
④ Mr. Yellow - tarp/rain skirt and backpack
Yellow, a hardcore ultralight hiker with a love for bivy camping, showed up with a tiny tarp and rain skirt for the bivy, plus a backpack—all overflowing with their passion for bivys.
——How long have you been doing MYOG?
About six months, ever since I joined this program. I figured if I really wanted to cut weight, I’d have to start making my own gear.
——What did you make this time?
I put together a rain skirt that doubles as a tarp, plus a backpack. Some of the other participants were using Palante kit patterns and such, but I’m pretty lazy—that sounded like way too much work (laughs). Instead, I found a YouTube video of someone making a ~30L backpack. They shared a rough blueprint, so I converted the measurements from inches to centimeters and sketched out my own pattern on Tyvek.
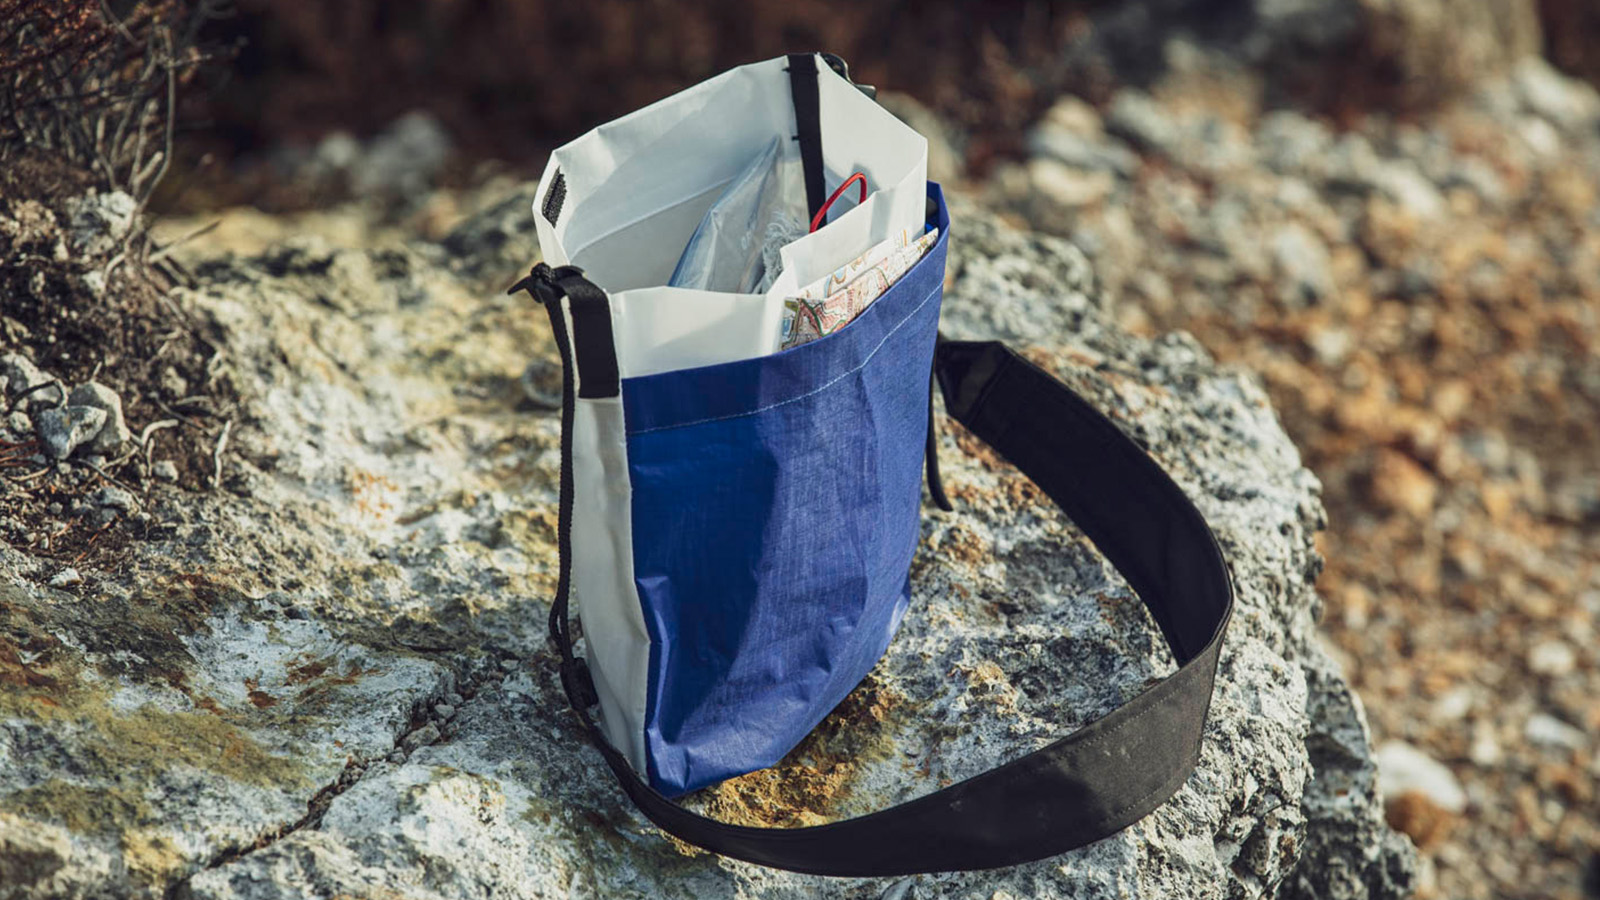
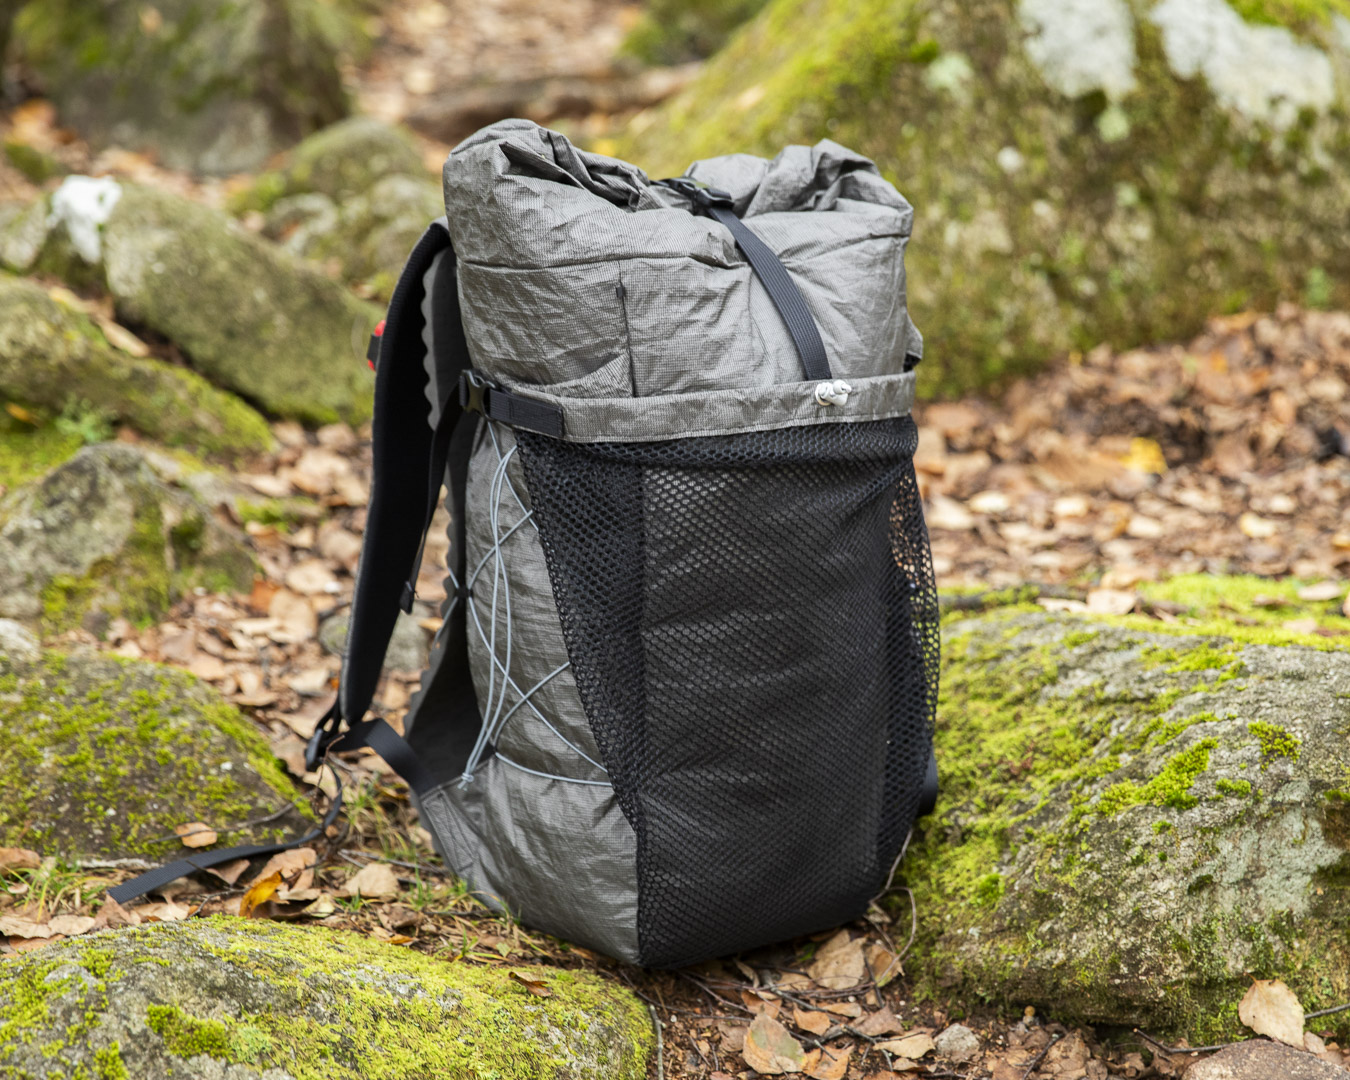
The shape’s a bit wonky, but this is Yellow’s backpack, which carried them through a 3-day, 2-night trip from Nikko to Oze.
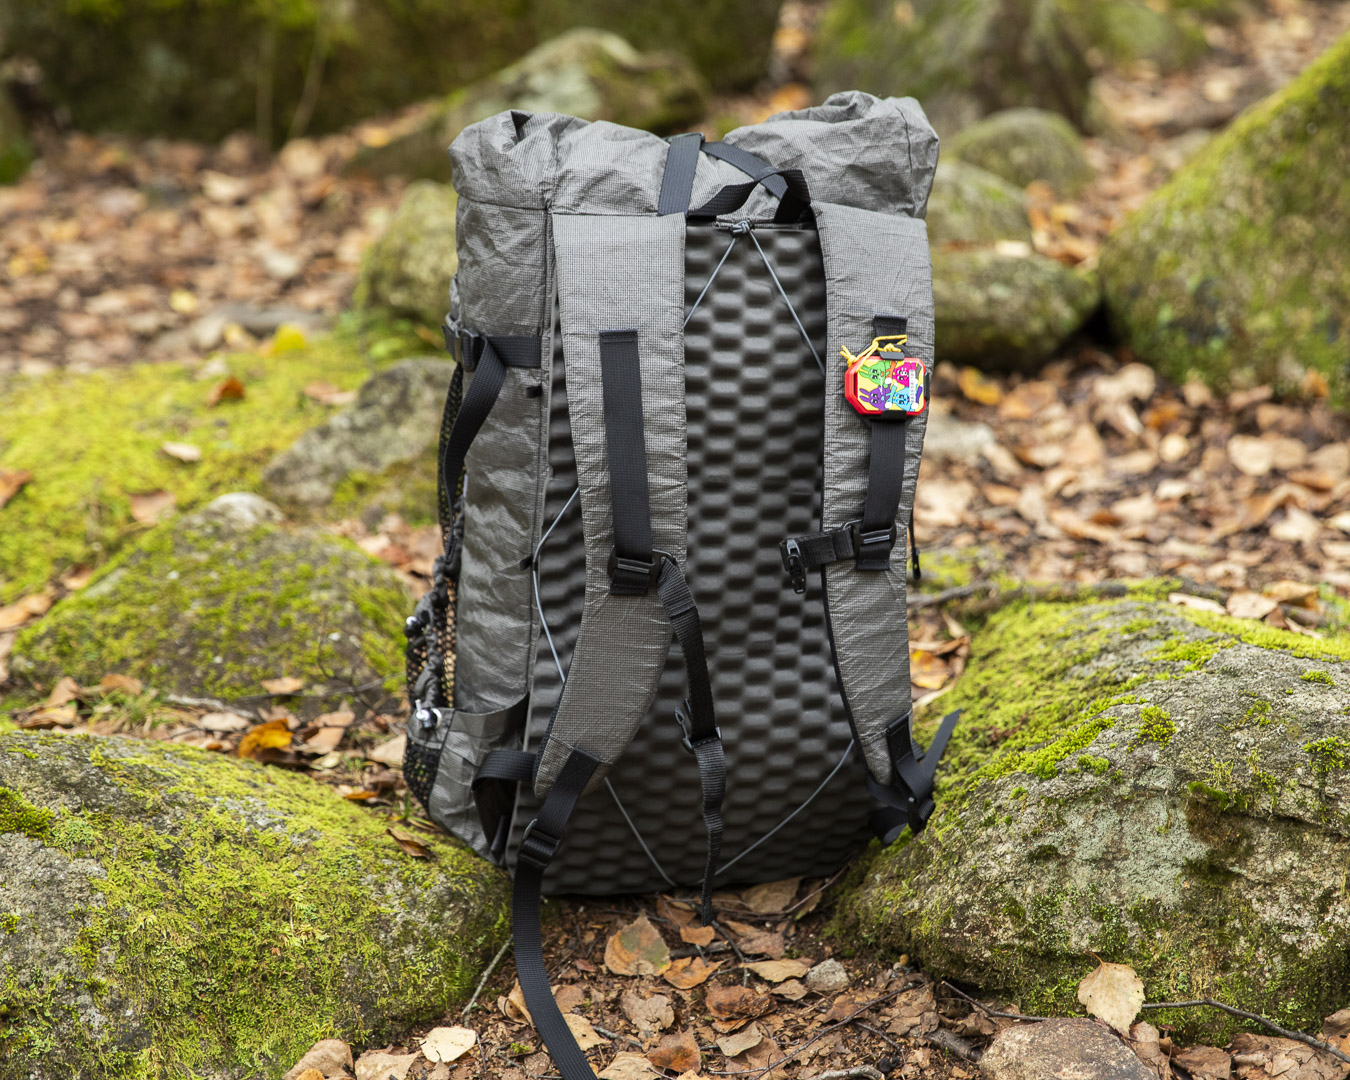
I wanted something like the shoulder straps from my Palante Joey, so I laid the real harness on paper and traced it to make a pattern. My first attempt, though, ended up way too narrow (laughs).
——Ah, you need to account for the folds, right?
I didn’t want to waste it, so I actually put the first tiny harness I made inside as padding. Now it’s a 4-layer mesh shoulder strap (laughs). It’s probably thinner than most straps, but my base weight is around 2kg, so I figured I can manage without extra padding.
The shoulder straps accidentally ended up as a 4-layer mesh structure.
——Have you hiked with it?
Yeah, I joined an HLC Practice program and we hiked in Oze. It was a two-night trip, and with rough weather in the forecast my base weight ended up heavier than planned—but the pack handled it well. I added a bottom pocket by eyeballing it, though it definitely needs stronger reinforcement. The mesh also feels a bit fragile, so I’ll probably swap it for a tougher material next time.
——How was it making it?
Honestly, even on a three-day hike I never ended up using the roll-top extension. The pack comes in at about 340g, and it would be even lighter without it. I built it with EcoPak, but if I switched to silpoly or silnylon, I could probably shave it down into the 200g range. Compared to everyone else’s, mine’s pretty rough—basically a lazy build—but it gets the job done.
Base of the shoulder straps, inspired by Palante’s Joey.
——That’s very MYOG in spirit, isn’t it?
I wasn’t entirely sure how to sew certain parts, so I just kept stitching and re-stitching, wondering if I was doing it right (laughs). The shoulder harness came together without any real reference—I built it purely by trial and error. The pockets were added a bit haphazardly as well, which left them slightly uneven in size. Next time, I’d like to approach the construction more cleanly, but given my style, I feel I did the best I could for now.
——But it has that raw, first-impulse charm, which is great.
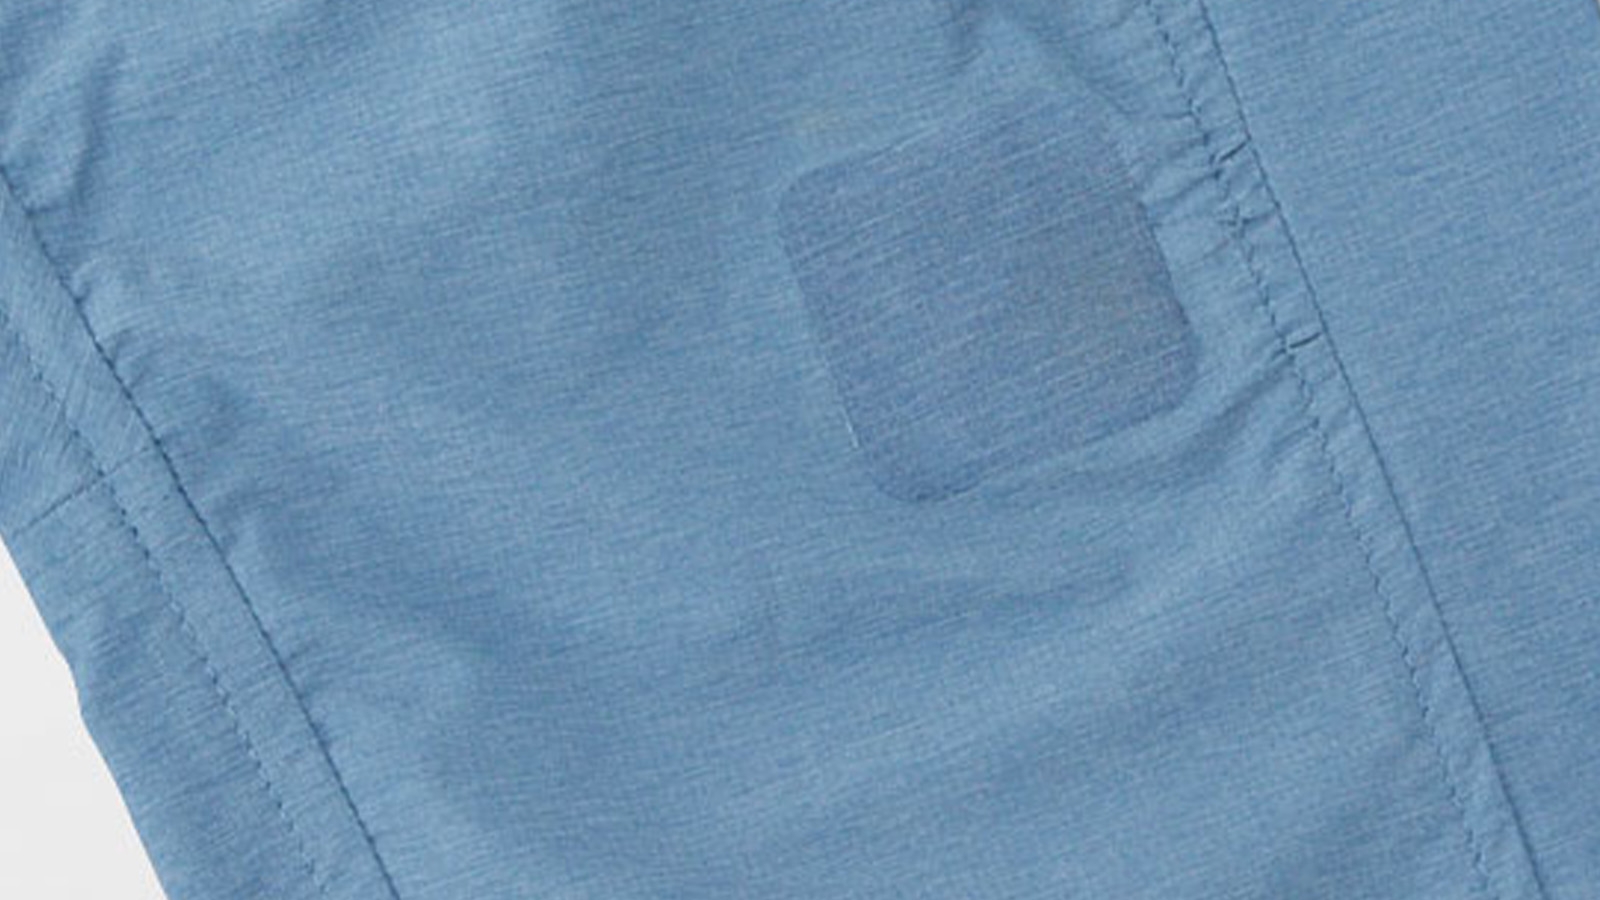
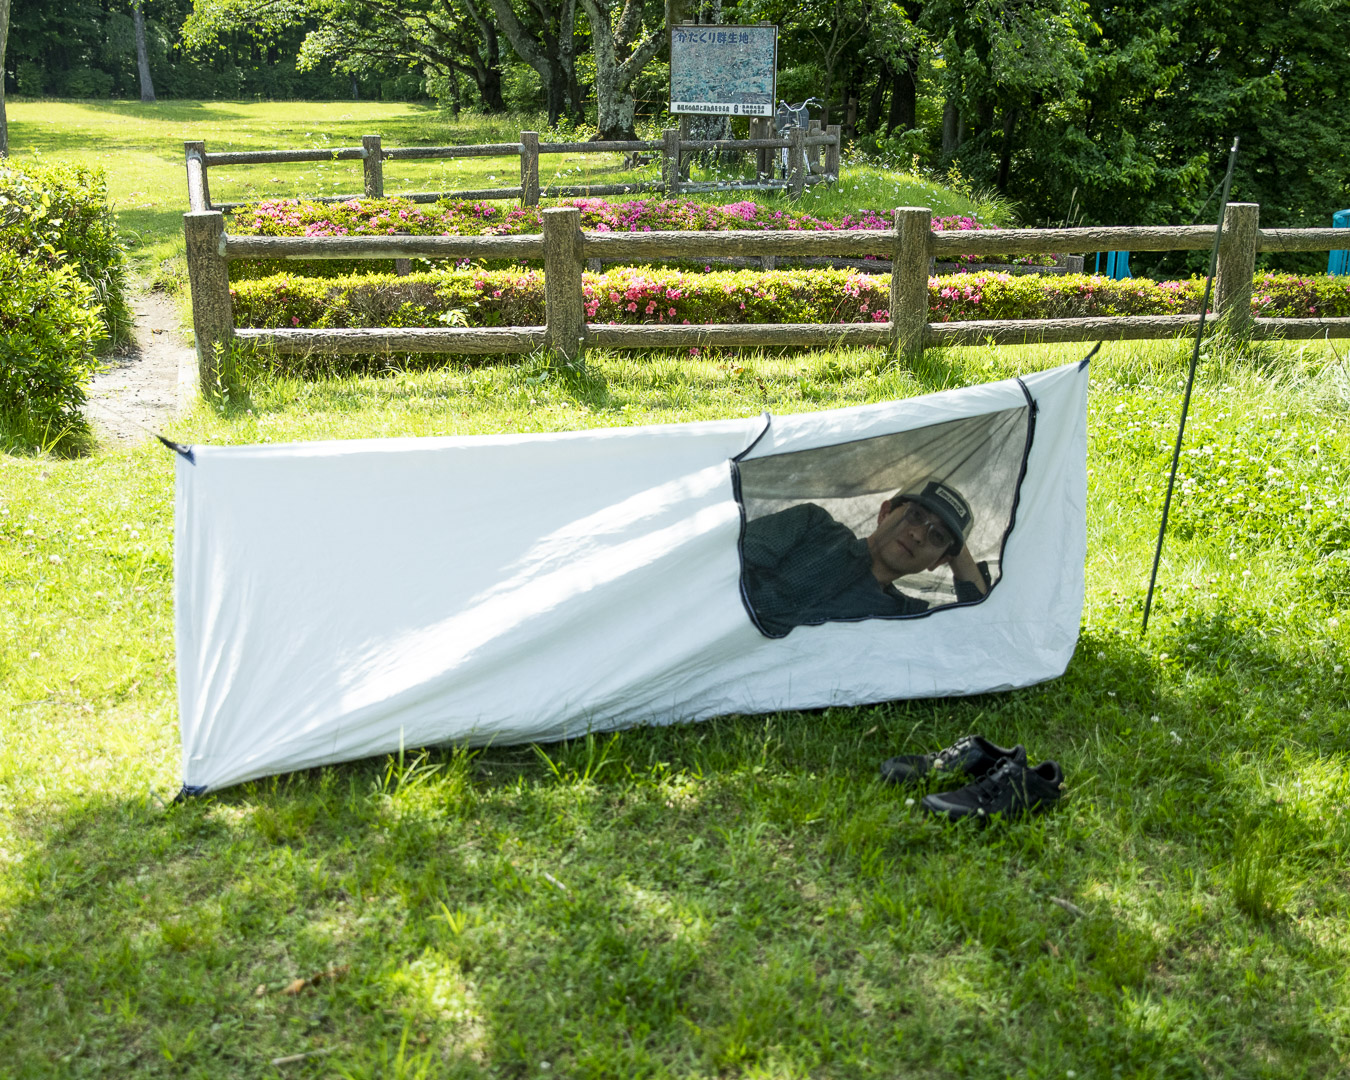
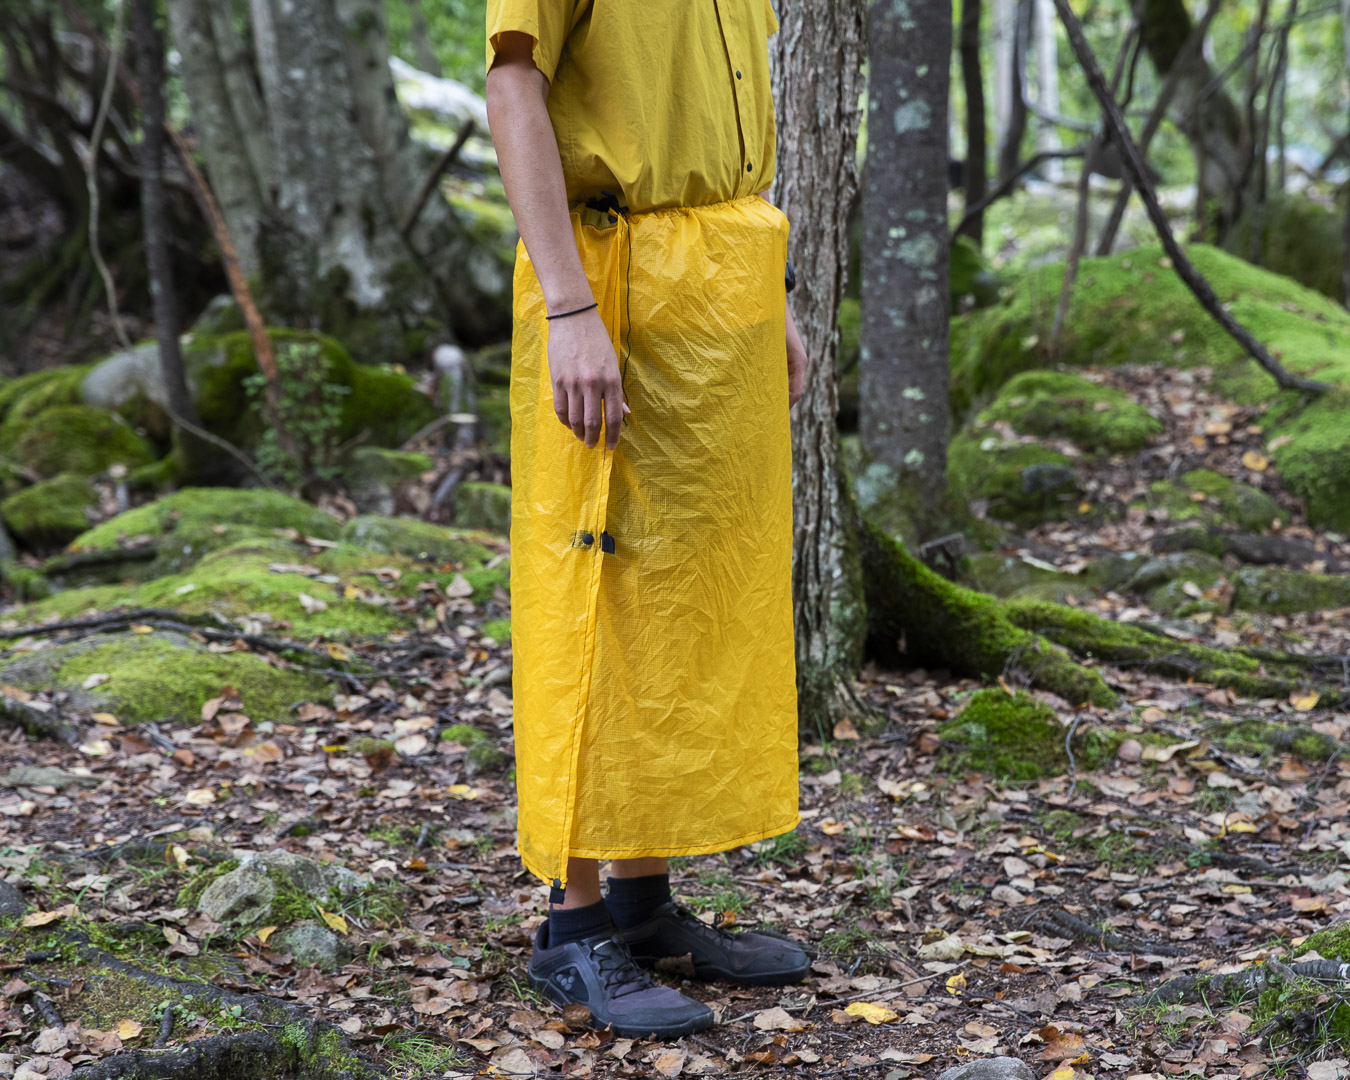
And then there’s the rain skirt that doubles as a mini tarp.
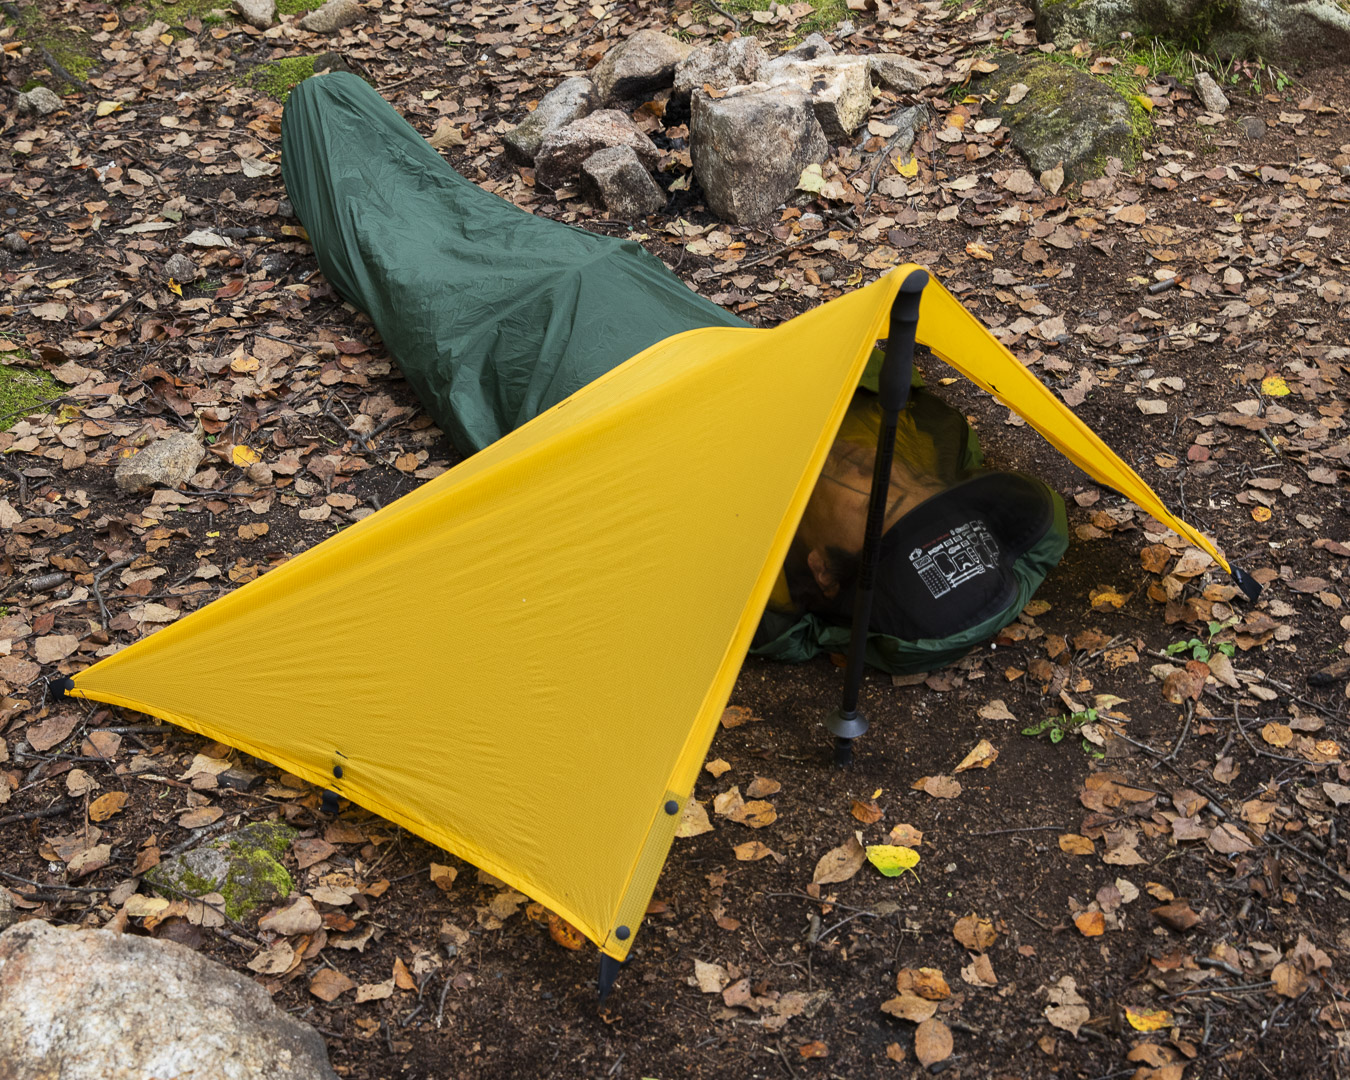
A tiny tarp/rain skirt just big enough to cover the head of a bivy. Definitely a true MYOG piece—something no mass manufacturer would ever make.
——That’s pretty unique.
There’s a rain skirt from Enlightened Equipment called the Rain Wrap. On the Moonlight’s website site, the description even casually suggests, “Could maybe be used as a head cover tarp for bicy use?”
——What made you decide to add a tarp to your setup?
I’m obsessed with bivys and had always wanted a minimal tarp to pair with mine. I already had a one-pole tent made from this fabric that I wasn’t using much. Thin fabric like this is hard to come by—and since I love yellow—I figured, “Why not just cut up the tent?” and stitched it into shape.
——And it can also be used as a rain skirt.
Yep, works for that too.
——How was it on your hike?
It poured at the Oze campsite, but the setup held up fine. Getting in and out, though, wasn’t exactly comfortable.
——Rain in a bivy sounds a bit rought to me.
Exactly. Once you crawl into the bivy, you don’t really want to get back out. Honestly, I’d rather use it in dry weather—when it rains, all you can do is lie there thinking, “I hope morning comes soon.”
——But the tarp must be super light.
Super light. Around 60–70g. It’s a tarp and rain skirt in one. But honestly, I’d love to make a poncho. The silnylon poncho-tarp is probably more practical. This one is a bit inconvenient (laughs).
——So you really like bivys?
Yeah, they’re vety straightforward. I don’t even have a sleeping bag with me today. It provides a good amount of insulation and I just wear a bit of warm clothes when I sleep.
——So are you liking MYOG so far?
Even the “ultralight” gear sold today is often built a little over spec. Brands add extra features to make it look fancier or boost durability. But if you really want to strip things down to the essentials, MYOG is the way to go.
——And you can completely tailor it to your needs.
Exactly. It’s cheaper too, and you build a real attachment to the gear. There’s something fun about having a one-of-a-kind piece—even if it’s a bit rough or imperfect—rather than carrying the same tent or pack as everyone else. My goal is to eventually make everything myself, and to design a bivy in my own style as well. It’s all part of the learning process.
⑤ Koh - tarp, stuff sacks, bug net
The youngest participant, KOH, lit up the event with his enthusiasm—arriving with a lineup of handmade tarps, mosquito nets, and accessories.
——How long have you been doing MYOG?
Just under a year.
——Where resources did you use to create your patterns?
I learned a lot from Trails’ Innovation Garage. I got all the fabric, parts, and cords for this tarp there, and also got tips on how to make it. I also bought some off-the-shelf gear, used it, and then figured out what I wanted to change. I’d take things apart to see how they were made and then copy those ideas.
——What did you make this time?
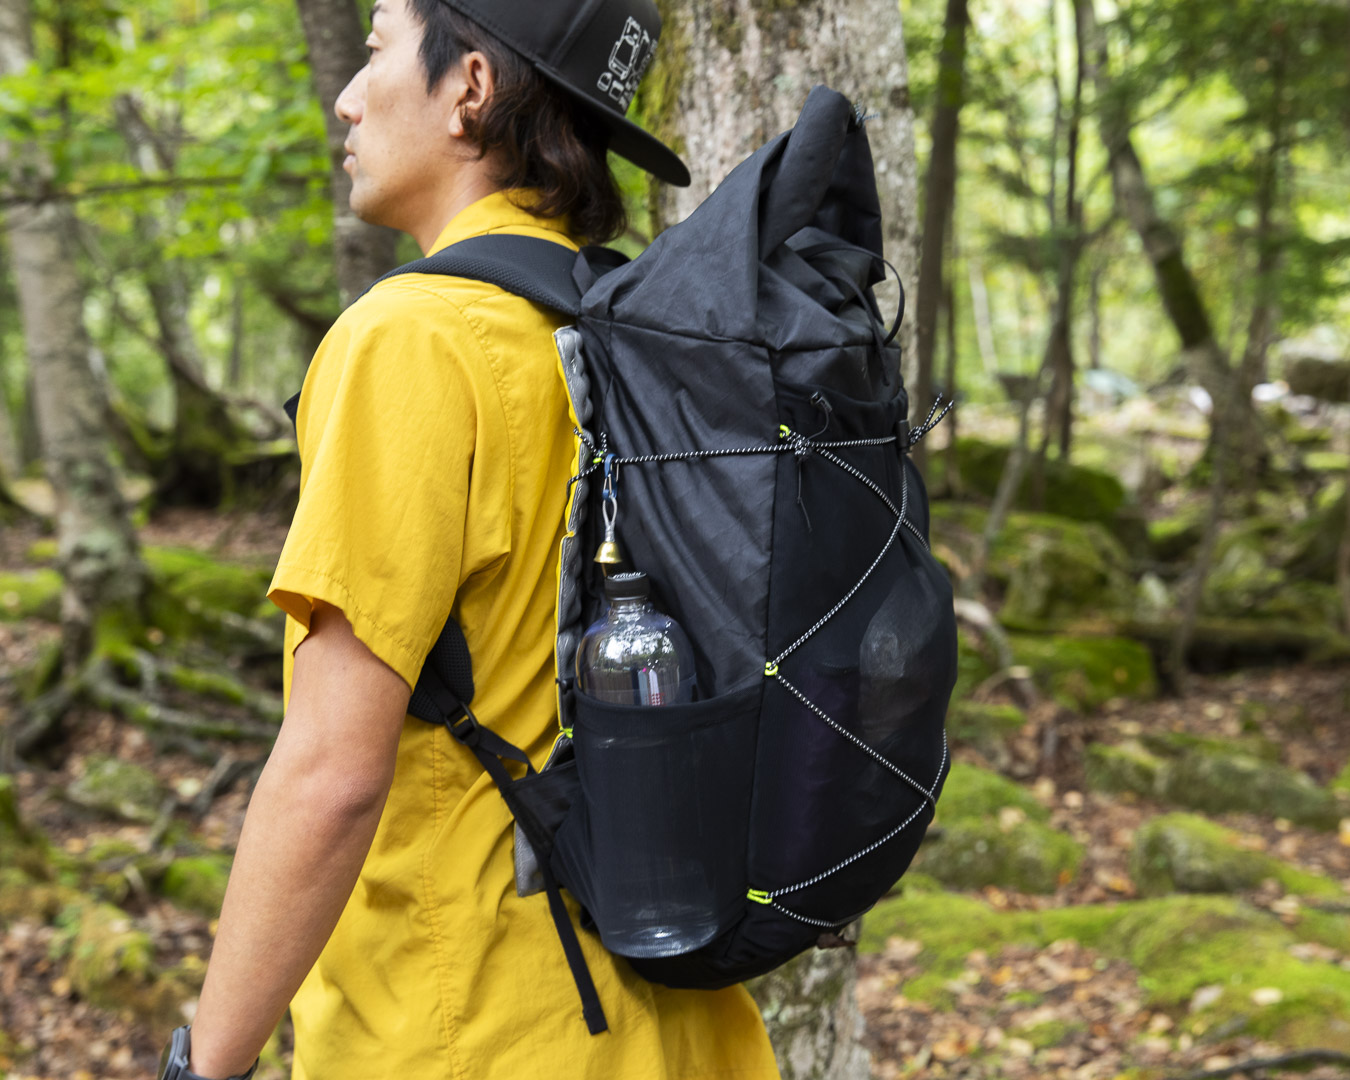
I like making small items, so I made a wide-mouth peg case, a bottle holder, and a stuff sack. I really like the one-action pull cords used in Yamatomichi backpacks, so I put them on everything.
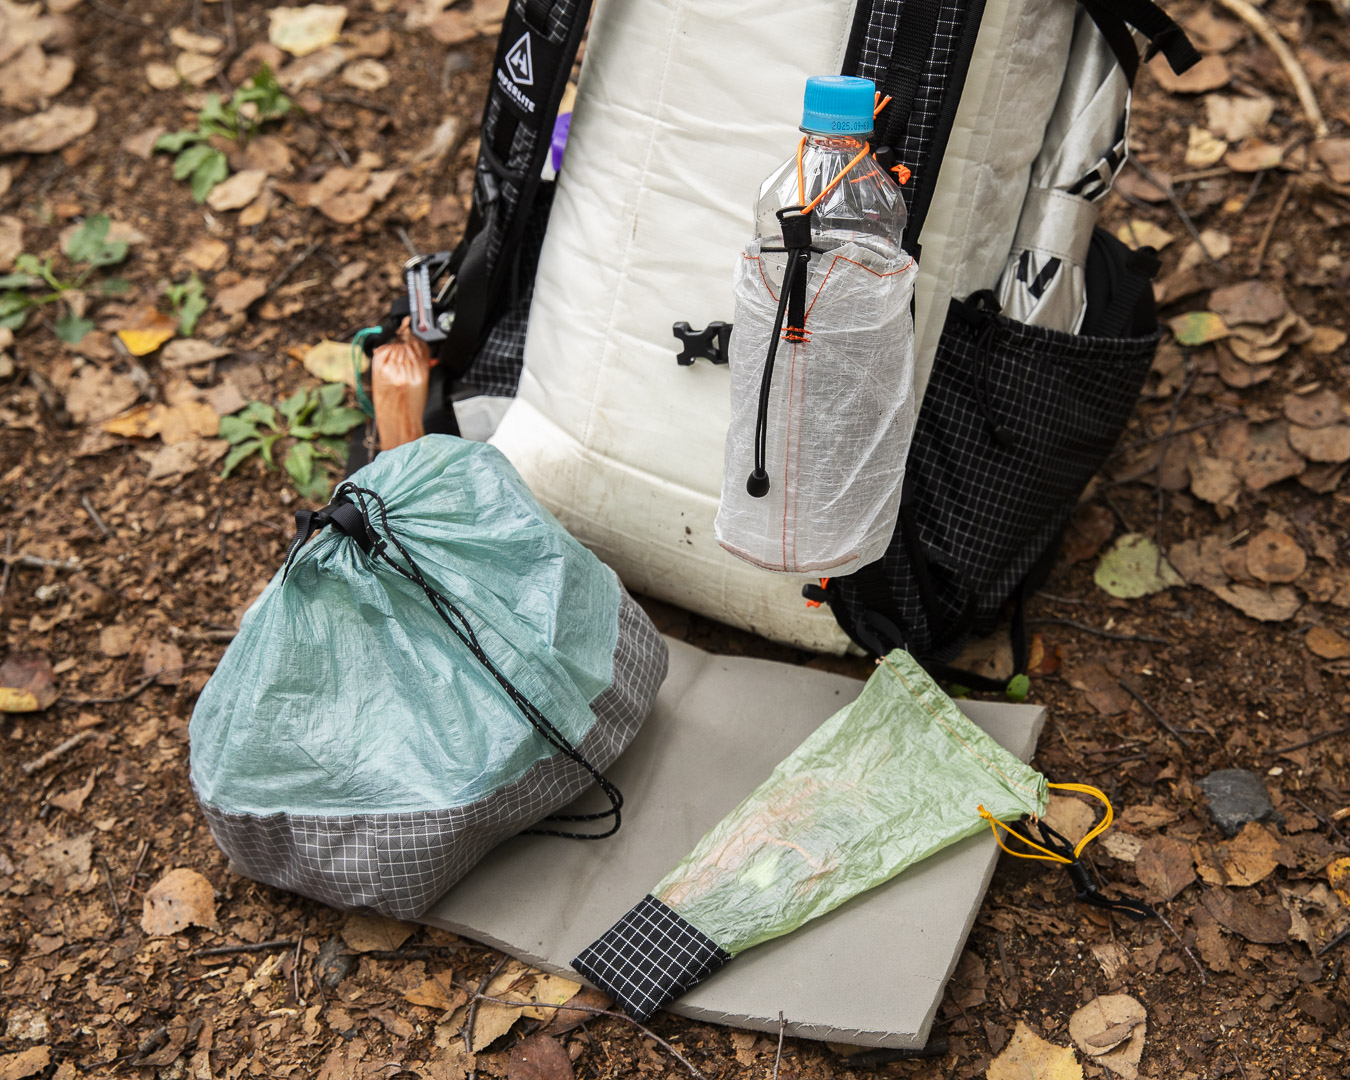
I also made a bottle pocket, fastening the bottle at the neck with a bungee for quick access. To make it easier to get things in and out, I added a slit at the opening—a feature I now use on most of the small items I make. The peg case started out narrow, but that turned out impractical, so I redesigned it with a wide mouth.
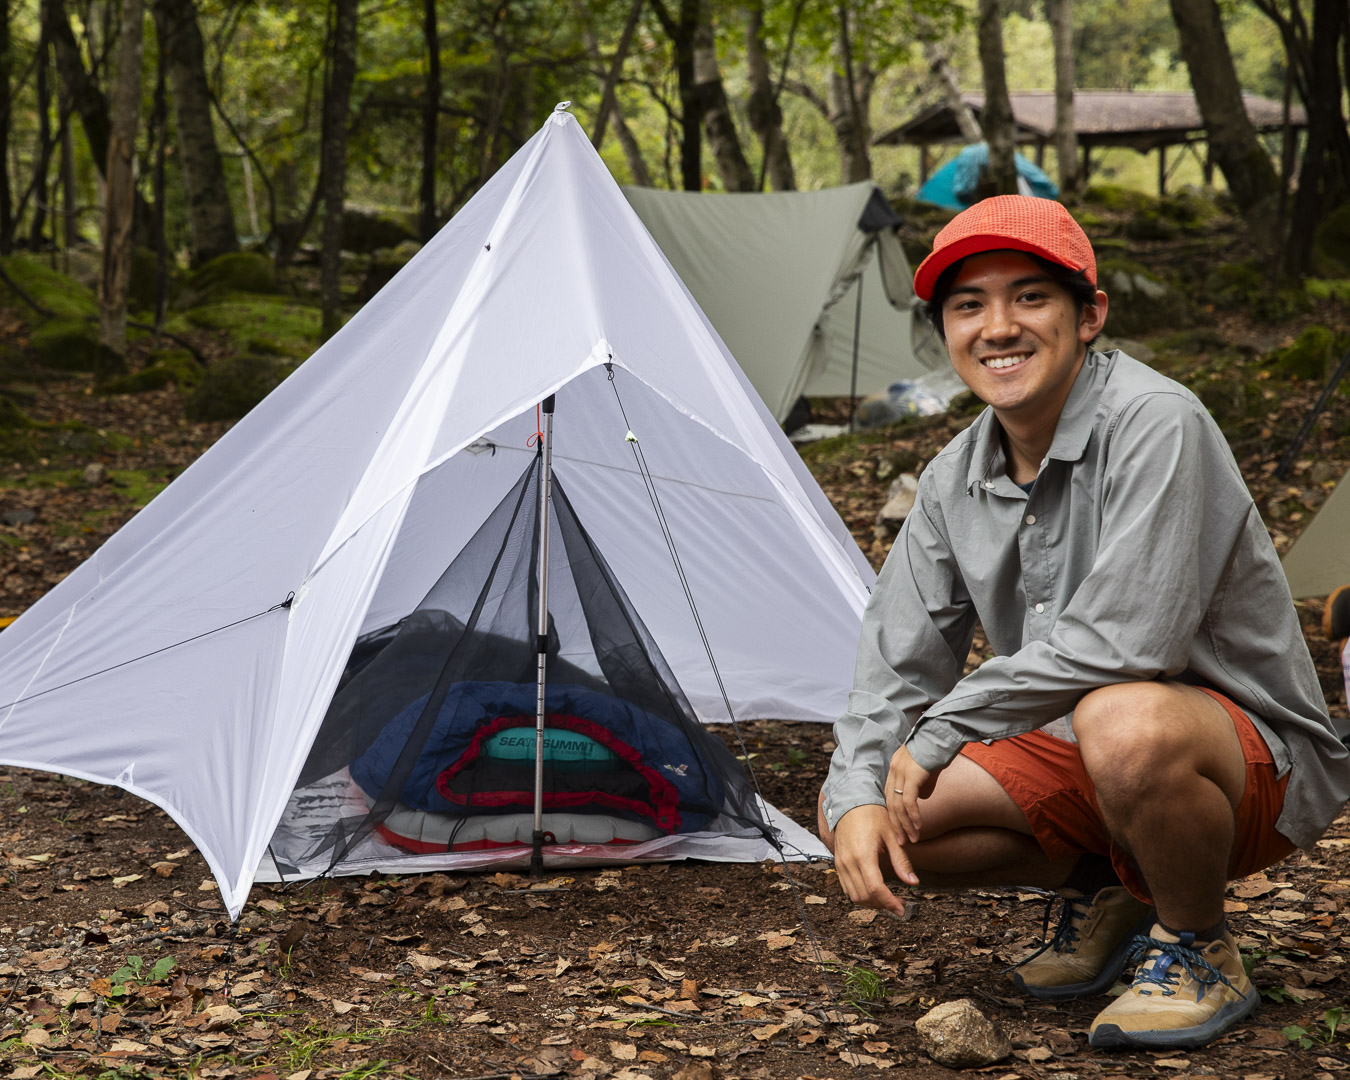
But for this workshop I really wanted to challenge myself, so I decided to make a tarp and bug net.
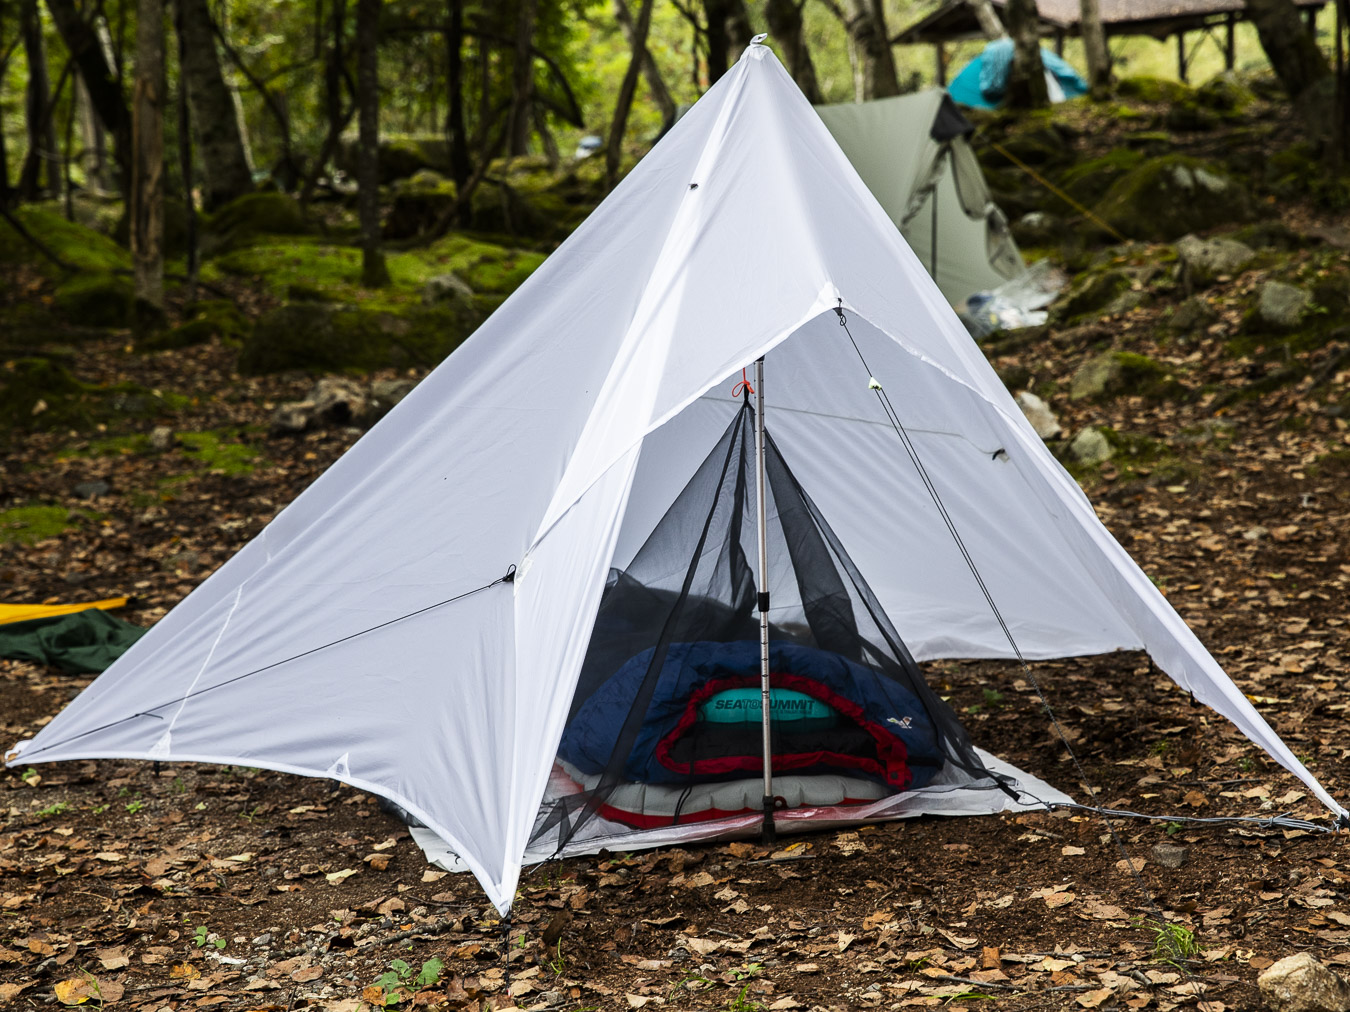
A MYOG tarp inspired by TrailBum’s CT Tarp.
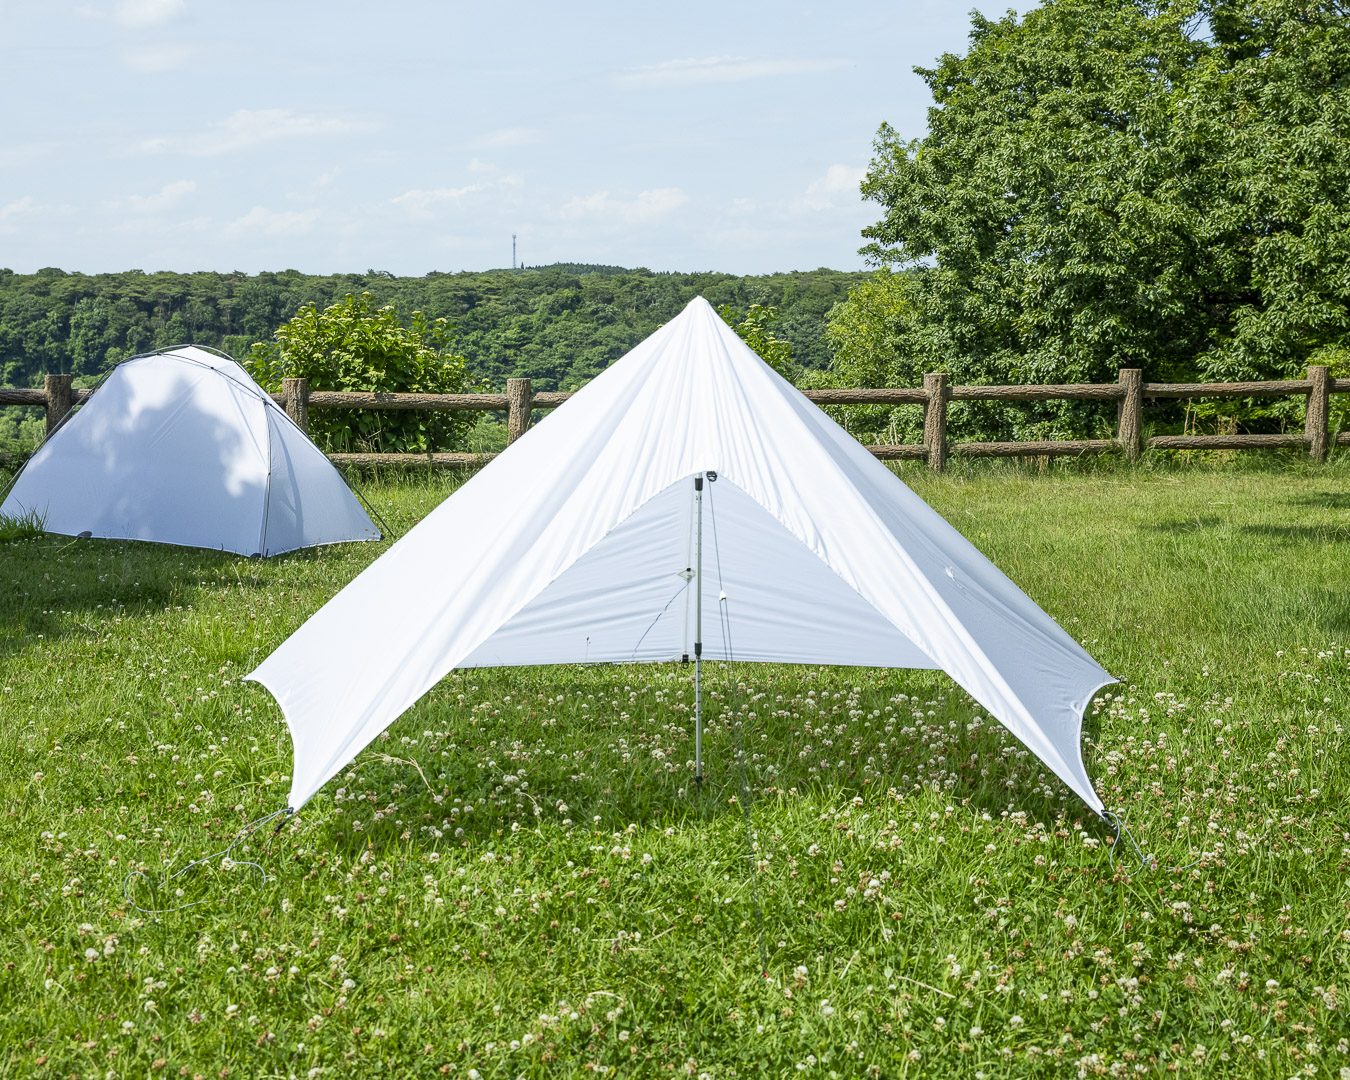
Tarp can be pitched in a variety of ways.
——Why did you decide to make a tarp?
Still fairly new to hiking, having only started last year, I had only ever camped in tents. Wanting to experience tarp camping for myself, I decided to make one.
——It’s pretty big!
Oh yeah—I made it 2.8 × 2.4 meters. I mostly borrowed the shape and tie-out positions from TrailBum’s CT Tarp
, but extended the short side from 2 to 2.4 meters. I’d been thinking about what I wanted from a tarp—an open feel, flexible pitching options, and the freedom to just enjoy it—so I sized it up for more space and comfort, rather than keeping it small and tight.
——Is your sewing machine commercial grade?
No, it’s just an entry-level model. Those machines come with automatic tension and other handy features, and since the fabric I used is thin, I didn’t need a lot of power. People often say silnylon and silpoly are tricky because they slip around, but it worked out fine.
——And then you made the inner tent—or mosquito net—after that?
Yeah, just on a whim (laughs).
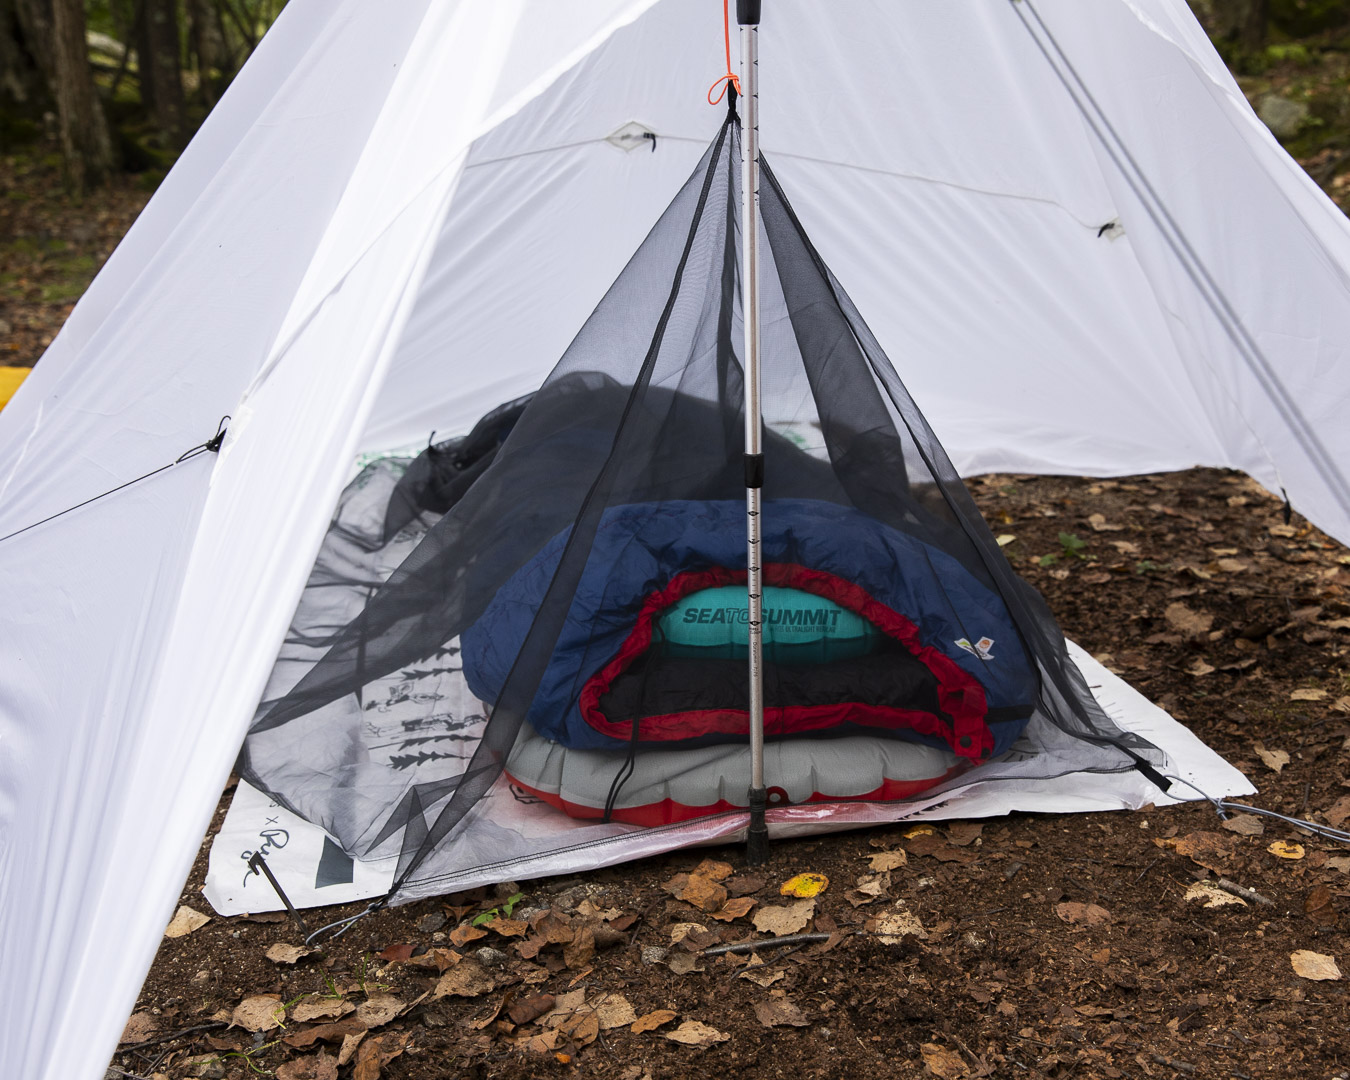
——A floorless bug net!
The tarp ended up a bit heavy because I made it roomy, and if the inner + tarp weighed more than a tent, it’d defeat the point. So I thought about how to keep it light—and that’s why I went floorless.
——Are floorless mosquito rare?
Sea to Summit has the Mosquito Pyramid Net, which I used as a reference. I added a DCF skirt on the outside and folded it inside, which should help keep bugs out a bit better. A little tweak I added.
Loops at the four corners to peg the bug net down.
——Do will you make next?
I want to make a backpack, but since I’ve only used a couple myself, that might be a project for the future. For now, my current pack feels a bit small, so I’m starting with a stuff sack that attaches to the top to add extra capacity. I want it simple and easy to use—a spot to stash a tent or wet gear that I can pull out to dry when the sun comes out, or to grab snacks without any hassle.
——Has MYOG changed the way you look at gear?
Totally. Now whenever I check out gear in stores, I immediately turn it inside out. Seeing those clever patterns and understanding how it’s put together is really a beautiful thing. At the same time, I’ve realized just how inexpensive off-the-shelf gear really is—if I tried to make the same thing myself, the materials and my time would end up costing way more (laughs).
⑥ Usami - backpack, ultralight chair, sacoche and cozy
USAMI, originally a traditional style hiker, switched to ultralight gear soon after starting MYOG.
——What did you make?
I made a backpack, plus some small stuff like a sacoche and a stuff sack. I also tried making a camp chair, but that one didn’t turn out well, so I wanted to get ideas from everyone.
——How long have you been doing MYOG?
Since the pandemic—around 2020. I didn’t actually start with hiking gear; my first projects were simple things like a sewing machine cover. My family used to work in fashion, but when they decided to step away, I ended up with the sewing machine they had been using.
——Ah, so it started with having the sewing machine first.
Exactly.
——Had you been hiking before that?
Yeah, but before I got into MYOG, I thought the right approach wasn’t to switch to lighter gear, but to train my body to handle heavier gear.
——So MYOG led you into ultralight hiking?
Yes. When I signed up for the Yamatomichi ‘Ultralight Hikers for Beginners’ seminar, I saw the other participants’ backpacks and realized just how big mine was.
A backpack with a unique design that links the front pocket to the compression straps. Usami also left off the left side pocket, since he never uses it—making the pack highly tailored to his own needs.
——How did you go about making this backpack?
I based it on MYOG videos I found on YouTube. Even though the videos were in English, the visuals made it easy to follow and helped me understand how the parts fit together and how the pack is constructed.
——It’s interesting how the front pocket connects to the compression straps.
Yeah, you can adjust the capacity here, and opening it wide is convenient too.
——What was the hardest part?
The first hurdle was having to buy all the fabrics from the U.S. (laughs). Sewing the stiff fabric was fine, but the stretchy materials were really tricky. That’s why I decided to avoid using any elastic fabric for this project.
——Did you make a pattern?
Not really. I traced my own backpack on newsprint. For the shoulder straps, I traced several straps from different backpacks I own and picked the one that seemed to fit best.
——So there’s bungee cord on only one side?
Right. I never used the left pocket, so I left it off and planned to attach a sleeping mat there instead.
I also tried making a camp chair out of a closed-cell sleeping pad, but the structure didn’t really work—the back kept collapsing, so it wasn’t exactly something you could lean on (laughs).
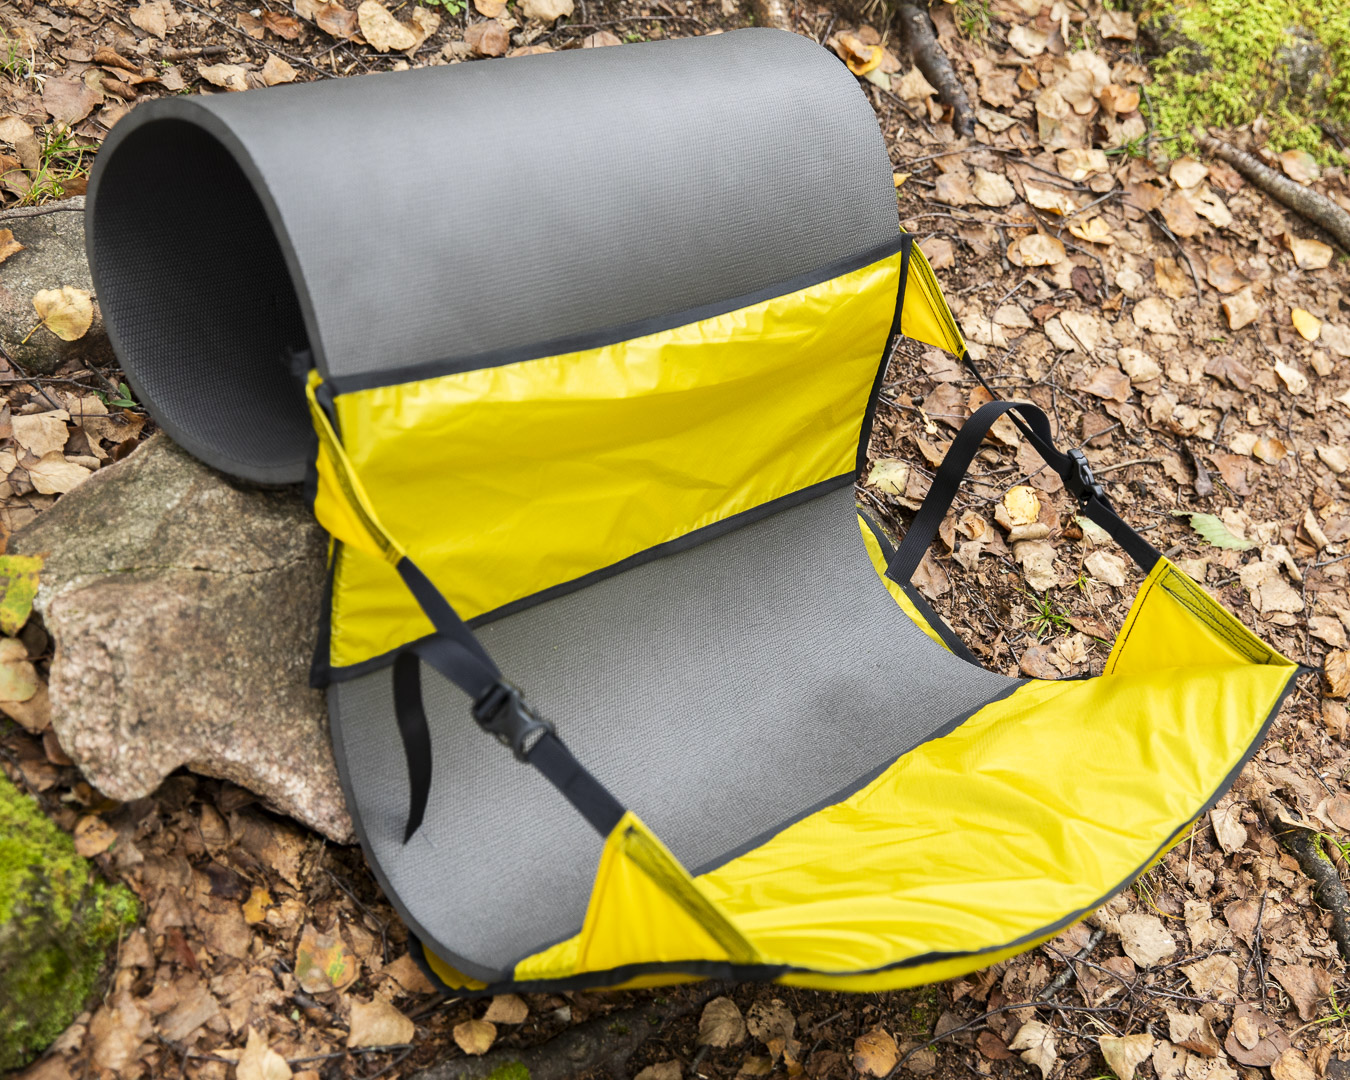
That’s the fun of MYOG, trying things that don’t exist on the market. There’s no kit for a closed-cell chair, so you just have to experiment and see what works.
——I also really like the clear vinyl sacoche.
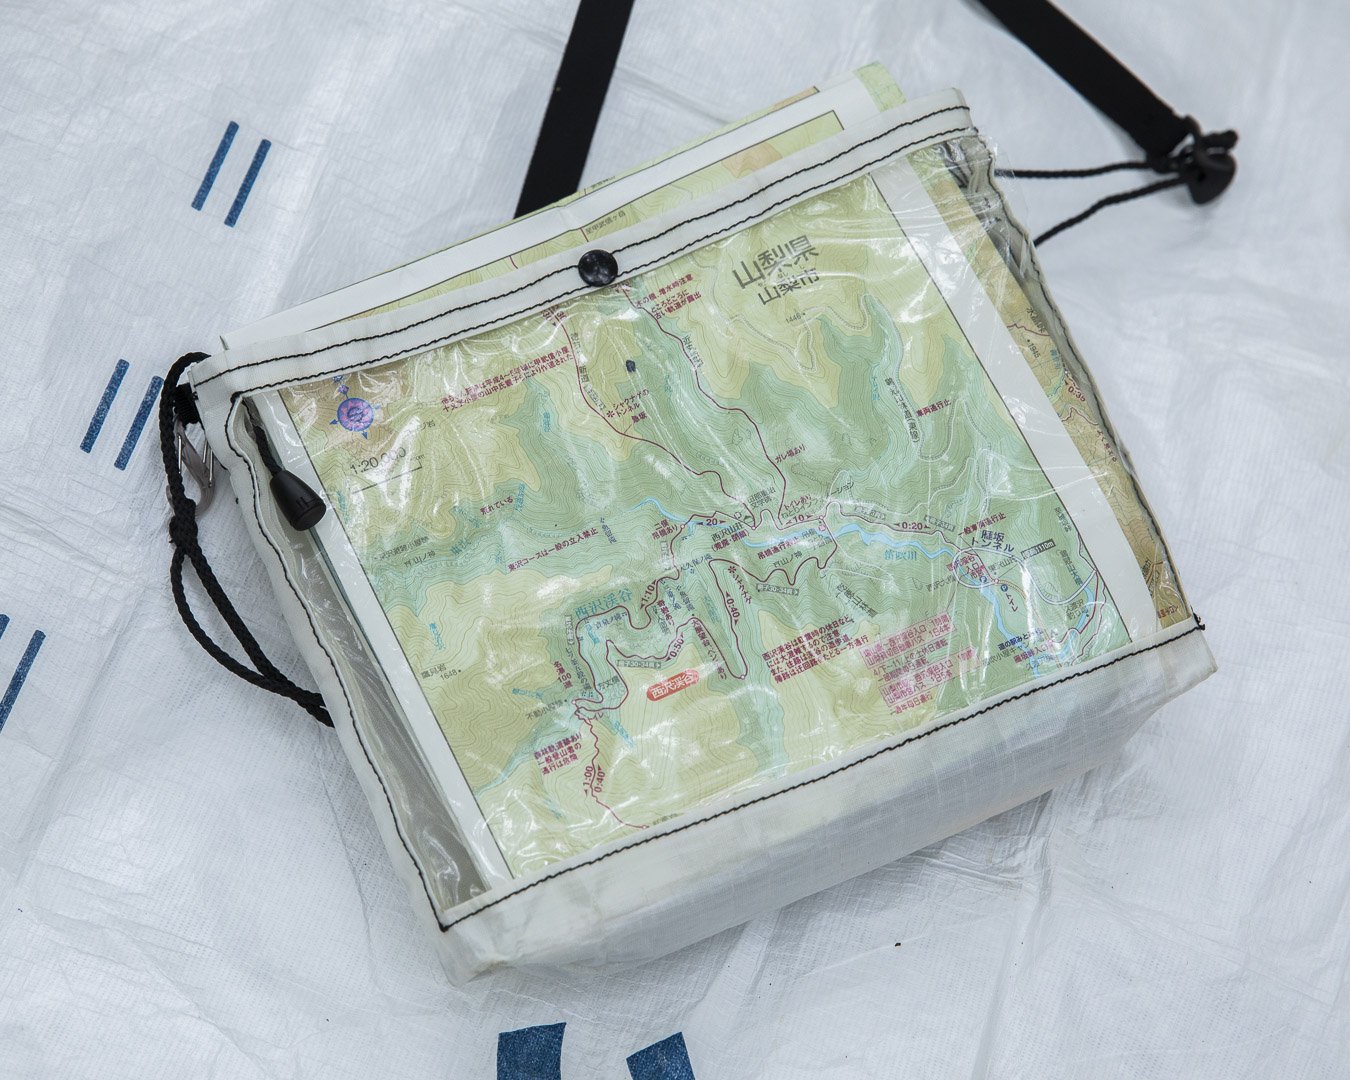
The sacoche has one side made of clear vinyl, so you can check maps without taking it out.
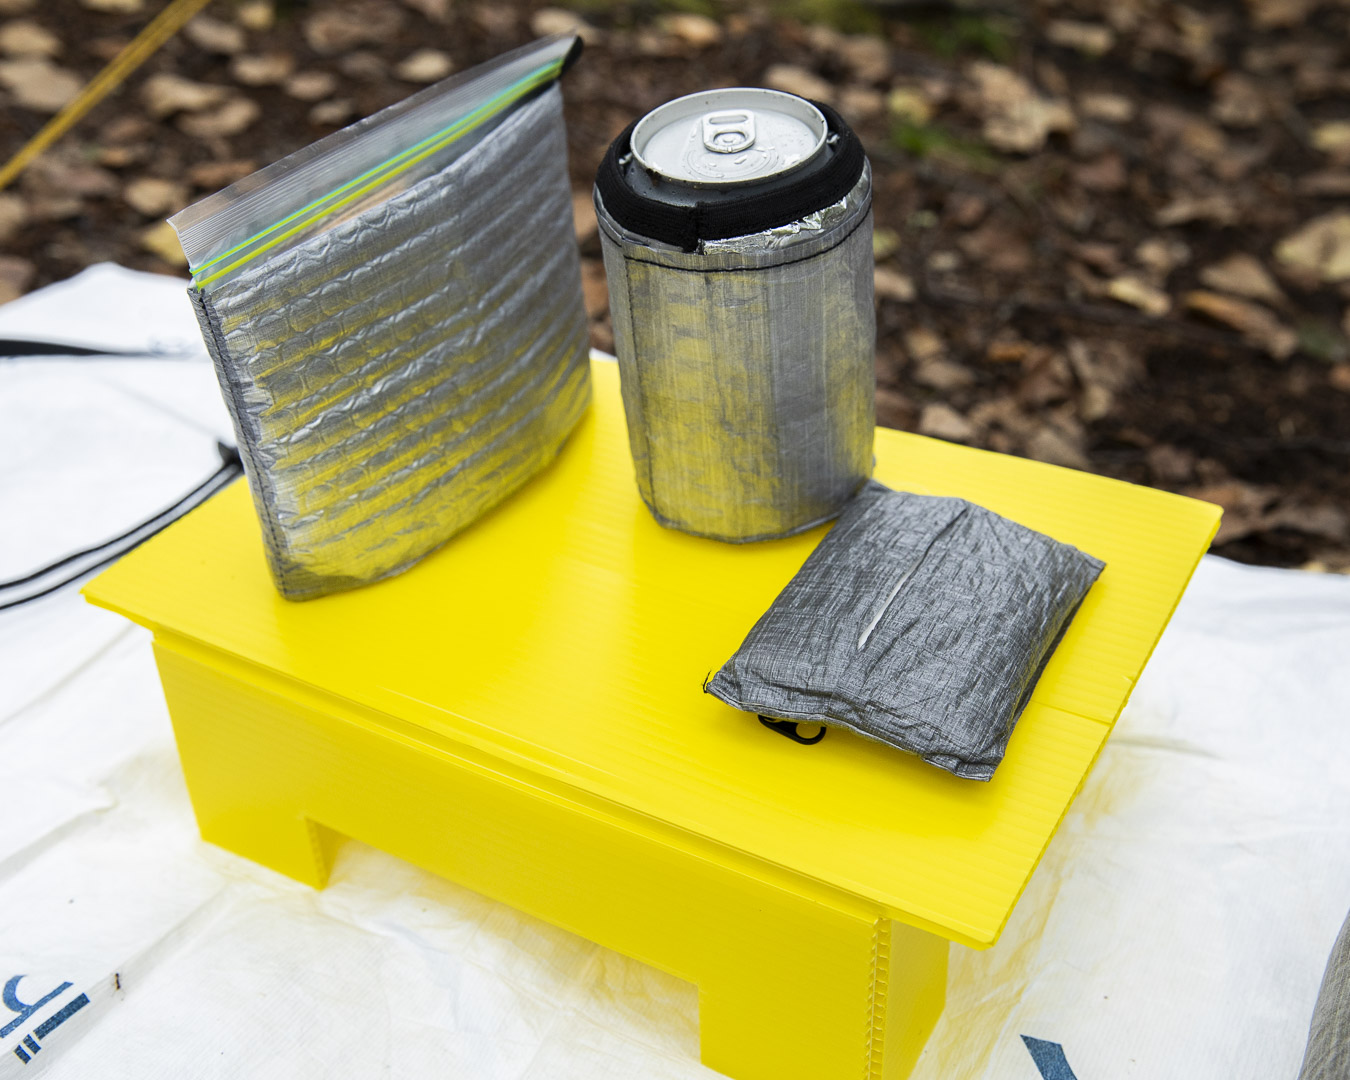
Can and dry food cozies, a tissue case, and a foldable table—also USAMI’s creations.
My ultimate goal is to make all of my hiking gear myself. Next up, I want to try making a tent. I used to be all about dome tents, but I recently switched to a floorless shelter—it’s light, you can sleep in it without any issues, and honestly, I love it (laughs). I’d also like to try making my own trail food if possible.
——Food as well!?
Yeah! I’m thinking of making Ziplock meals with Indian rice flakes and dried veggies. Eventually, I want to make clothes and shoes too—basically, turn everything into MYOG gear!
Closing
Thanks for reading all the way through. It’s been almost a year since these interviews, but once again—hats off to all the participants and to HLC North Kanto Ambassador Mr. Meguriya! After the workshop, the participants even launched a community called Yama to Myogu—a playful mashup of Yama to michi (mountain and way) and MYOG—to connect with other gear makers. They sometimes join events together as well (if you’re curious, check out the hashtag #山と妙具 on Instagram). HLC North Kanto will also keep hosting MYOG-focused programs, so if you’re interested, definitely check them out.
On a personal note, seeing everyone actually making their own gear really sparked my own urge to create. If this article gives someone else that same push, that would be the best outcome. Here’s to an awesome MYOG life!
Working as a photographer for cultural and music magazines, a deep passion for adventures emerged. Drawn to the grandeur of nature during adventures to many countries, Masaaki began hiking as a way to connect with nature. Before long he was working for outdoor magazines, with writing assignments, leading to the current state of not knowing his main profession. As a writer he, continues to pursue ultralight hiking and the culture of Japanese independent makers as a lifelong passion. Through a work-related interview with Yamatomichi’s founder Akira Natsume, he gradually found himself in his current positions through sharing drinks and going on hiking adventures with Akira.
Series: HLC Report