


Yamatomichi’s Introduction to Ultralight Hiking
Yamatomichi’s Introduction to Ultralight Hiking
This guide introduces the ultralight hiking philosophy we share at Yamatomichi, along with practical ways to begin putting it into practice.
There is no single right way to approach ultralight hiking. It is an ongoing experiment in which repeated trial and error gradually transforms the uncertainty of Will this really be enough? into the confidence of This will do just fine. Along the way, you may also discover a kind of creative joy.
There is no need to aim for perfection from the beginning. Start by becoming familiar with the basic ideas and ways of thinking introduced here. With experience, you will gradually find your own way of hiking.
Note: This introduction focuses on reducing pack weight, one of the defining aspects of ultralight hiking. It does not cover foundational hiking skills such as navigation, safety management, or weather awareness. It is intended for hikers who already have these skills and want to hike with a lighter pack.
- Our approach to ultralight hiking
- The origins of ultralight hiking
- The benefits of going ultralight
- The four steps to lighten your pack
- Step 1: Weigh
- Step 2: Consider
- Step 3: Choose
- Step 4: Test
- Ultralight hiking tips and tricks
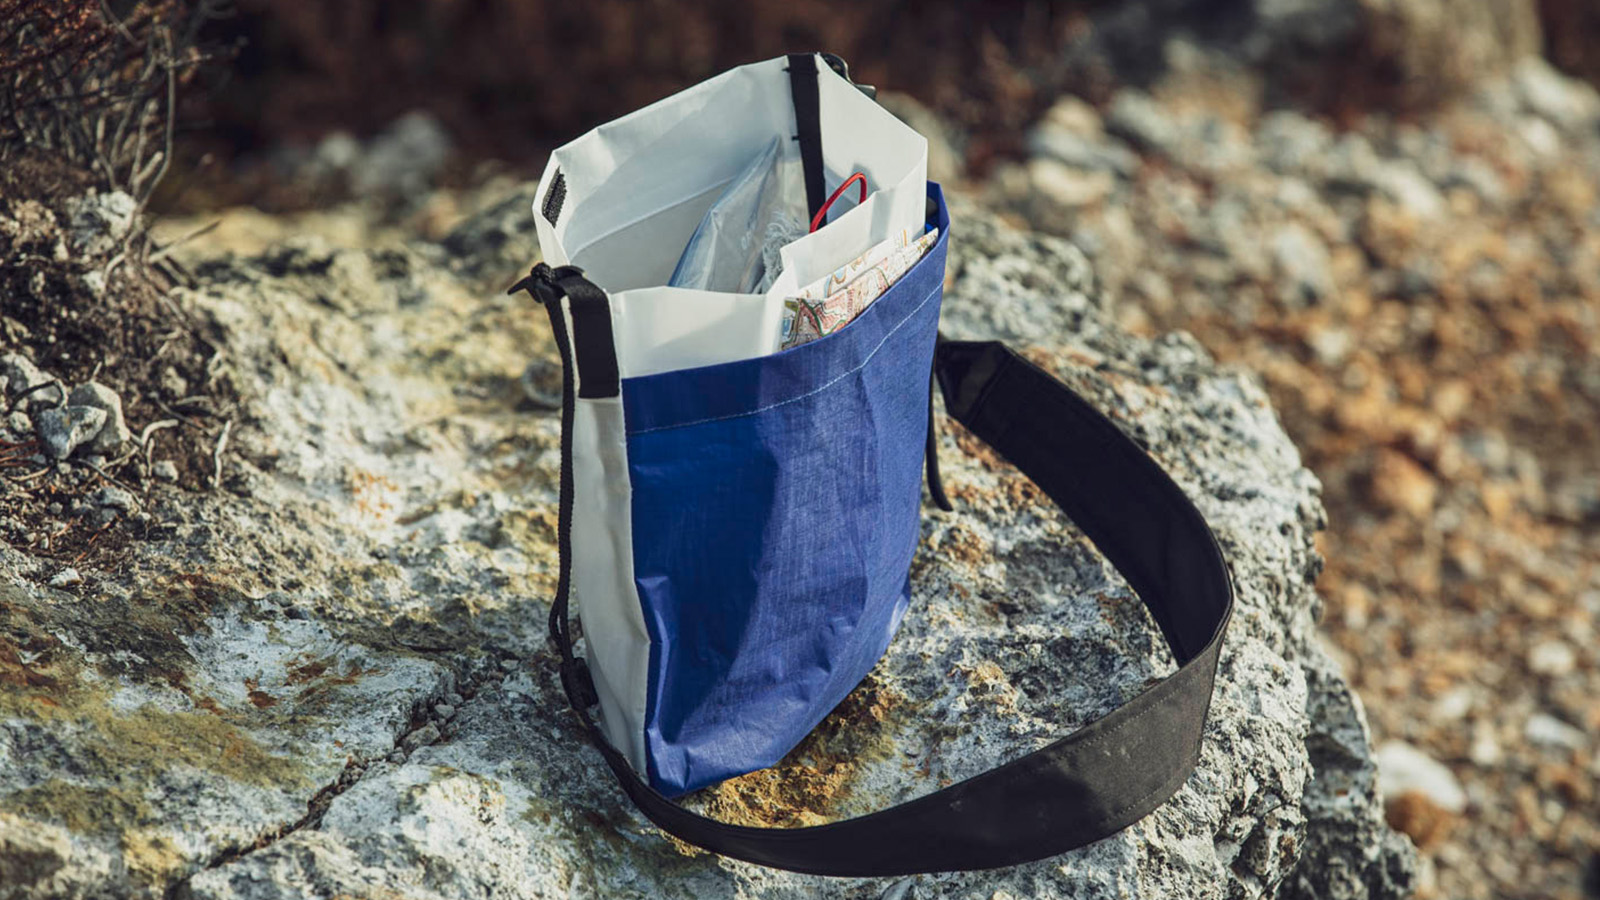
- Repackage
- Carry fewer spare clothes
- How you pack matters
- Choose a smaller backpack
- What to carry in your emergency kit
- Frequently asked questions
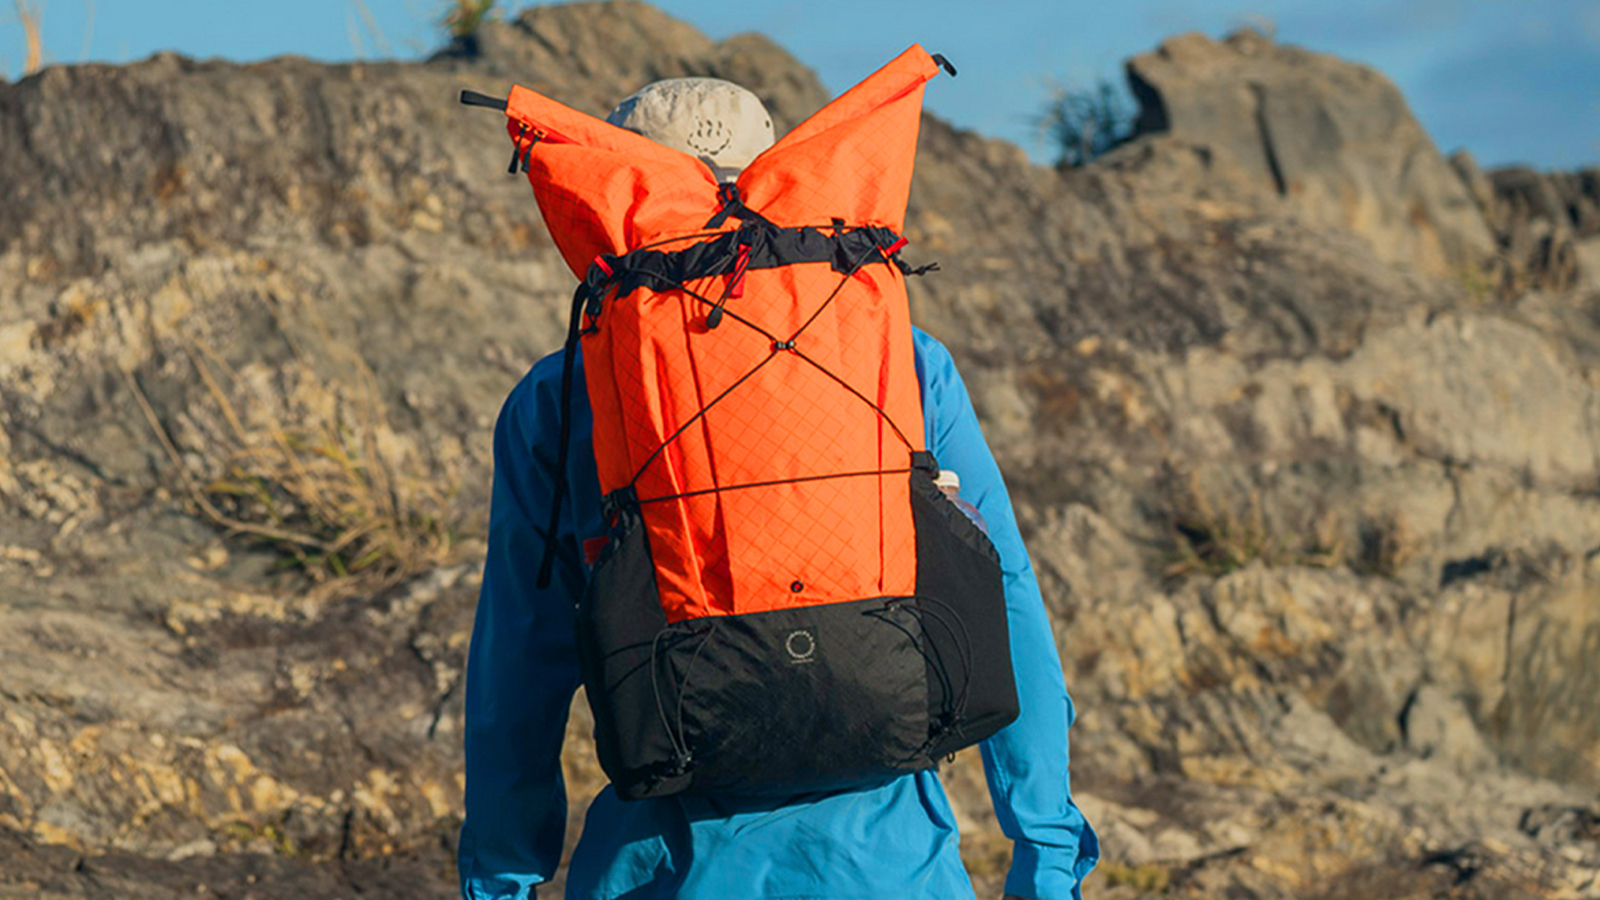
Our approach to ultralight hiking
The origins of ultralight hiking
Ultralight hiking grew out of thru-hiking on America’s long-distance trails, where hikers spend months on foot covering thousands of kilometers. To complete those journeys, they needed to reduce the strain on their bodies and keep moving day after day. Going light was a practical answer to that need.
When a heavy pack no longer weighs you down, your awareness begins to expand. You notice more of nature, read conditions more calmly, and gain greater trust in your own ability to keep moving. With only the essentials on your back, you begin to feel more fully how far you can go. In the process of thinking, choosing, and learning through experience, you also come to understand what gear is really for, and the essential role it plays in life outdoors.
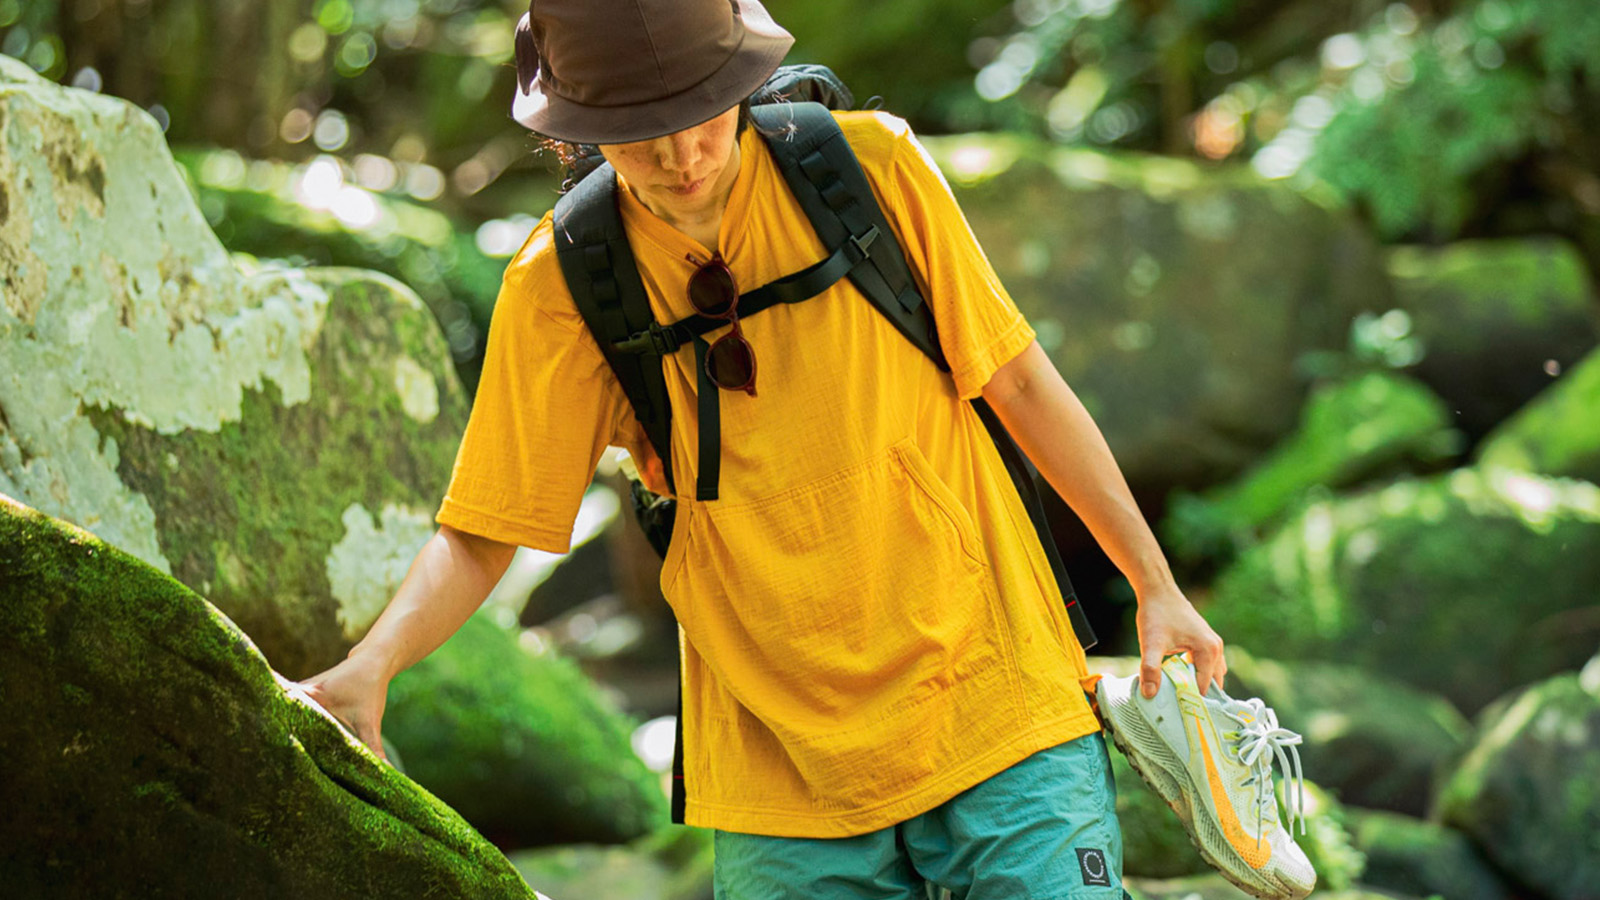
The benefits of going ultralight
When you carry less, the experience of hiking begins to change in a few important ways.
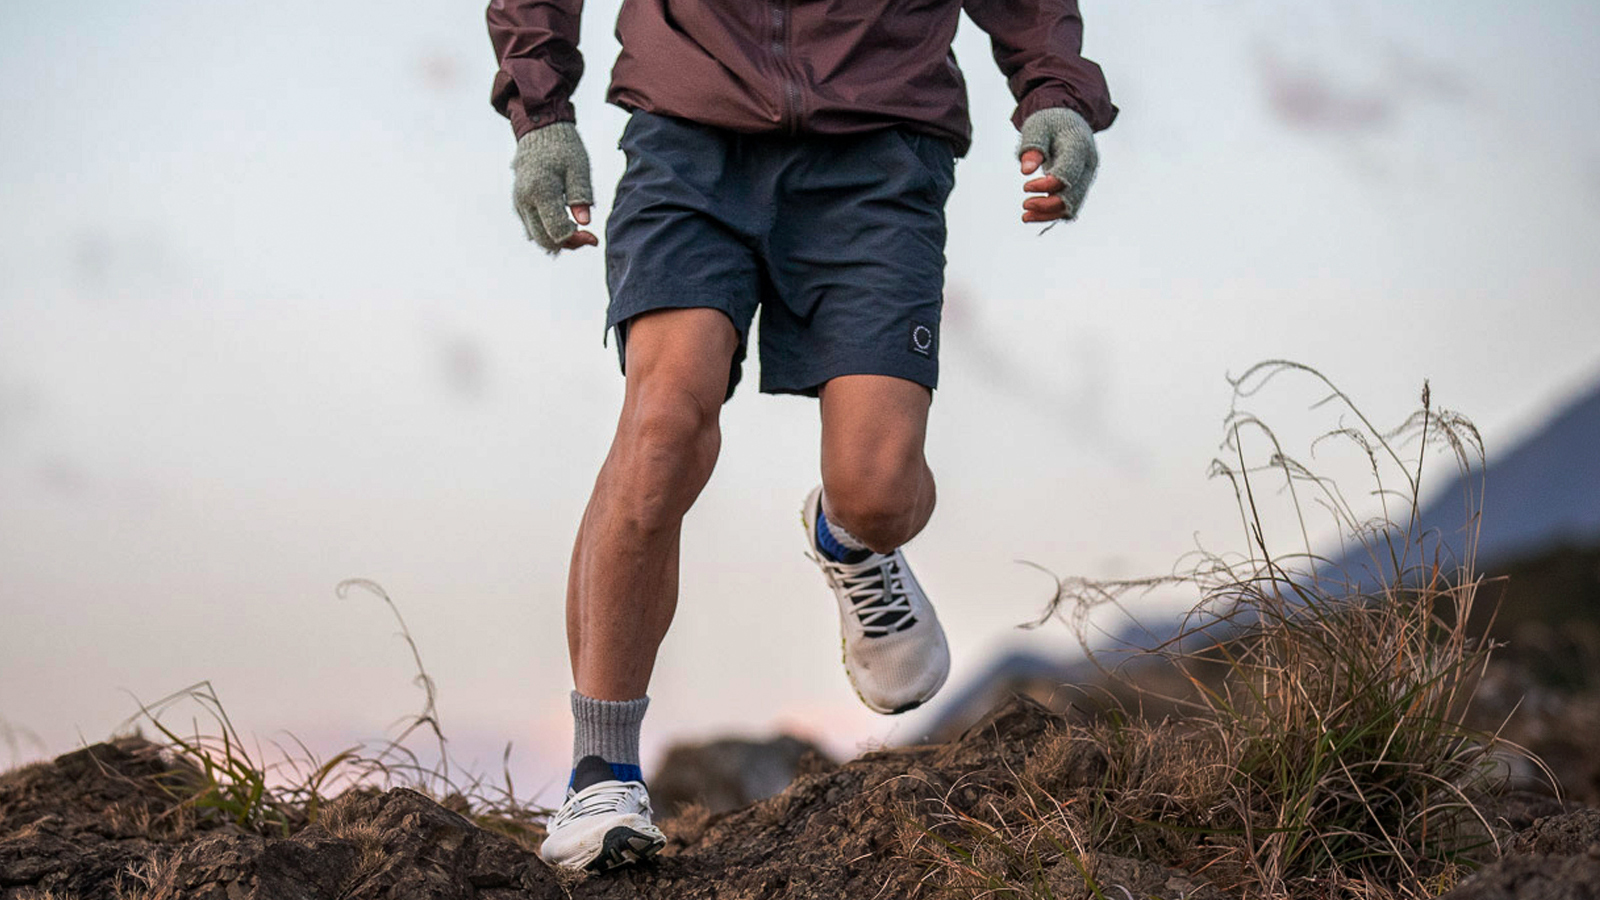
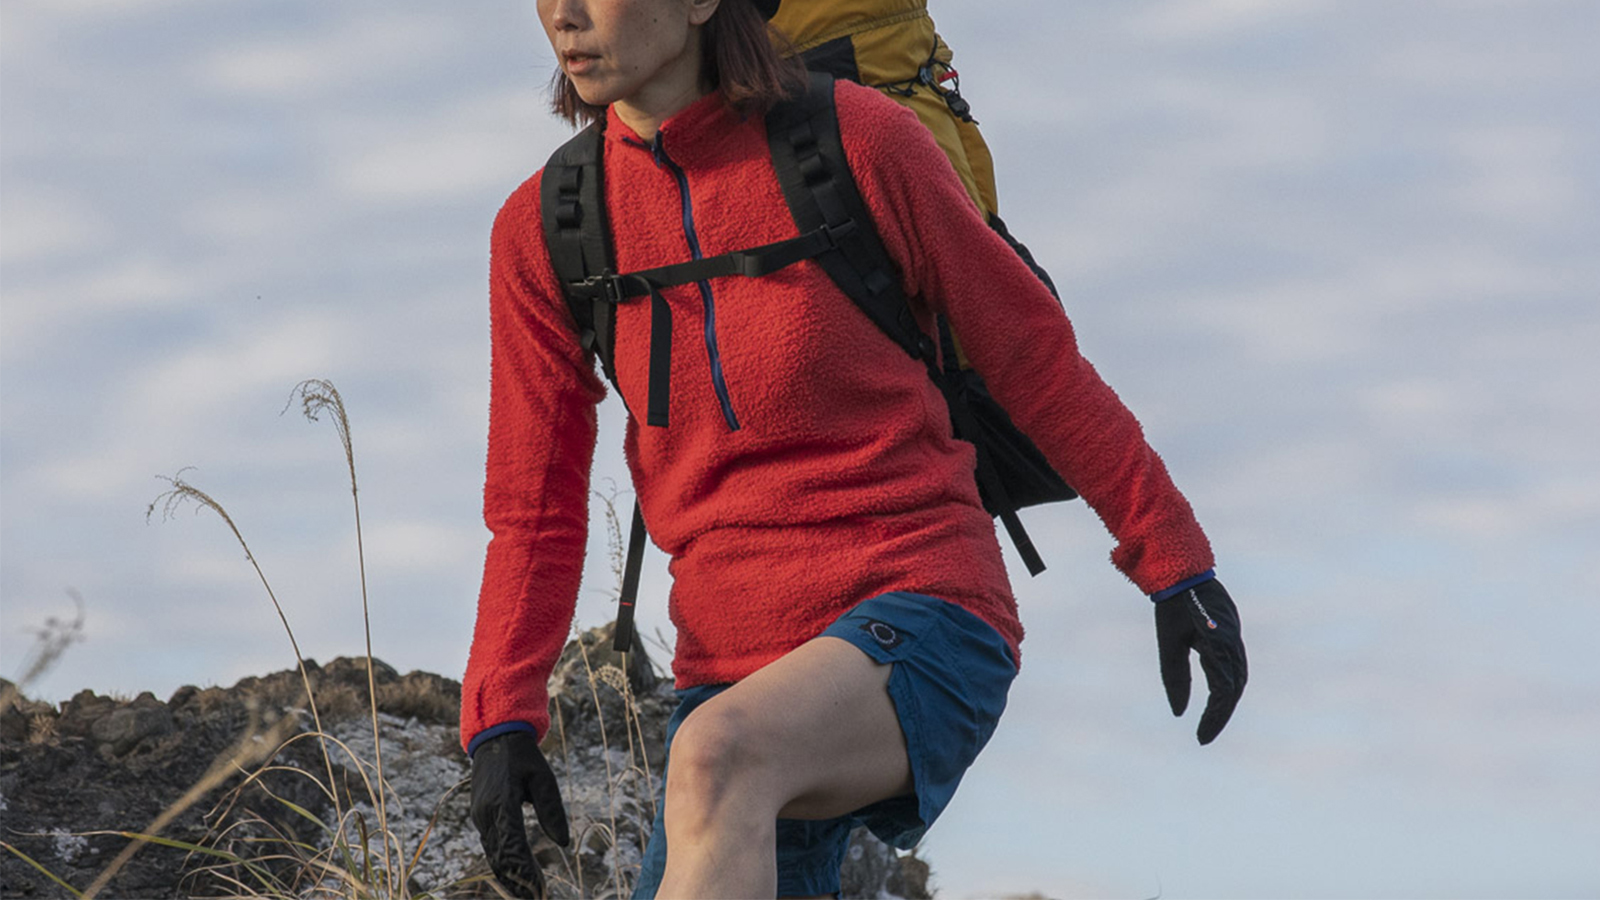
- You gain more freedom on the trail
With less strain on your body, you can stay on the move longer and walk at a steadier pace, making it possible to cover more distance in a day. - Mental freedom on the trail
Your mind will thank you for a lighter pack. It gives you more mental space to adapt to changing conditions and move more freely through the day. - You feel more connected to nature
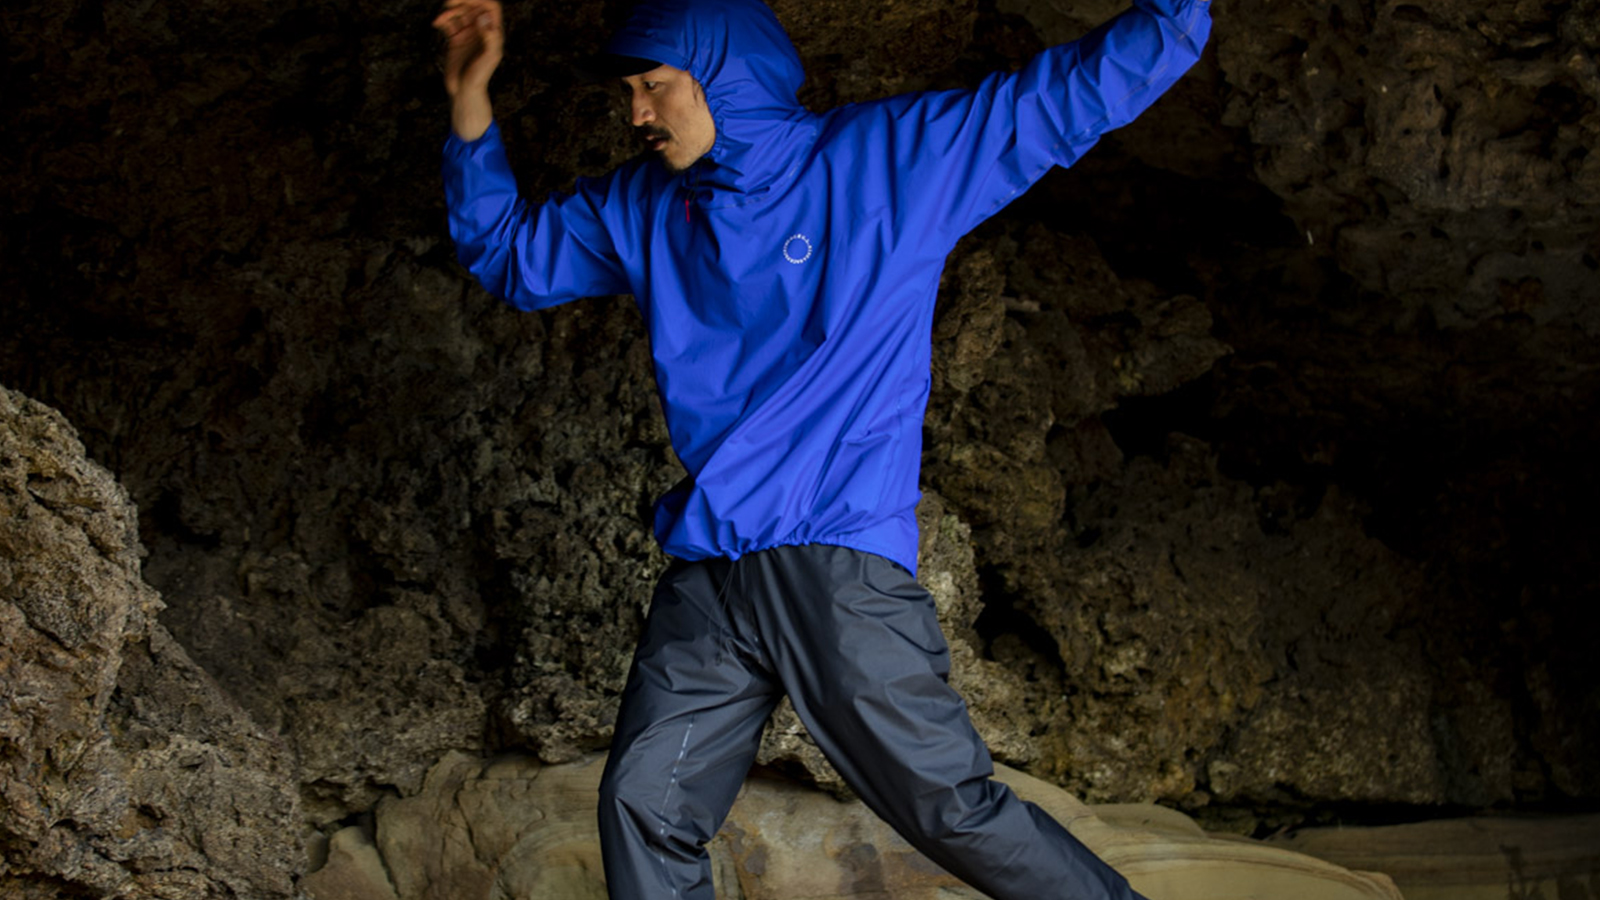
When a heavy pack is no longer weighing you down, you spend less time managing the weight on your back and more time noticing the landscape around you. Your gaze lifts, your senses open up, and everything comes through more directly. Sleeping with simple shelter systems like tarps or floorless tents can deepen that connection even further. Their more open design leaves less of a barrier between you and nature.. - You can respond better when things go wrong
With simpler gear, you think more clearly and can act faster. And because fatigue takes less out of you, you have more room to stay out of danger when conditions turn bad.
The four steps to lighten your pack
Step 1: Weigh
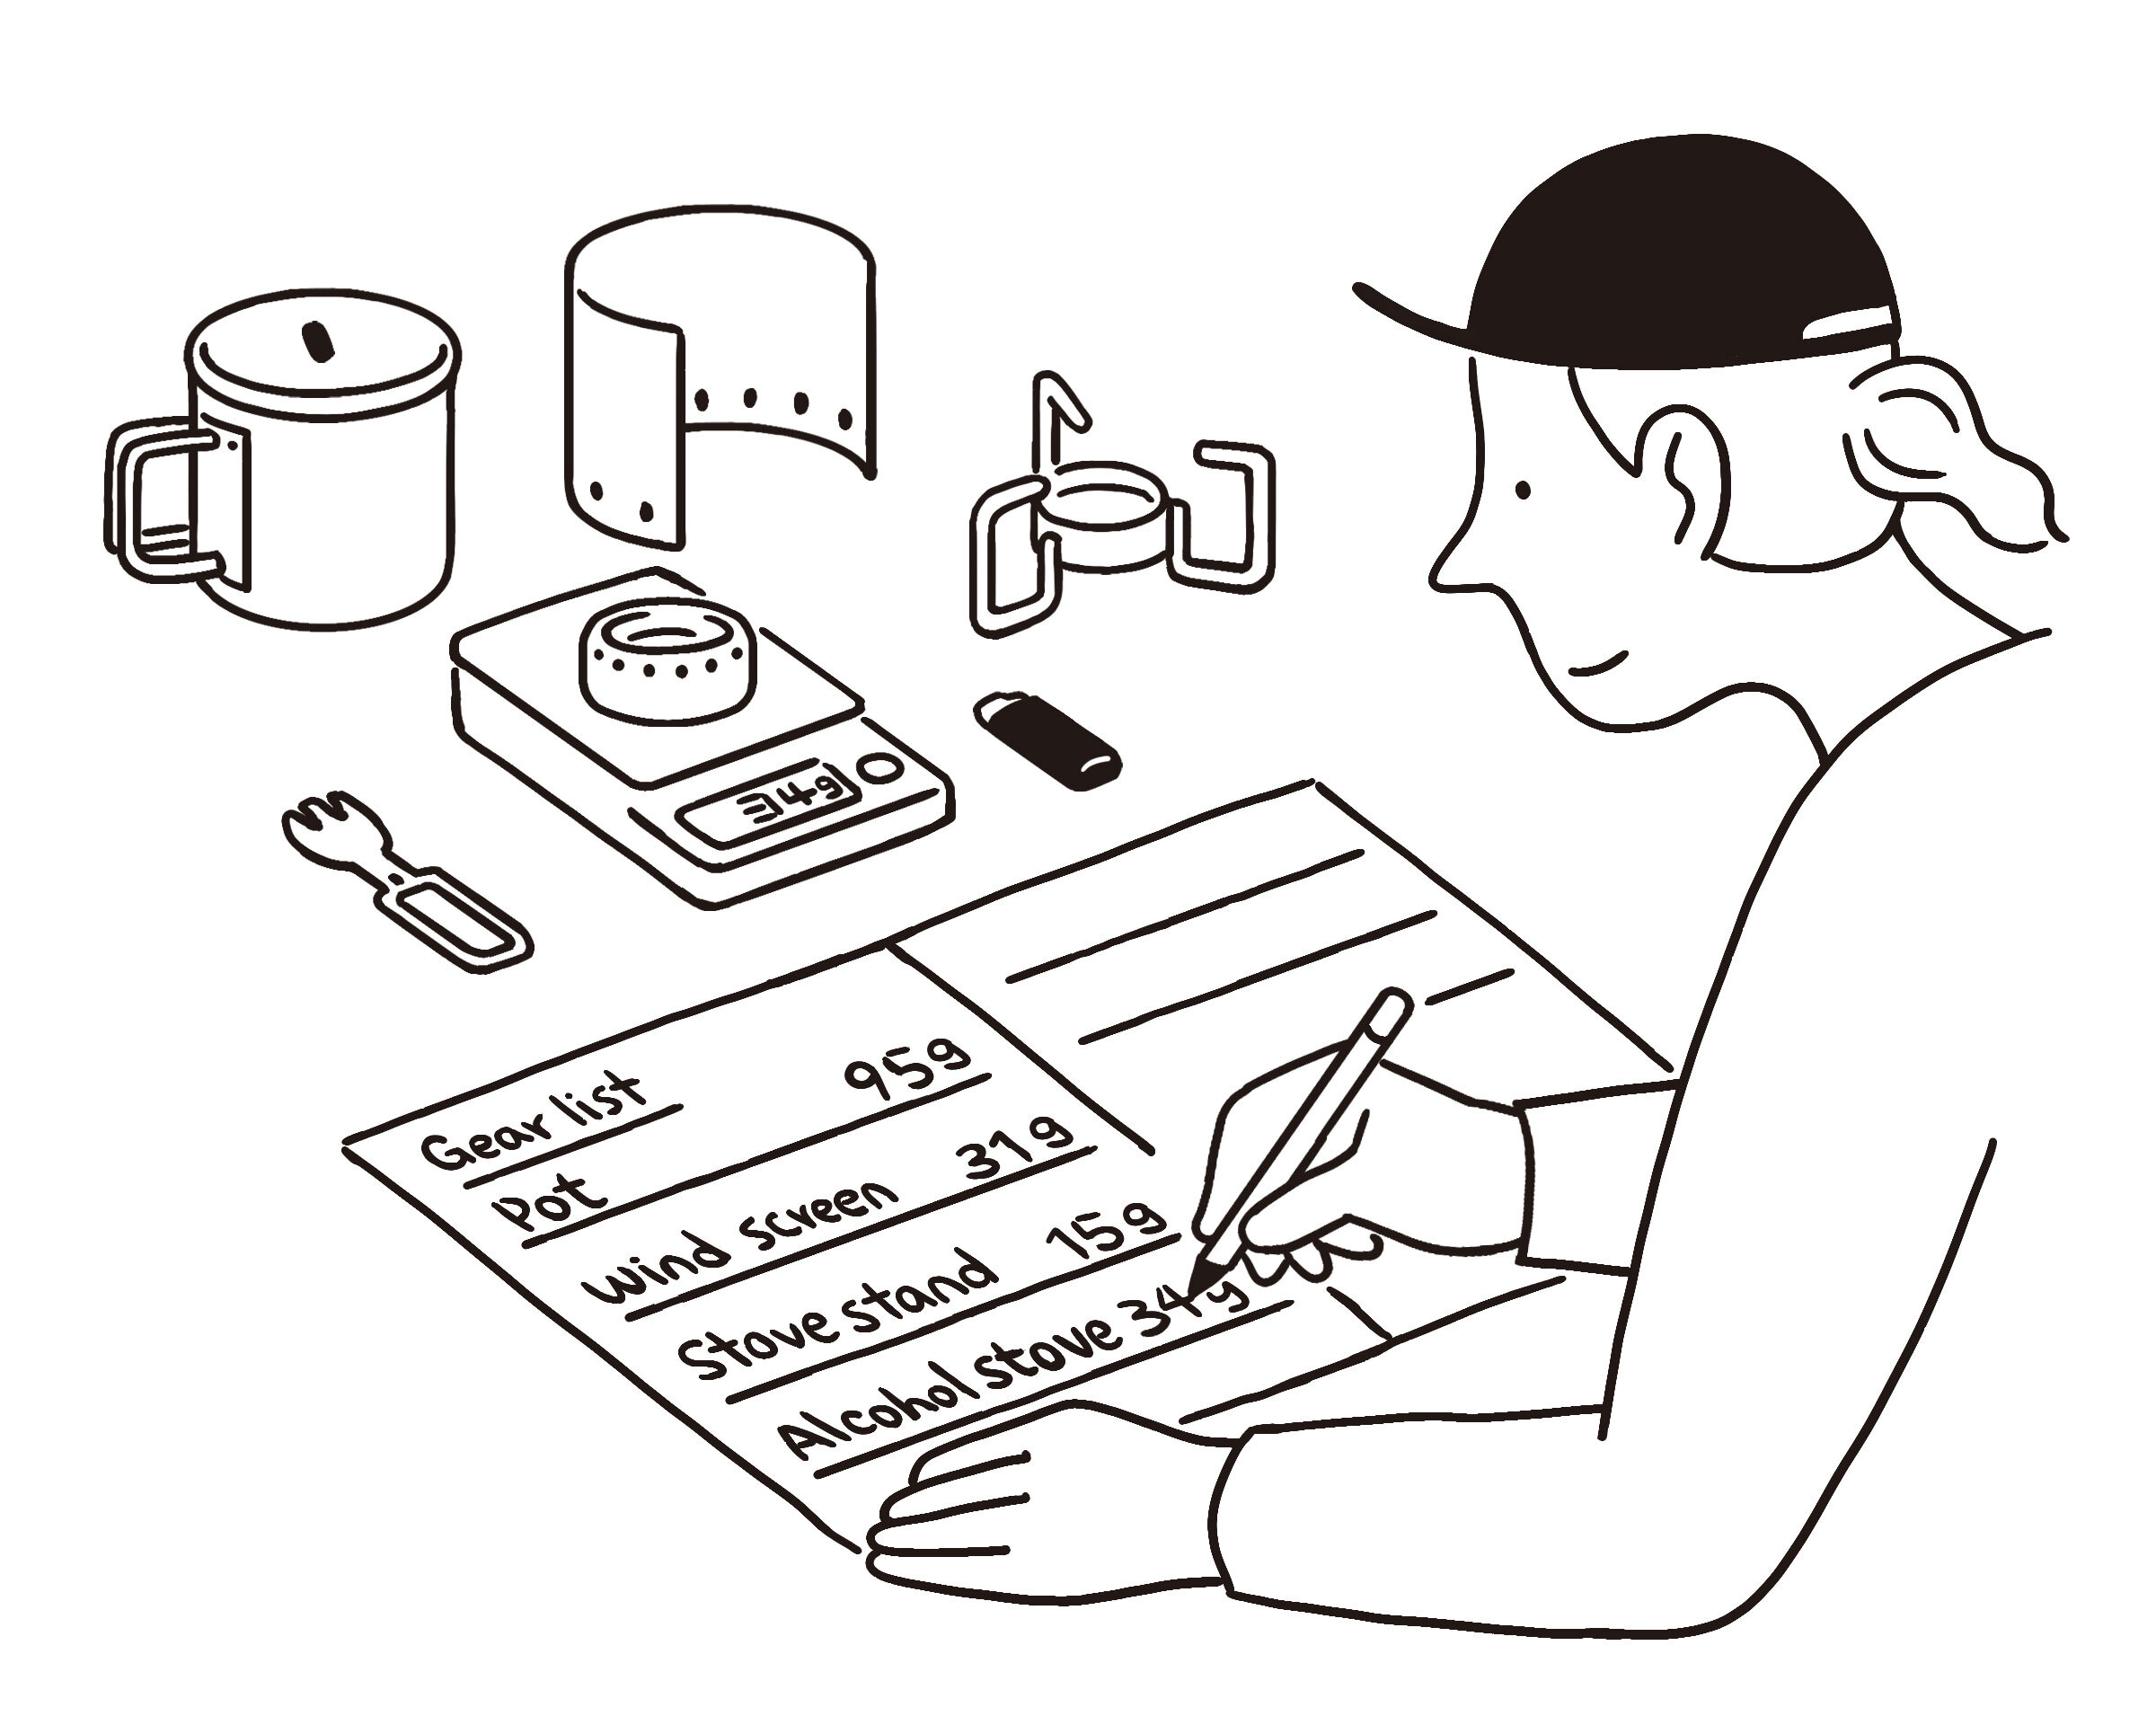
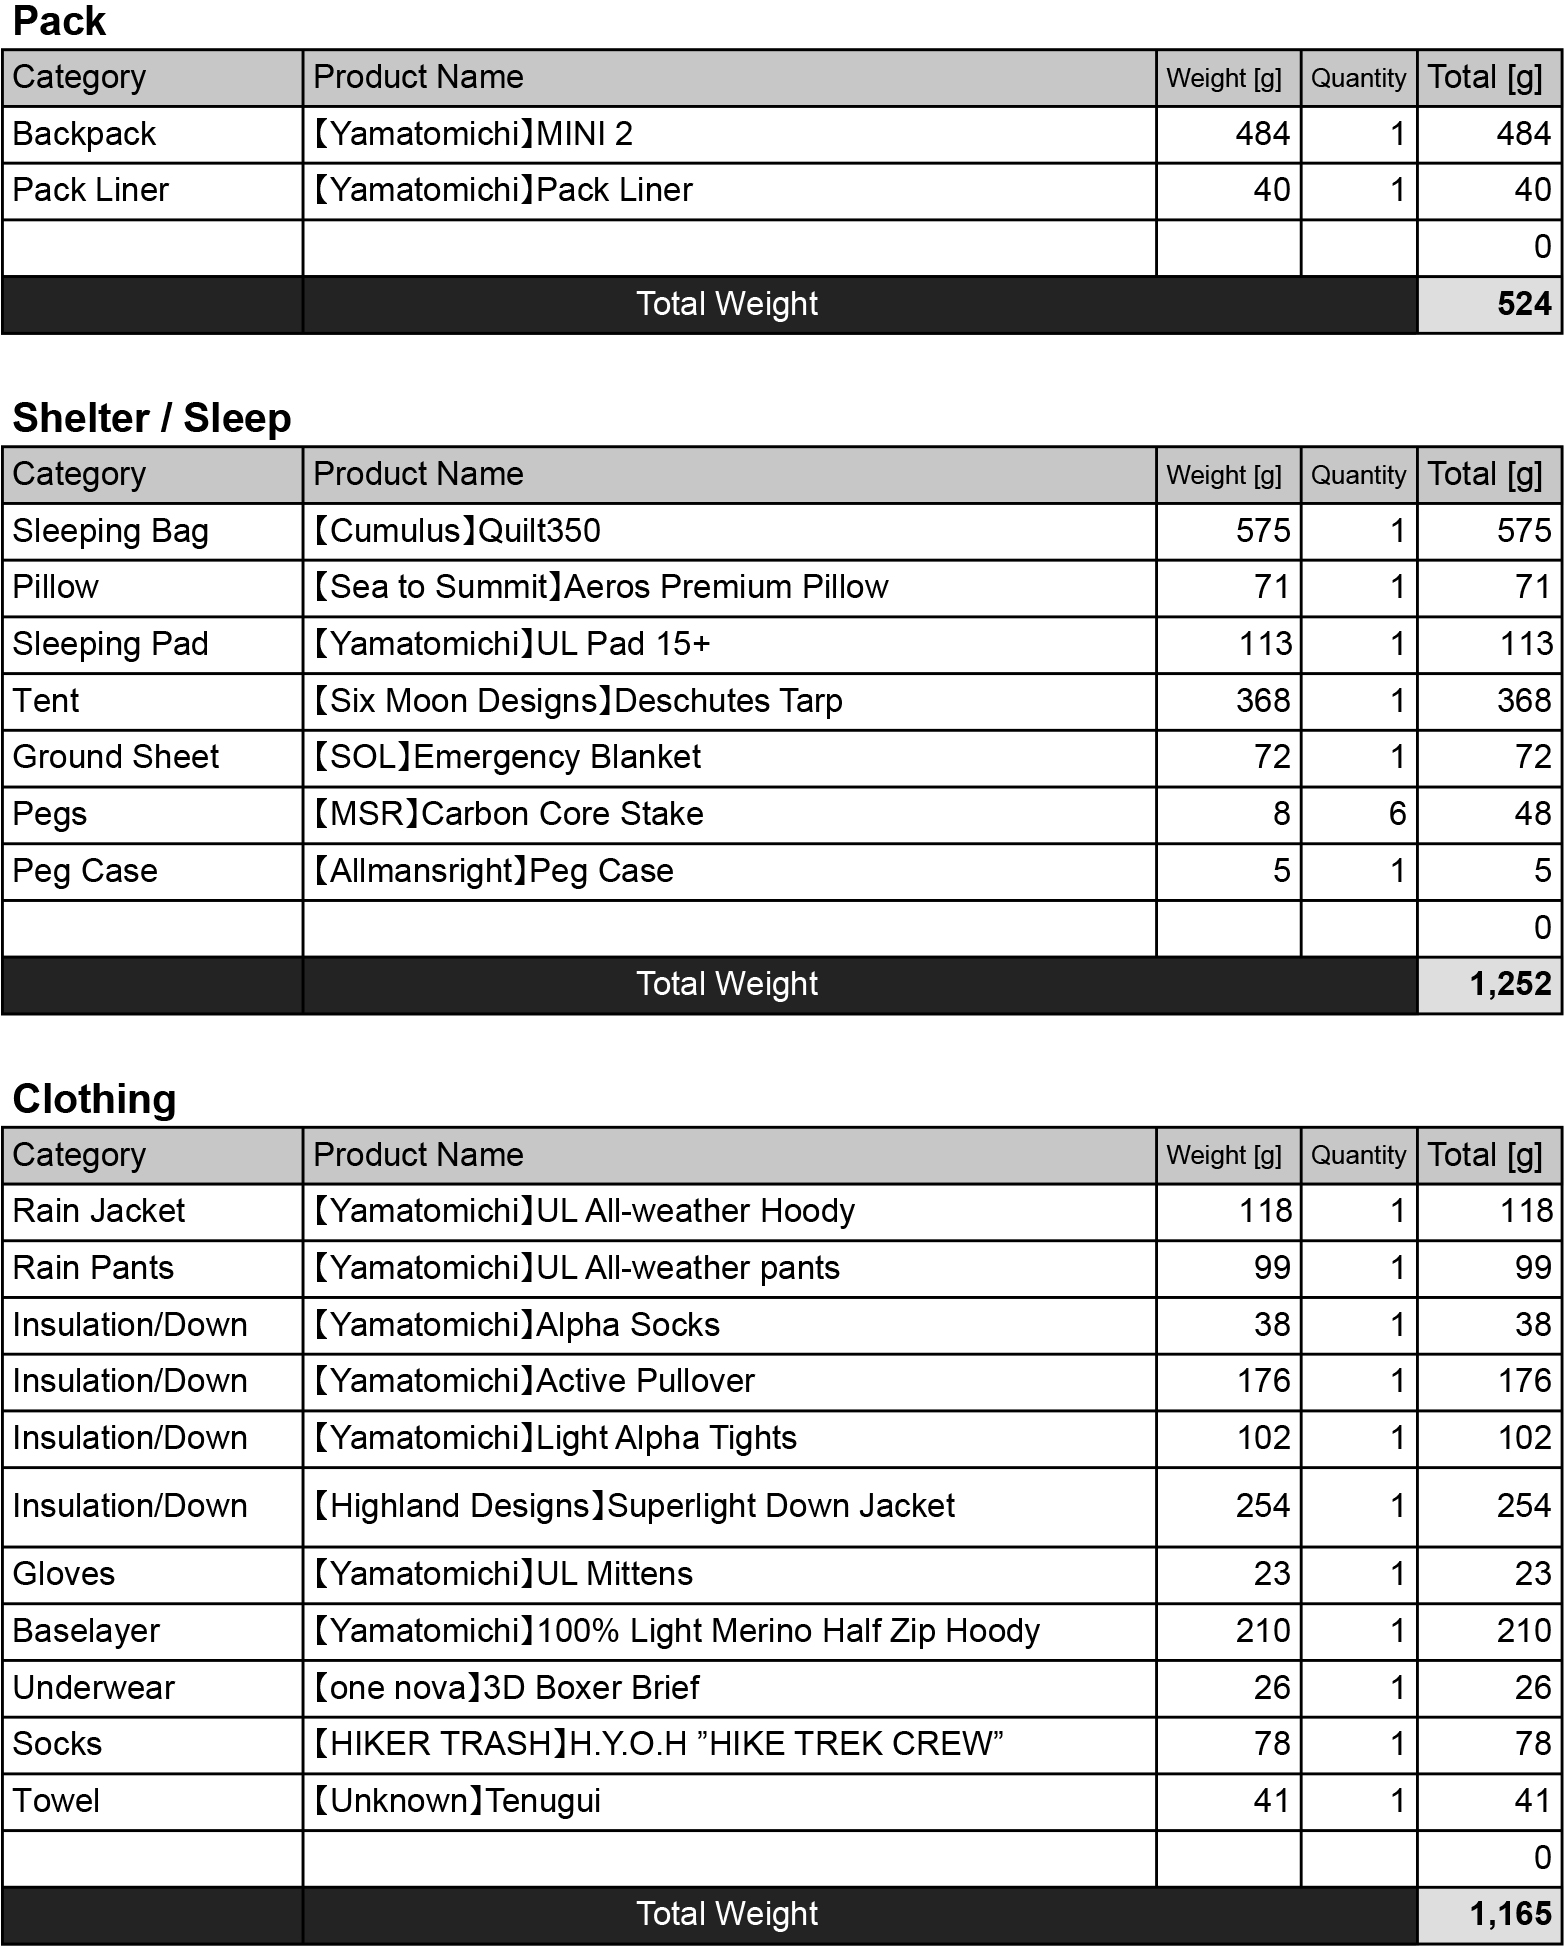
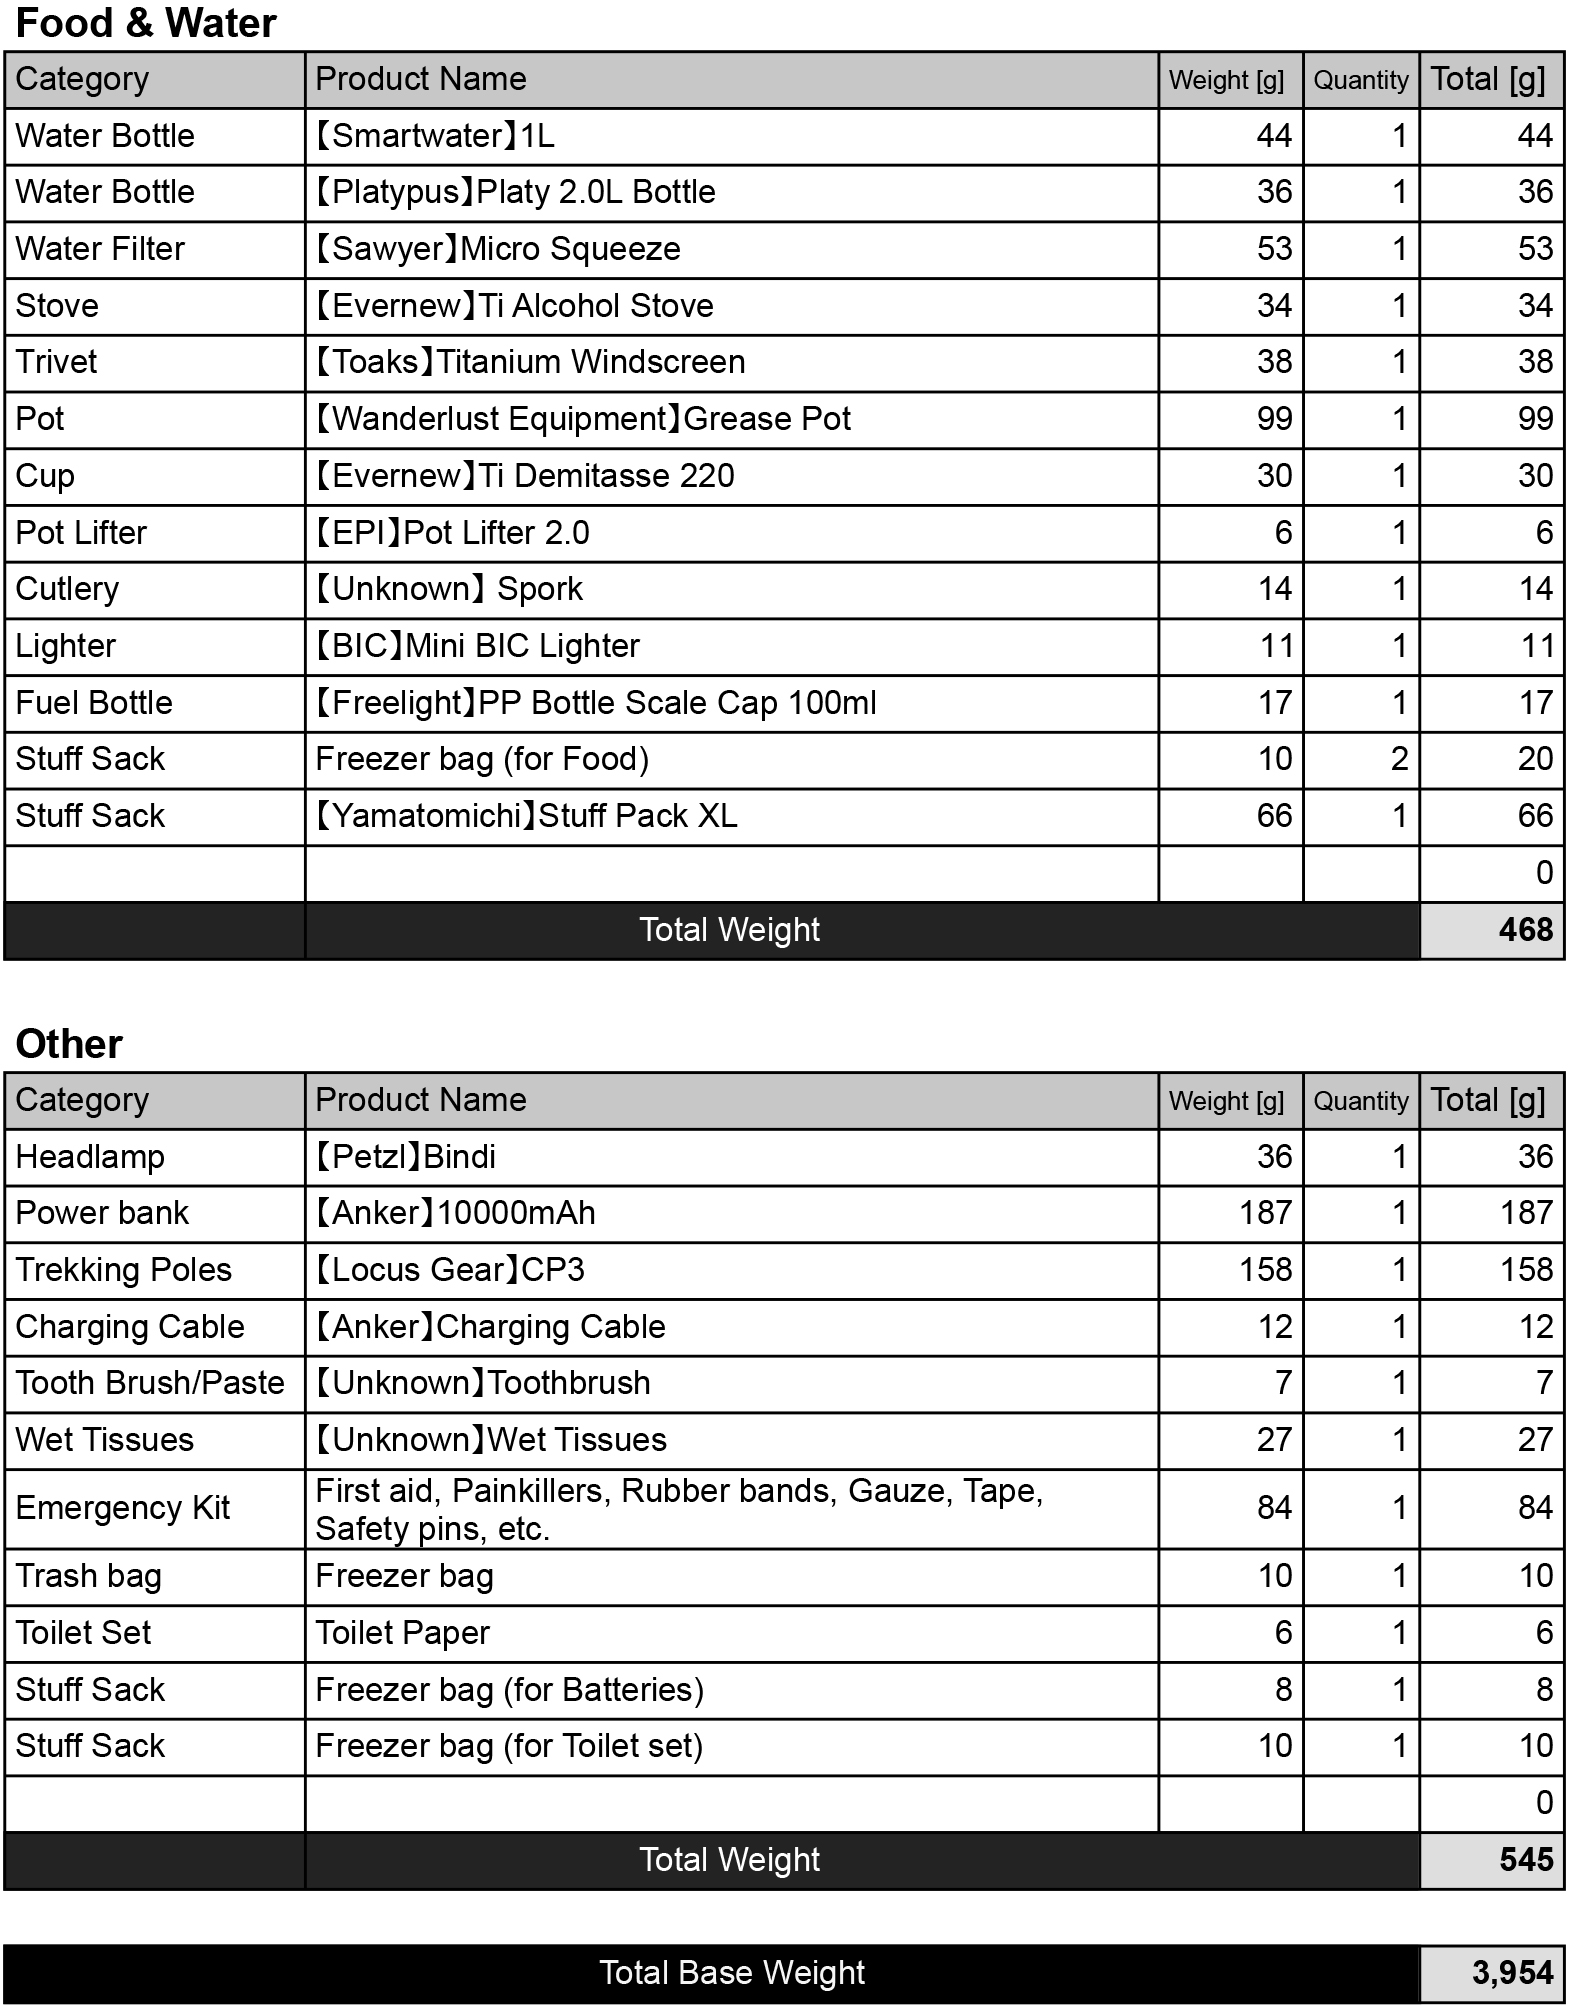
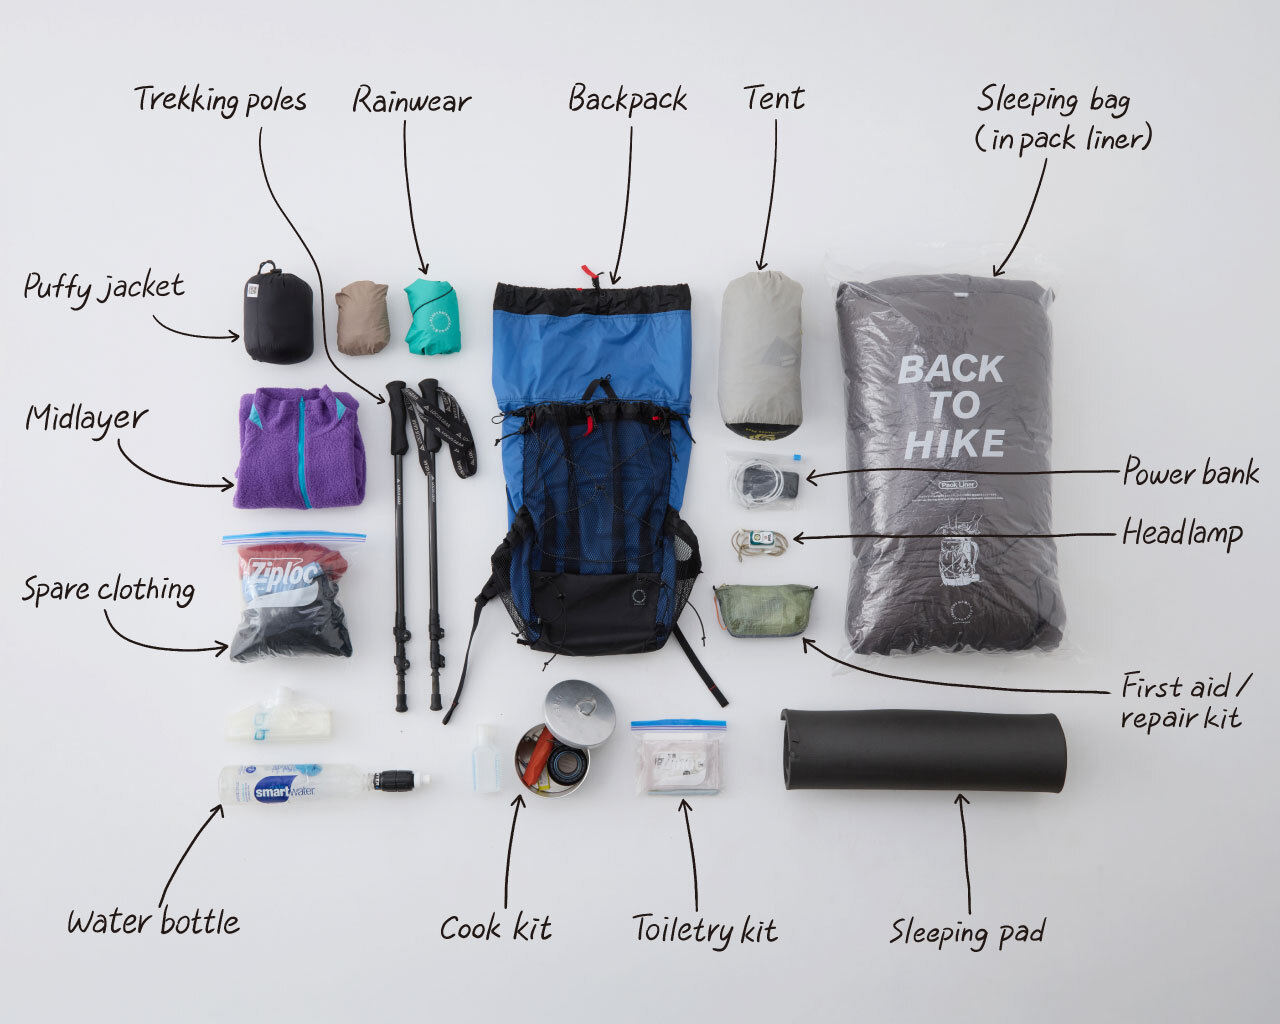
When you know how much you are carrying, what you are carrying, and why, you can make better decisions about what belongs in your pack. One of the best ways to build that understanding is by making a gear list.
Make a gear list
Use a kitchen scale to weigh everything you plan to bring, and do it in as much detail as possible—down to your sleeping bag stuff sack, each individual stake, and everything inside your emergency kit. Small items add up faster than you think. Going lighter starts with knowing the numbers.
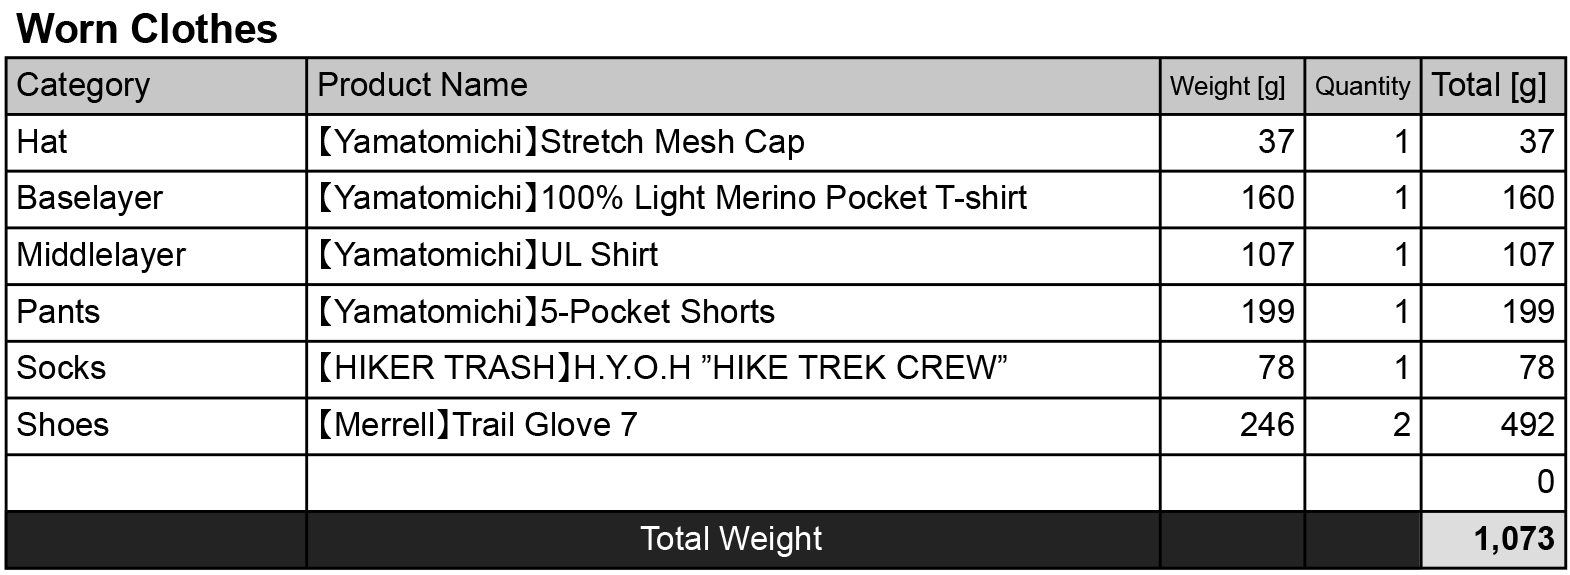
Then build a detailed gear list—a full breakdown of every item you plan to carry and how much it weighs. Leave out the things you will be wearing while you hike, such as your shoes, hat, and clothing, as well as consumables like water, food, and fuel.
The weight of your full kit excluding consumables is called your base weight. The total weight including consumables is called your pack weight. Because consumables change as you hike, base weight is the more useful benchmark when you are thinking about reducing pack weight.
Organize your gear list by category based on what each item is used for. A Google Sheets gear list is a simple and practical way to do this.
- Carry: backpack, stuff sacks, pack liners, hip packs
- Clothing: rainwear, insulation, spare clothes
- Sleep: tent, sleeping bag, sleeping pad, pillow
- Food and water: cookware, water filter, bottles, stove
- Other: headlamp, first aid supplies, small essentials
An example of a Yamatomichi staff gear list
Step 2: Consider
What kind of hiking do you want to do?
Start by getting clear on the kind of experience you are aiming for. Then look closely at your gear list and ask whether each item is truly necessary for this particular hike. As you think more deeply about what each piece of gear does and why you carry it, what really matters to you in hiking will gradually come into focus.
Know where you are right now
Knowing the weight of your gear is important. Just as important is knowing where you are right now, and how much comfort you need on the trail.
Think honestly about your fitness, your tolerance for cold, and what you have felt on past hikes—fatigue, cold, discomfort, or anything else that stood out. Those experiences are some of the best guides you have for deciding what you truly need and what you do not.
Knowing yourself, just like knowing your gear, is an essential part of the process of measuring, considering, and choosing.
The lightest gear is the gear you leave behind
When it comes to reducing weight, the most effective approach is simply not bringing something in the first place. No matter how light a piece of gear is, it will always be lighter left behind.
Simplifying your gear means separating what is truly necessary from the just-in-case items you bring for peace of mind, and the things you pack almost automatically out of habit or assumption. Are you carrying things you could take or leave without really thinking about it? If, after careful consideration, something is not necessary, stop and consider leaving it behind.
Work with nature
Carrying less does not mean taking on more risk. If anything, it is a creative way of responding to the challenges of nature with judgment and resourcefulness.
How can you make your gear work for the conditions around you? Thinking through how different items can work together is part of the challenge. It is also how you stay safe with less gear and experience the outdoors more directly.
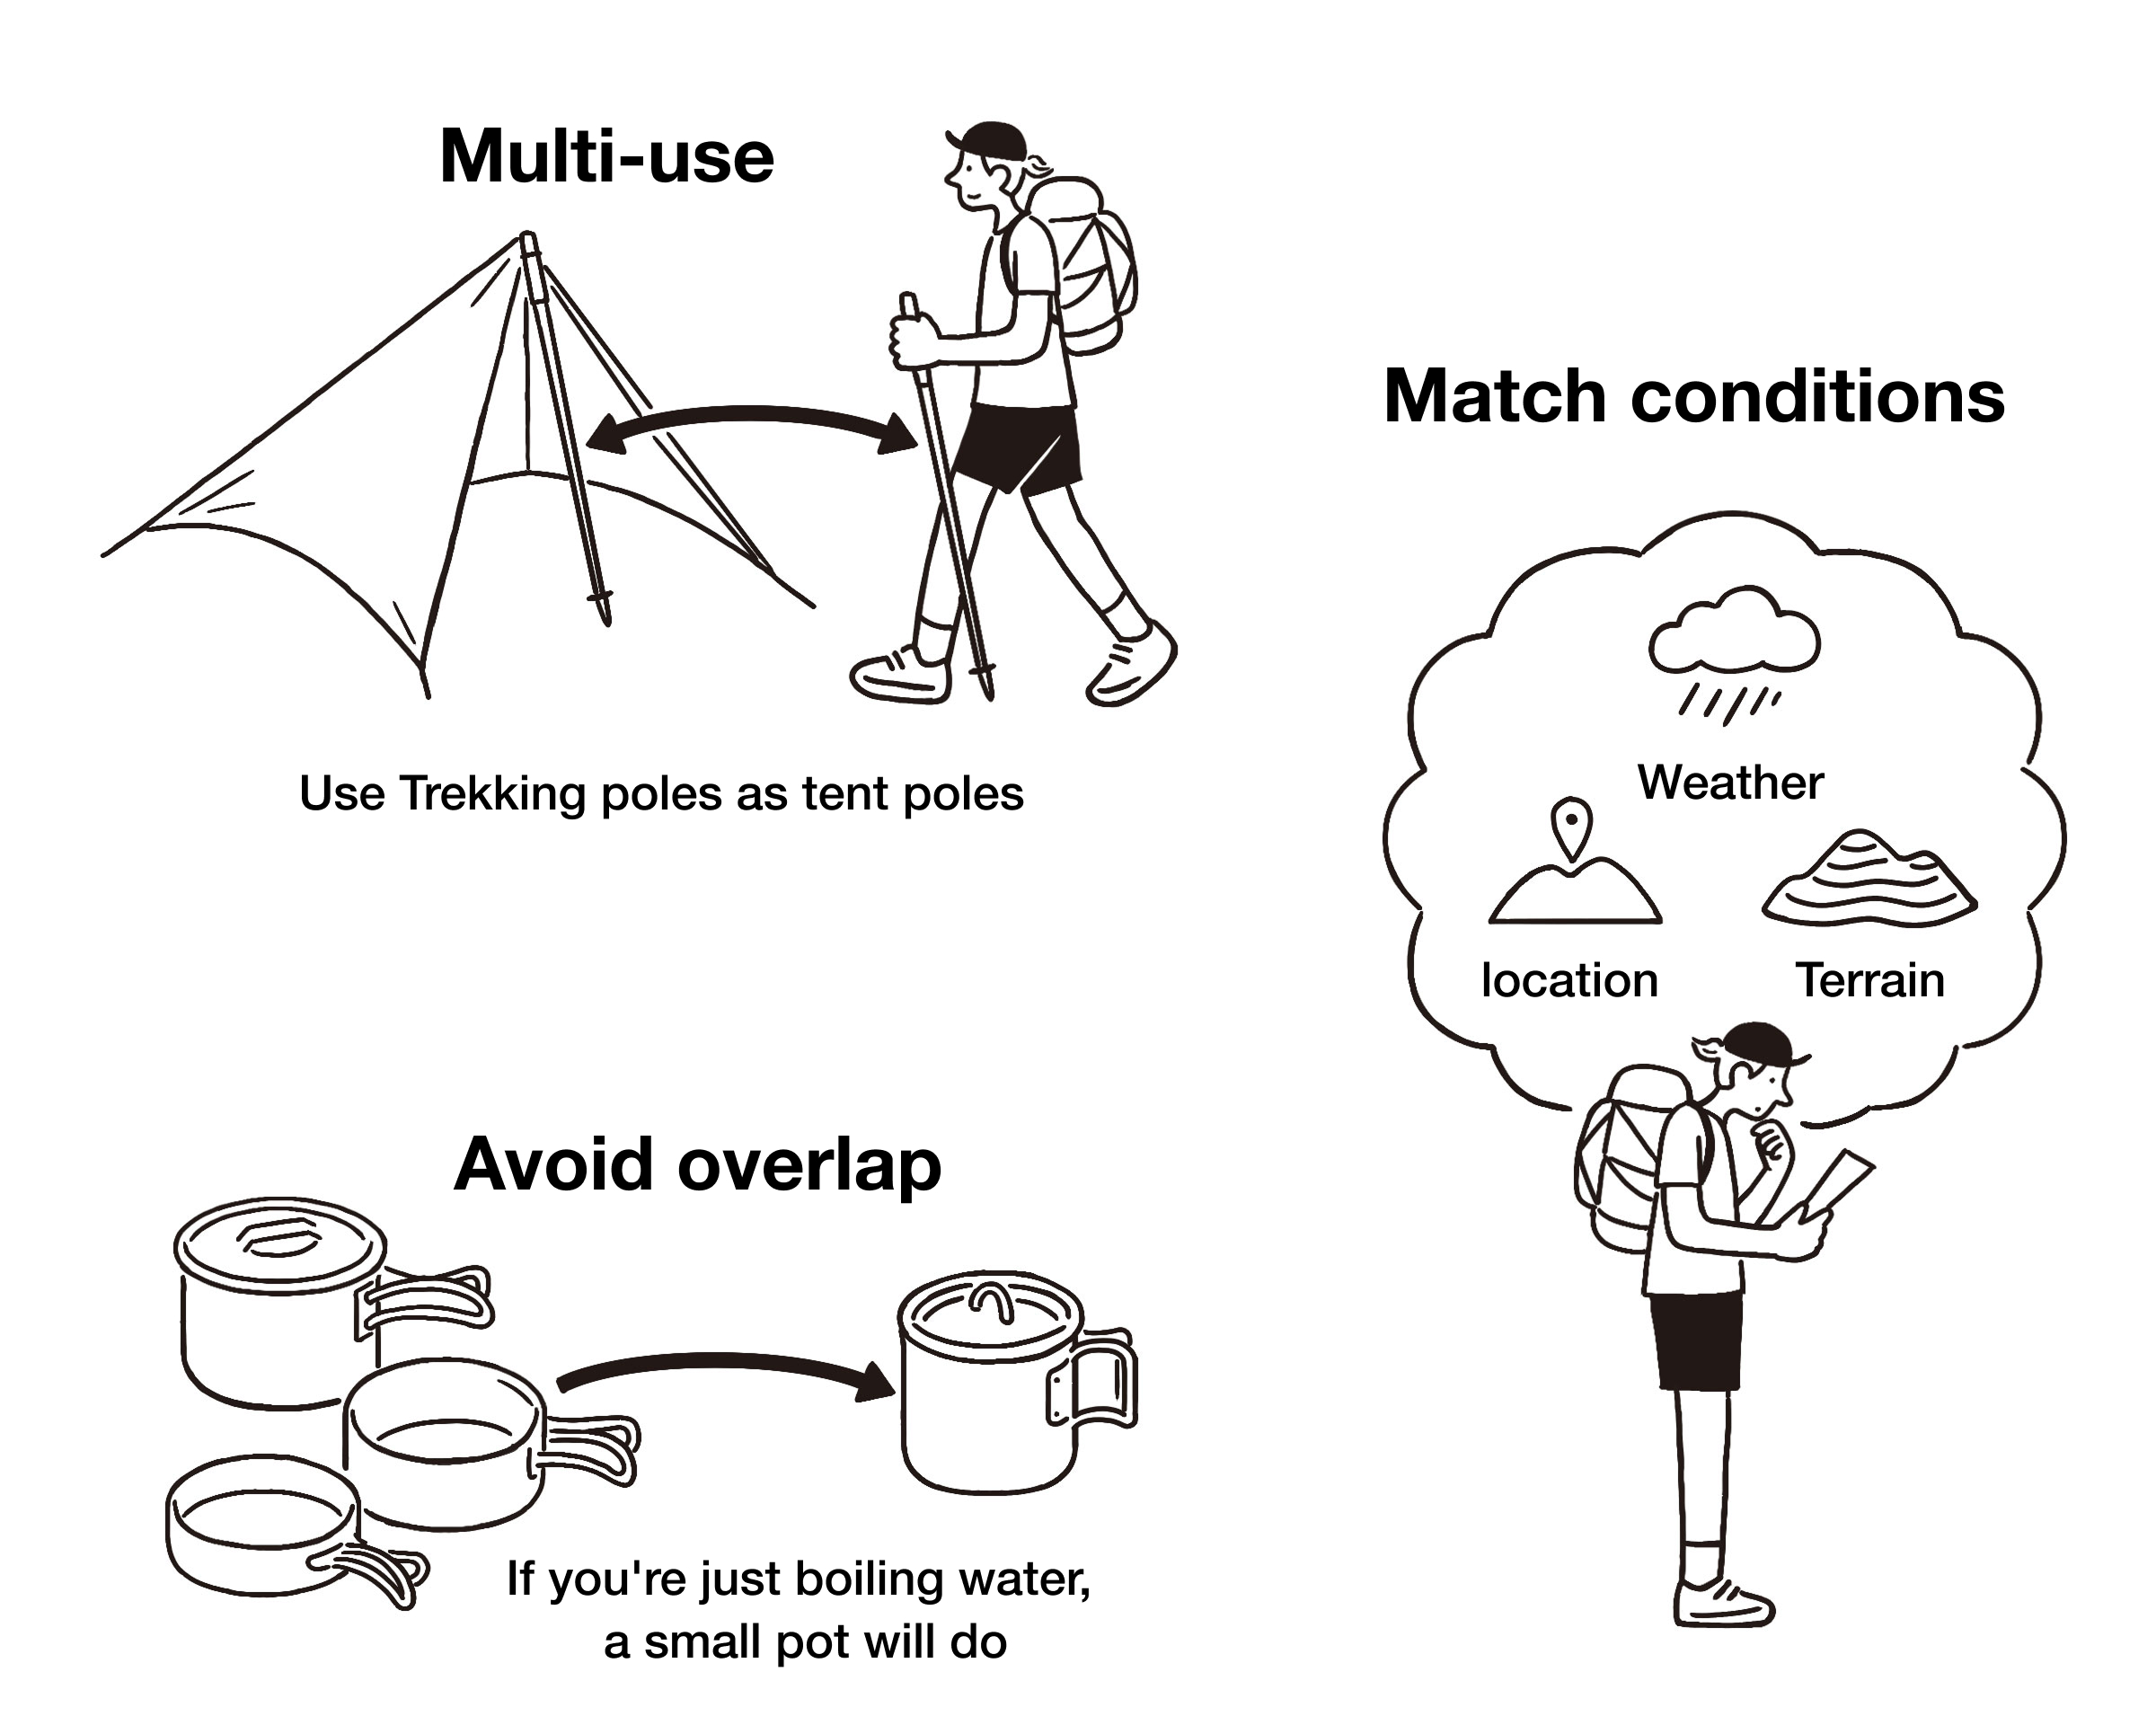
- Multi-use
If one item can serve two or more purposes, you can carry less overall. A trekking pole can double as tent poles. A stuff sack filled with clothing can become a pillow. - Avoid overlap
Look carefully for overlap in your kit. Are there multiple items serving the same role, such as extra insulation or redundant cookware? The key is learning to subtract: if one item covers the job, another may not be needed. - Match conditions
Going lighter is not just about removing gear. It is about thinking carefully about where you are going—the temperature, weather, and terrain—and imagining how you will move through those conditions.For example, once you understand layering and the role wind plays in making you feel cold, you can do more with less. A lightweight shell for blocking wind, paired with light insulation for warmth, can form a system that works across a wide range of temperatures. By combining pieces thoughtfully, you can adapt to changing conditions without carrying unnecessary backups.
Step 3: Choose
Once you have stepped back, looked over your gear list, and gotten clear on what you really need, it is time to start choosing specific gear.
This is a creative process. As you imagine how you want to move and live in the mountains, each choice helps shape a freer way of hiking.
Start with the heaviest pieces
When choosing gear, start with the pieces that account for the most weight and bulk, such as your shelter and backpack. These are the choices that will have the biggest impact on your overall pack weight.
For example, switching from a standard rain jacket to a lighter model might save only 100 to 200 grams. But choosing a 500 g floorless shelter instead of a 1.5 kg double-wall tent saves 1 kg. Choosing a 500 g frameless backpack instead of a 2 kg framed backpack saves 1.5 kg. Starting with the heavier, bulkier pieces is where the biggest gains are.
That said, your sleeping bag deserves a different kind of judgment. It is one of your last lines of defense against the cold. Until you have enough experience to understand your own tolerance, do not judge it by weight alone. This is one of the places that caution matters more than cutting grams.

Let weight guide your choices
When choosing gear, it is important to gather information and compare your options carefully. If two items offer the same function, warmth, or durability, the lighter one is usually the better choice—if your budget and timing allow for it. But going lighter does not always mean spending more. Sometimes it means making better use of what you already have, modifying your gear, or finding a simpler, cheaper option through a bit of creativity.
Looking at materials, construction, and design is part of the pleasure of ultralight hiking. There is real satisfaction in understanding how stripped-down gear is designed to do its job with nothing extra. That understanding, in turn, can refine the way you move in the mountains.
Lay it all out one last time
Before you head out, lay all of your gear in front of you and look at it one more time. Even after all the weighing, considering, and choosing, this final check matters. Ask yourself, item by item: do I really need this?
When you see everything laid out at once, excess becomes easier to spot. And if there is something you choose to bring simply for peace of mind, that is a choice too. What matters is knowing why it is there. That last round of questioning is a crucial part of going lighter.
Once the hike is over, look again at what you used and what you did not. That reflection will shape what you carry next time.
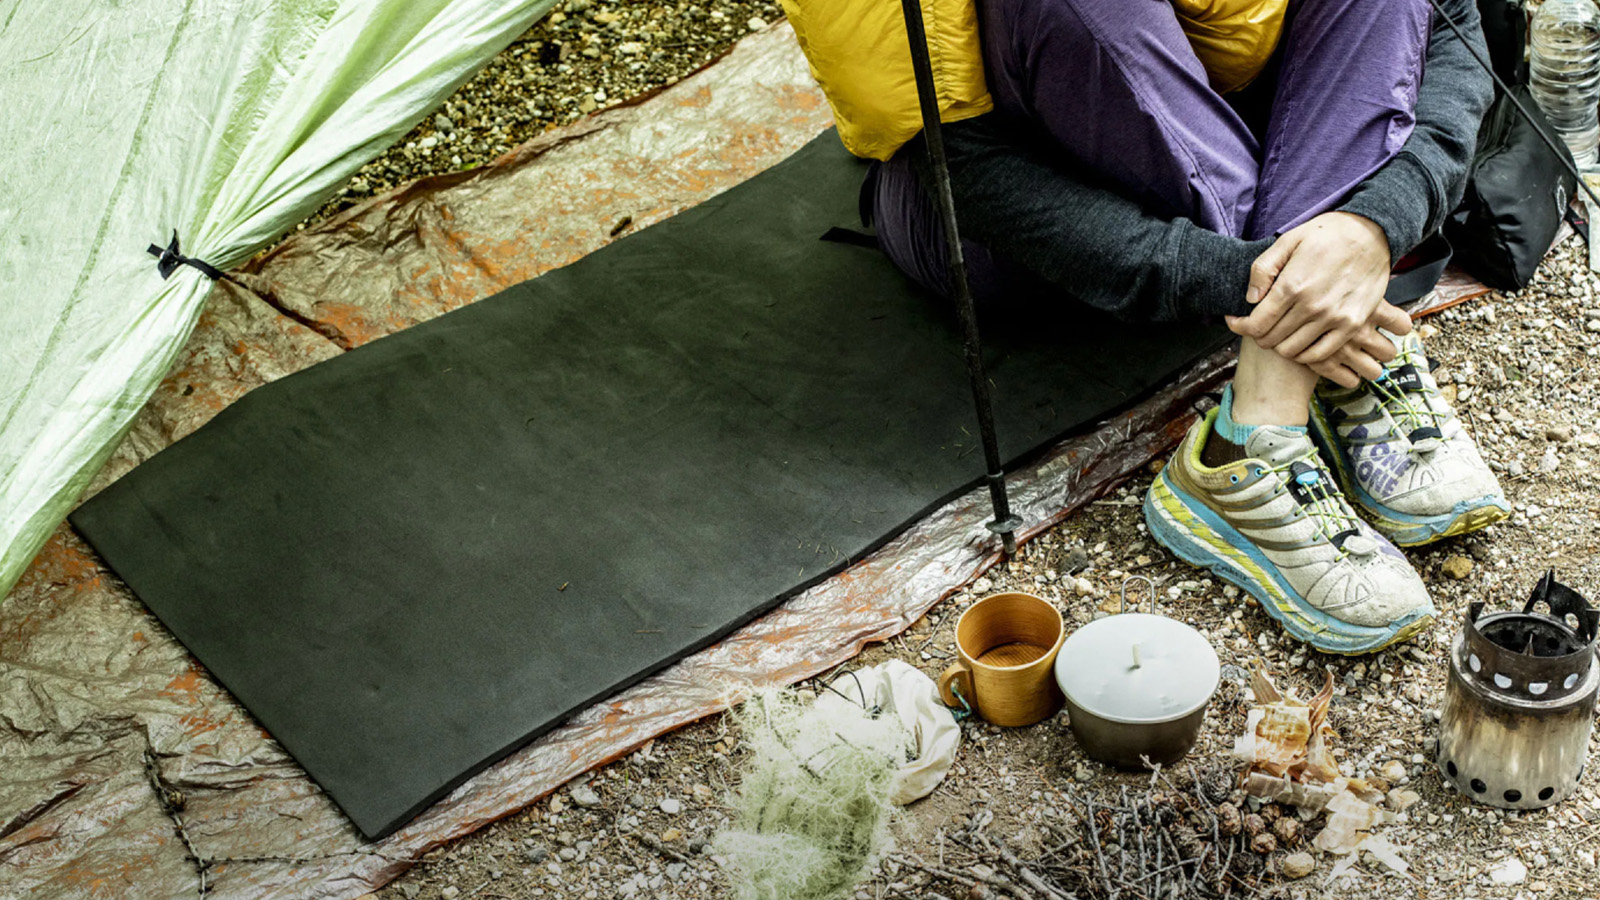
An example of an ultralight setup
Step 4: Test
Now that you have packed your carefully chosen gear, it’s time to hit the trail.
This is where your choices stop being ideas on paper and become something real. Out on the trail, your gear begins to reveal its strengths and weaknesses through movement, weather, fatigue, and changing conditions. This is how knowledge becomes experience.
Learn from trouble
Unexpected things happen outdoors. Gear breaks. Something you thought you needed turns out not to matter, or something you left behind suddenly does. These are the moments when judgment and ingenuity matter most.
Working through small problems with your own experience and skill deepens your understanding of hiking and helps you grow into a more self-reliant hiker.
Carry less. Go further.
As you refine your gear and head out with only what you truly need, you begin to realize that comfort and closeness to nature can go hand in hand. The boundary between everyday life and nature begins to soften, and the world starts to feel less divided.
That confidence is your own—not something handed to you, but something built through experience, choice, and practice.
Know your gear, carry less, go farther.
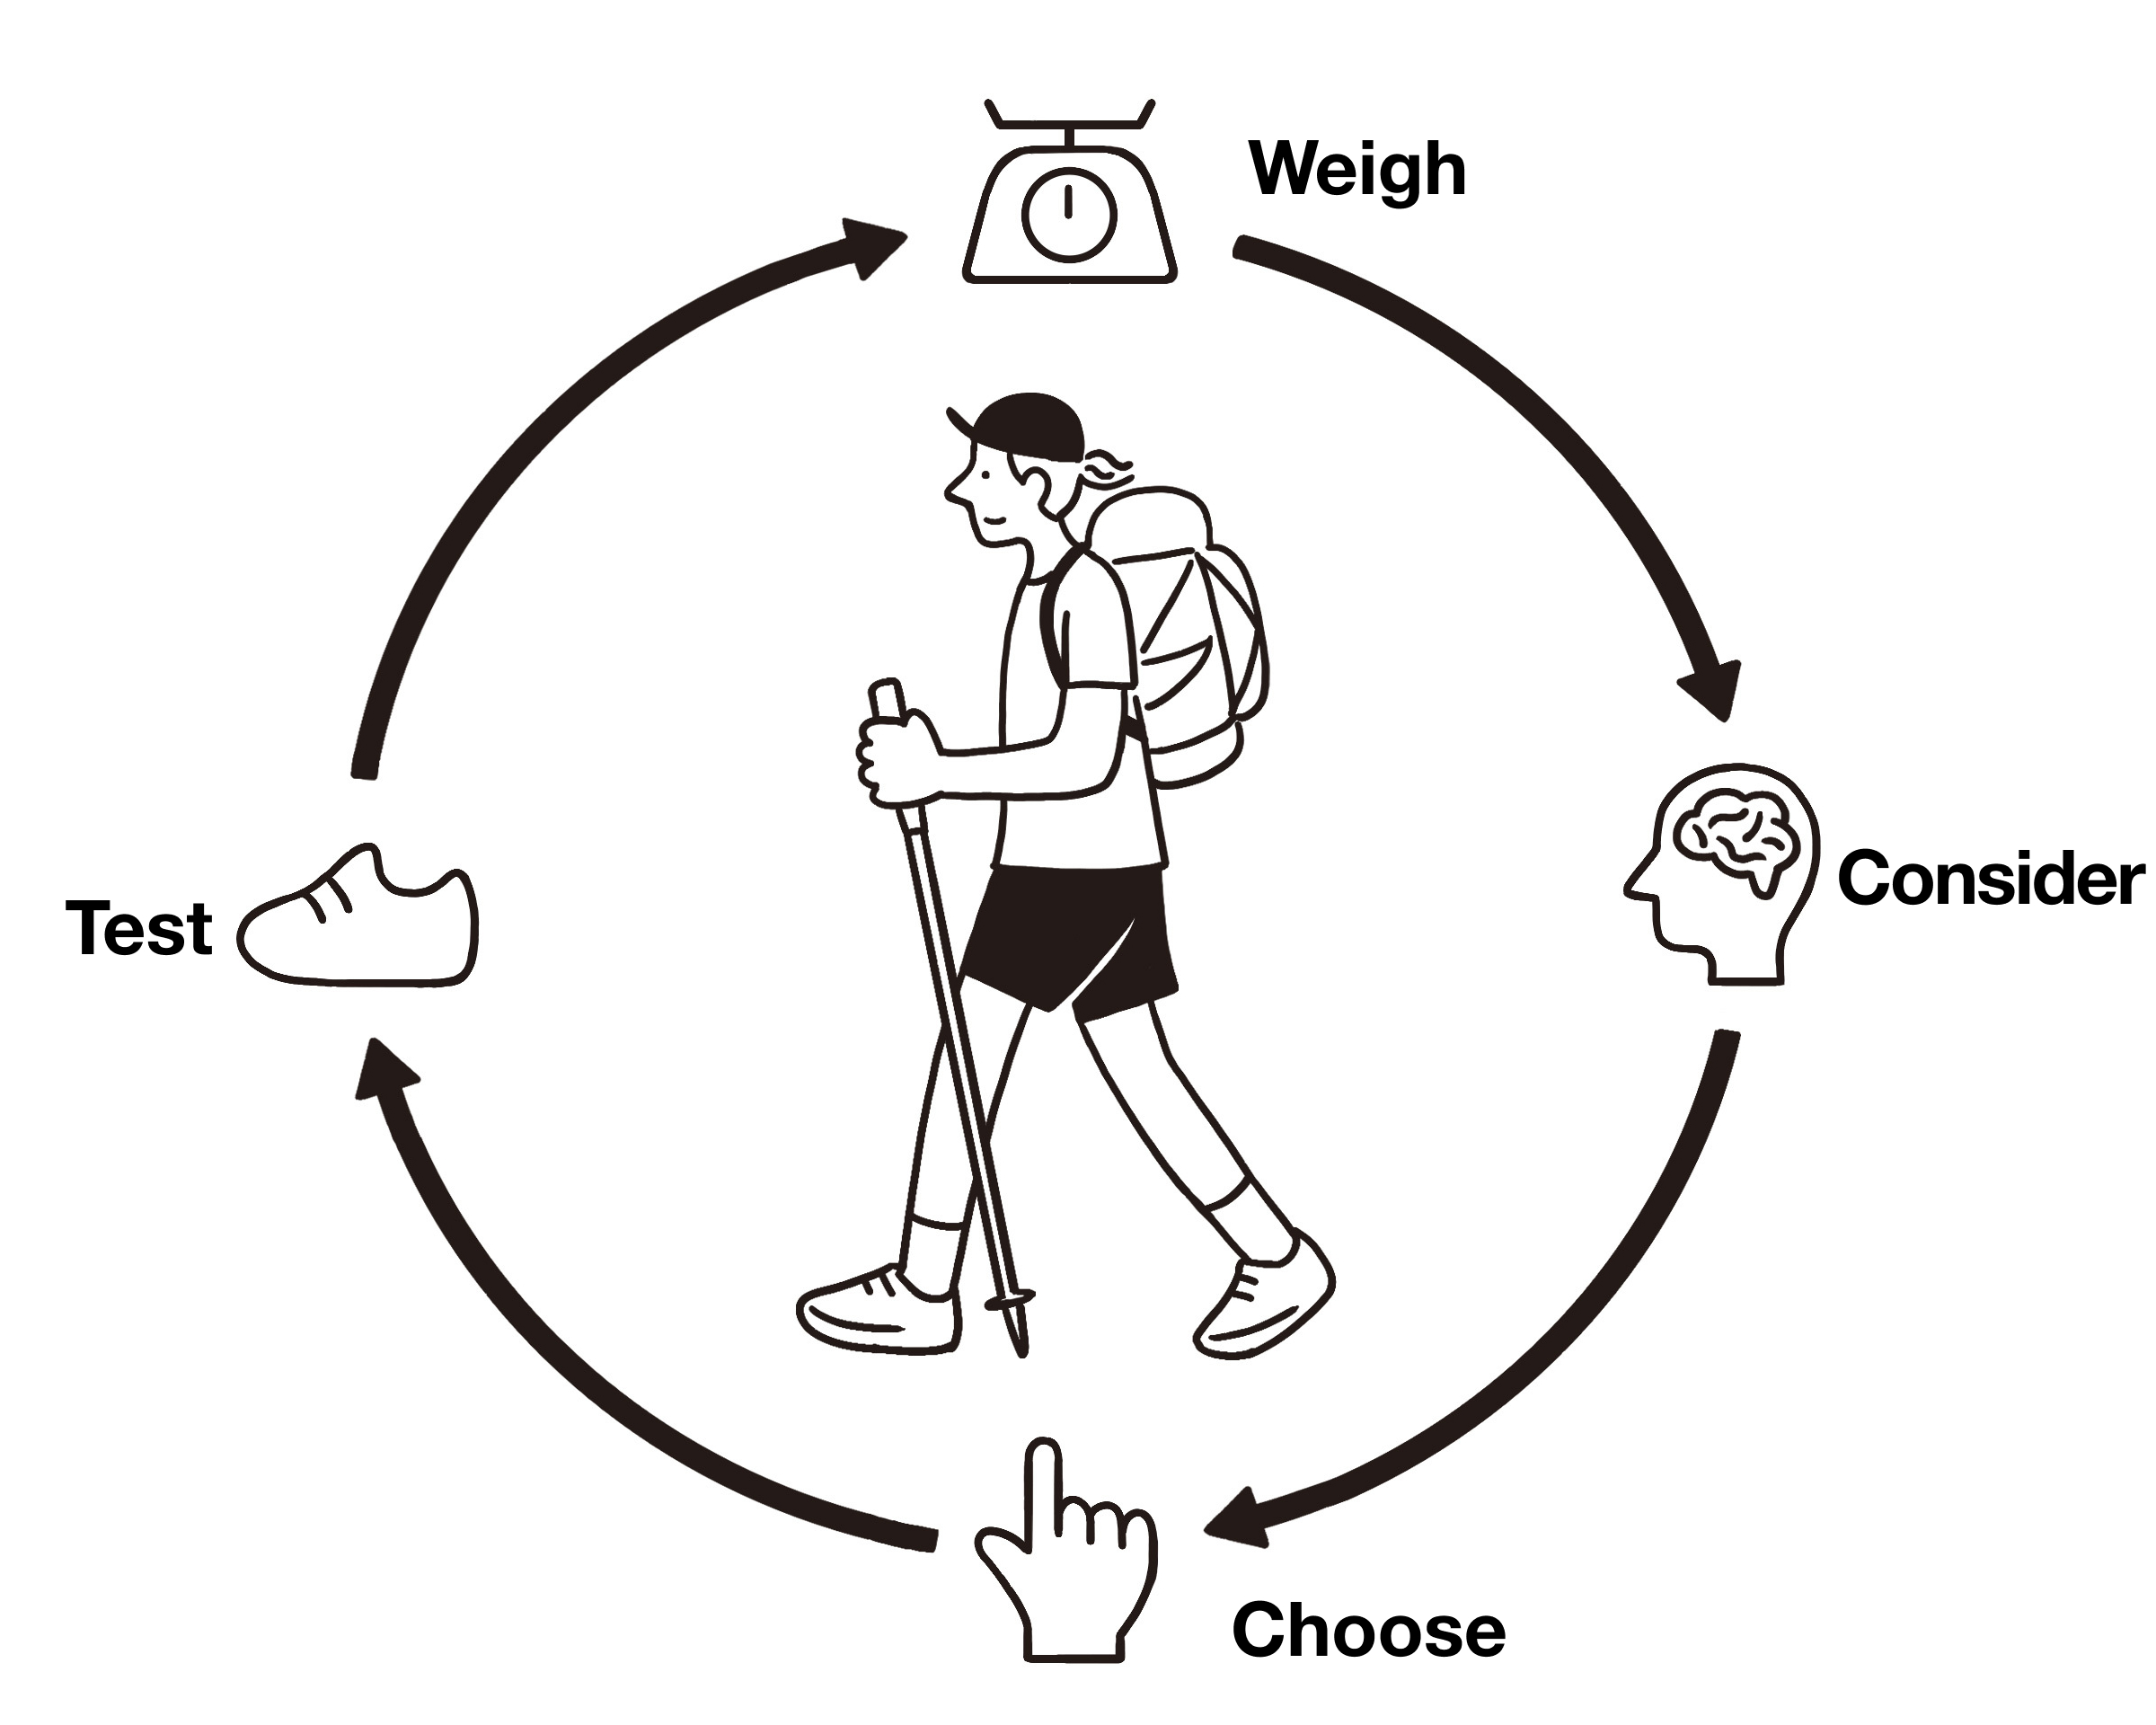
Repeat the cycle
Once your hike is over, look again at what you used and what you did not. Then return to the four steps—weigh, consider, choose, and test. With each cycle, your gear becomes more refined, and your own style of hiking begins to take shape.
Ultralight hiking tips and tricks
Repackage
Don’t carry items in their original packaging. Take only what you need and repackage them into lightweight, transparent zip bags. Do the same with food and fuel—calculate the exact amount based on your plan and bring only what’s necessary to avoid excess.
It’s also helpful to note cooking instructions and expiration dates from the packaging, or simply take a photo on your phone for reference.
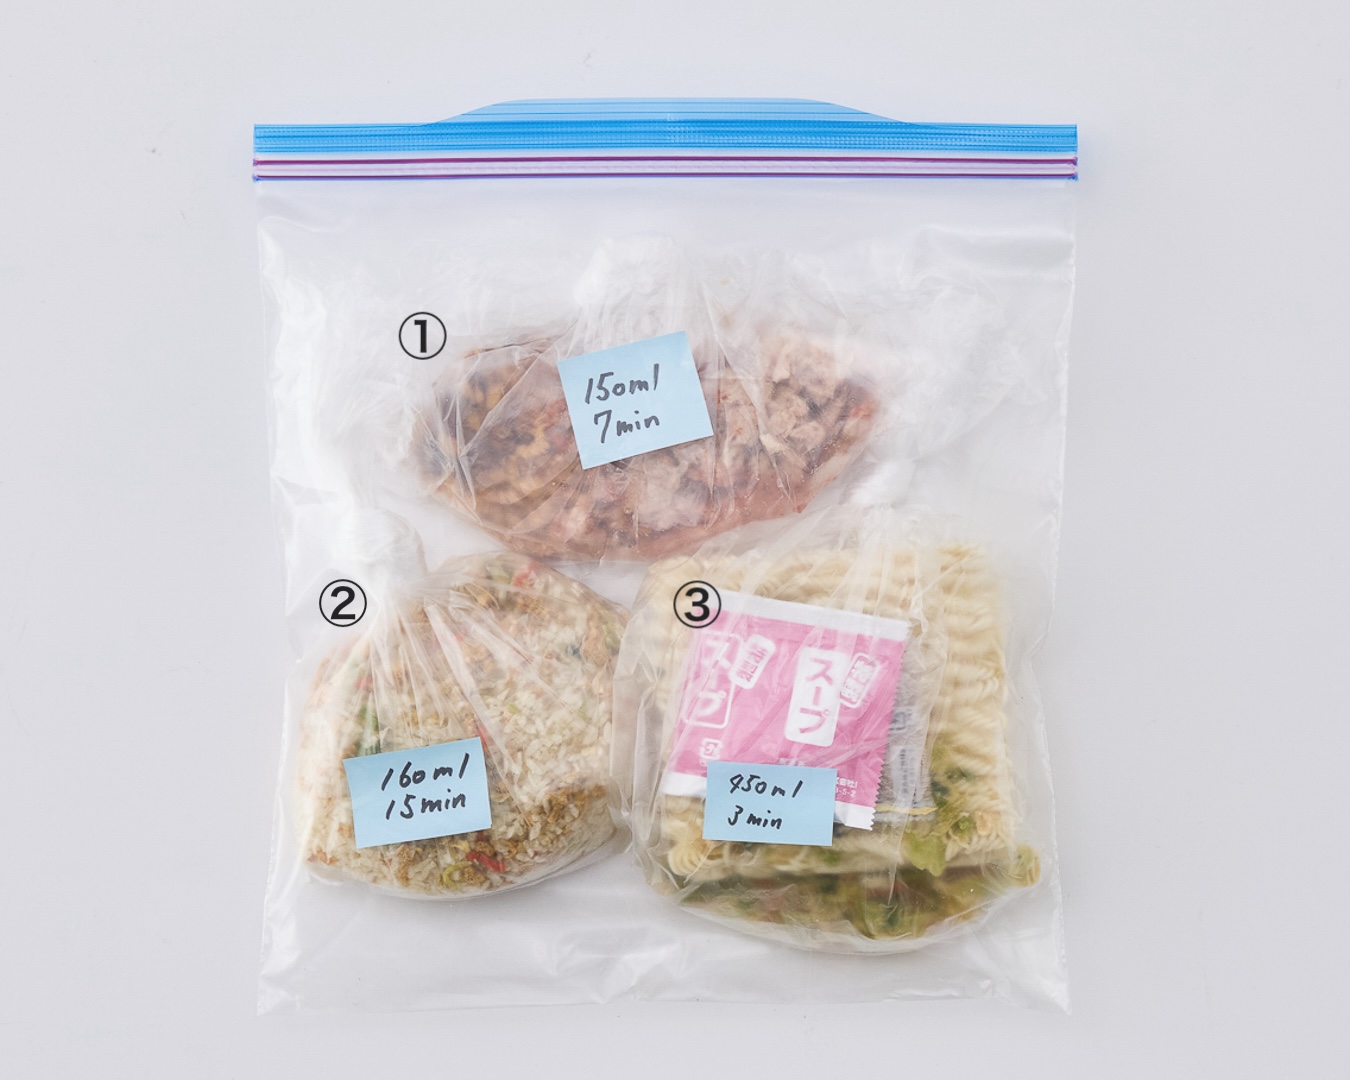
For example, repackage three days’ worth of dinners into individual lightweight bags, then store them together in a larger zip bag.
- Couscous, soup base, freeze-dried tomatoes, canned tuna
- Instant rice, curry powder, freeze-dried vegetables, soy meat
- Instant ramen, included soup and seasoning packets, freeze-dried vegetables
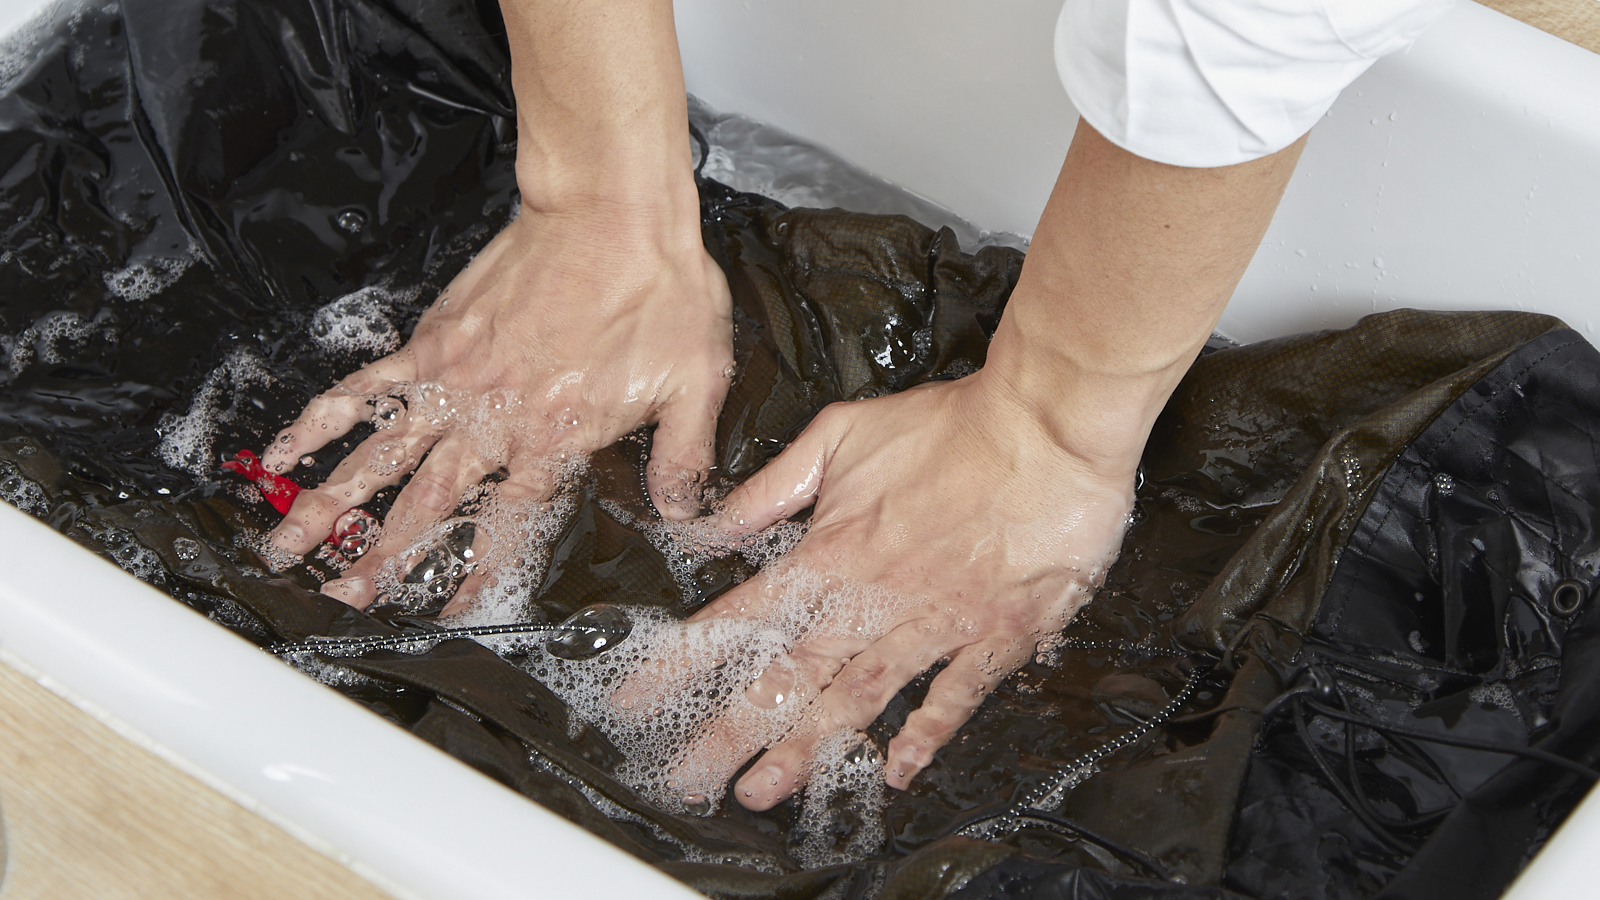
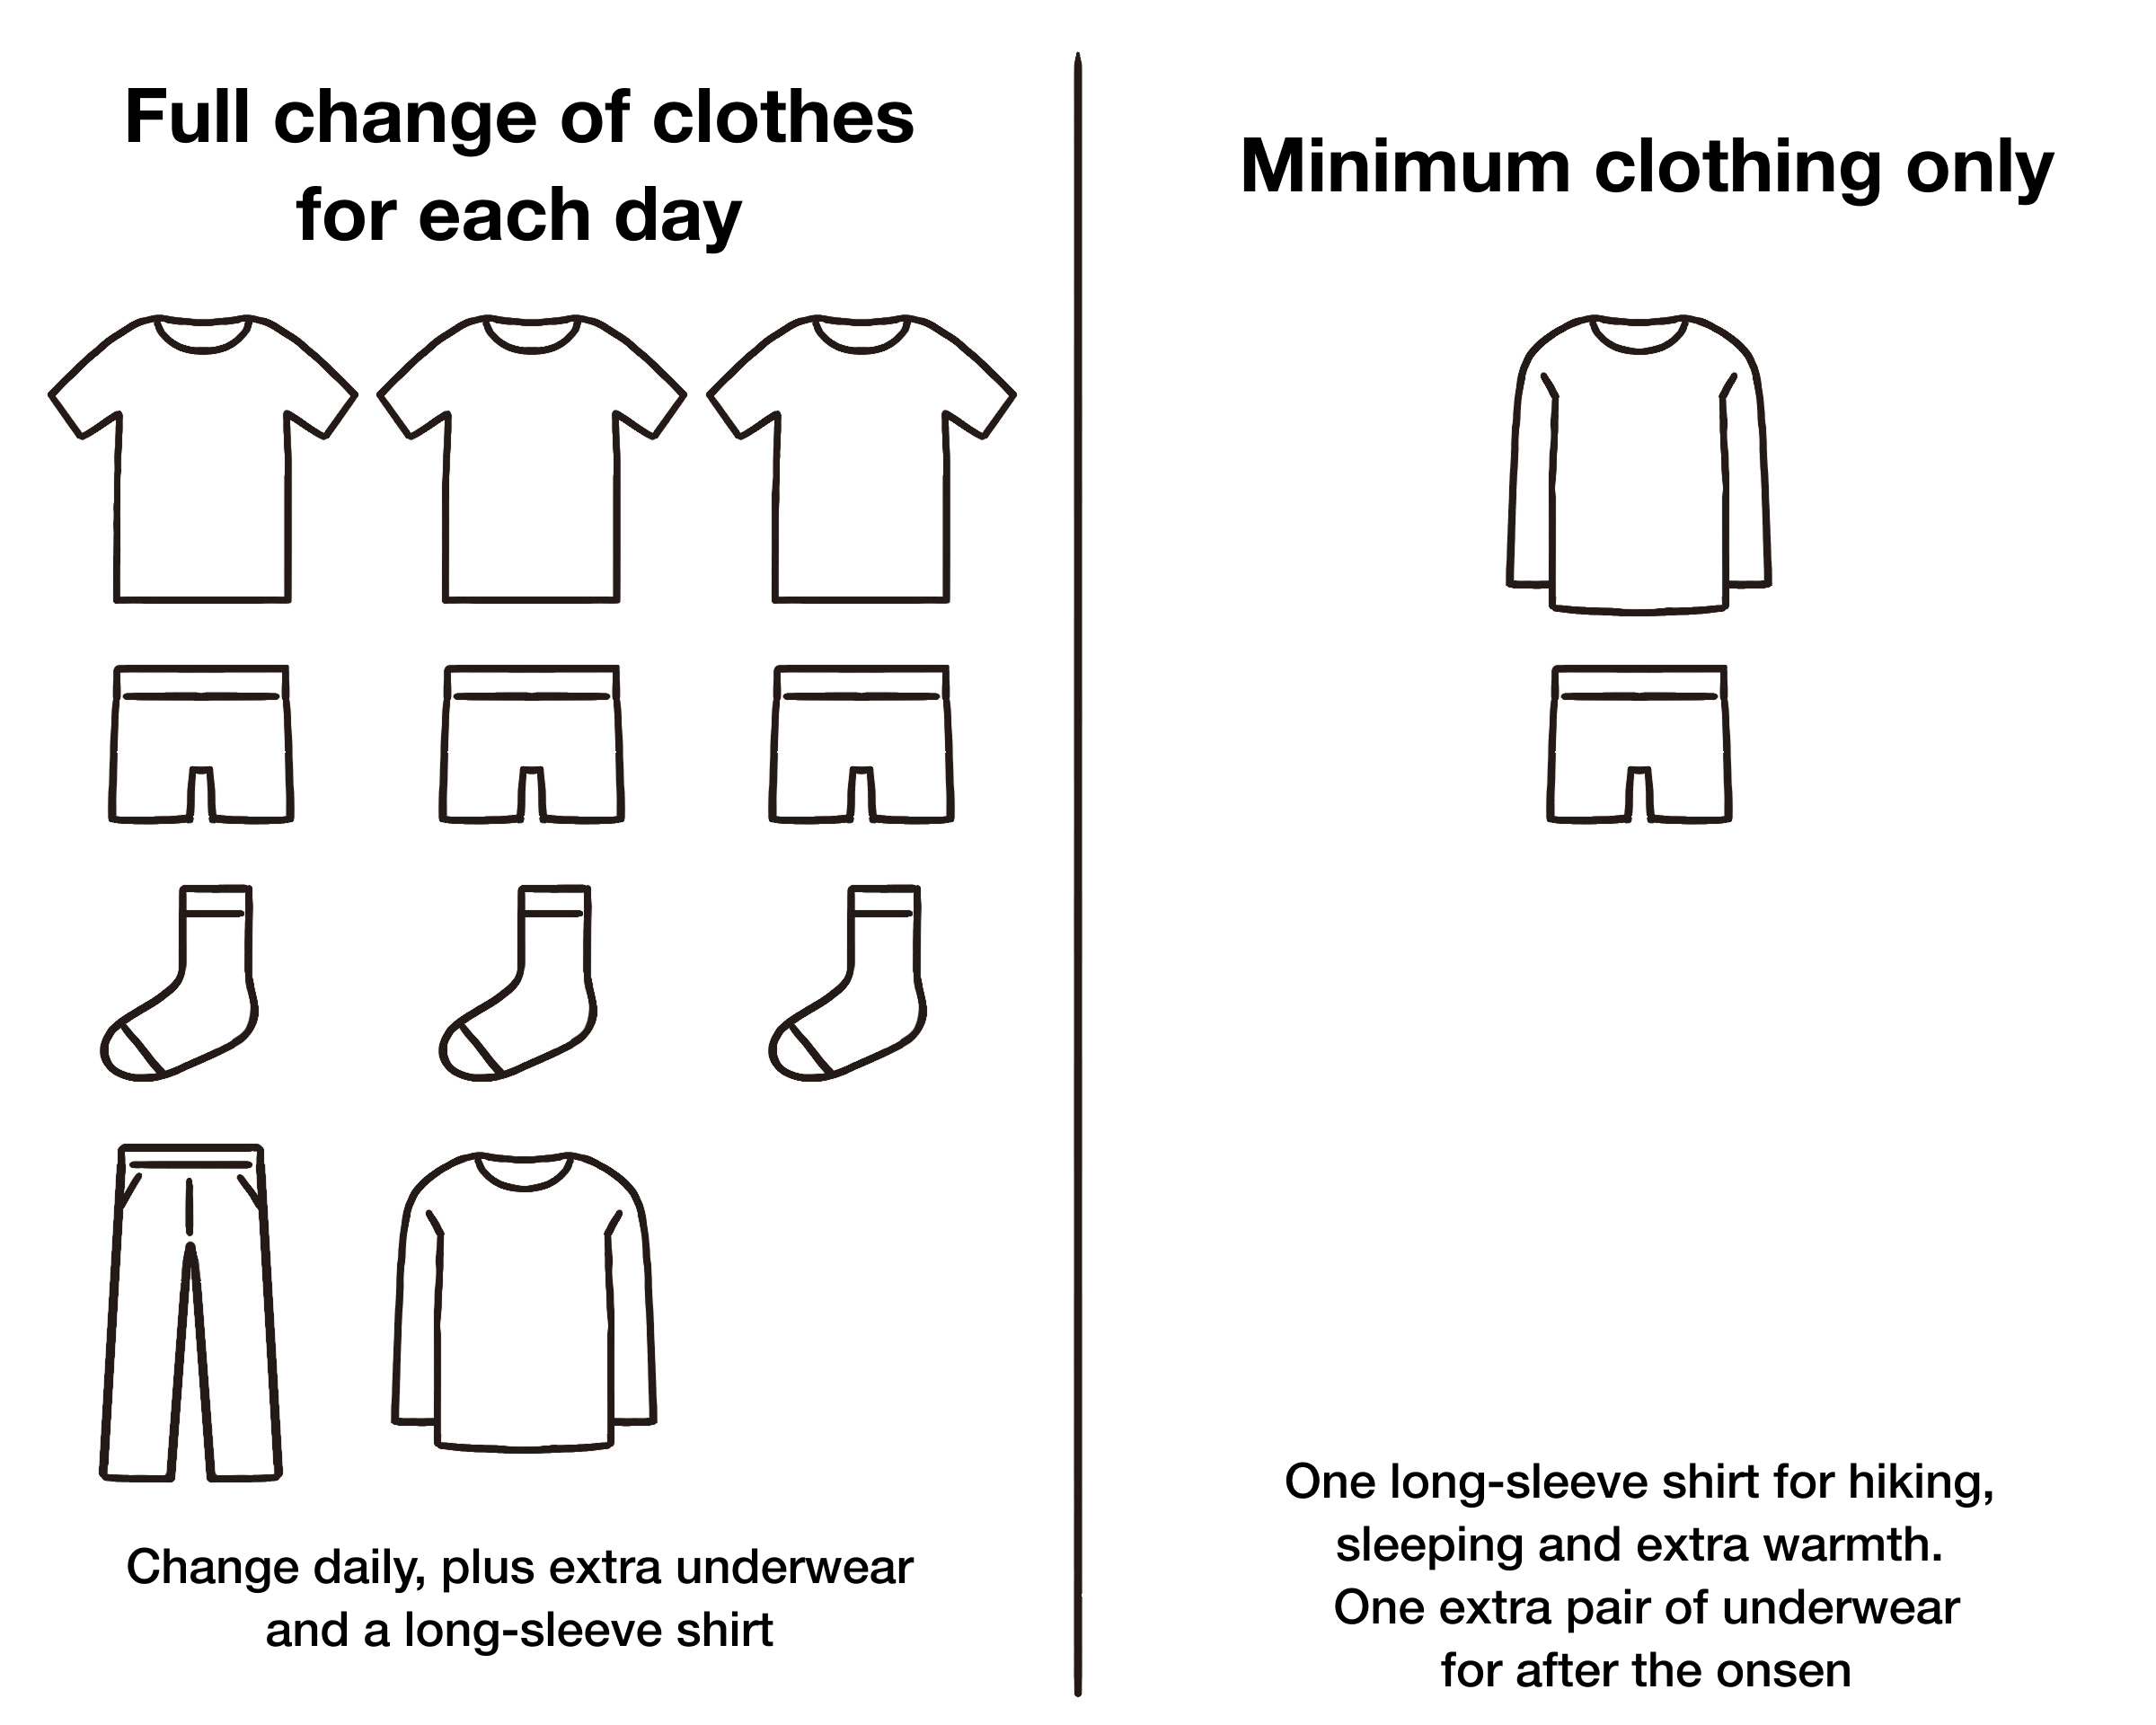
Carry fewer spare clothes
Choose odor-resistant materials like merino wool, or clothing that dries quickly after washing. That way, you can wear the same pieces for several days and may not need to carry spare clothes at all.
How you pack matters
With a frameless backpack, proper packing is essential for a comfortable hike. It is also another place where the idea of multi-use comes into play. A sleeping pad, for example, can be rolled into a cylinder or placed against the back panel to give the pack structure and create a virtual frame. Where you place each item—based on its weight and how often you will need it—can dramatically change how the pack feels on your back.
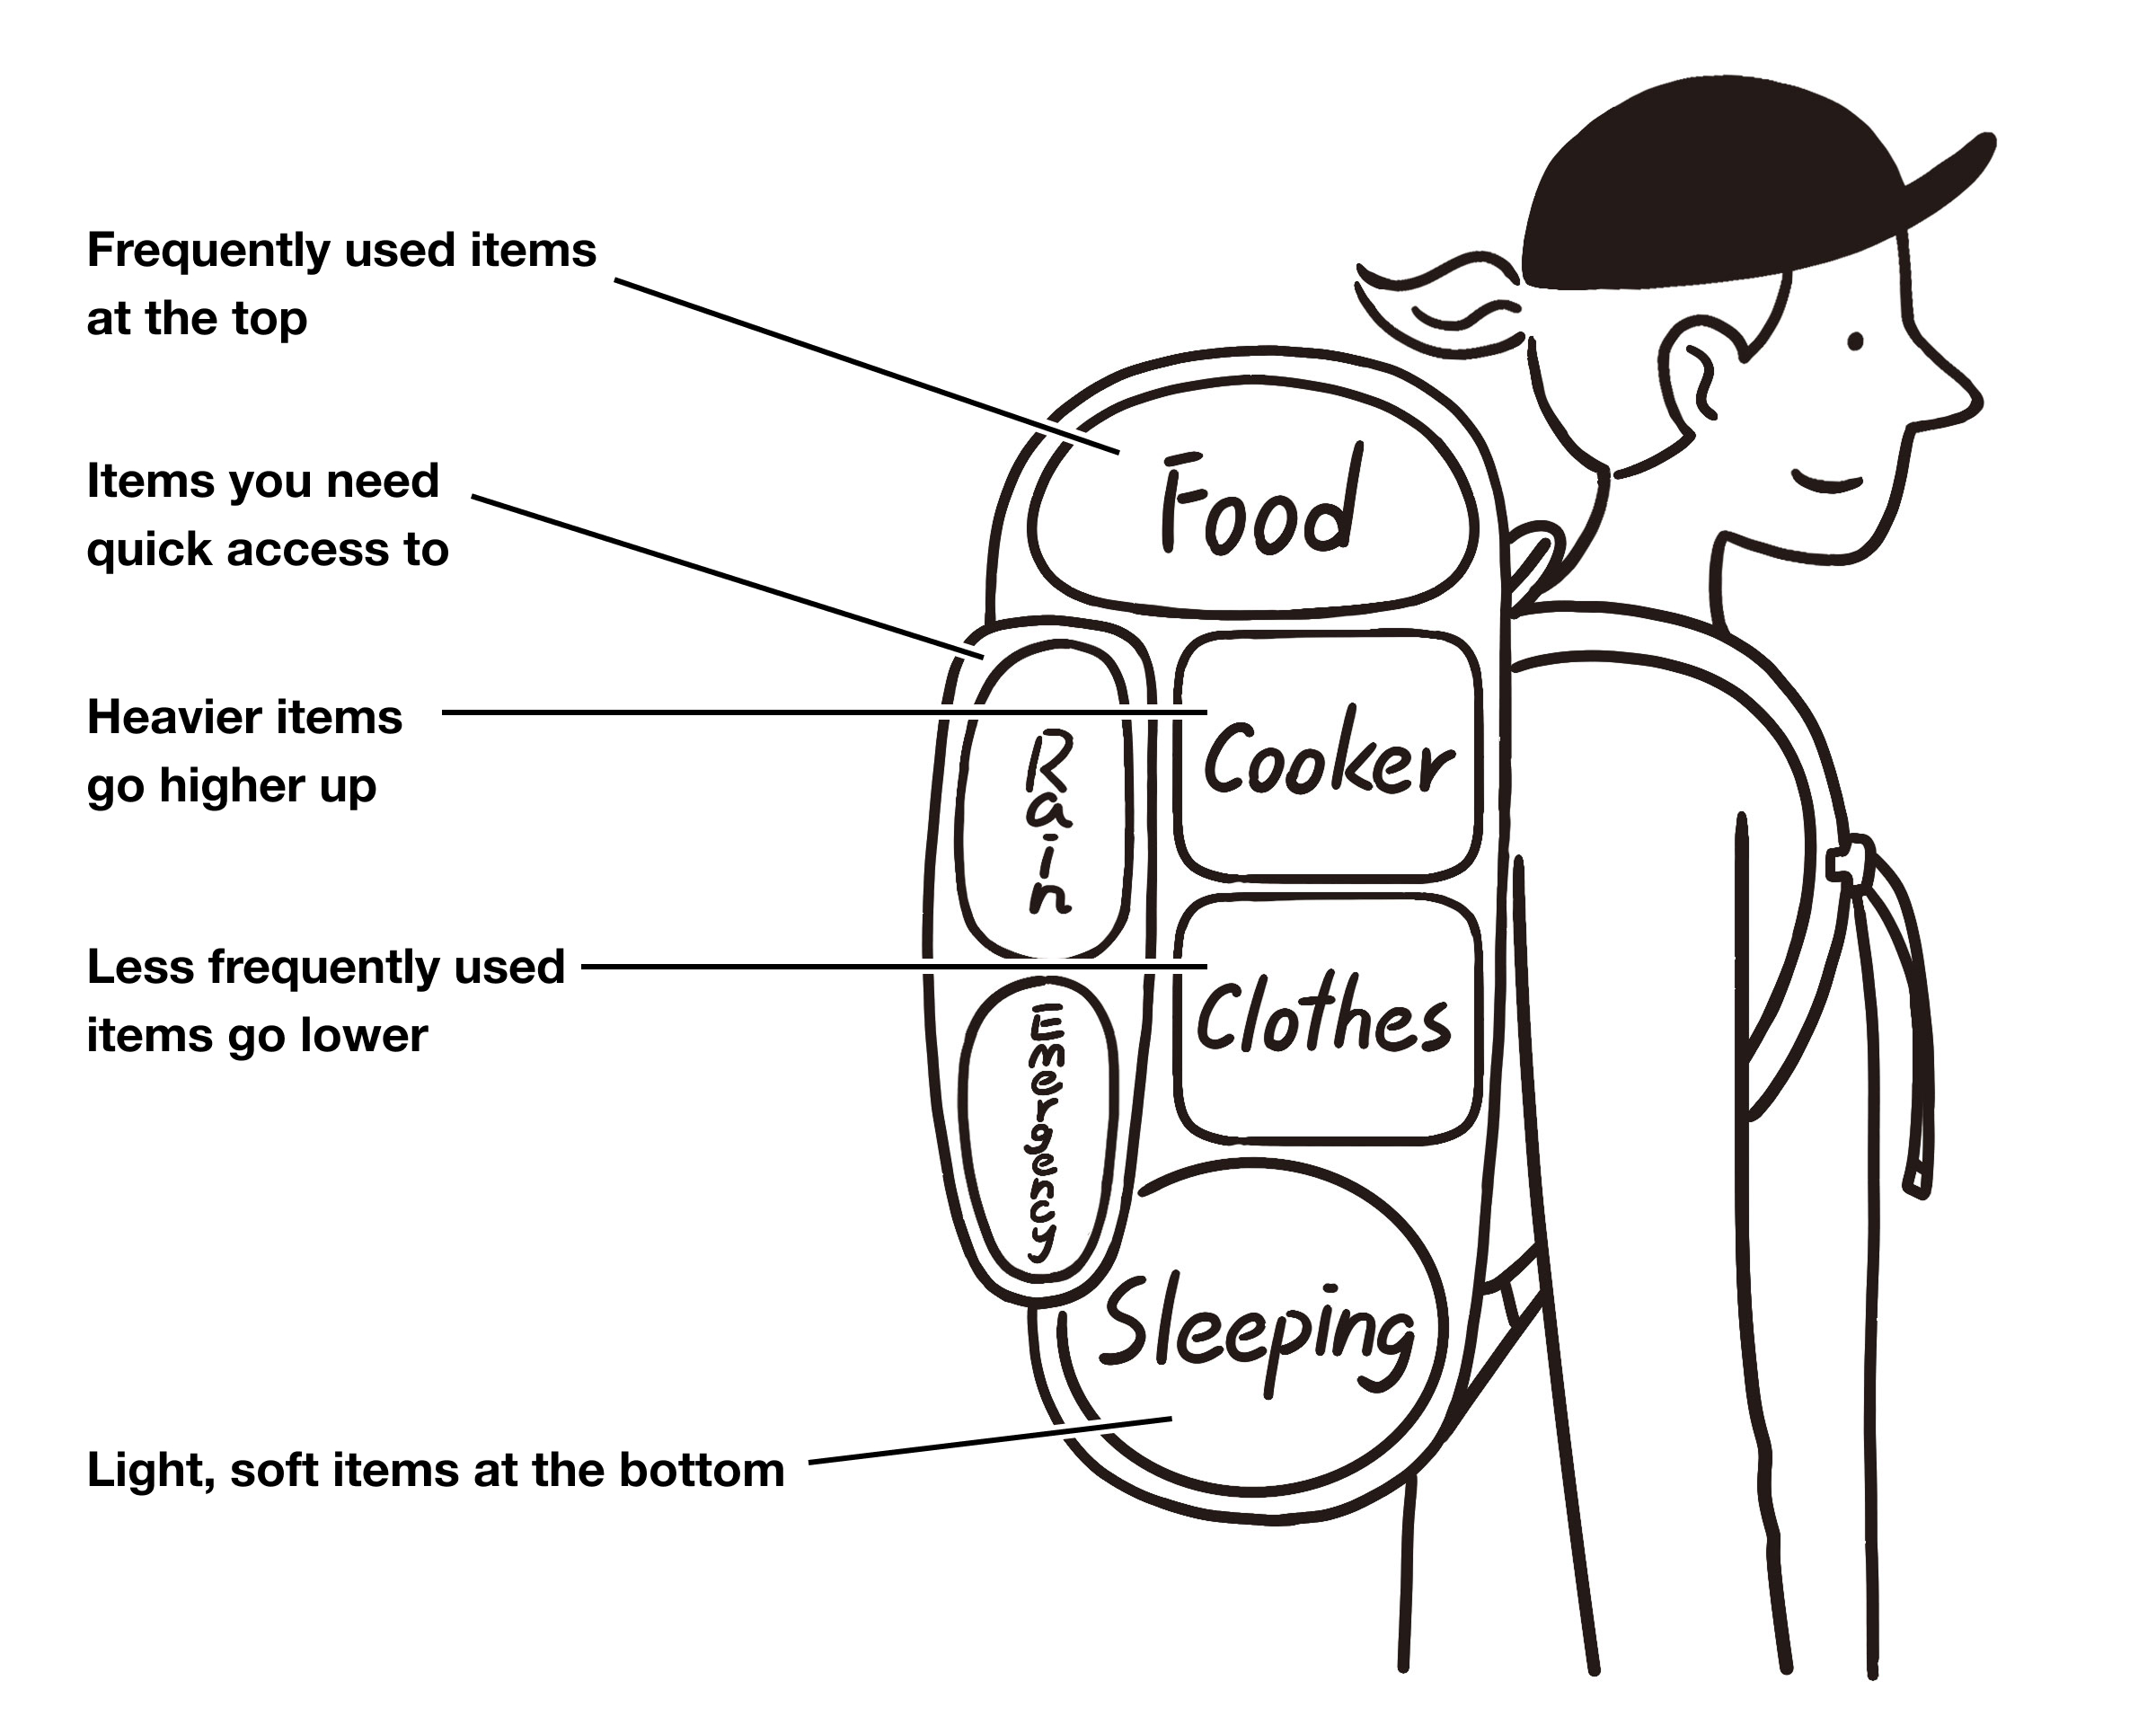
Choose a smaller backpack
Another useful approach is to begin with a smaller backpack on purpose. Limiting yourself to what fits inside naturally encourages more thoughtful packing and more creative ways to make each item serve more than one purpose.
What to carry in your emergency kit
The key to an emergency kit is simple: do not carry anything you do not know how to use, and do not carry more than you need for the length of your trip.
Gear can break on the trail, especially lightweight gear, so it is worth being prepared to make basic repairs in the field. A small repair kit—such as a little duct tape, a needle and thread, or a few repair patches—can help you deal with common problems without adding much weight.
The goal is not to pack for every possible fear. It is to be prepared for the problems you are most likely to face, with just the right amount of gear.
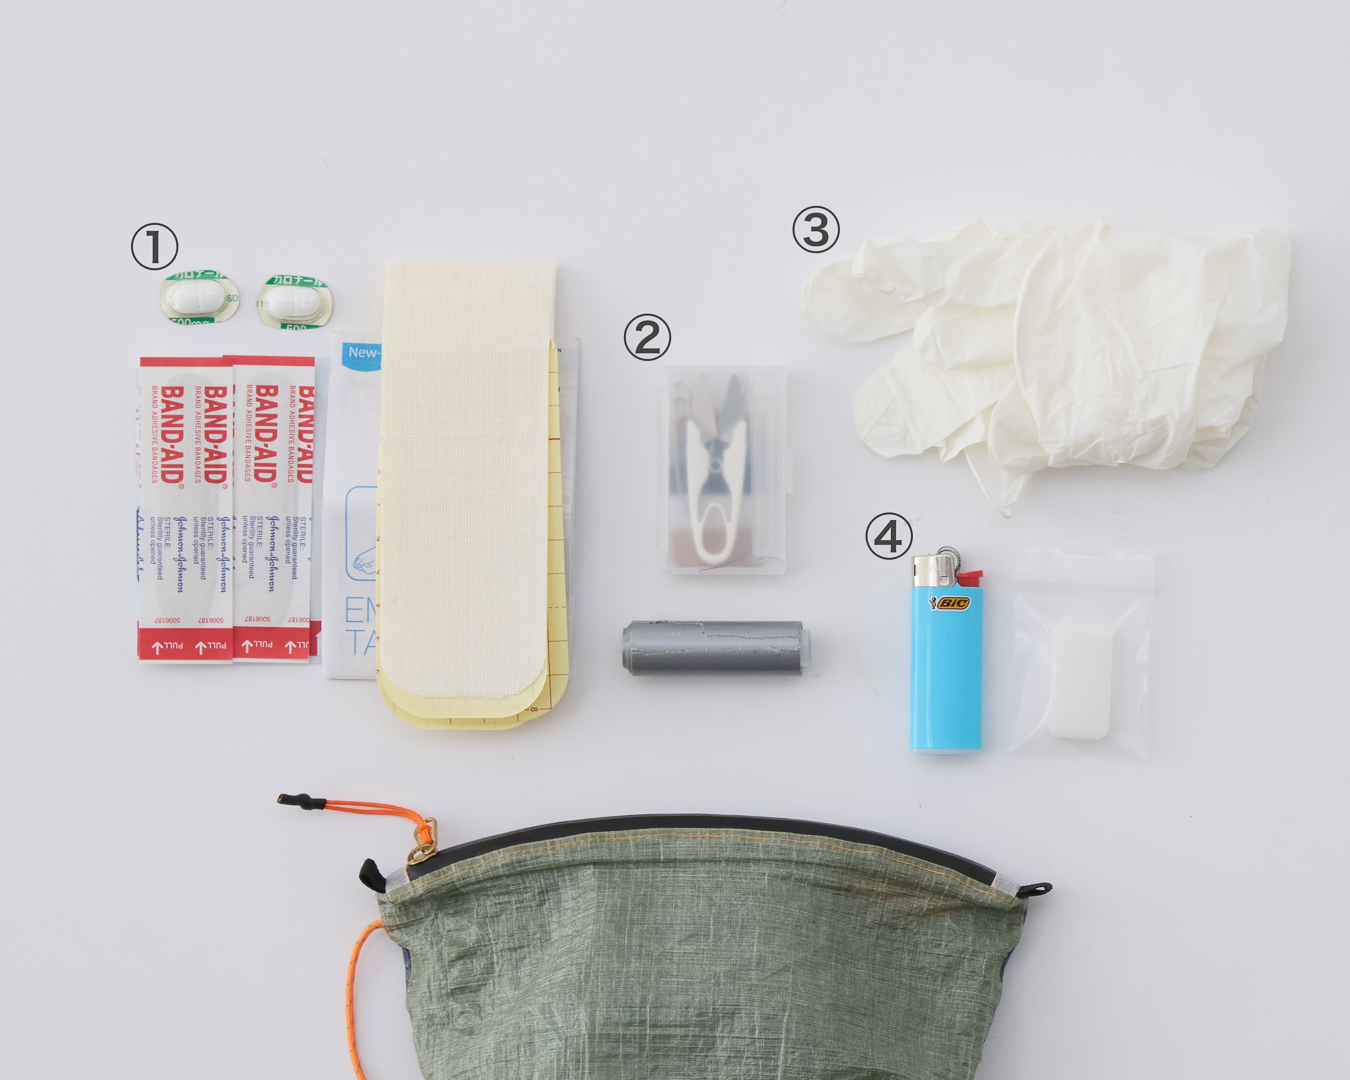
- First-aid basics
Bandages, pain relievers, and kinesiology tape are a good starting point for dealing with minor injuries or physical issues. Kinesiology tape can also serve as a large bandage or as temporary repair tape for your gear. - A repair kit
Duct tape, a needle and thread, and repair patches can help you keep going if your backpack, tent, or poles are damaged. The lighter your gear, the more important field repair becomes. - Rubber gloves
In cold conditions, they can serve as simple wind-blocking gloves. They can also be used as a small water bag for cooling an injured area, or for hygiene when treating a wound. - Lighter, solid fuel tablets
These can be carried as a backup in case your stove fails. Ethanol-based tablets can also be used as an emergency disinfectant.
Frequently asked questions
Q. Won’t I get cold if I lighten my gear?
A. What makes you feel cold is wind and temperature. What keeps you warm is the warm air trapped inside your clothing, so the key is holding that warm air in place. If you understand your own tolerance for cold and the temperatures you are likely to face, you can stay warm with surprisingly light clothing by combining a shell for wind protection with insulation for warmth. One of the keys to staying warm without adding unnecessary weight is avoiding overly bulky layers that compress the warm air inside your clothing.
Q. Isn’t ultralight hiking dangerous?
A. The goal is to create more margin—so you can walk more safely and more comfortably. There is no need to strip everything away all at once. Start small on familiar trails: for example, by leaving behind something you did not use on your last hike. Repeat that kind of small experiment, and gradually build confidence in what works for you. The process of learning what is enough is itself one of the best ways to stay safe.