


The Michinoku Coastal Trail, Part 2: Planning Your Hike
The Michinoku Coastal Trail, Part 2: Planning Your Hike
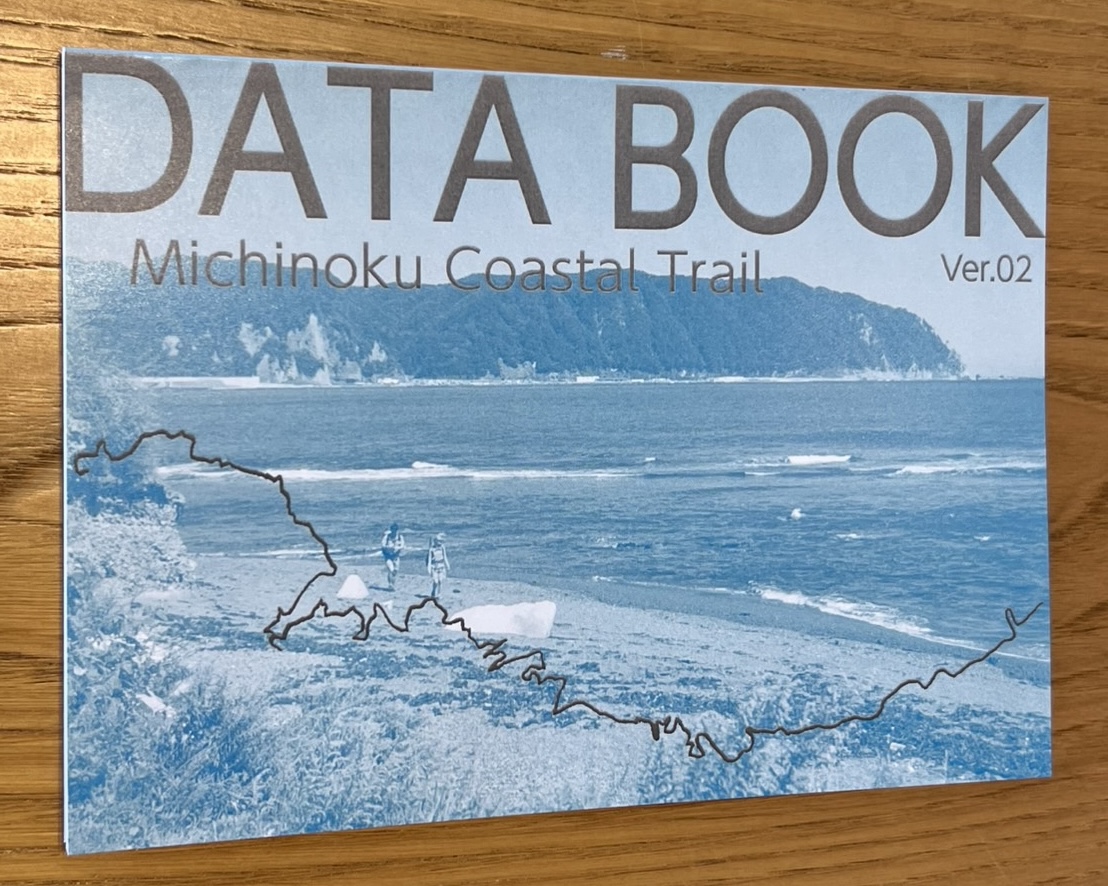
The Michinoku Coastal Trail (MCT) stretches for more than 1,000 kilometers, connecting 29 municipalities across four prefectures from Fukushima to Aomori. Since the trail was completed in 2019, it has become one of Japan’s premier long-distance trails and has helped to foster a thriving hiking culture.
Daisuke Ito, of Yamatomichi Kyoto, hiked the trail in 2024. Drawing on that trip and his extensive experience hiking long trails overseas, Daisuke has compiled a hikers' handbook, filling it with practical tips and model itineraries, trail highlights and recommendations for shorter section hikes.
Part 2 is a practical guide to planning for the hike, with tips on the best seasons to go and the ideal gear to carry.
First, a disclaimer. The information that I’ve compiled here includes tips that I believe will be most helpful. But keep in mind that this guide is meant to serve as a reference, based on my own personal experience. Conditions on the trail are constantly in flux. It’s essential to research the latest information before setting out and to adapt as conditions on the trail change.
Thru-hiking, section hiking and section thru-hiking
Another thing to keep in mind: On long trails, there is no such thing as the right way.
Thru-hiking
By definition, thru-hiking involves walking the entire trail in a single journey. For a trail longer than 1,000 kilometers (600 miles) like the Michinoku Coastal Trail, you’re spending nights in tents, guesthouses, inns, or other accommodations along the way.
Section hiking
Technically, section hiking involves only walking a portion of a long trail. It might be a day trip. It might last a week or even longer. The appeal lies in sticking to areas that interest you and enjoying the trail on your own terms, at your own pace.
Section thru-hiking
A section thru-hike is, as the term suggests, a mix of the two: completing the entire trail by hiking it in sections at different times.
Anyone who wants to complete a long trail but can’t take enough time off to walk it in one go. This is a common tactic for many hikers on the Michinoku Coastal Trail and other long-distance nature.
This guidebook is for anyone who’s considering a thru-hike of the Michinoku Coastal Trail.
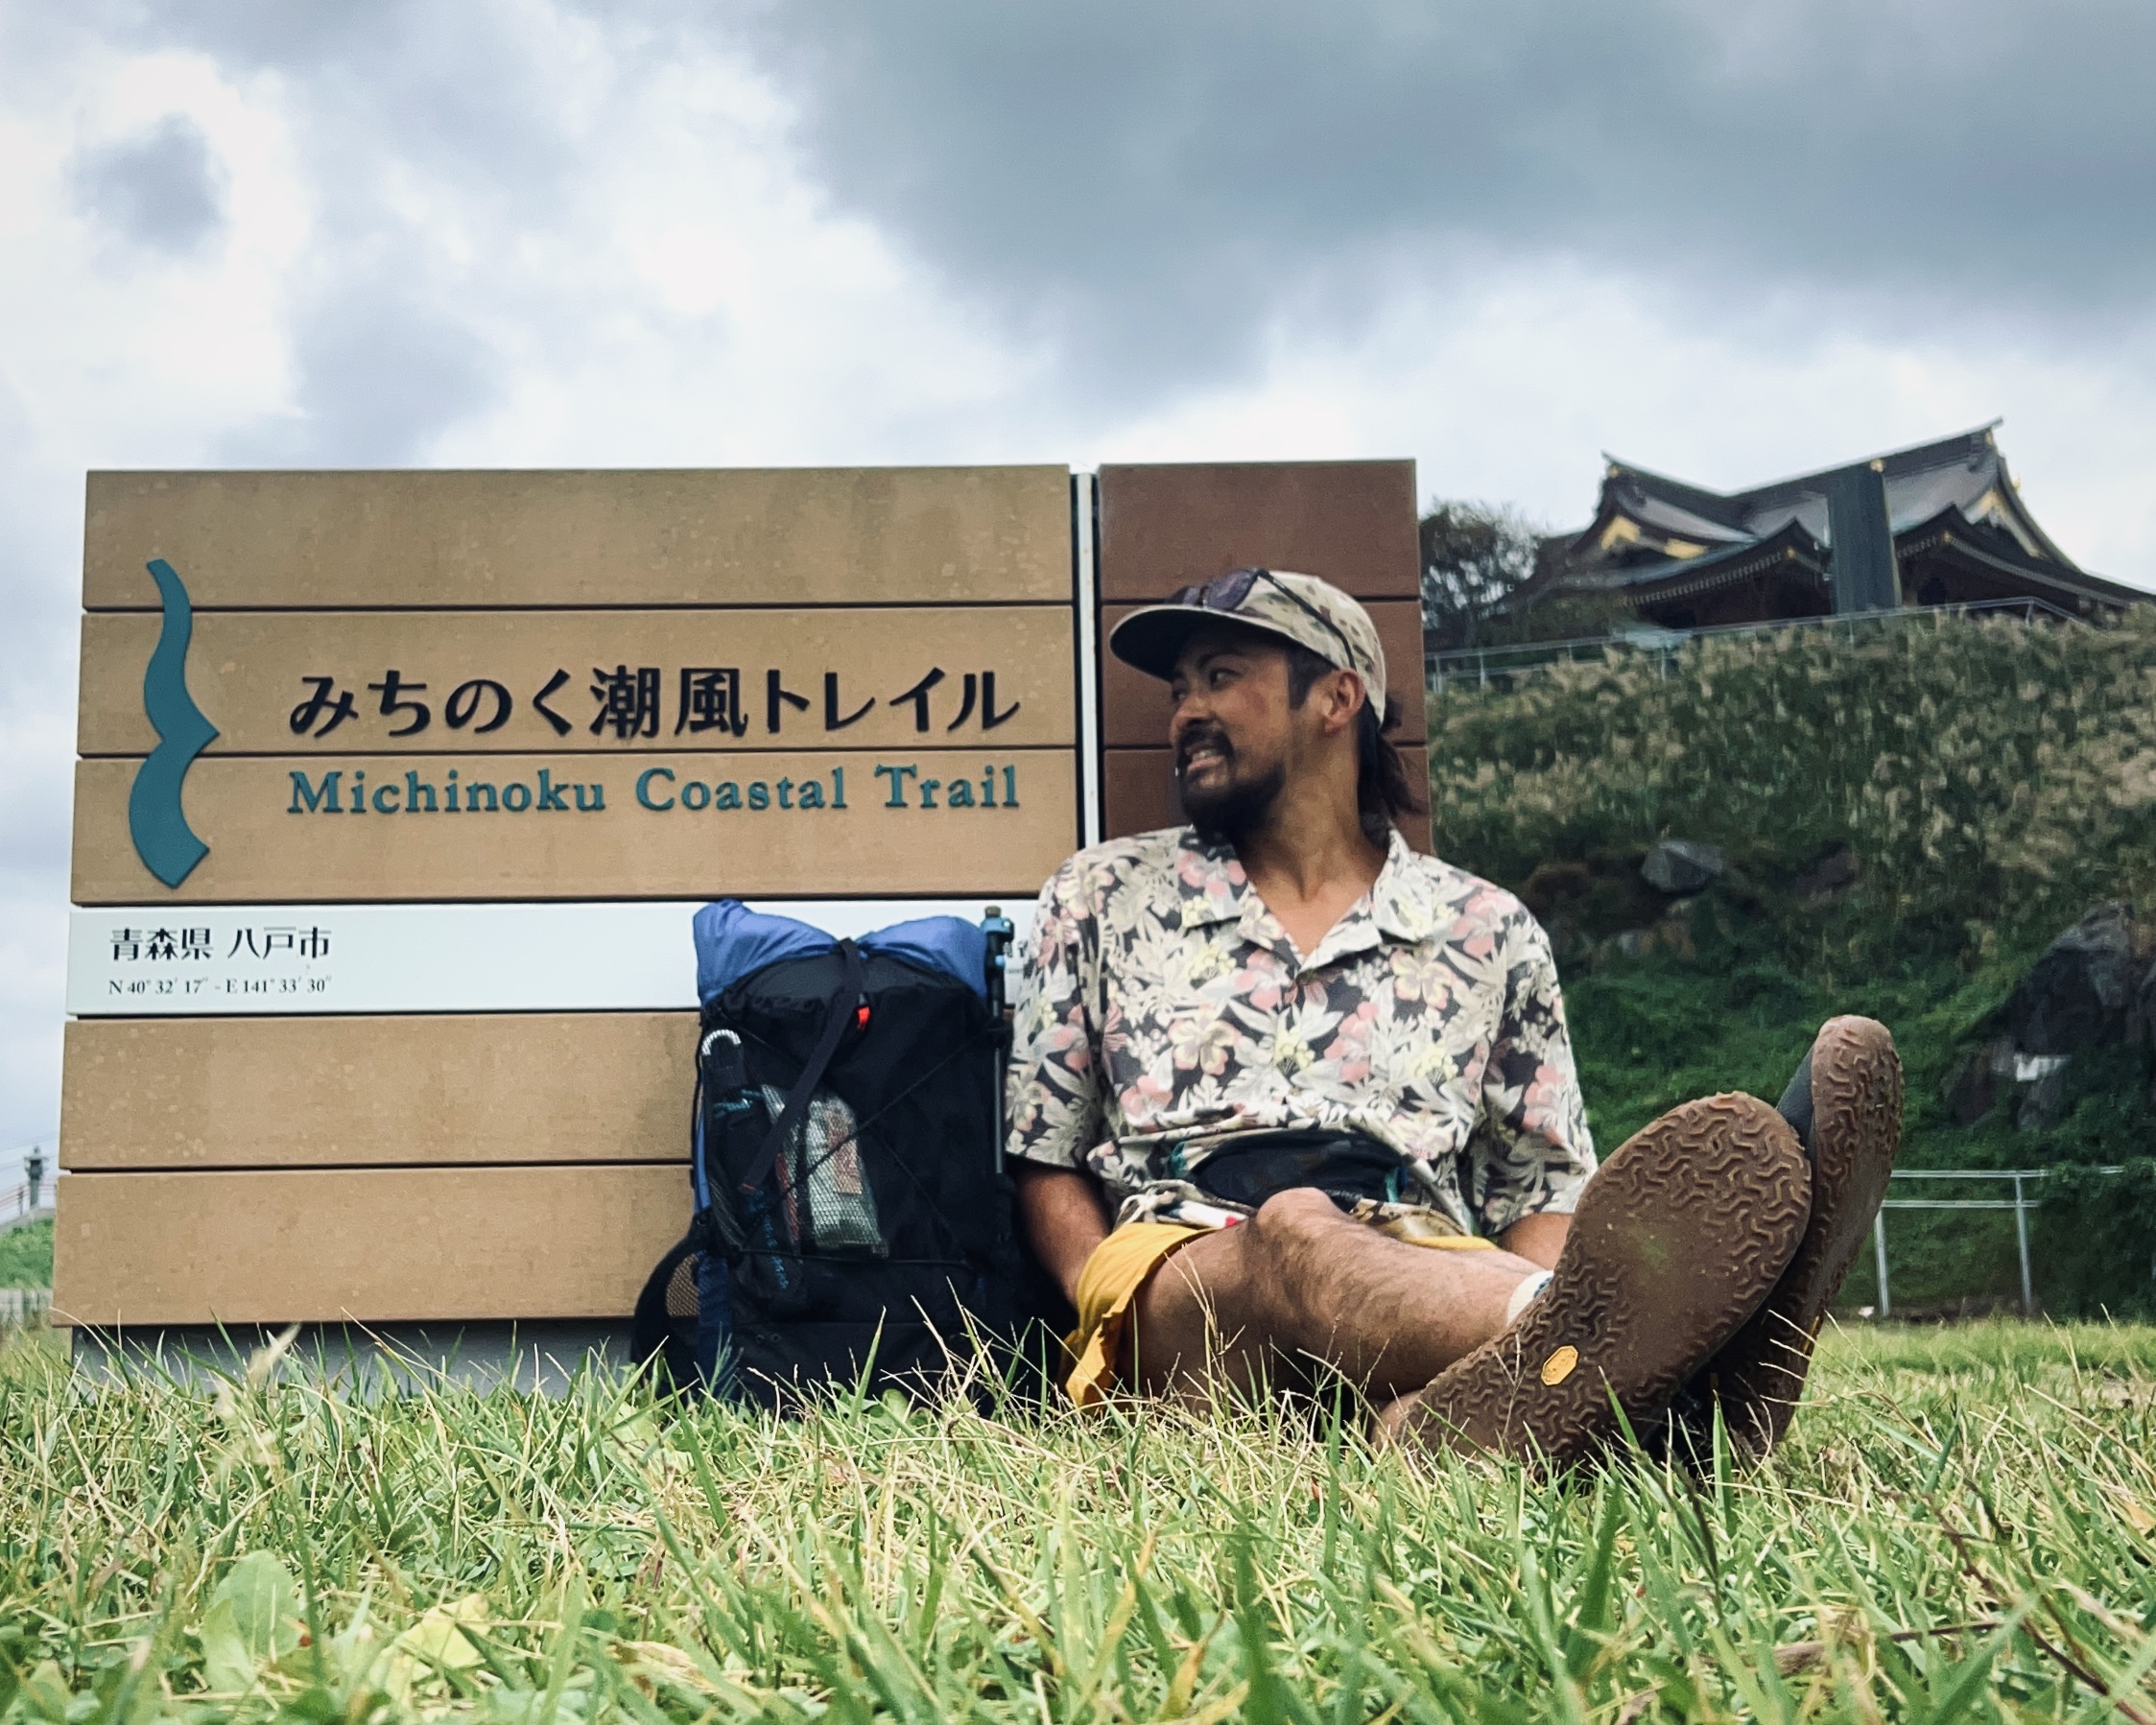
Thru-hikers spend months on the trail and can be identified by their haggard appearance. This was my third time on the Michinoku Coastal Trail. On my first trip, in 2020, I section-hiked roughly 100 kilometers between Ishinomaki and Natori. A year later, I walked about 200 kilometers between Kabushima and Tanohata.
How long does a thru-hike take?
Most thru-hikers spend one to two months on the trail. But every hiker’s fitness level, walking style and speed differs. To complete the 1,059-kilometer (658-mile) trail in a month, you would have to average about 34 kilometers (21 miles) per day, without any days off; the daily average falls to 17 kilometers (10.5 miles) per day if plan on finishing in two months.
Since much of the Michinoku Coastal Trail is relatively flat and passes through towns, it’s possible to cover more ground than if you were hiking in the mountains. But there are also some uphill sections and mountain passes, so you need to plan accordingly.
It took me 33 days, including one rest day, to thru-hike the trail. But time and speed shouldn’t matter as much as the experience itself: How fulfilling is it? You would’t want to walk the trail as if it were a task on a checklist.
A friend told me that he repeatedly left the trail to visit places that sparked his interest. His thru-hike ended up taking nearly three months. It reminded me of a monument at the starting point of the Kyushu Nature Trail that quotes Benton MacKaye, the visionary behind the Appalachian Trail:
“One purpose of a nature trail is to improve physical fitness; another is to foster an appreciation of nature. If, in the future, competitions are ever held on nature trails for the sake of physical achievement, it would be most unfortunate. And if that day comes, I would unhesitatingly give the prize to the person who finished last.”
The message is clear: Hike your own hike!
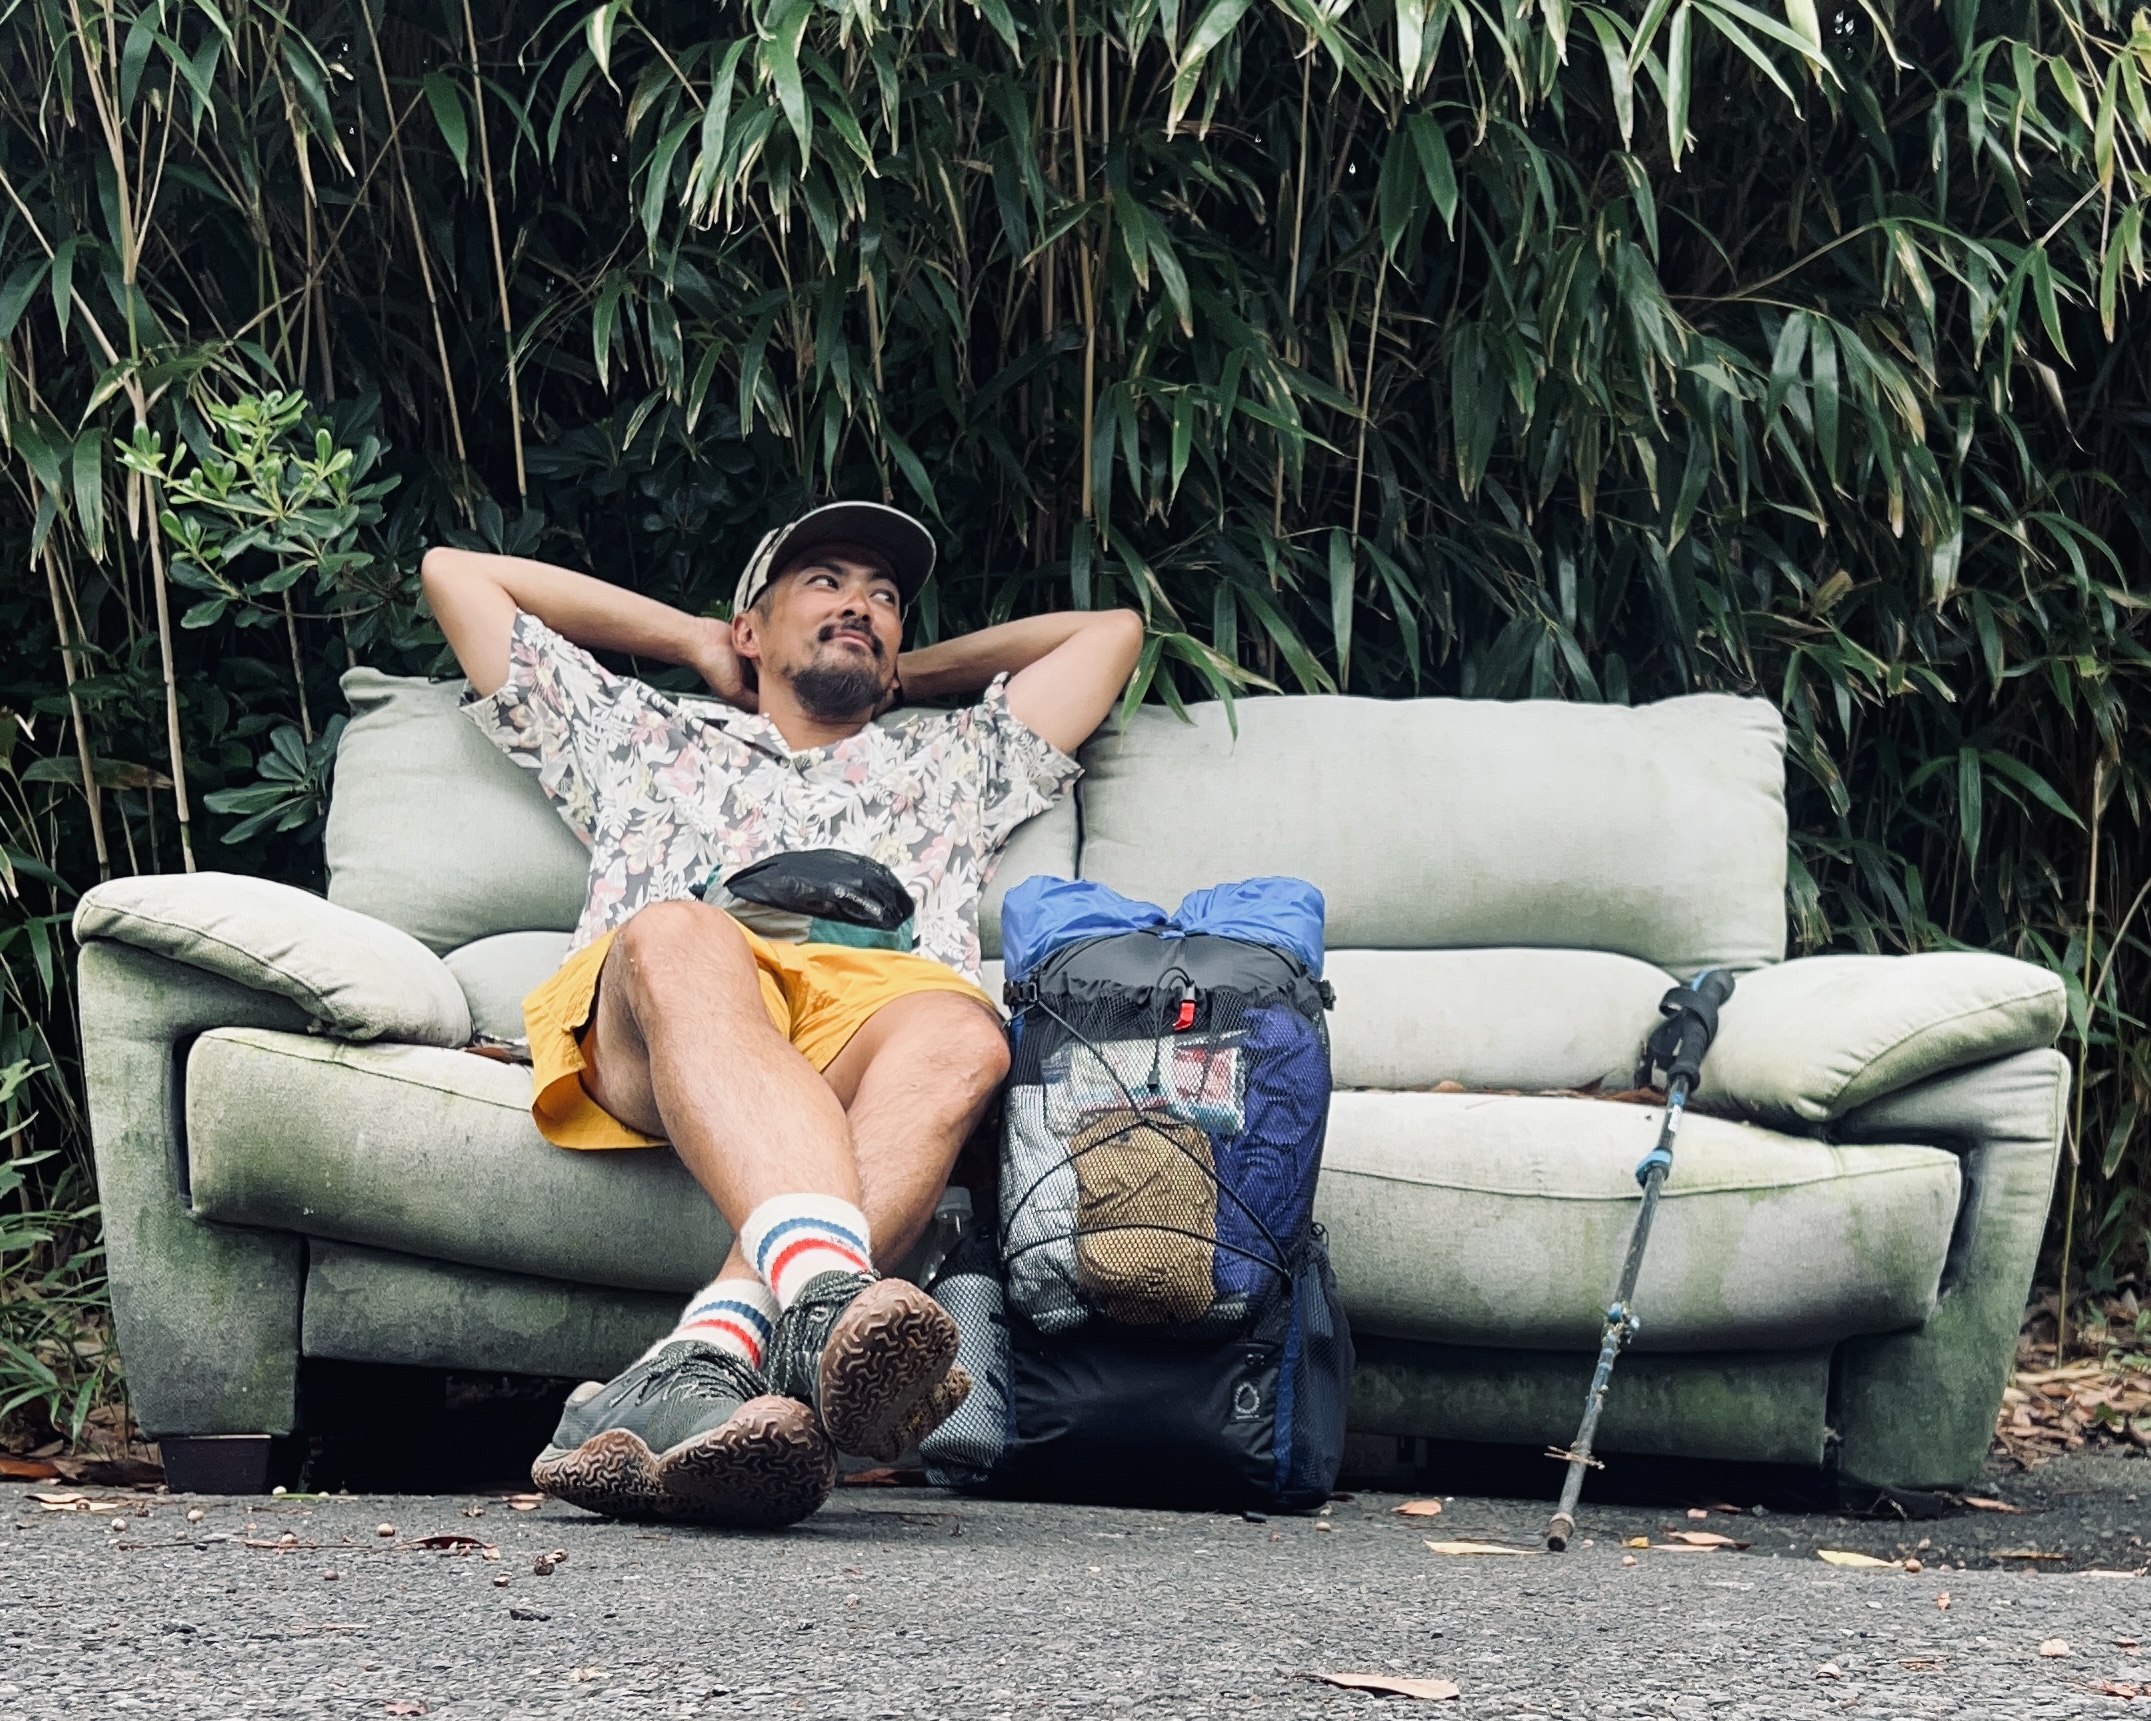
Something about sitting on the weathered, abandoned couch by the trail reminded me of an American movie.
Enjoy the journey! Go at your own pace!
Northbound or southbound
The Michinoku Coastal Trail connects Kabushima in Hachinohe, Aomori prefecture, with Matsukawaura in Soma, Fukushima prefecture, but unlike some trails, there is no officially designated place to start or finish. Hikers who head north from Soma are known as NOBOs (northbounders); those who go south from Hachinohe are SOBOs (southbounders).
NOBOs
Spring is when many hikers head north from Soma. This strategy gives hikers a better shot at encountering warmer weather up north, where chilly temperatures last through early spring.
SOBOs
Southbounders tend to set off from Hachinohe in autumn. This allows them to avoid the lingering heat of early autumn and the cold that’s soon to arrive.
Neither direction is inherently better.
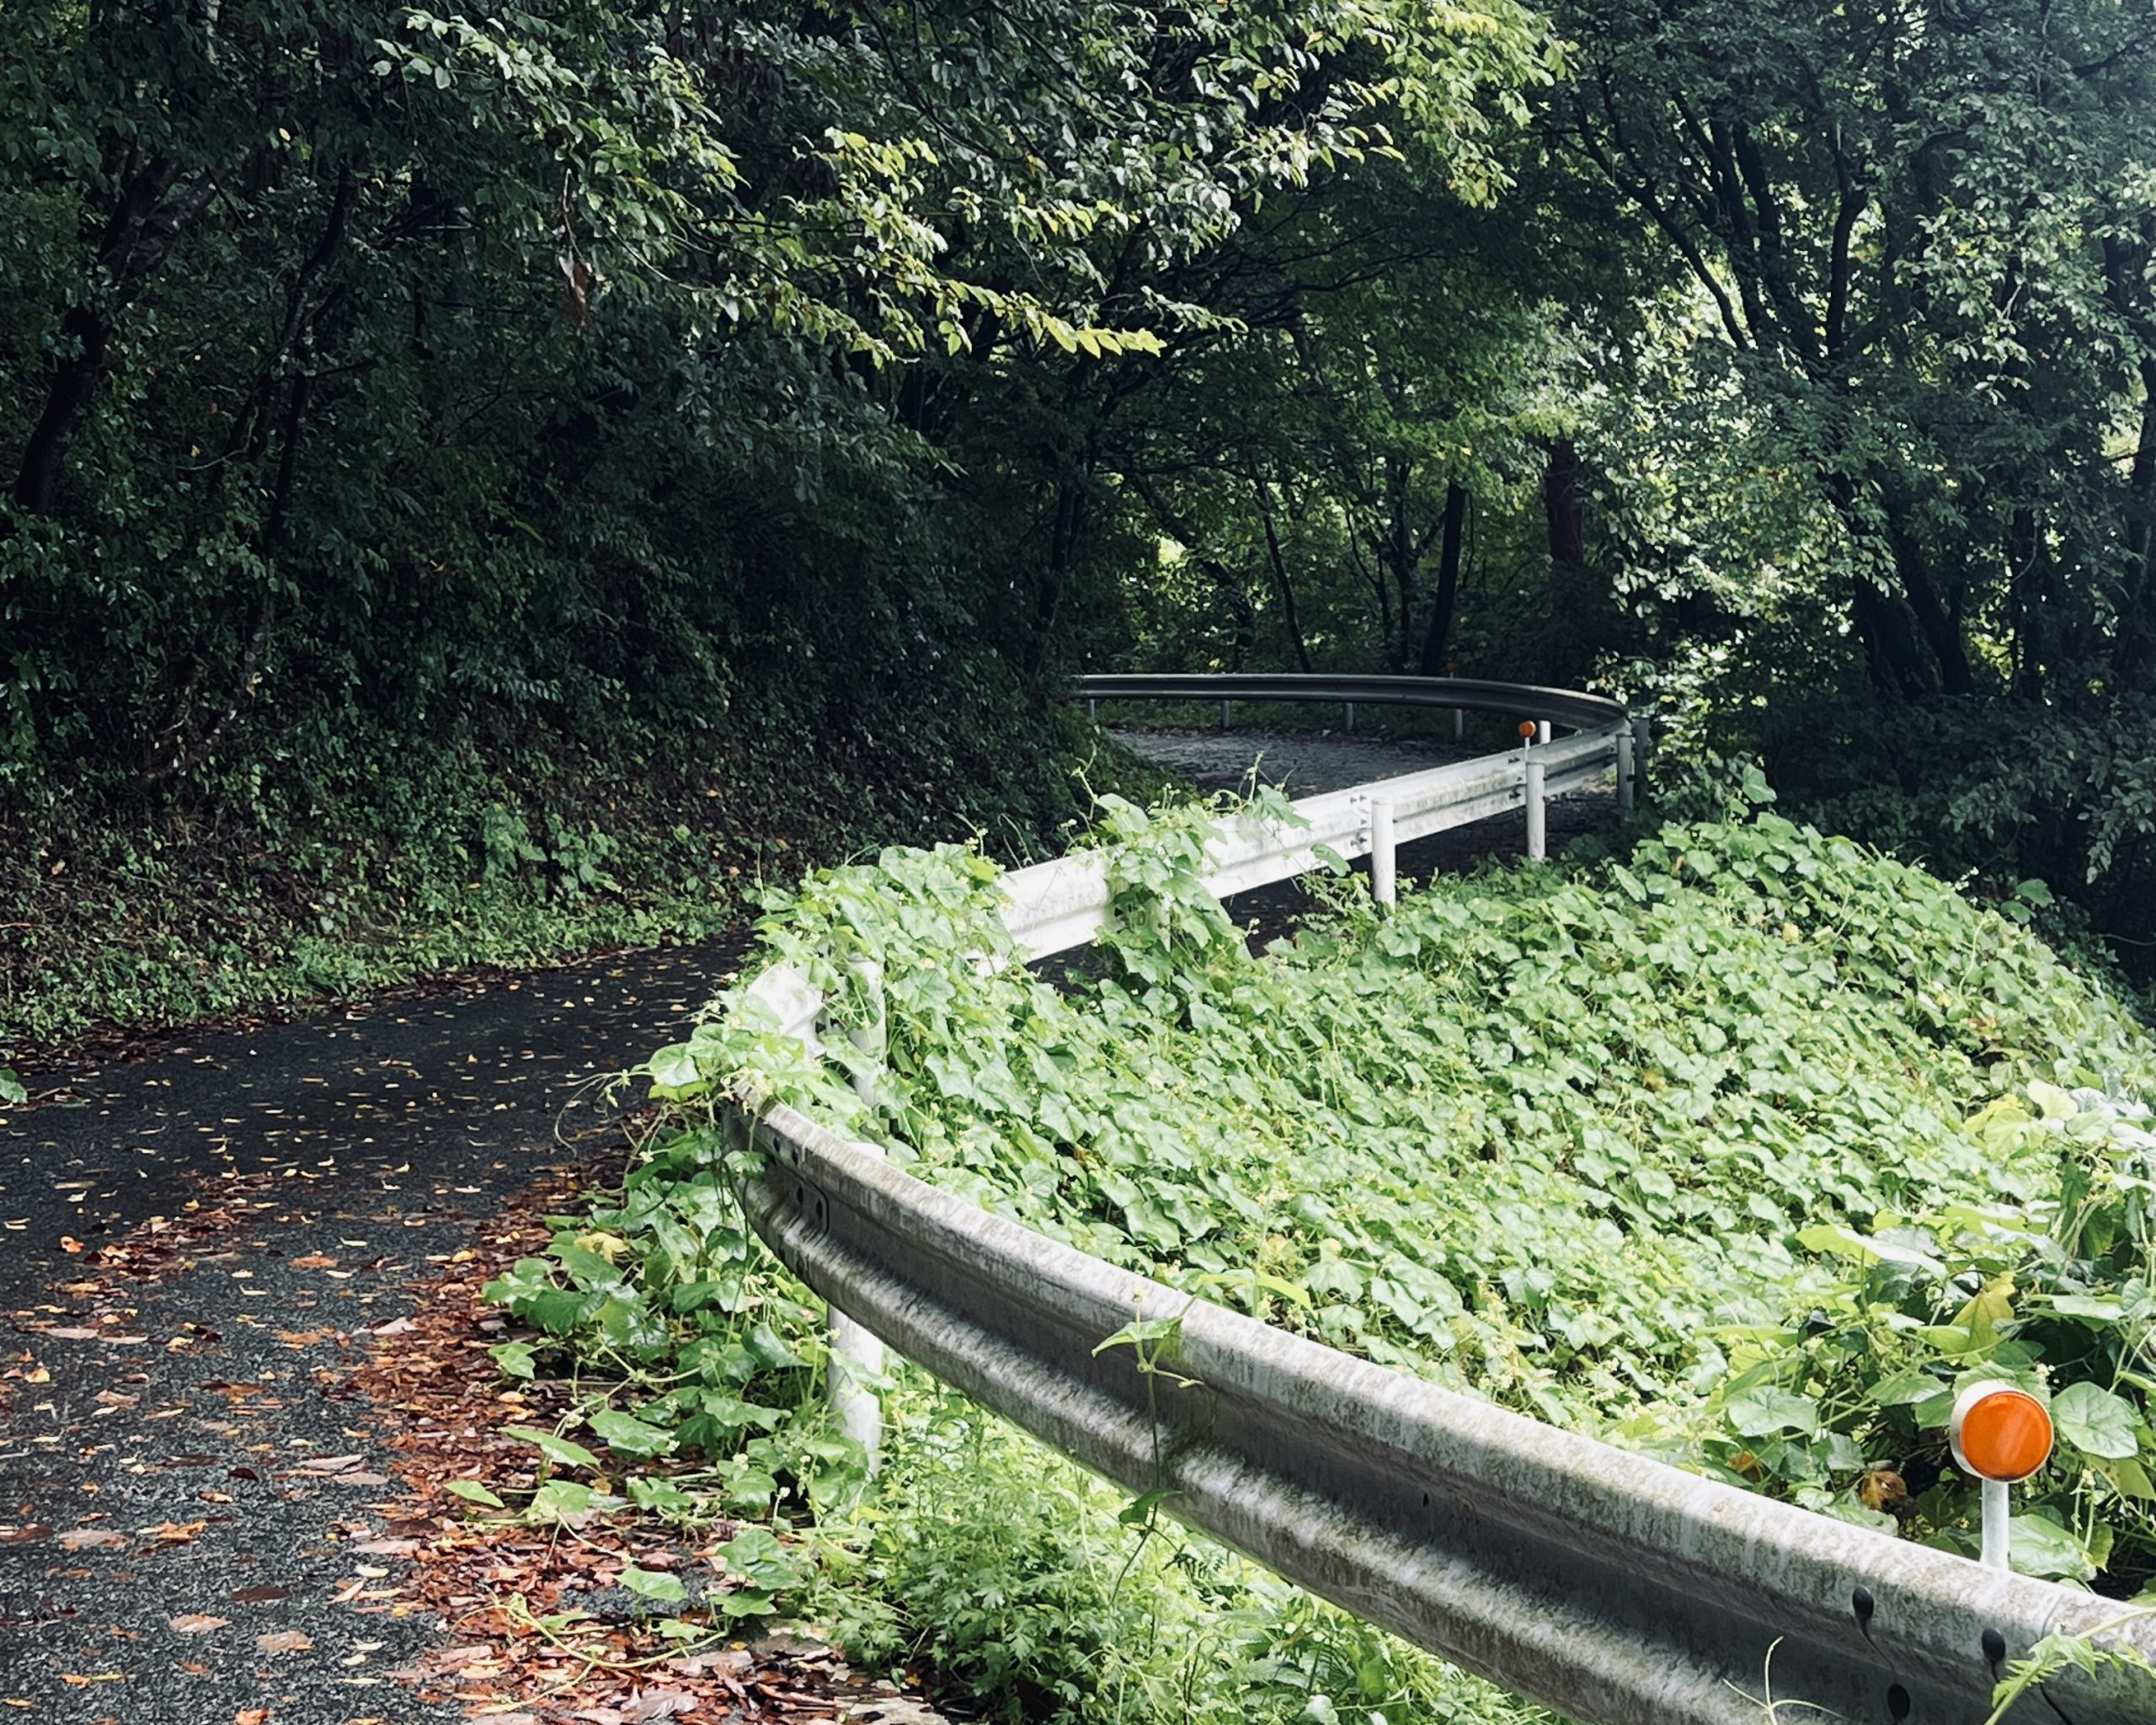
Terrain and scenery might influence your decision to walk northbound or southbound. The southern portion of the trail passes through more urban areas, while the northern sections get progressively wilder, more natural. Some may prefer the wilderness landscape first; others may want to save it for later.
Less-experienced hikers might want to start from Soma and head north. The terrain near Soma is more level and forgiving and you pass through plenty of cities and towns, so it’s easier to refuel or, if needed, to exit and make your way home.
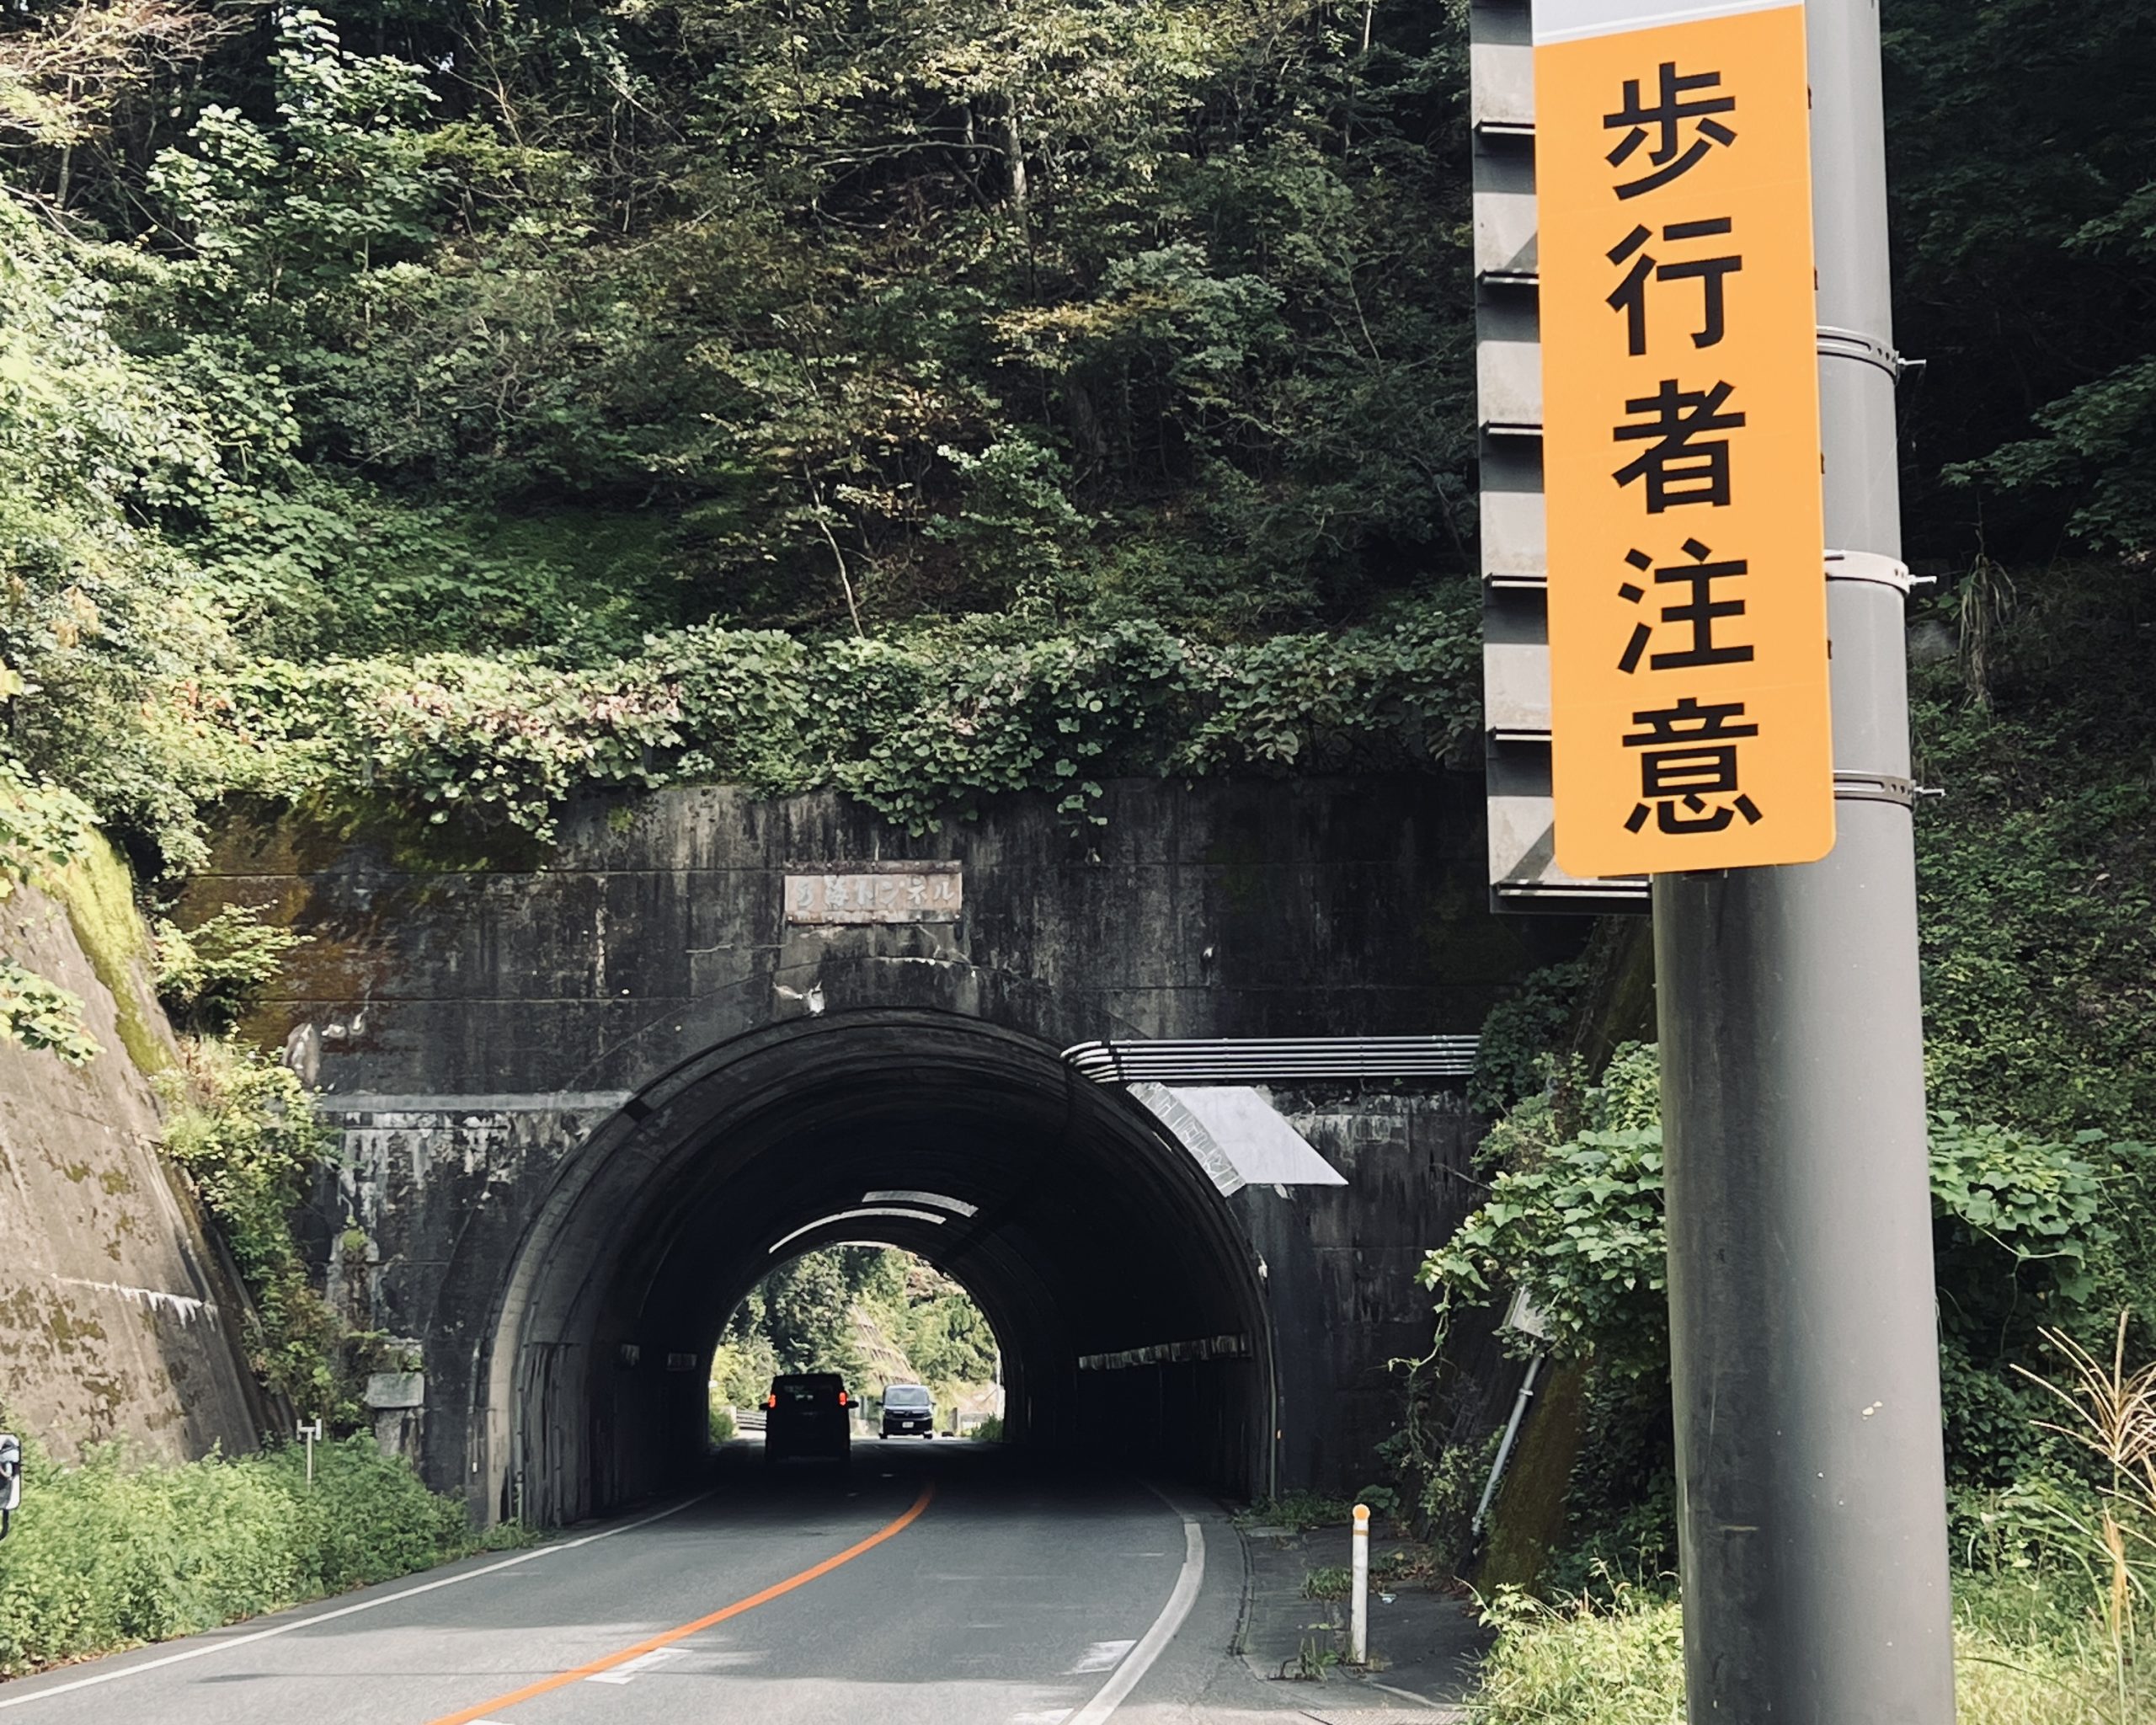
The northern sections are wilder, with stretches of climbs and descents.
Signs mark steep sections of the trail. The southern part is flatter and more urbanized.

A cycling path alongside a canal.
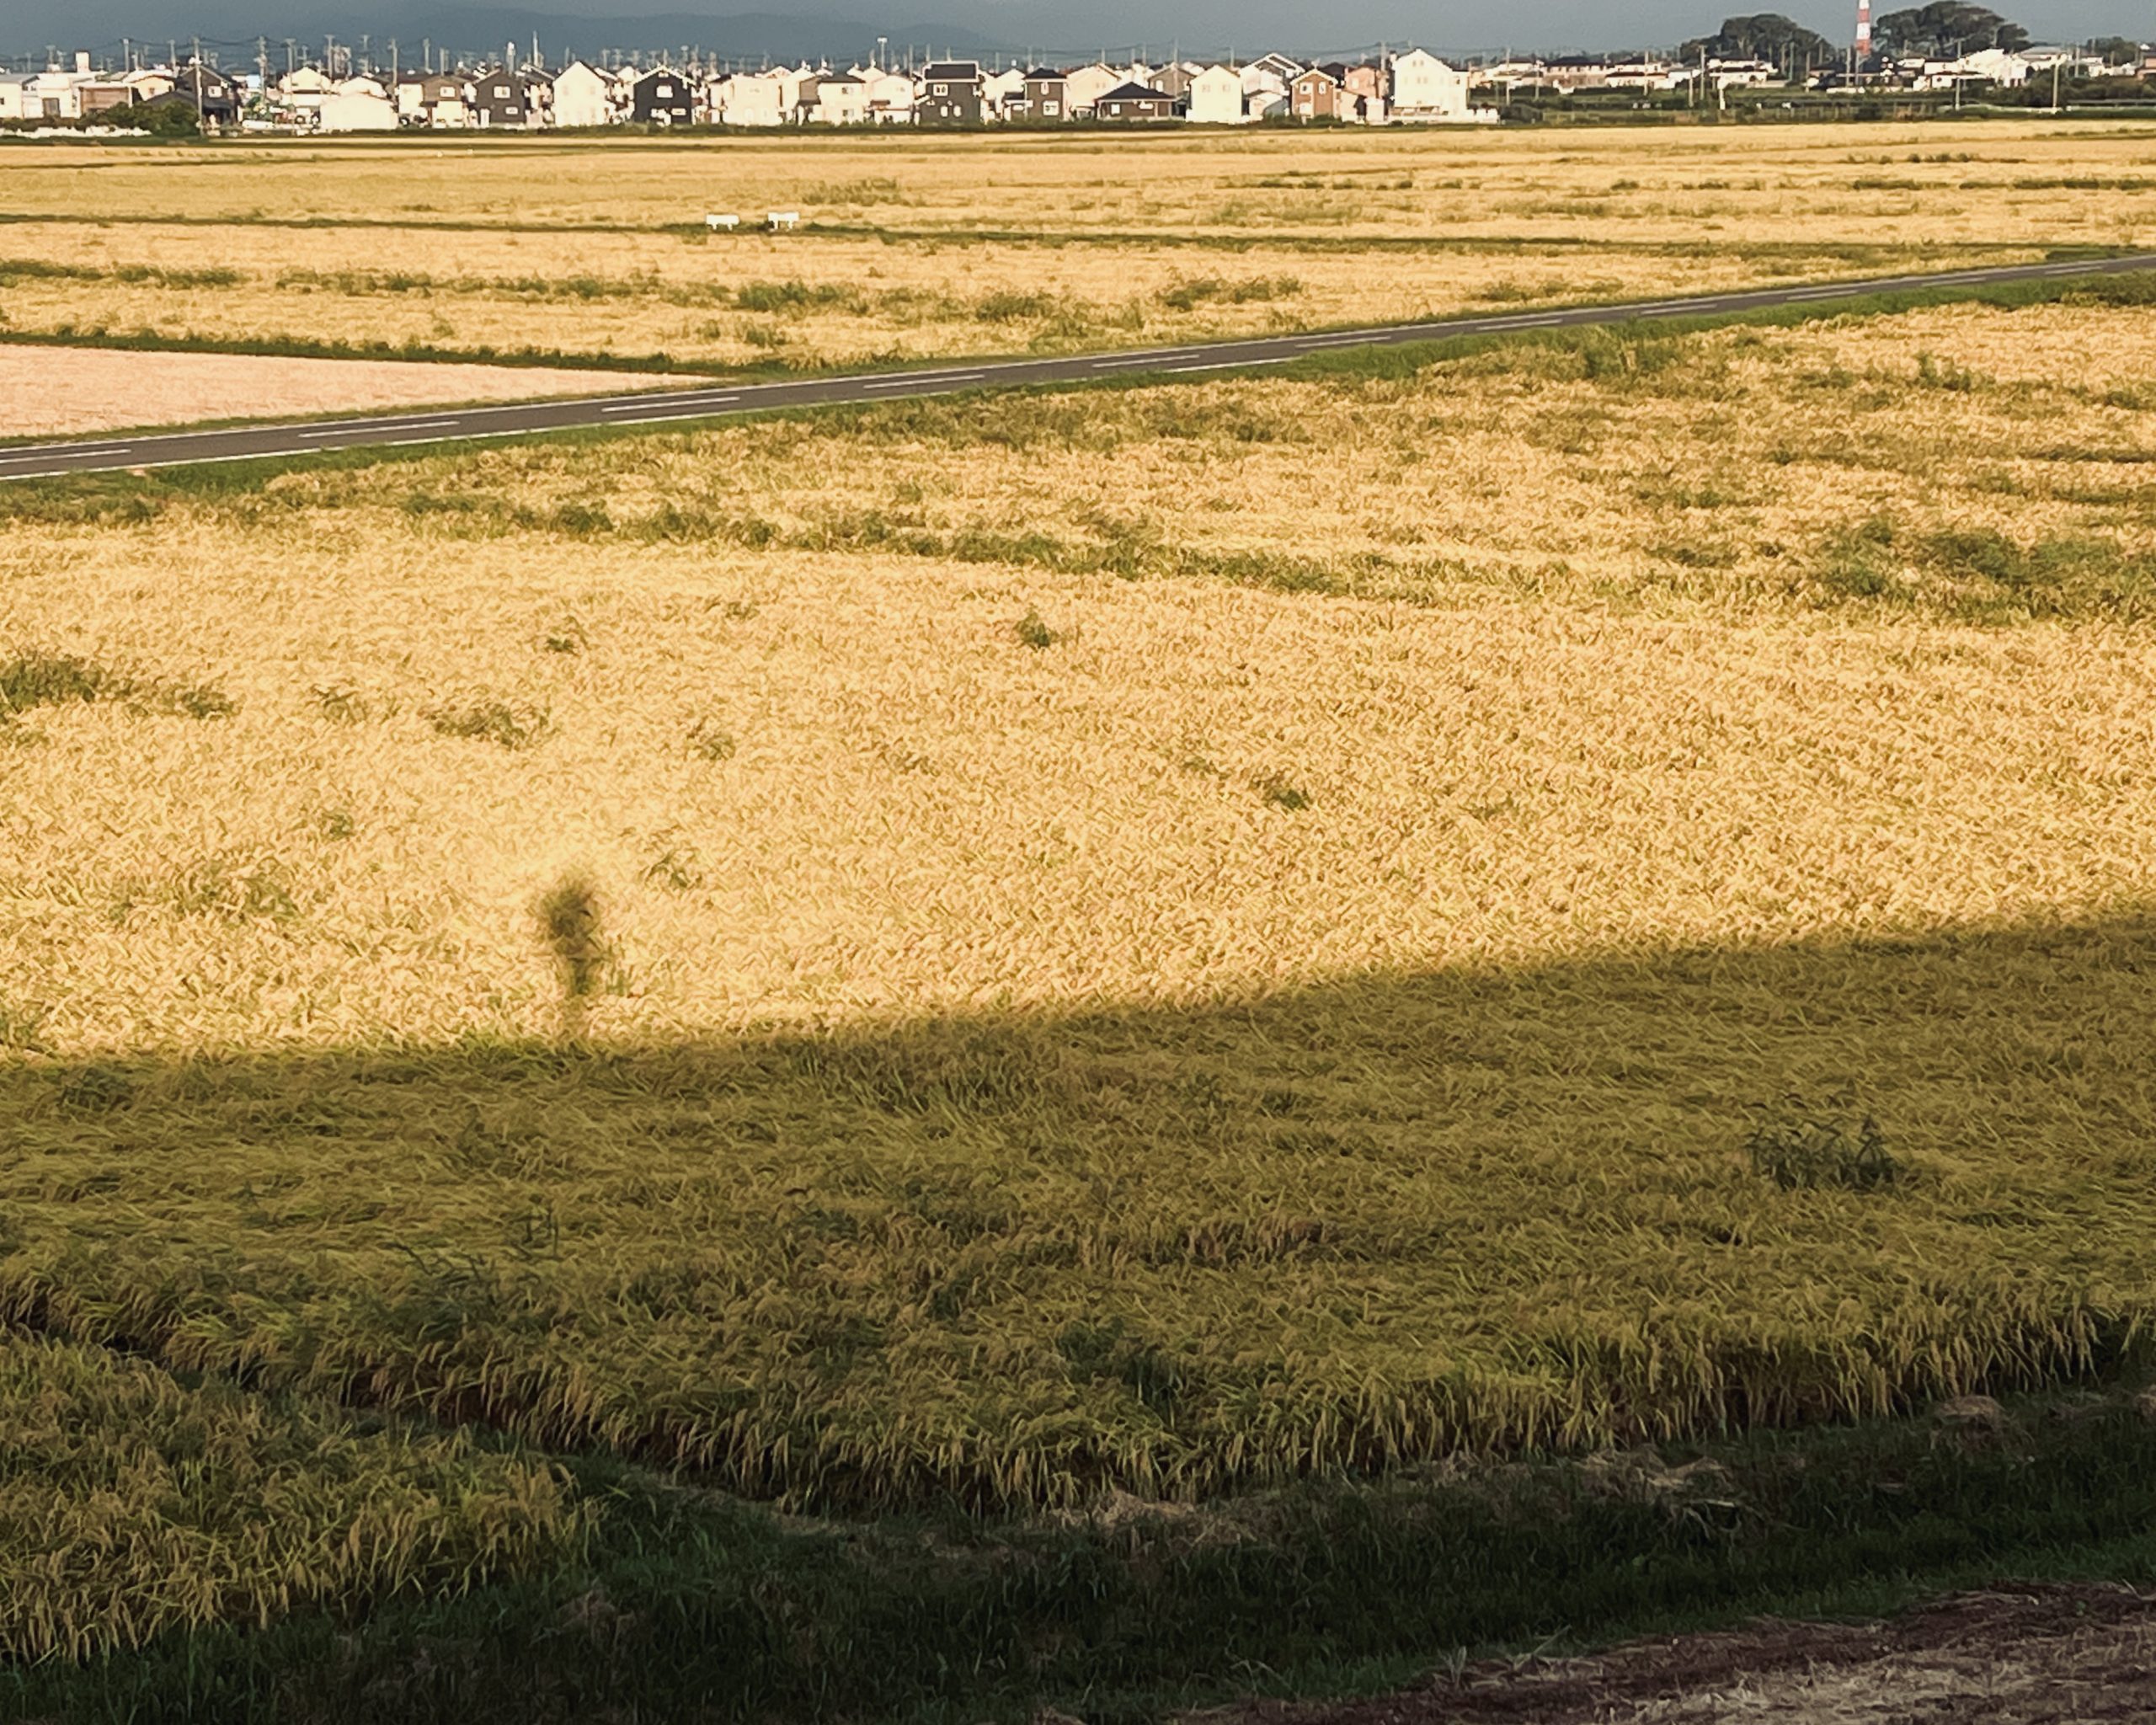
The walk through rural areas has a calming effect.
Hiking seasons
Spring and autumn generally offer the most comfortable hiking conditions.
That said, one of the strengths of the Michinoku Coastal Trail is that it can be enjoyed throughout the year.
Spring and Autumn
These seasons offer a pleasant balance, with temperatures that are neither too hot nor too cold. Autumn, however, coincides with Japan’s typhoon season, so hikers should monitor weather conditions carefully.
Summer
In summer, high temperatures bring a higher risk of heat exhaustion. Think intense humidity and heat radiating from the pavement. You’ll sweat profusely and need to rehydrate with a lot of water. Insects and leeches are also more active.
On the other hand, the trail passes beaches along the Pacific coast, so you’ll be able to cool off with a quick dip or swim.
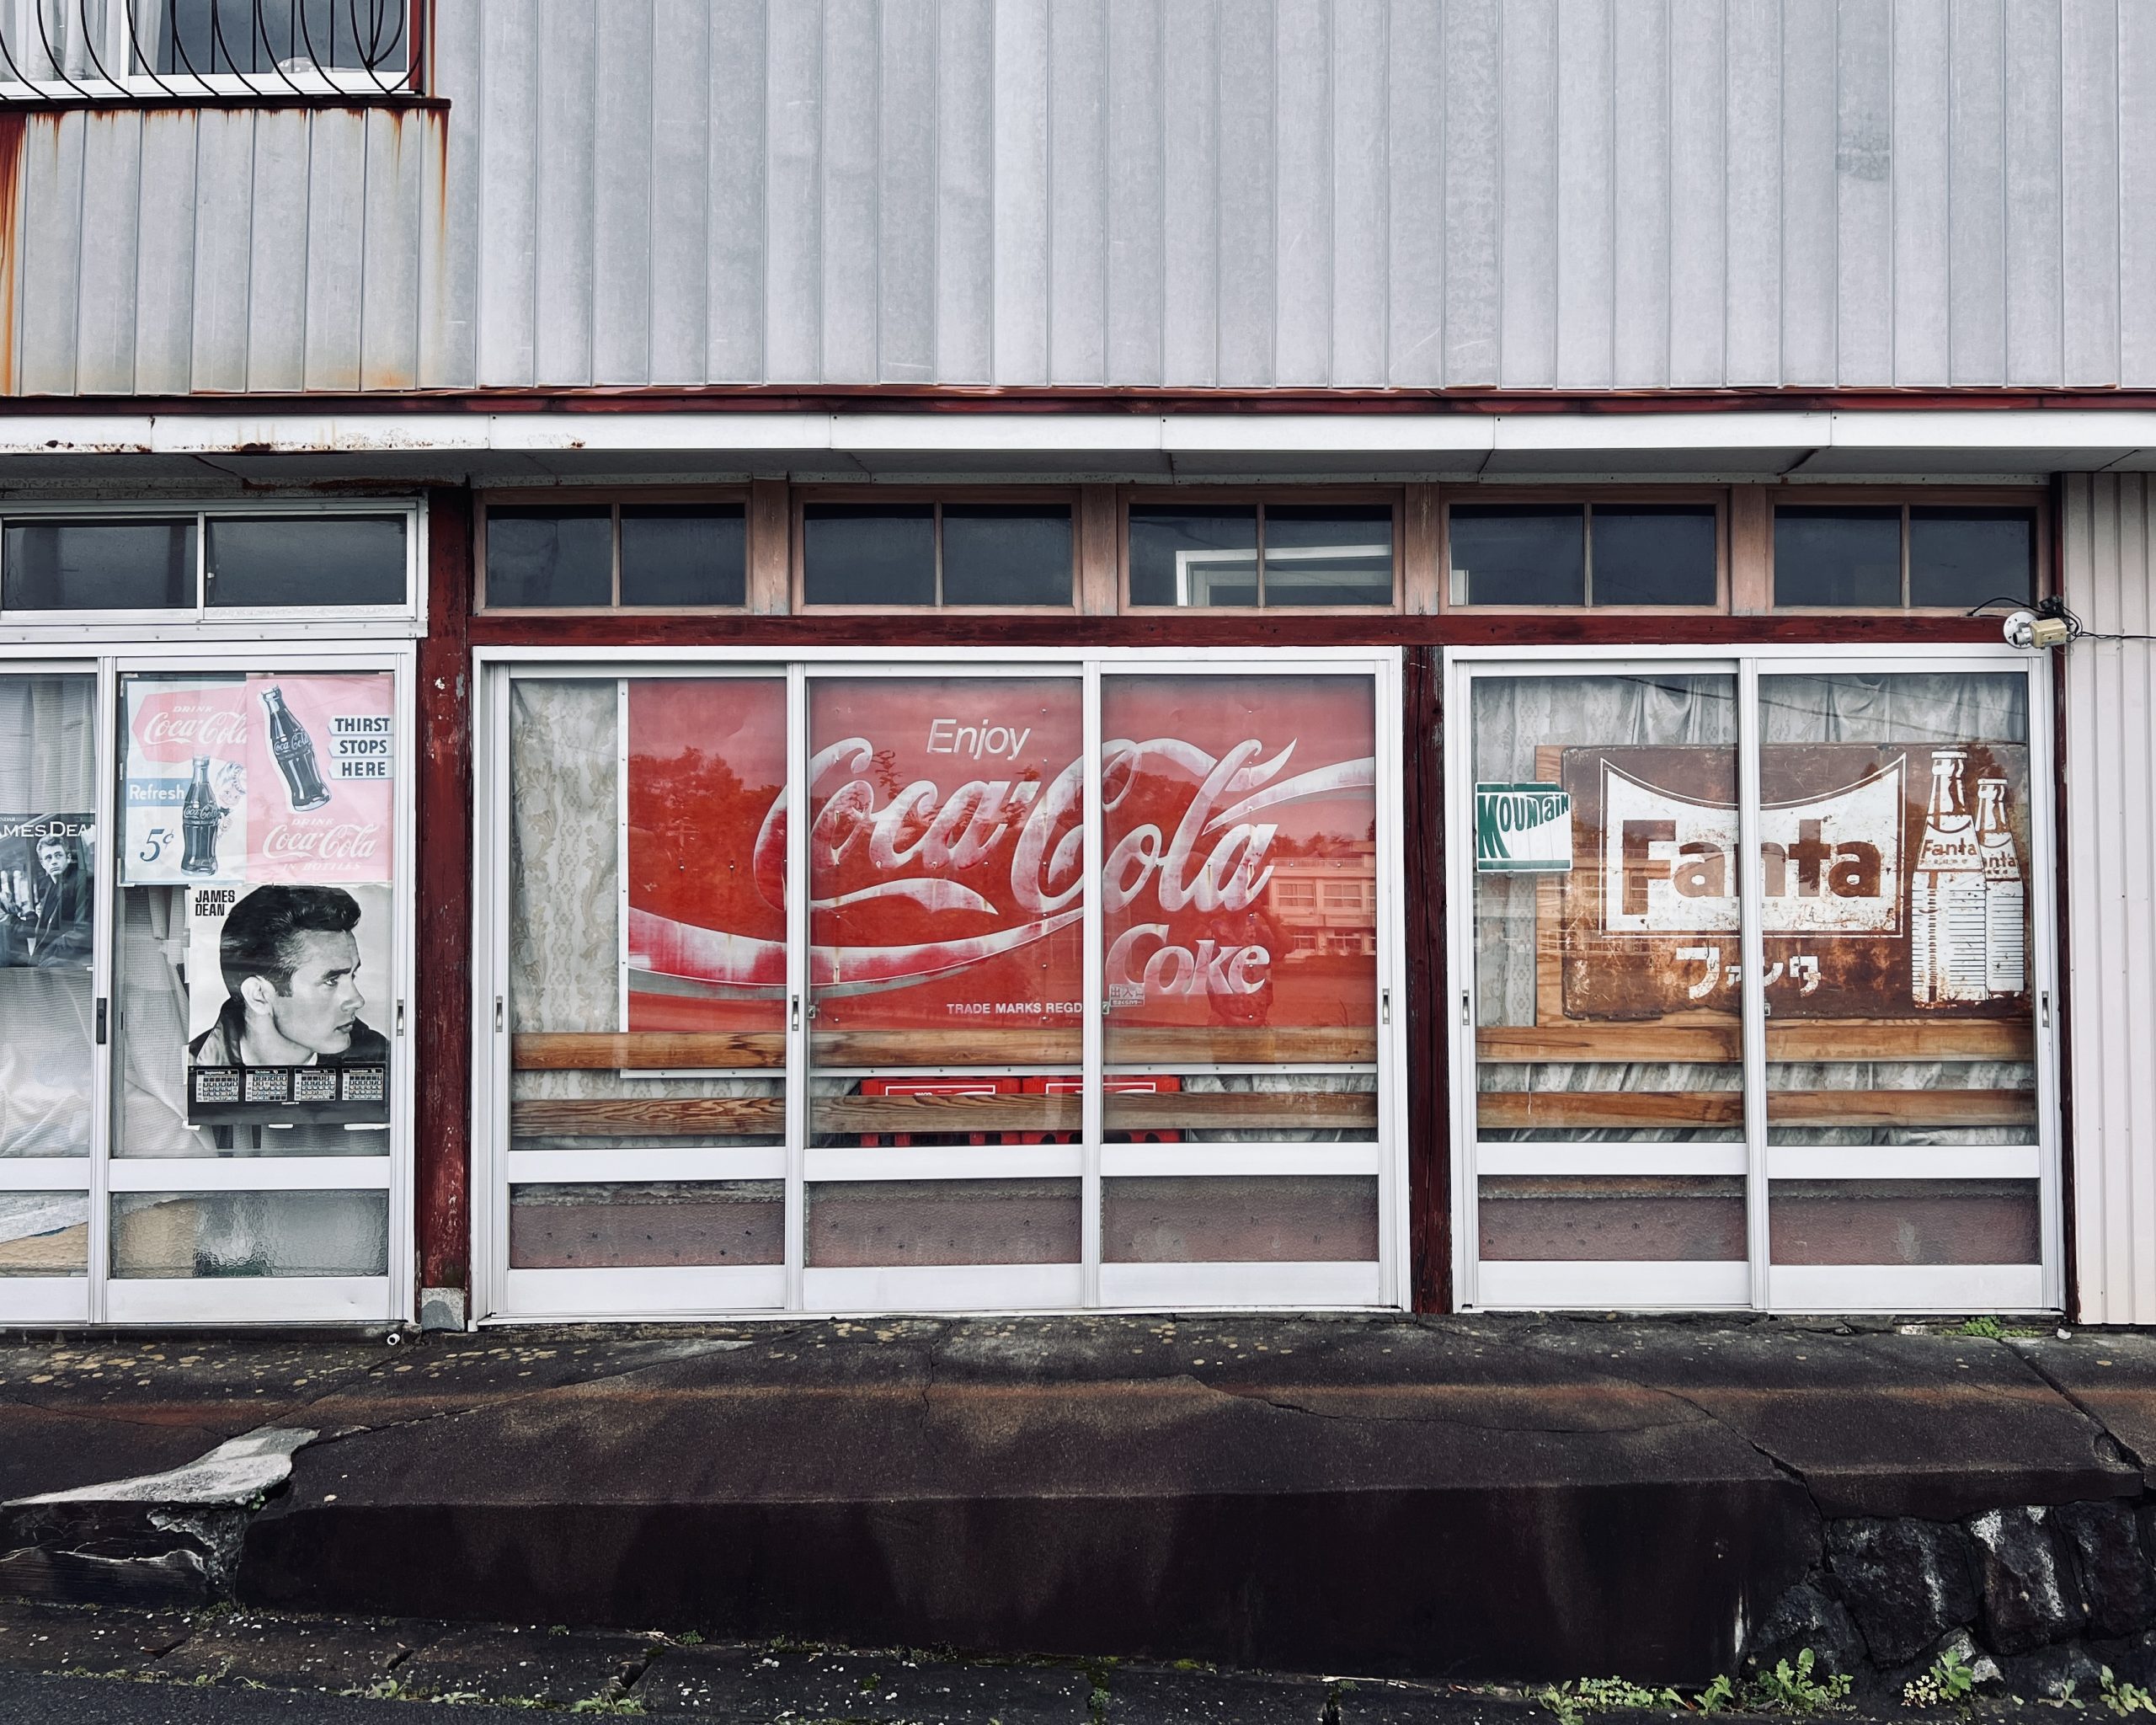
And a word of warning: You’ll come across vending machines and convenience stores. Don’t overdose on the ice-cold Cokes!
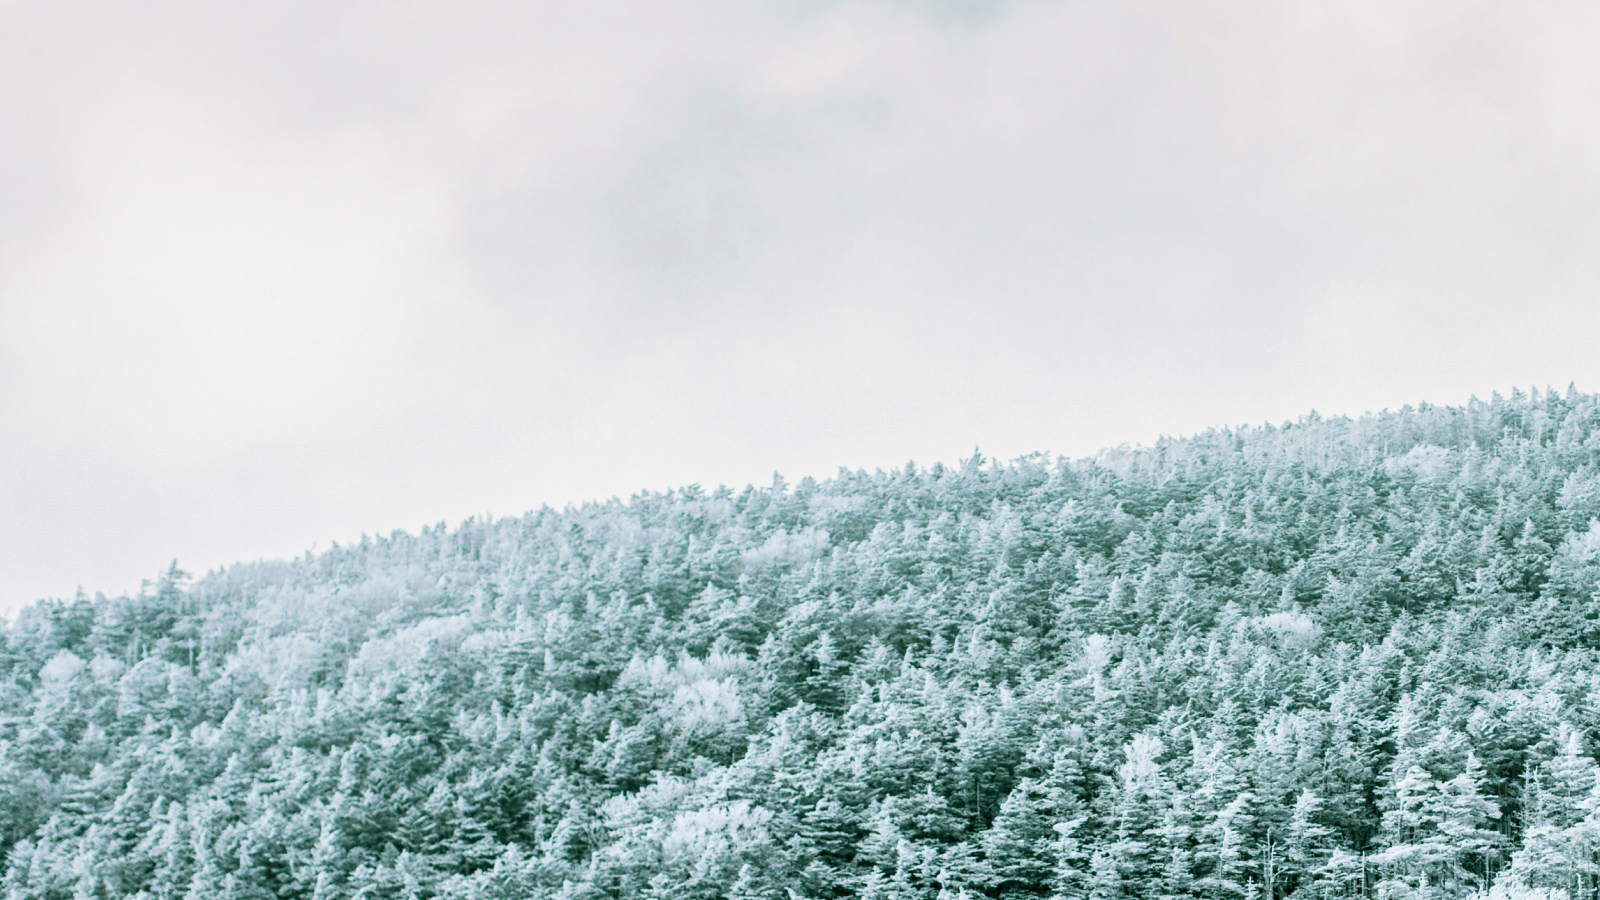
Winter
Talk about Tohoku’s winters and many in Japan will imagine deep snow and an icy chill that would make hiking unpleasant. Actually, though, the climate along the Pacific coastline is not quite so extreme. All you need is to proper prepare and pack clothing and gear for snow in the mountains and icy surfaces elsewhere. There are other benefits: the clear views, thanks to the visibility in dry weather, and the feeling of easing post-hike muscle aches in a hot spring, for instance. Check out the Michinoku Trail Club blog, hiking maps and tourist information listings.
In summer, I would have jumped in.
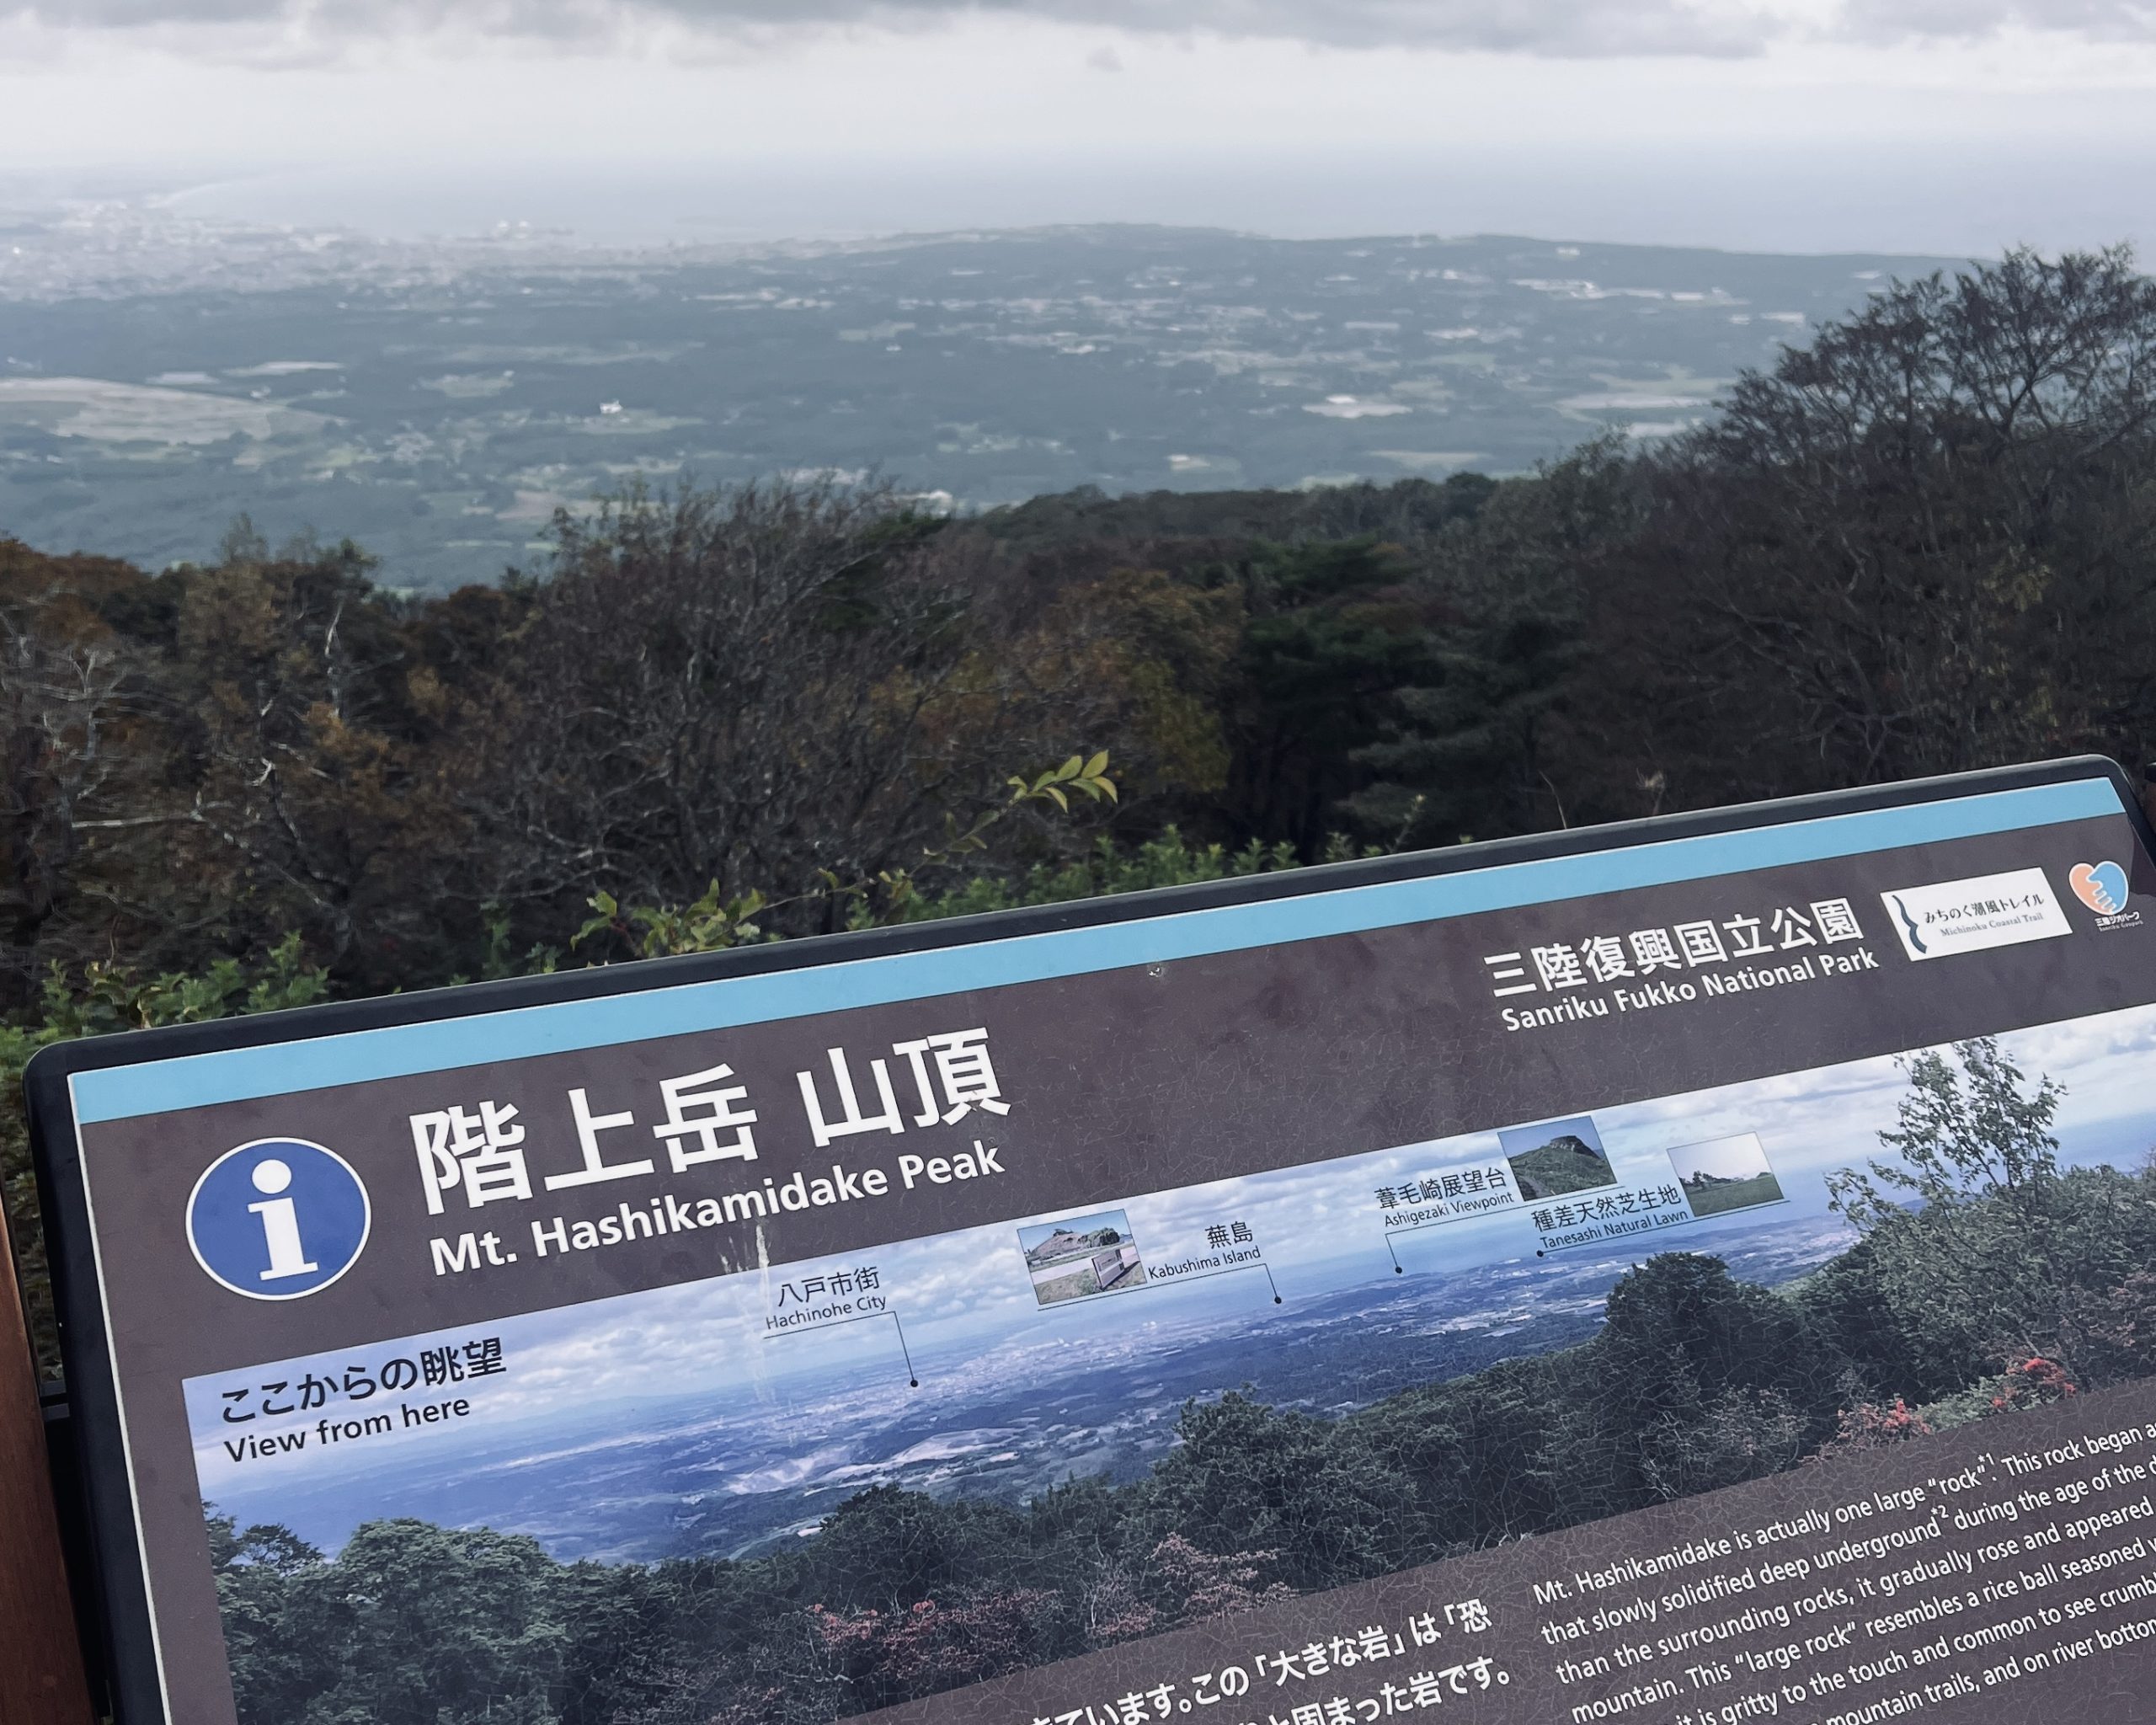
The highest point on the Michinoku Coastal Trail is Mt. Hashikami, 740 meters (2,428 feet) high, roughly 30 kilometers (19 miles) from the northern terminus in Aomori prefecture.
Planning your hike
On a hike lasting over a month, detailed day-by-day planning can be challenging. A more realistic approach is to plan one to three days at a time while paying attention to three essentials:
ー Food resupply
ー Water sources
ー Overnight accommodations
The Michinoku Trail Club’s online catalog of maps and data provides distances between landmarks, elevation information, nearby train stations, accommodations, toilets, shops and water sources.
Food resupply depots
You can replenish food supplies along the way at:
- Supermarkets
- Convenience stores
- Local grocery and general stores
You don’t need to carry a lot of food. That’s because you’re likely to come across places where you can replenish your food supplies every one to three days.
The longest stretch without a reliable place to stock up on food is on the Omoe Peninsula in central Iwate prefecture, where you may have to go 50 kilometers (31 miles) before you can make a pitstop.
Supermarkets and convenience stores are a reliable option. Not always so with local mom-and-pop shops, which might have fewer items, shorter business hours and odd days off. It’s best to call ahead of time or load up on extra food ー instant noodles, ready-to-eat rice, for instance ー from big stores. That said, small shops are a valuable opportunities to speak with local residents. I made an effort to support the local communities along the trail by purchasing food and trying regional specialties that I could only find in these places.
Buy staples at larger supermarkets and convenience stores. I picked up butter-fried dried scallop string (right) at a roadside station.
An old-school local shop. Part of the fun was figuring out how to incorporate regional specialties into my meals.
Accommodations
- Campsites
- Inns, guesthouses and business hotels
- Places where permission has been granted by residents or landowners
The Michinoku Coastal Trail has no designated overnight sites, so hikers need to plan their own accommodations. Check out the Michinoku Trail Club’s information on Google Maps for camping areas along the route.
The reality is that it’s difficult to only stay at campsites. You’ll also need to stay at guesthouses and other accommodations. I slept at several inns along the route, and was treated well whenever I mentioned that I was hiking the Michinoku Coastal Trail. Fresh local seafood, a comfortable bed and warm hospitality made these some of the most memorable parts of my journey, and I encourage every hiker to look into this option as well as the lodgings offered by some members of the Michinoku Coastal Trail Supporters network.
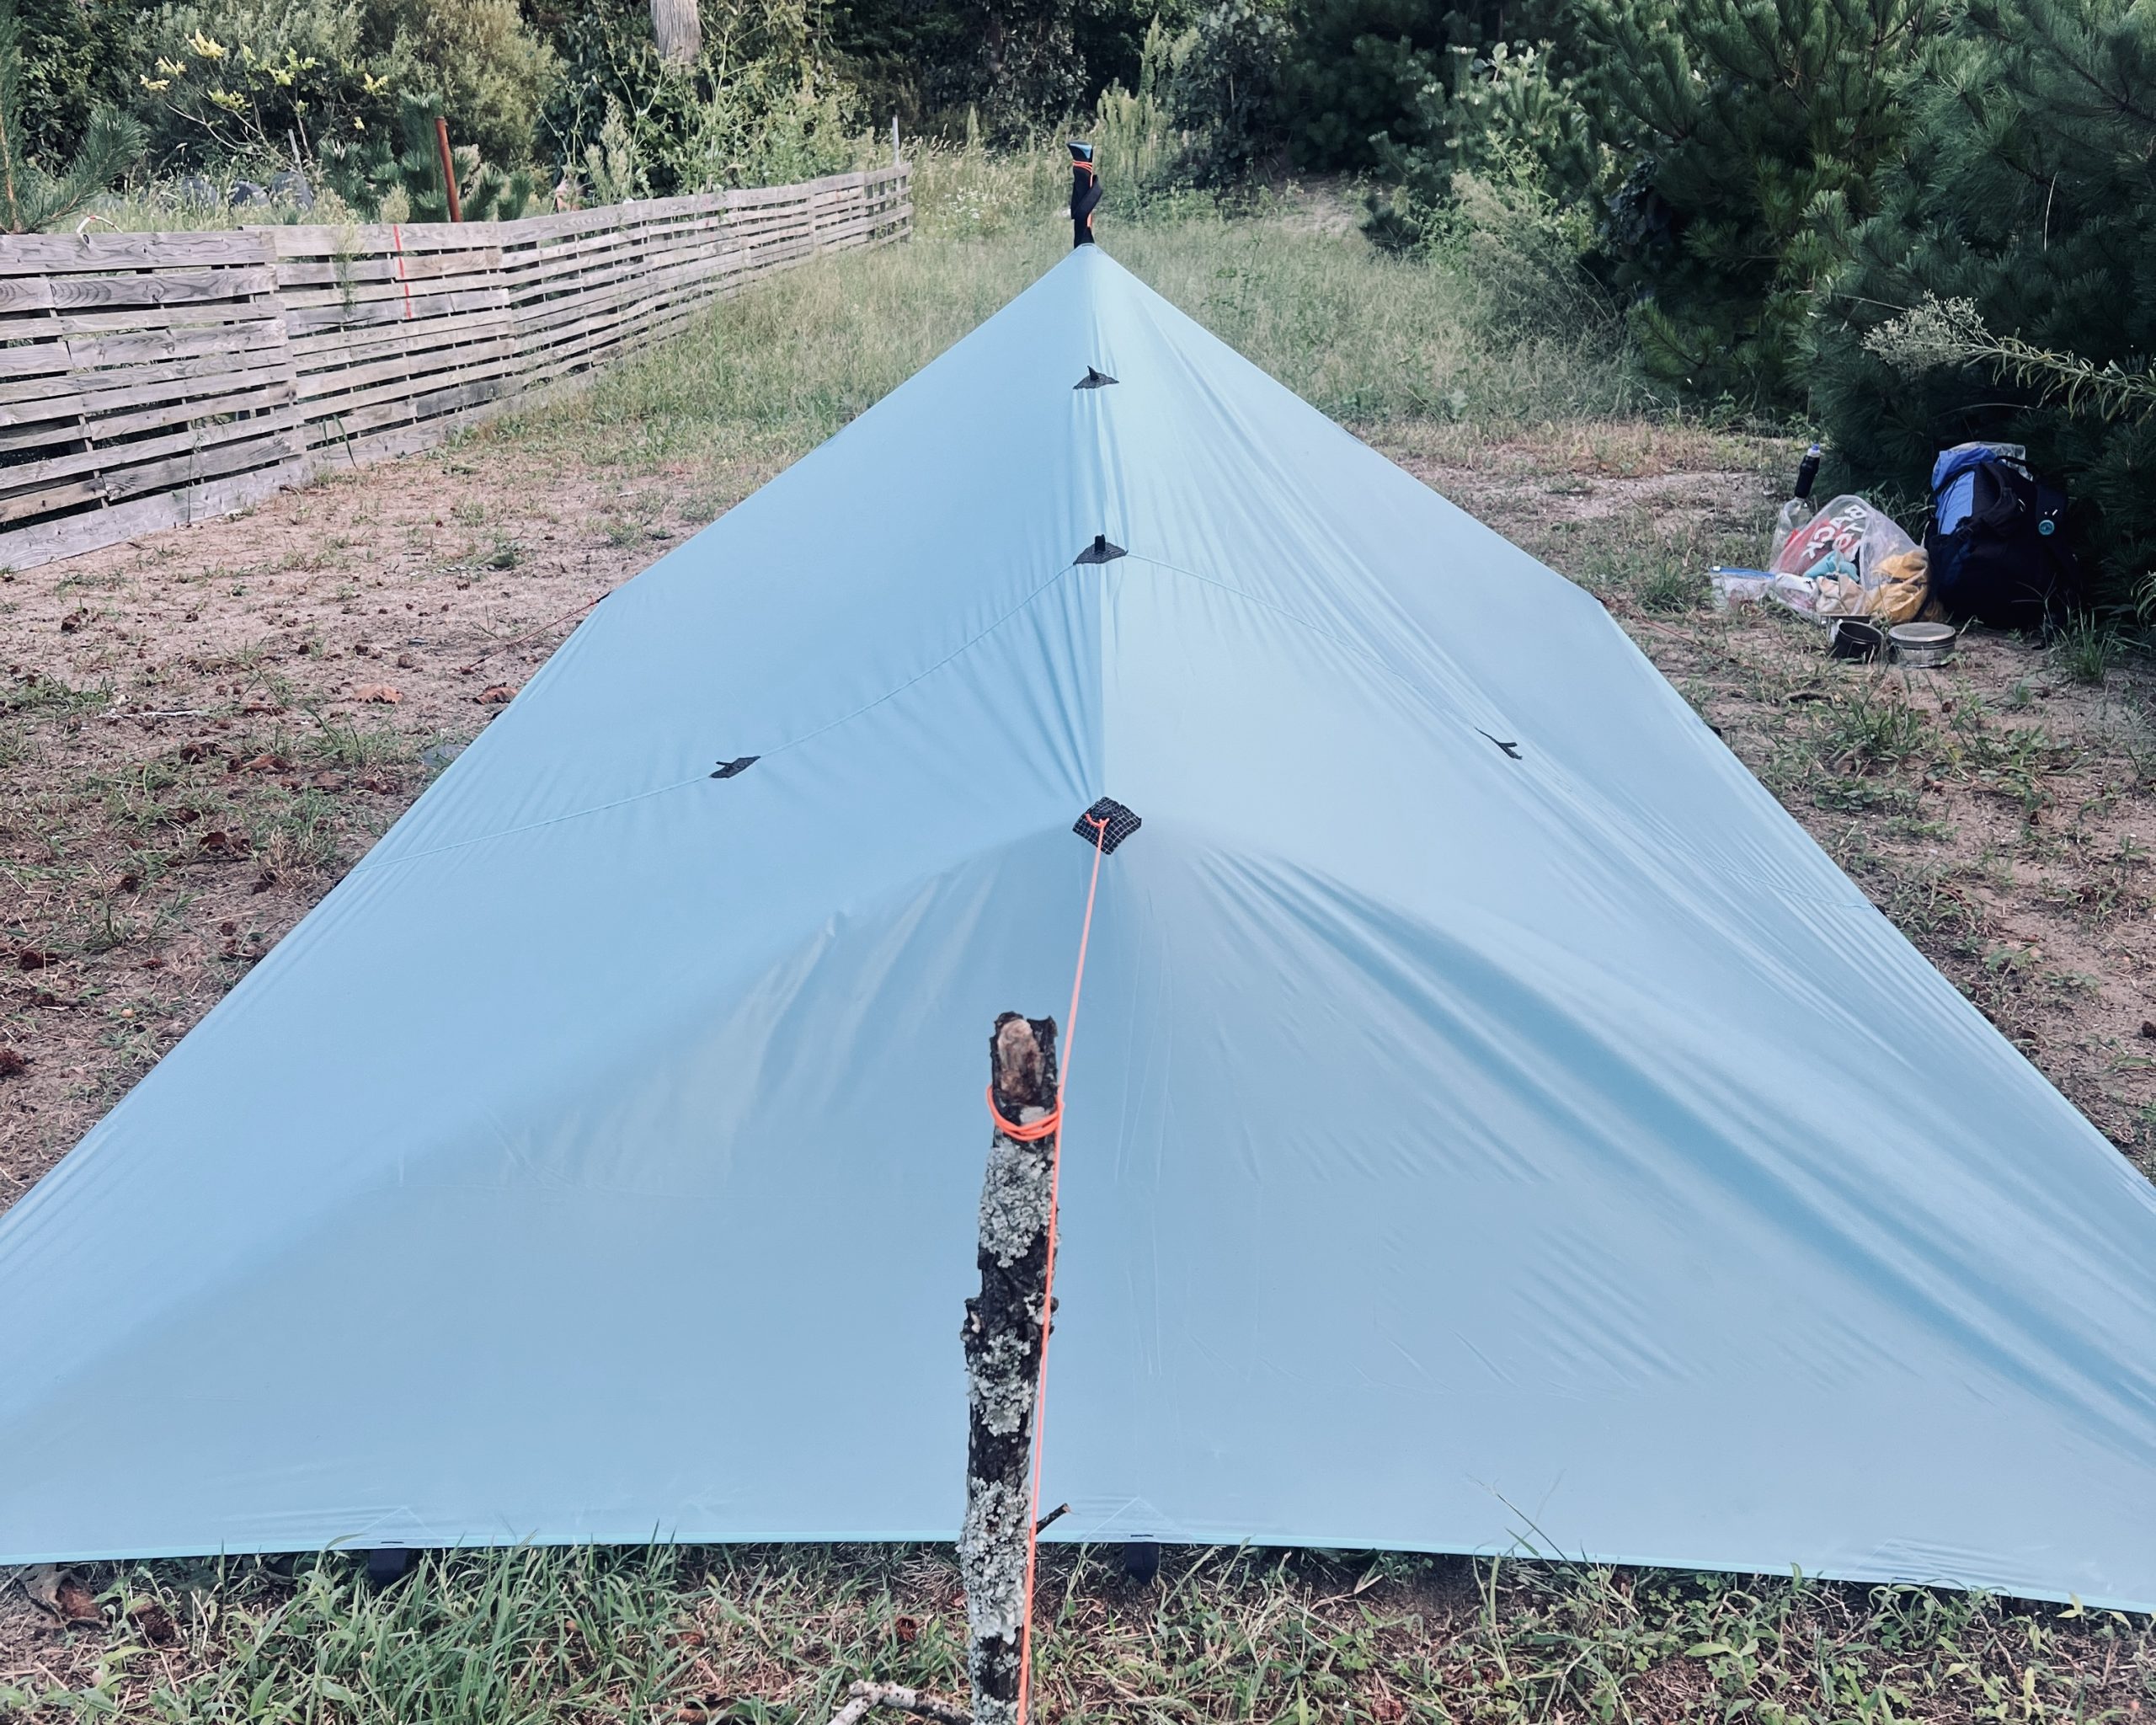
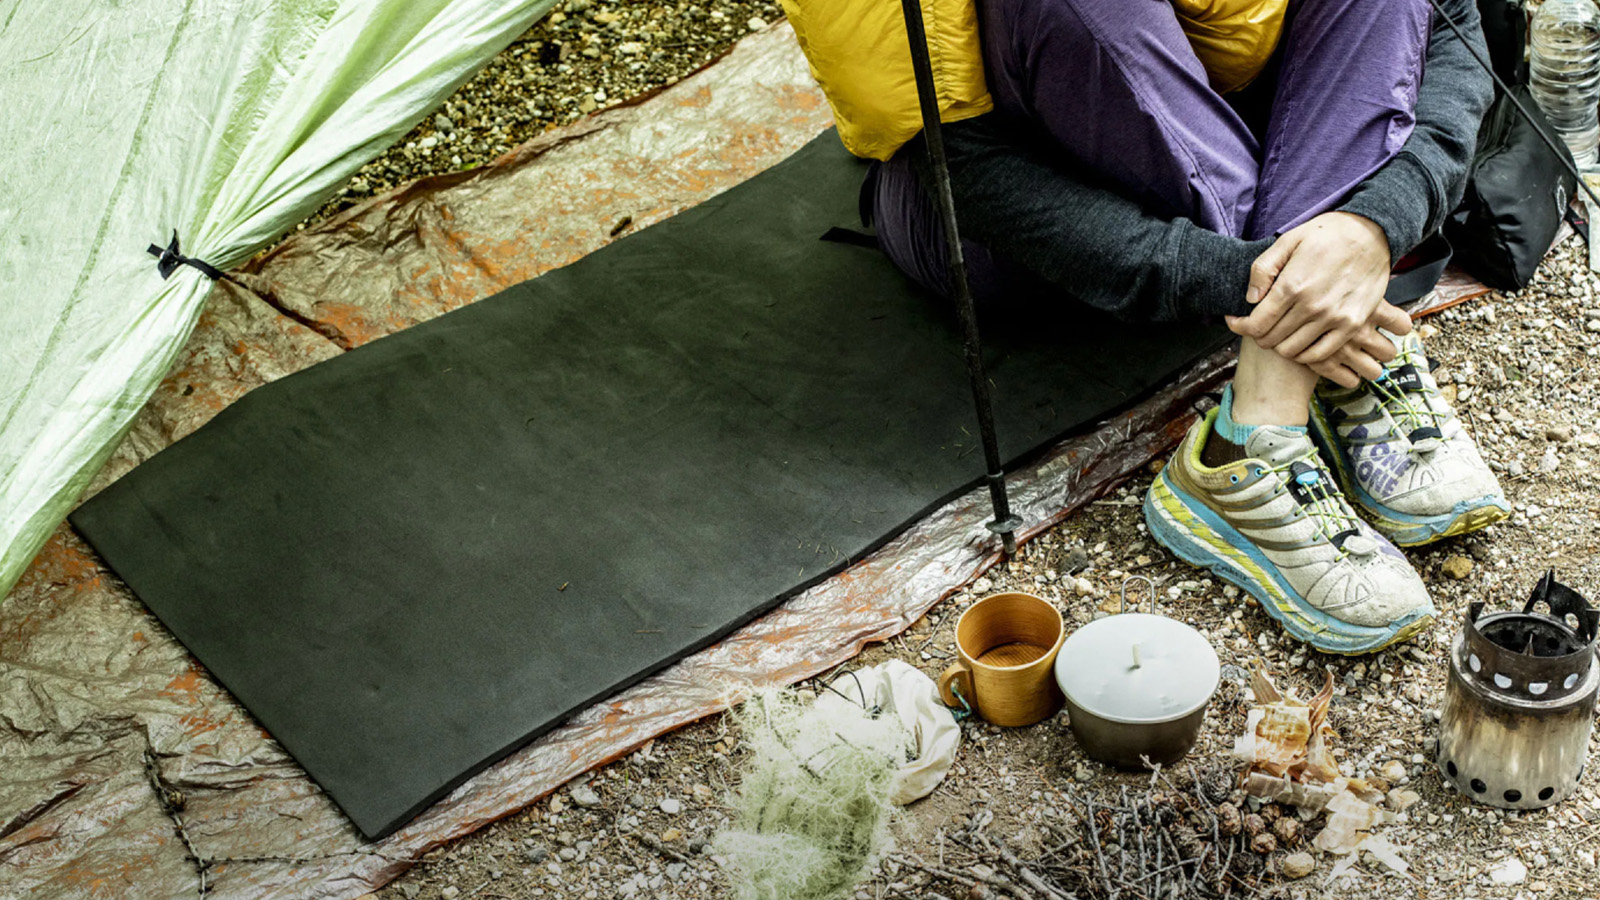
Most of the campsites are modest but perfect for recovering from a day of hiking.

A sunset dinner at a coastal campsite.
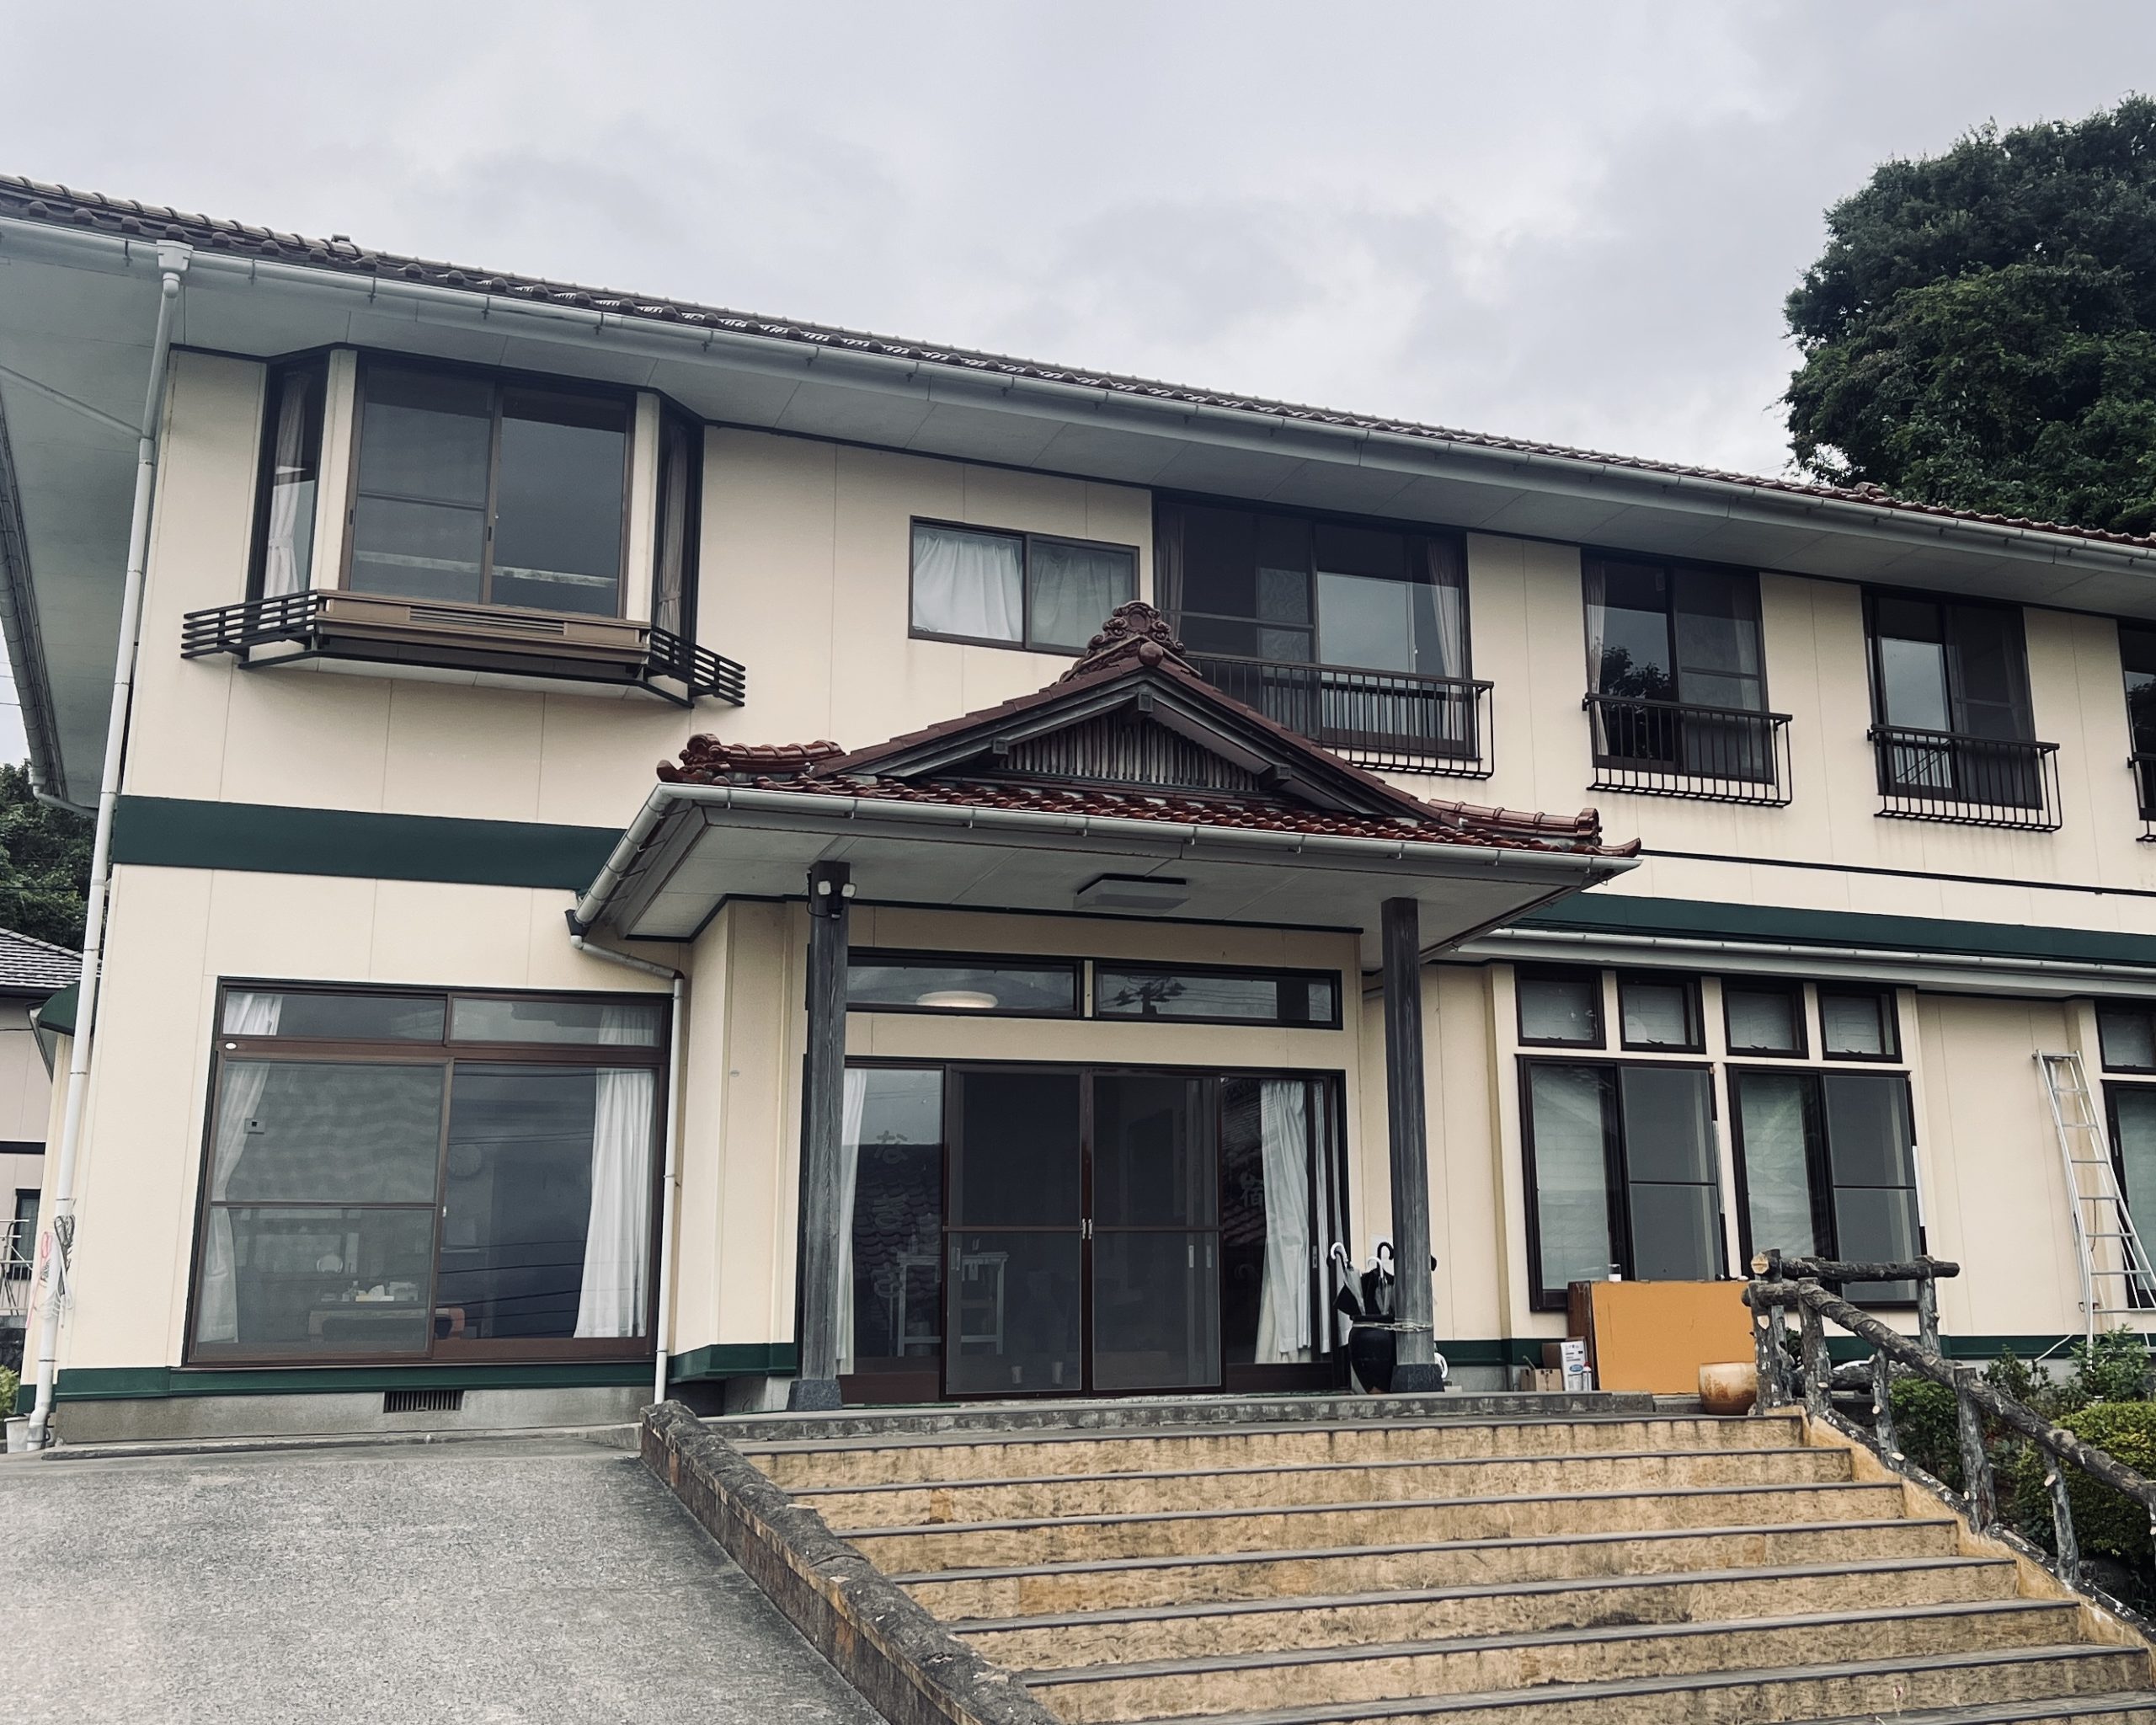
Minshuku Nagisa in Karakuwa, where I spent a memorable night.
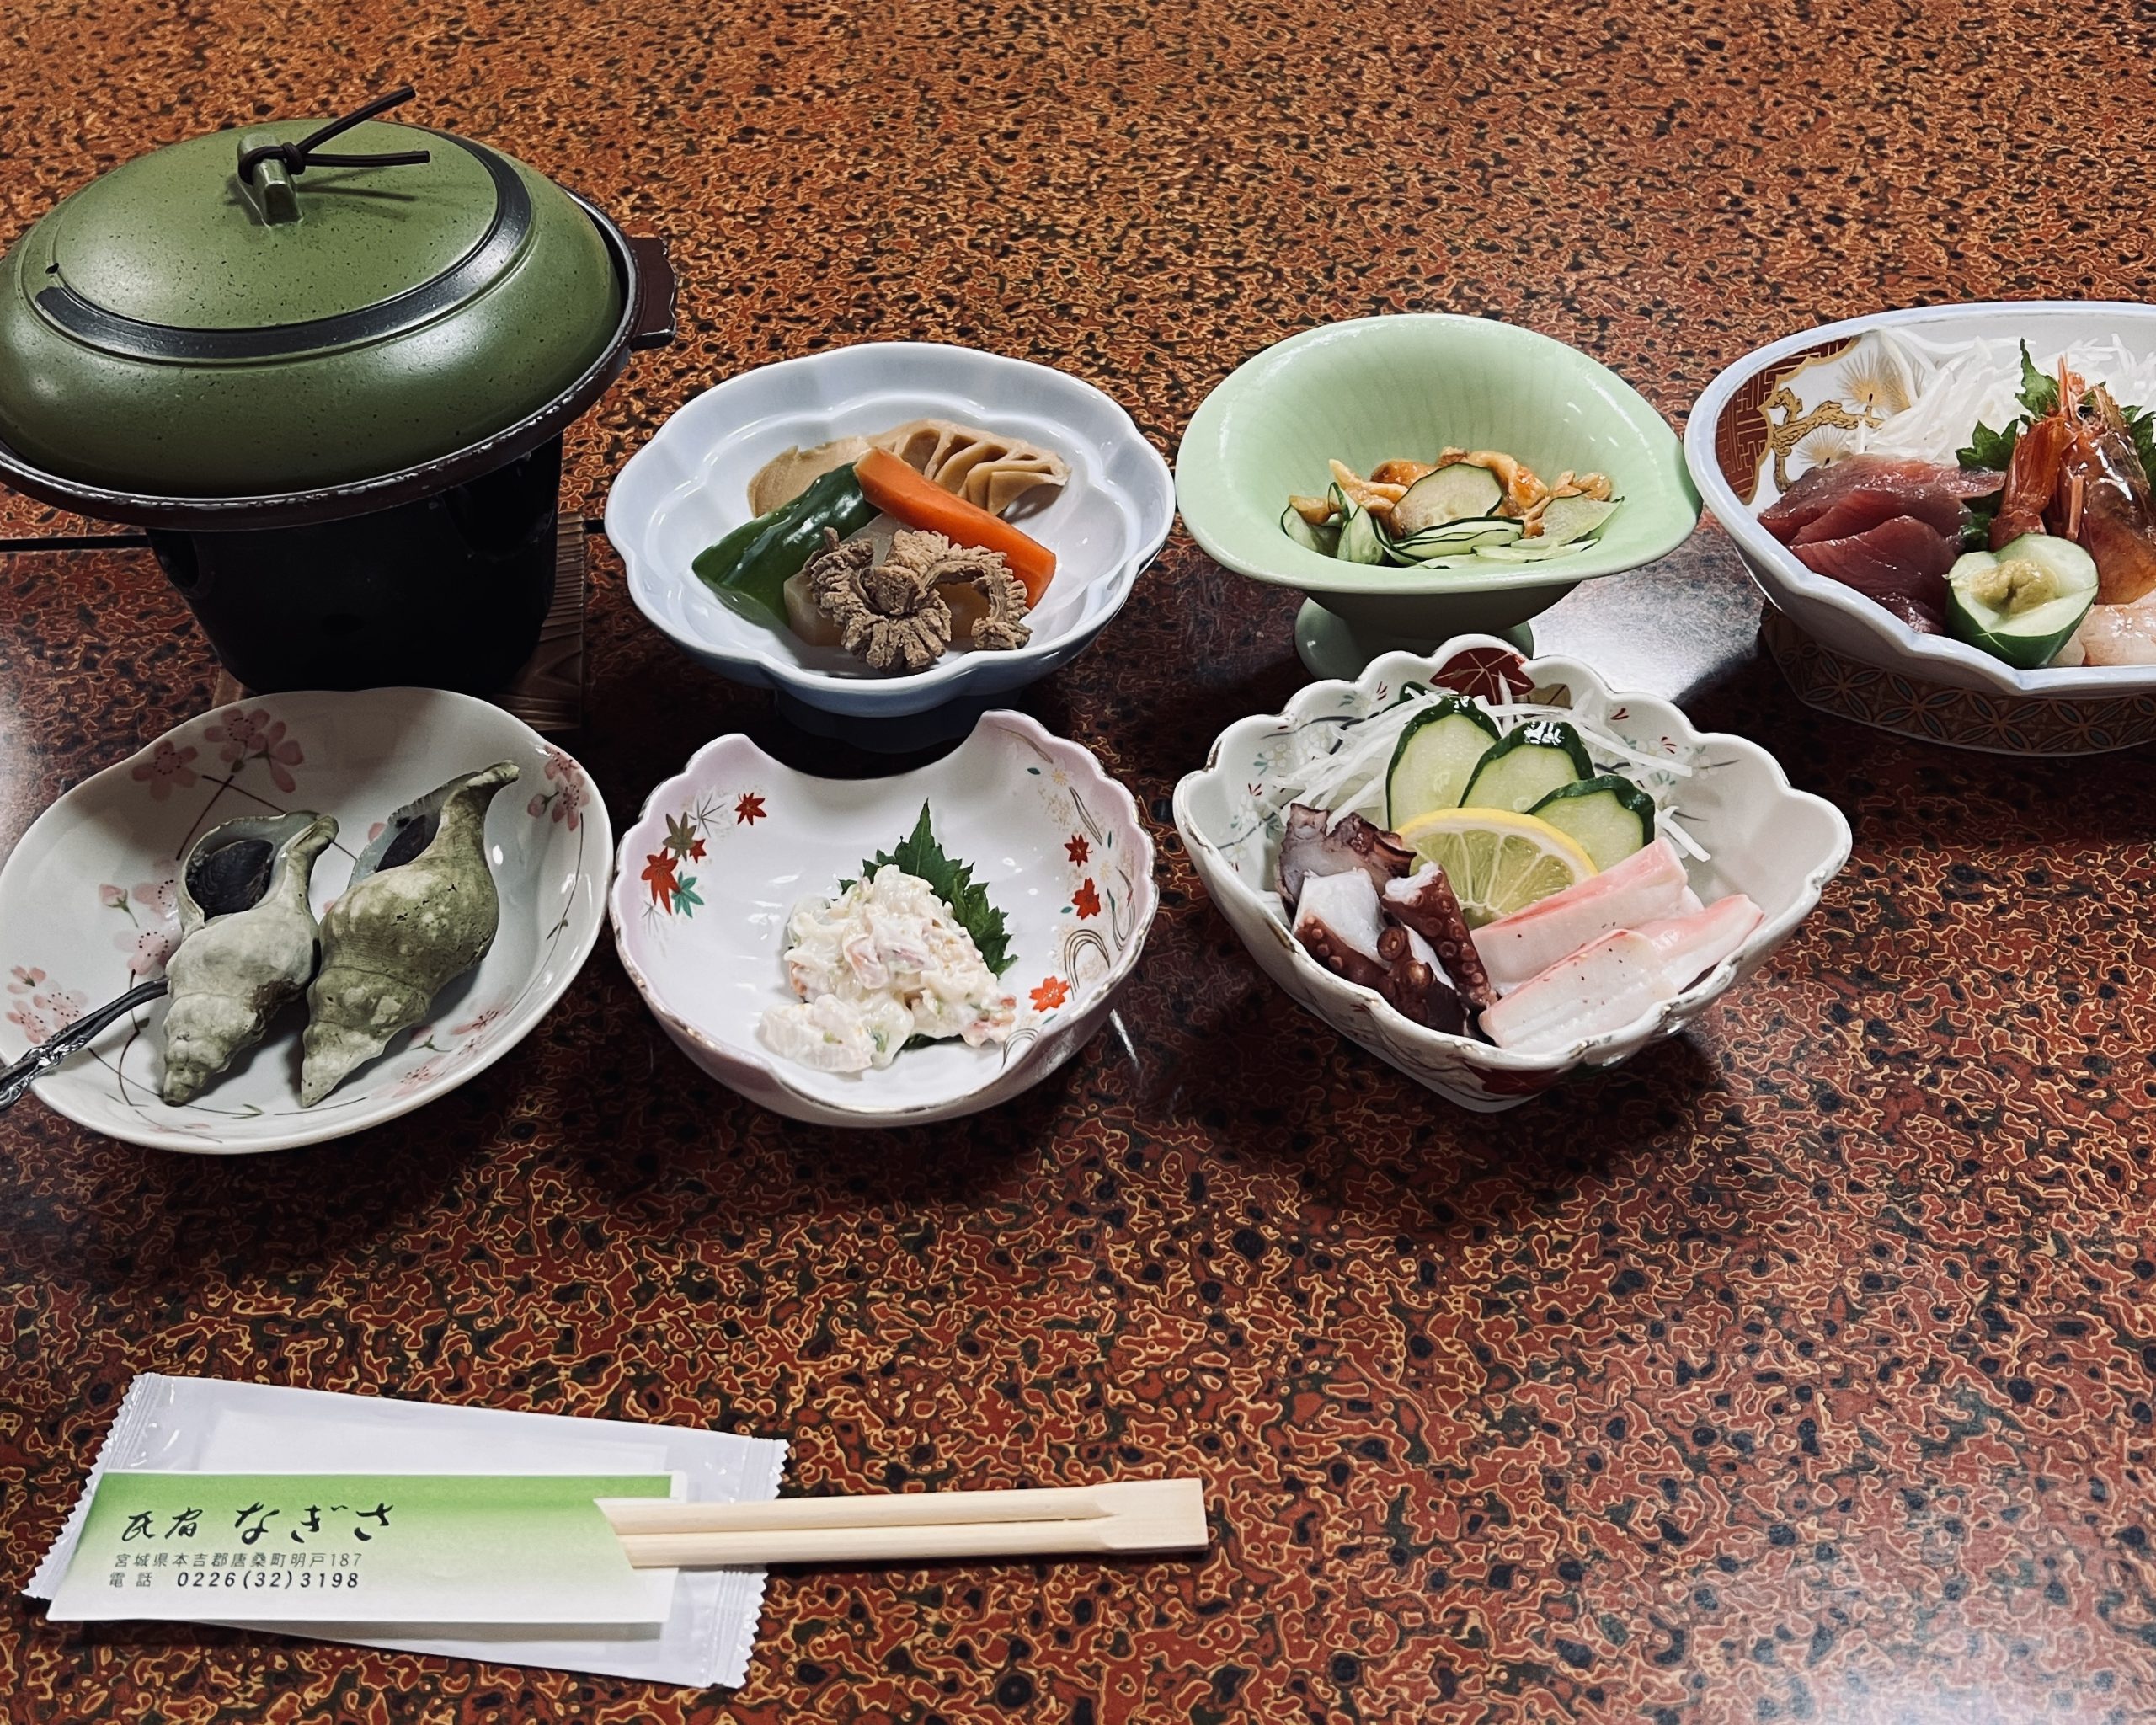
The guesthouses where I stayed treated me to an abundance of fresh, local seafood.
Water sources
- Streams and springs
- Tap water
- Vending machines
I recommend carrying a portable water filter. Though I rarely needed to fill up at streams, there were still times when it was a life-saver. Having it gave me an emergency fallback and meant that I didn’t have to carry so much water all the time.
Most of the time, I found facilities that let hikers refill their water bottles in the communities along the Michinoku Coastal Trail that I passed through.
When planning your itinerary, check the Michinoku Trail Club’s Data Book and Supporters information. Another unique feature of hiking in Japan: the abundance of vending machines. You’ll find them even on remote rural roads. They become harder to find, though, as you travel north, so don’t depend on them too much.
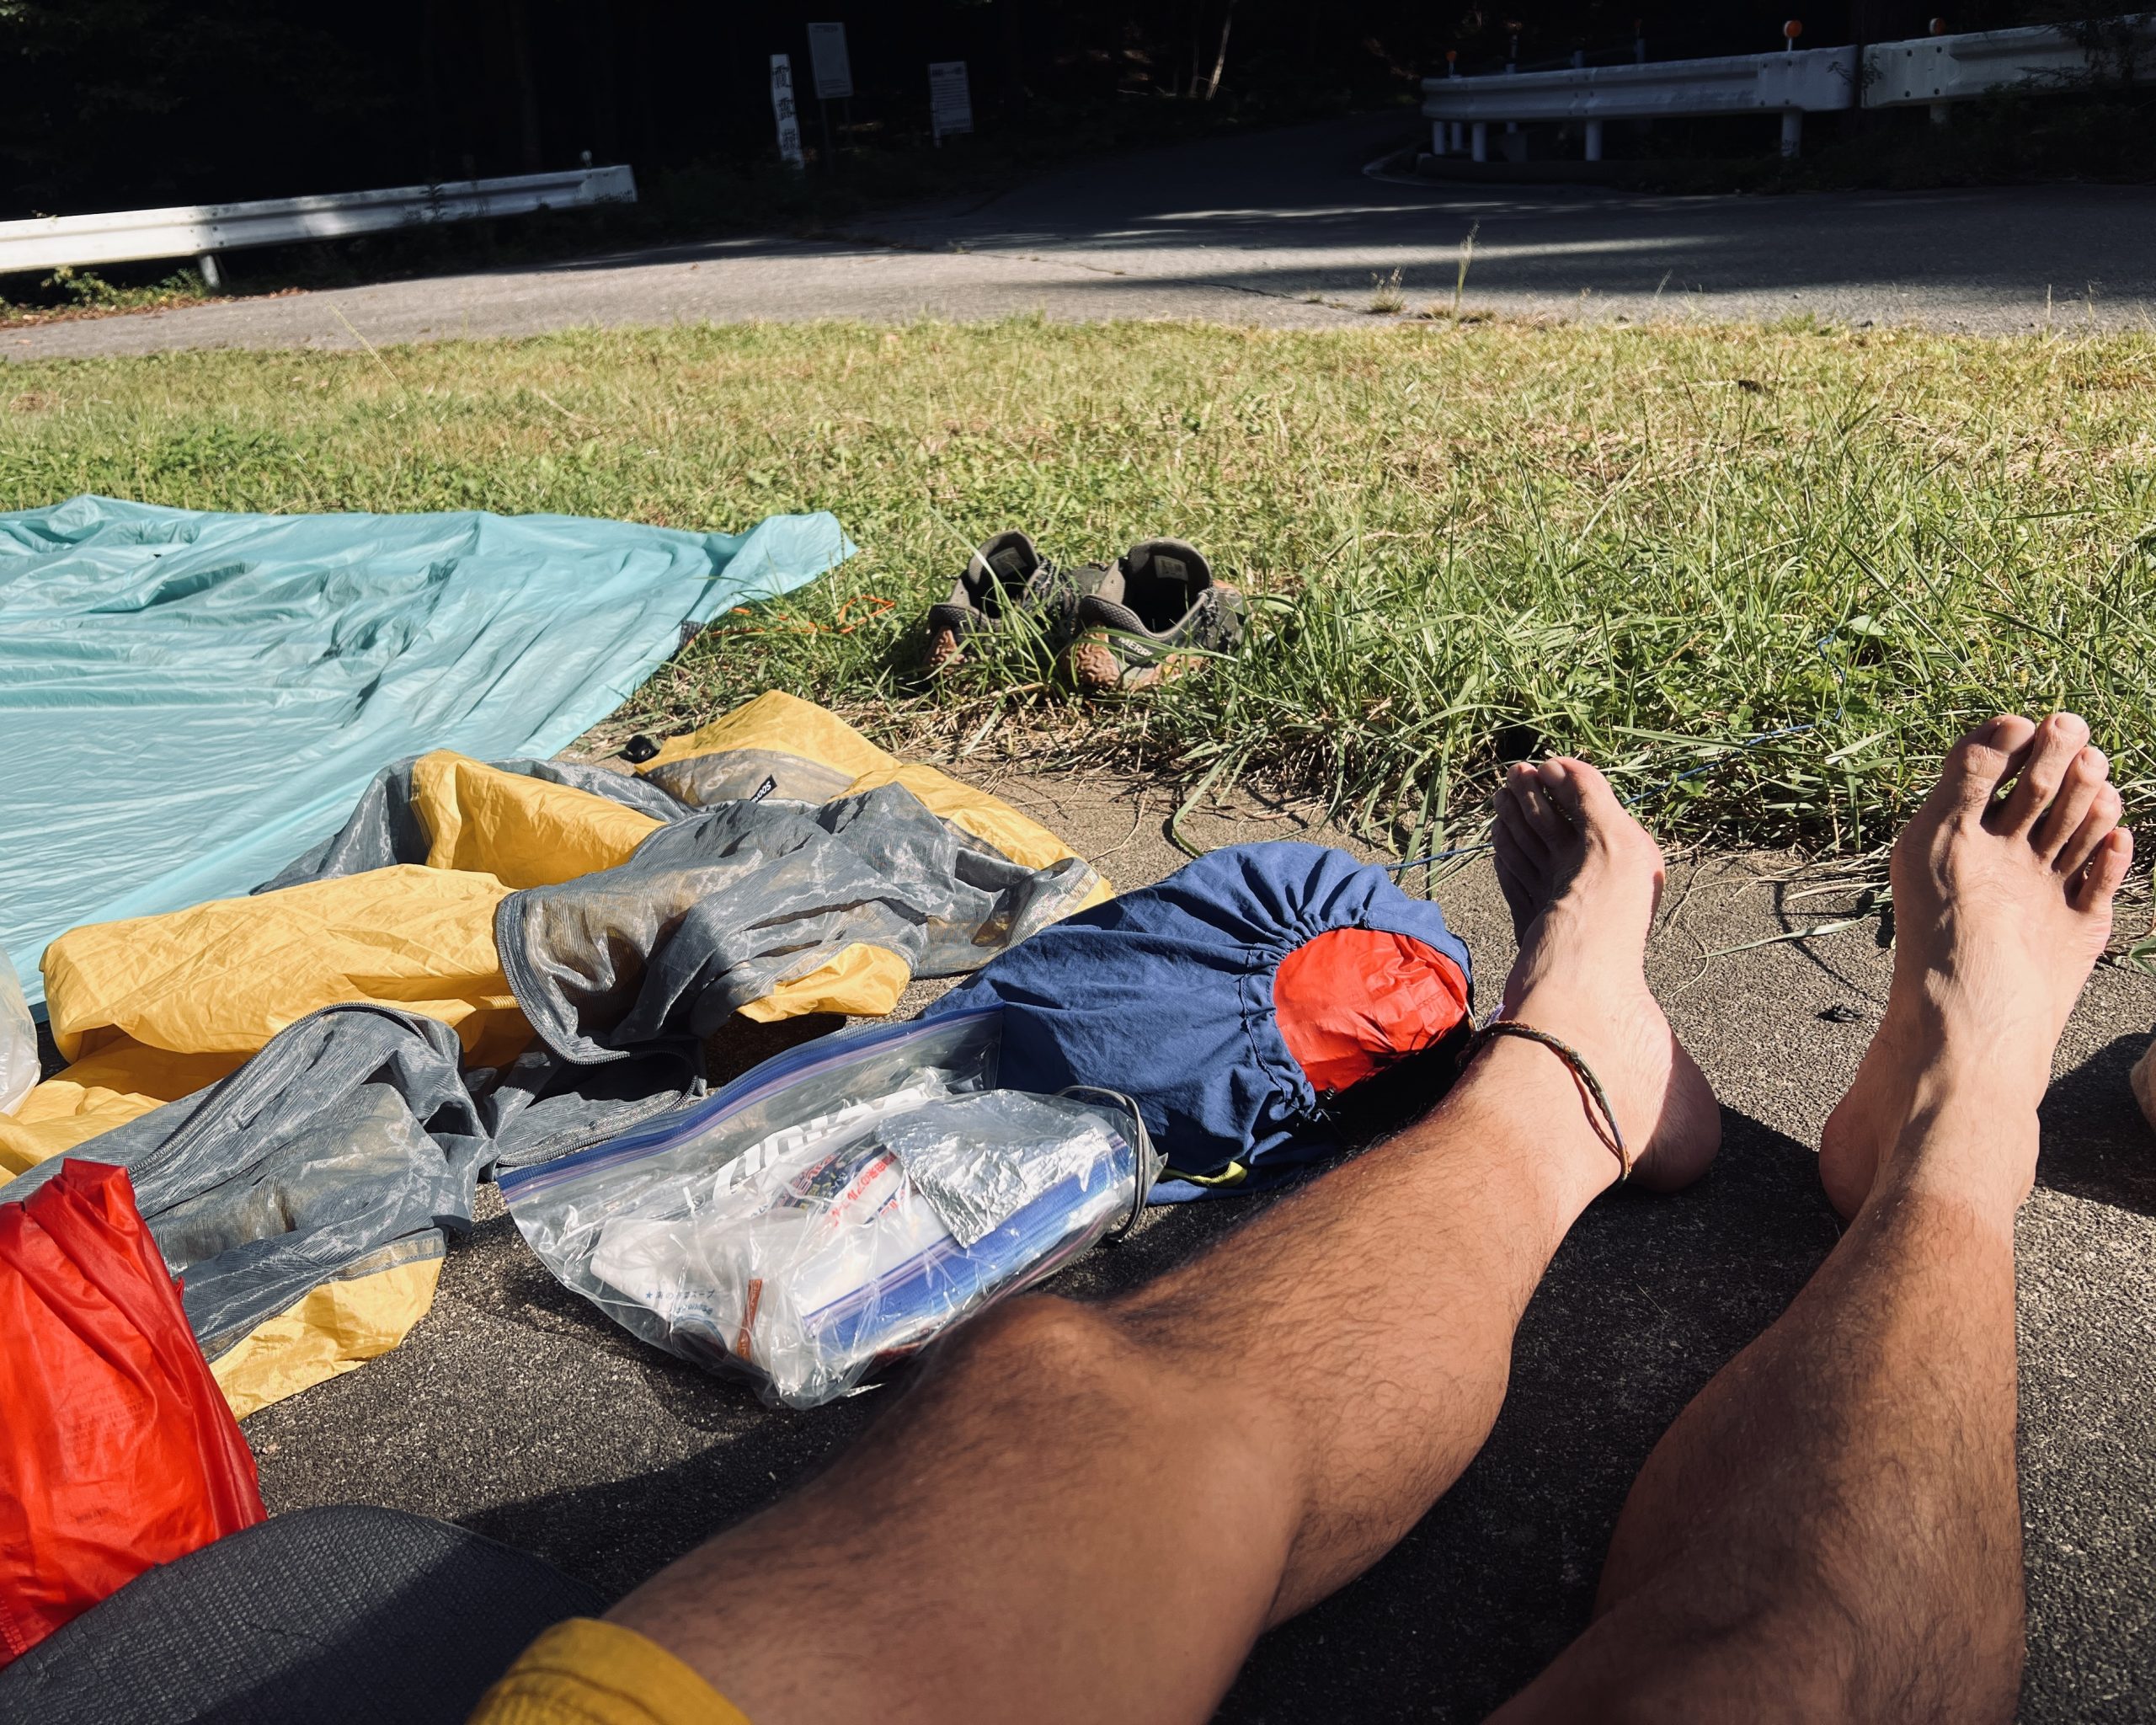
I hiked the trail during the relatively warm months of September and October, but I never carried more than about 2 liters (half a gallon) of water at a time or had trouble finding somewhere to fill up. Of course, everyone’s pace and hydration needs differ. Understanding how thirsty you get and how much you need to stay hydrated under different conditions is crucial.
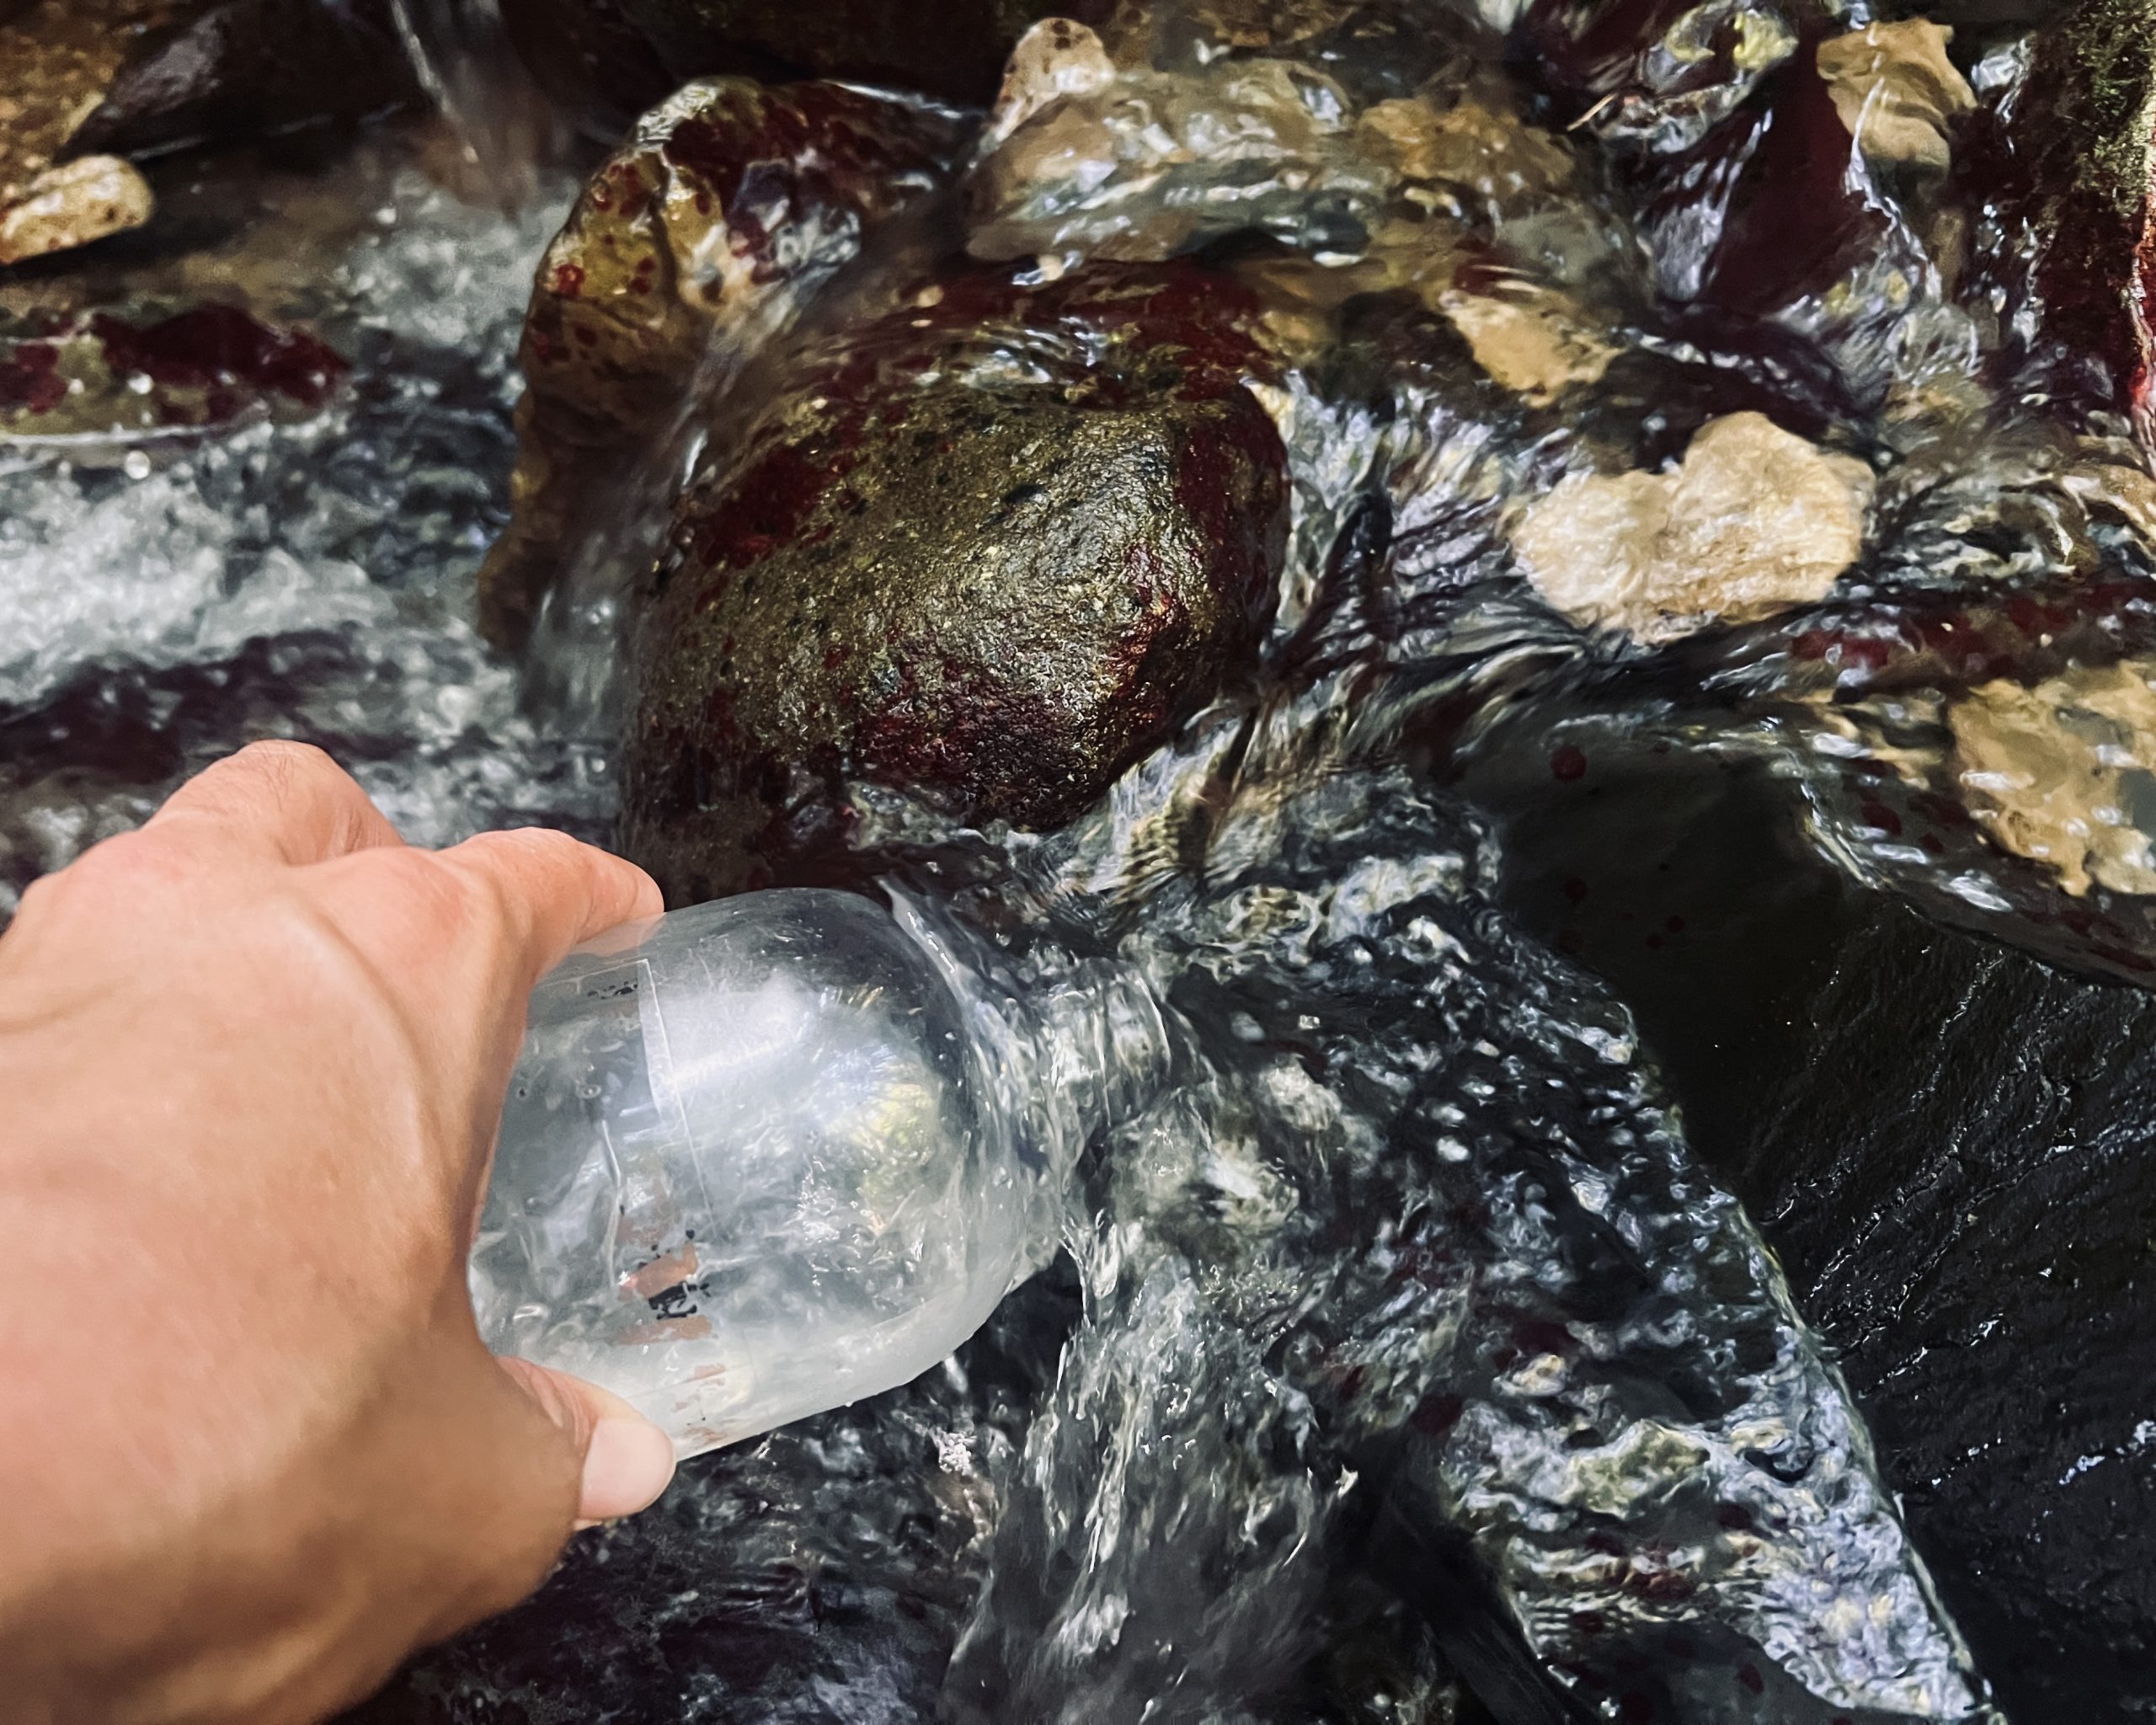
A water filter is essential on a long thru-hike.

You’ll come across vending machines on remote rural roads.
Trail details
Paved, unpaved
The Michinoku Coastal Trail is mostly paved roads ー roughly 70 percent, in fact ー and trail washouts are rare.
For hikers used to climbing mountains, walking on paved roads might sound unappealing. But the Michinoku Coastal Trail is hardly just an endless stretch of road.
The natural scenery makes for an enjoyable walking along the route, paved or unpaved. As I mentioned, imagining the historical significance of the roads that once connected villages and observing the distinctive qualities of each community is one of the pleasures of the trail.
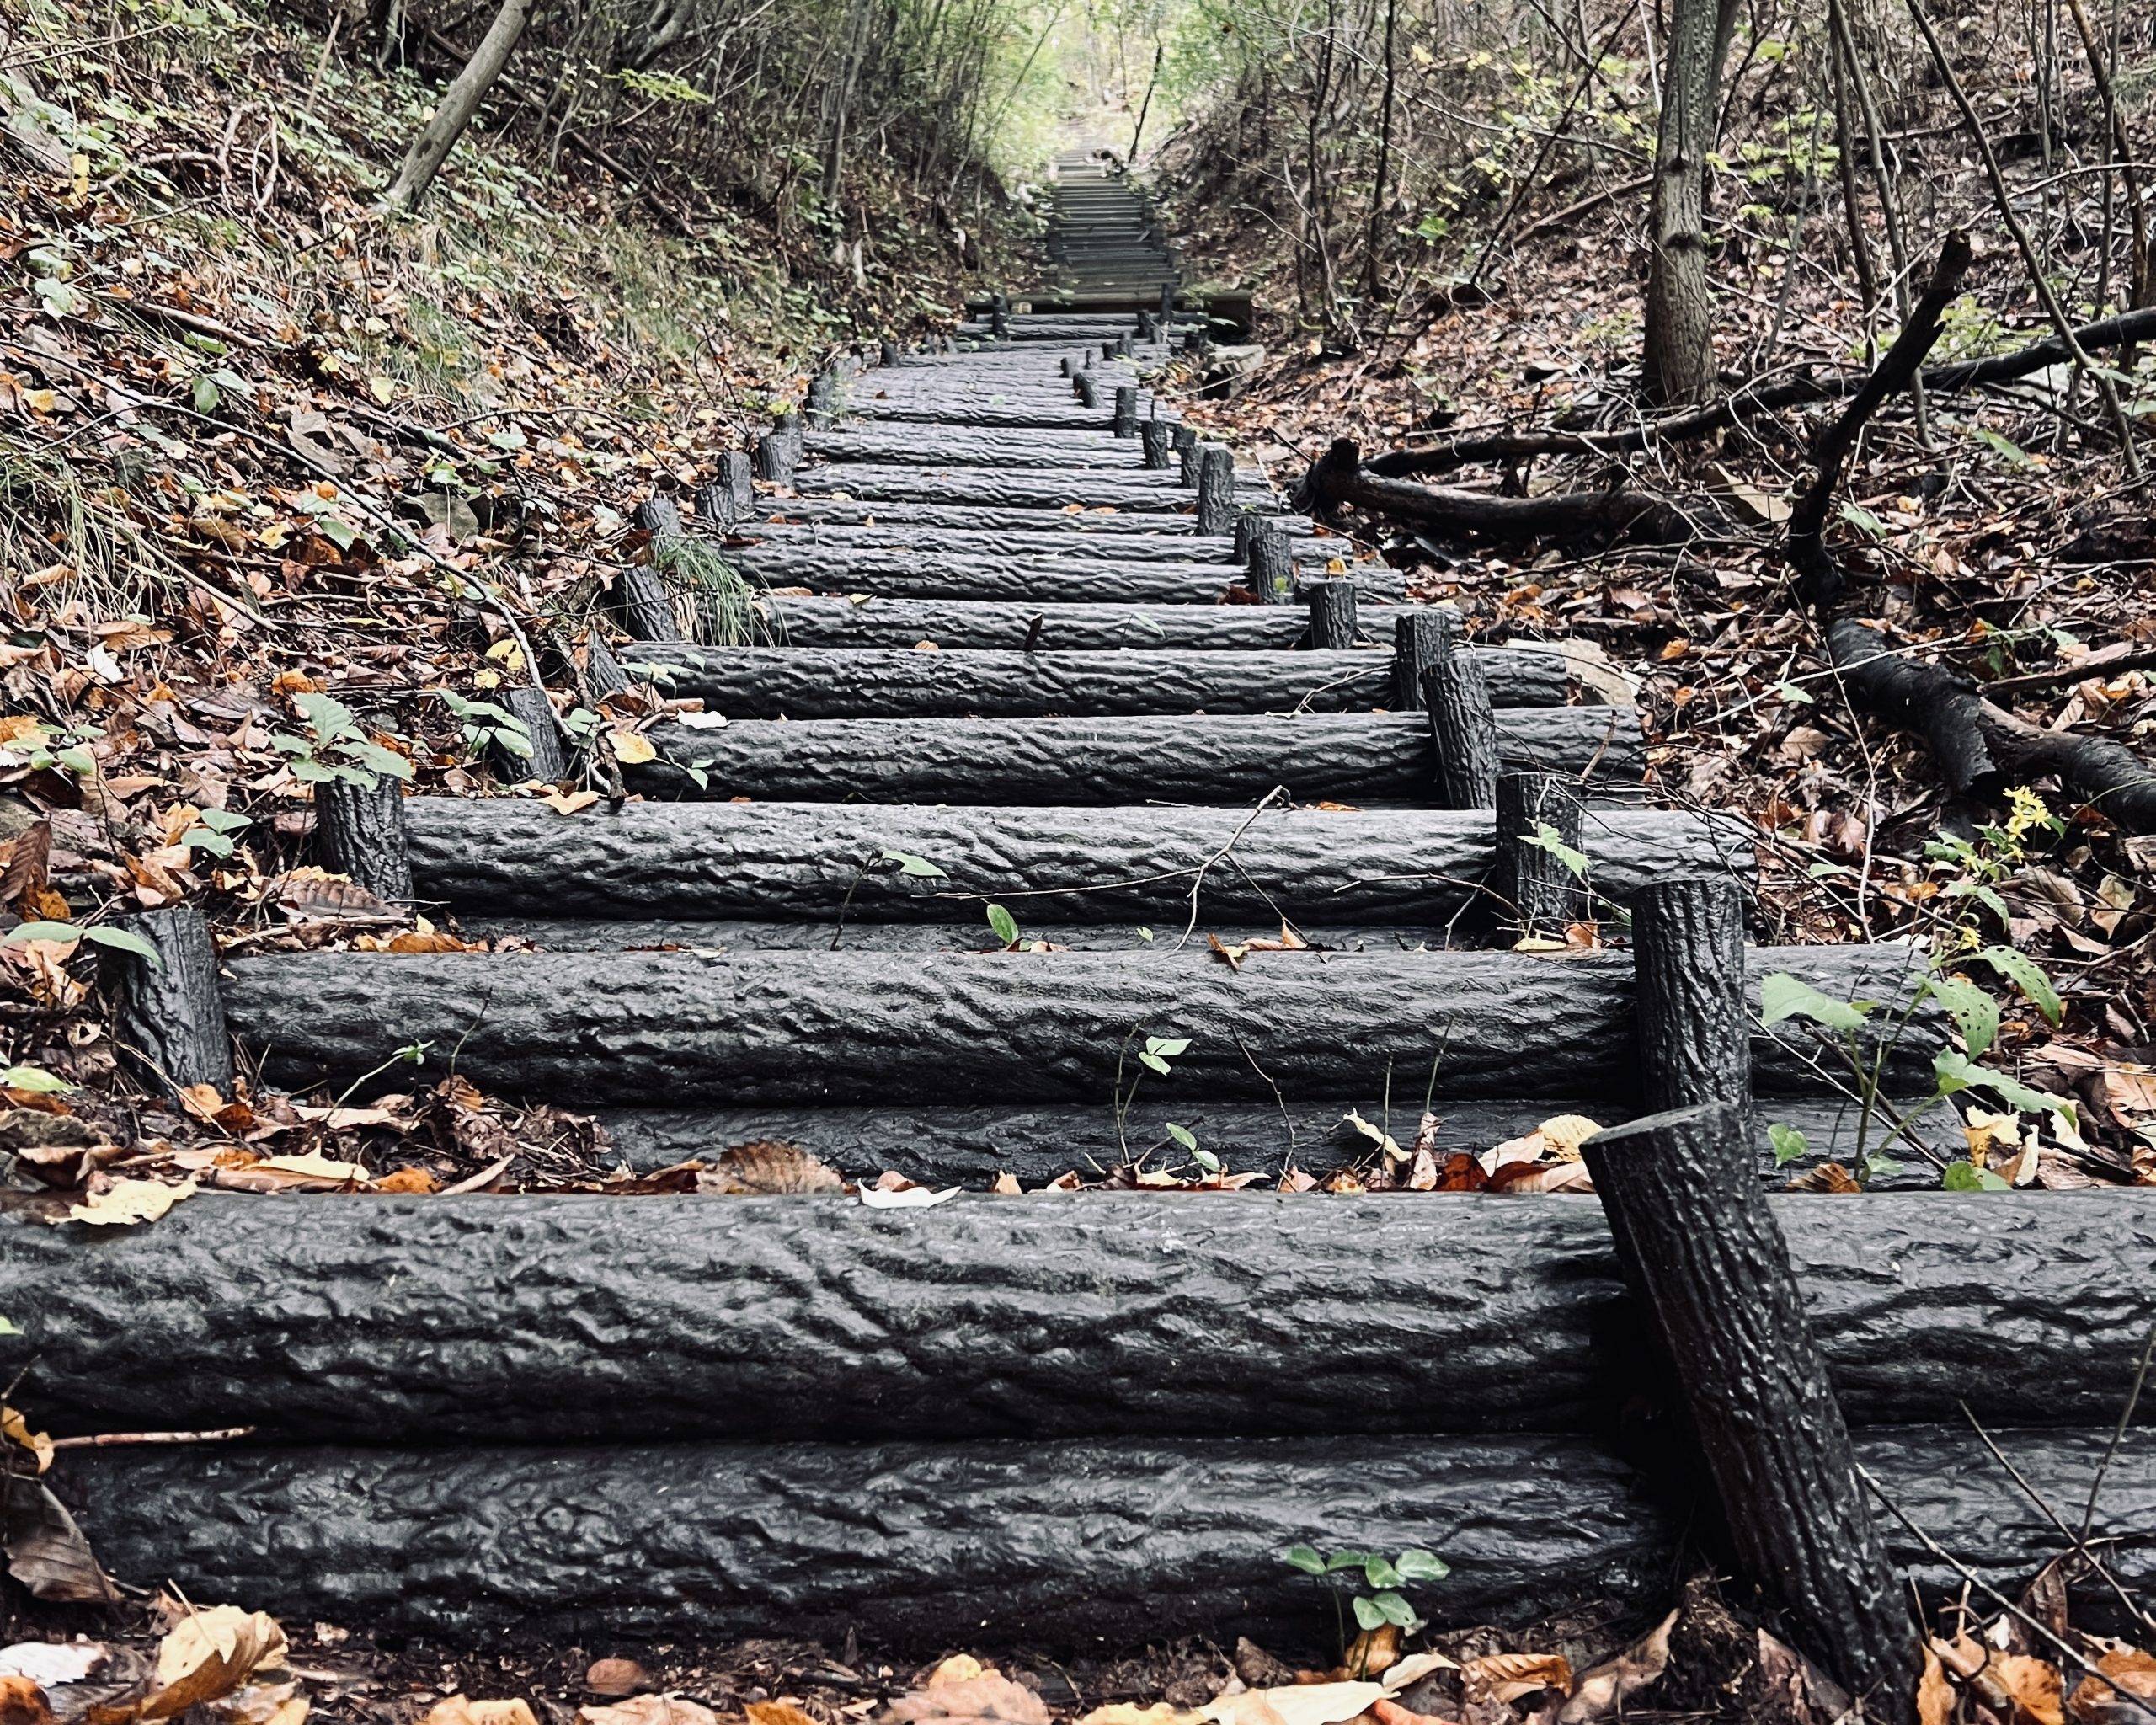
The unpaved paths are well-maintained and easy to follow. There were no impassable or dangerous sections. I was traveling when vegetation was at its thickest, but I never got lost, thanks to the trail management efforts of organizations and local volunteers.
The few rough sections that I encountered were, I later learned, areas where route changes had recently been made and maintenance work was in progress. The route continues to evolve, with efforts underway to add more natural paths wherever possible.
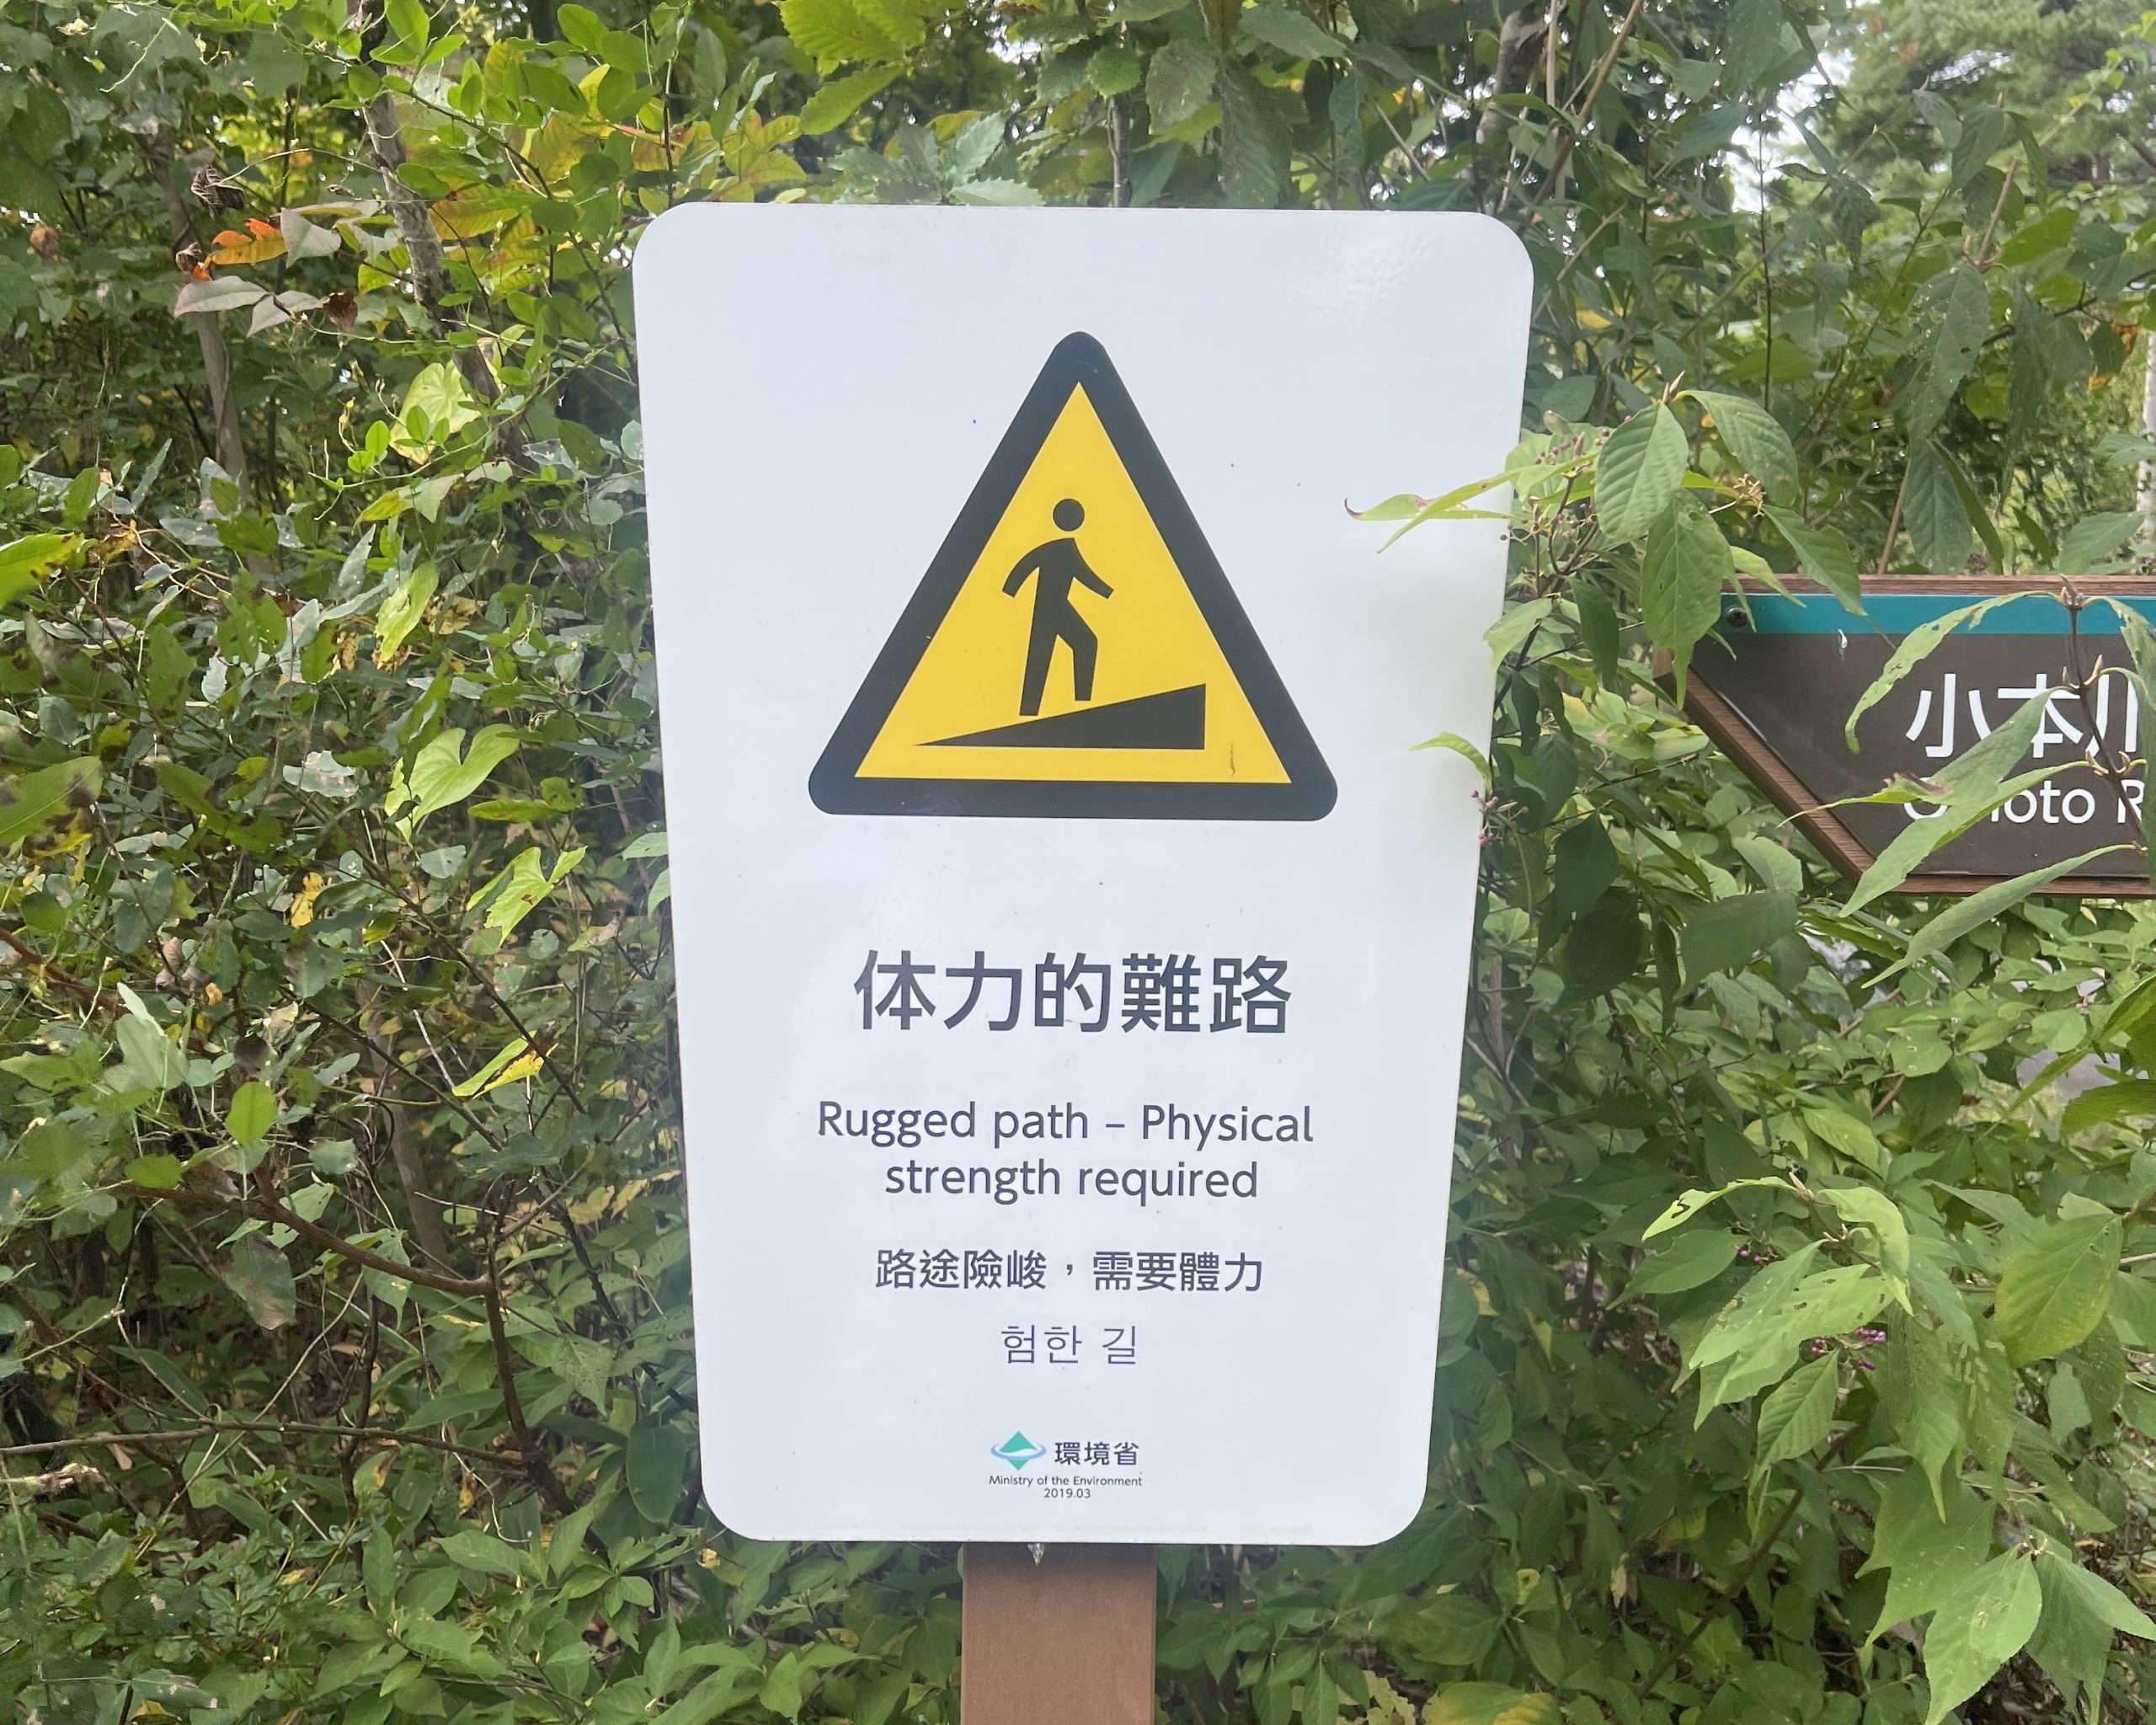
Note: Although trail conditions are generally excellent, don’t get complacent. Even minor lapses in judgment can lead to serious accidents. No one is inspecting the trail week to week, and typhoons and other natural disasters can alter the state it’s in. Be sure to check the most up-to-date information about closures and detours on the Michinoku Trail Club’s website.
Paved roads come in many forms. Roads surrounded by nature are often a pleasure to walk.
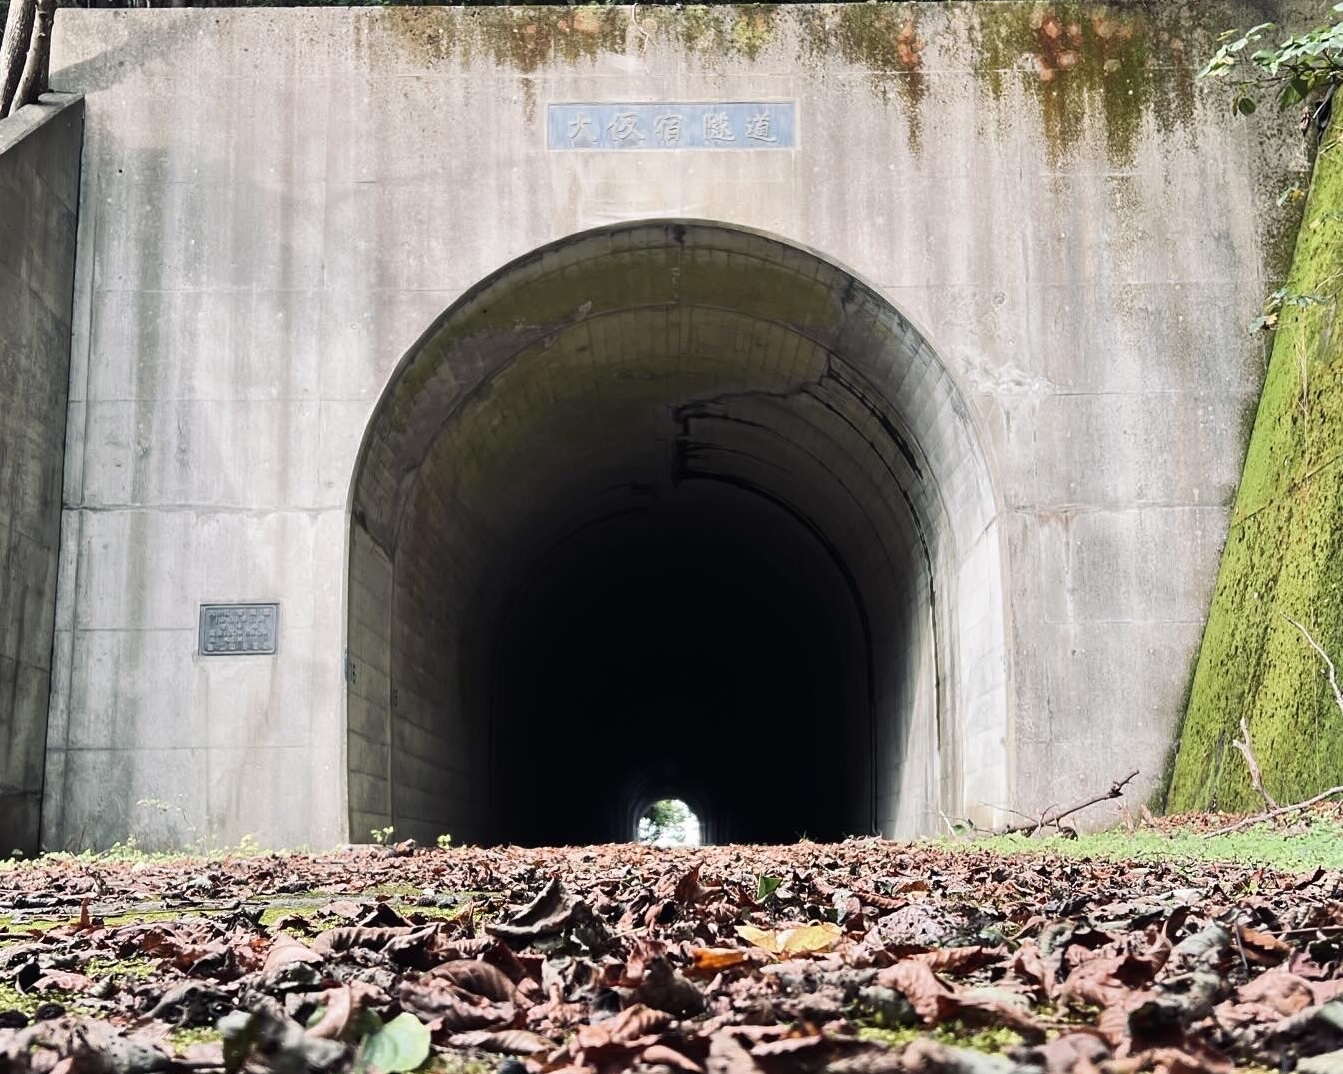
A tunnel on a secluded forestry road at the tip of a little-visited peninsula.
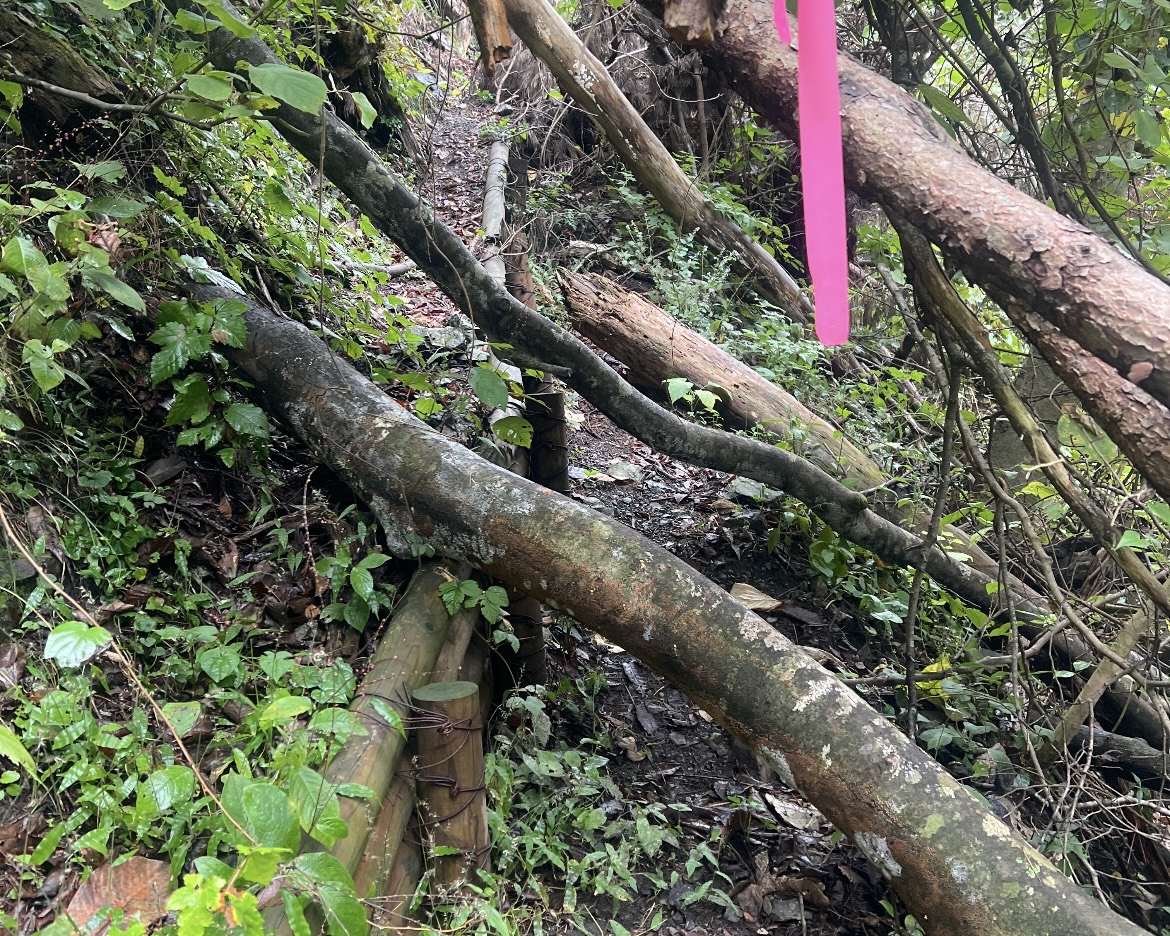
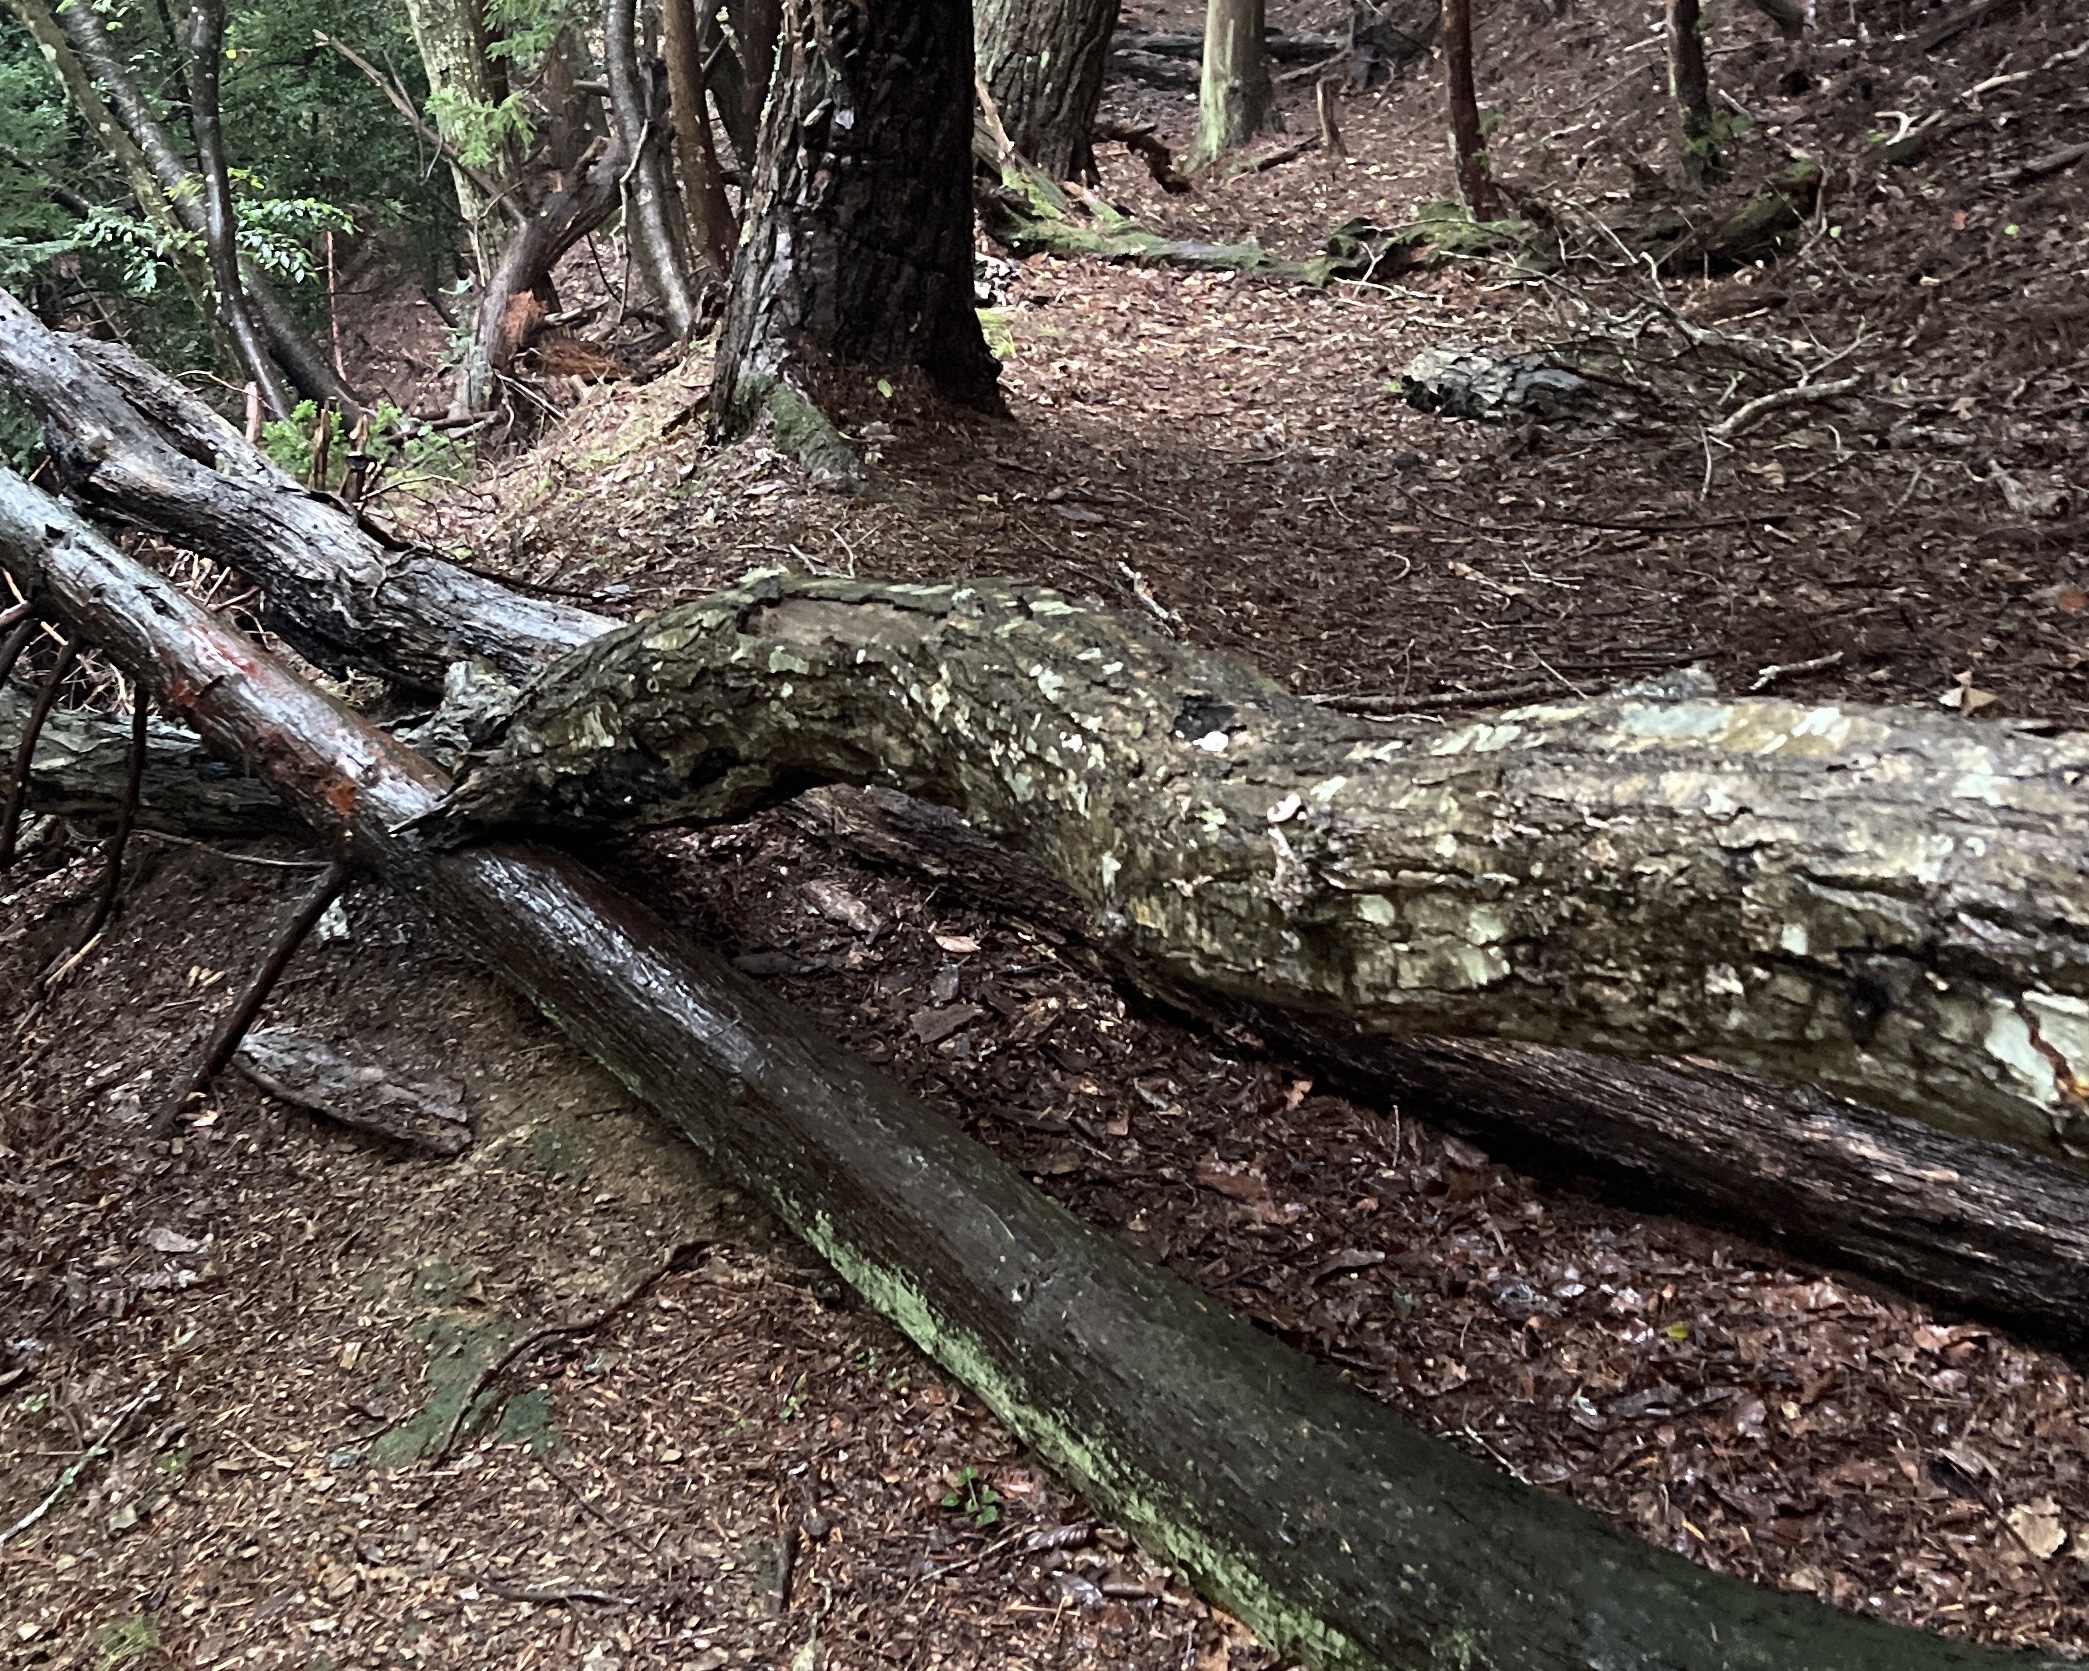
The occasional fallen tree never obstructed the path.
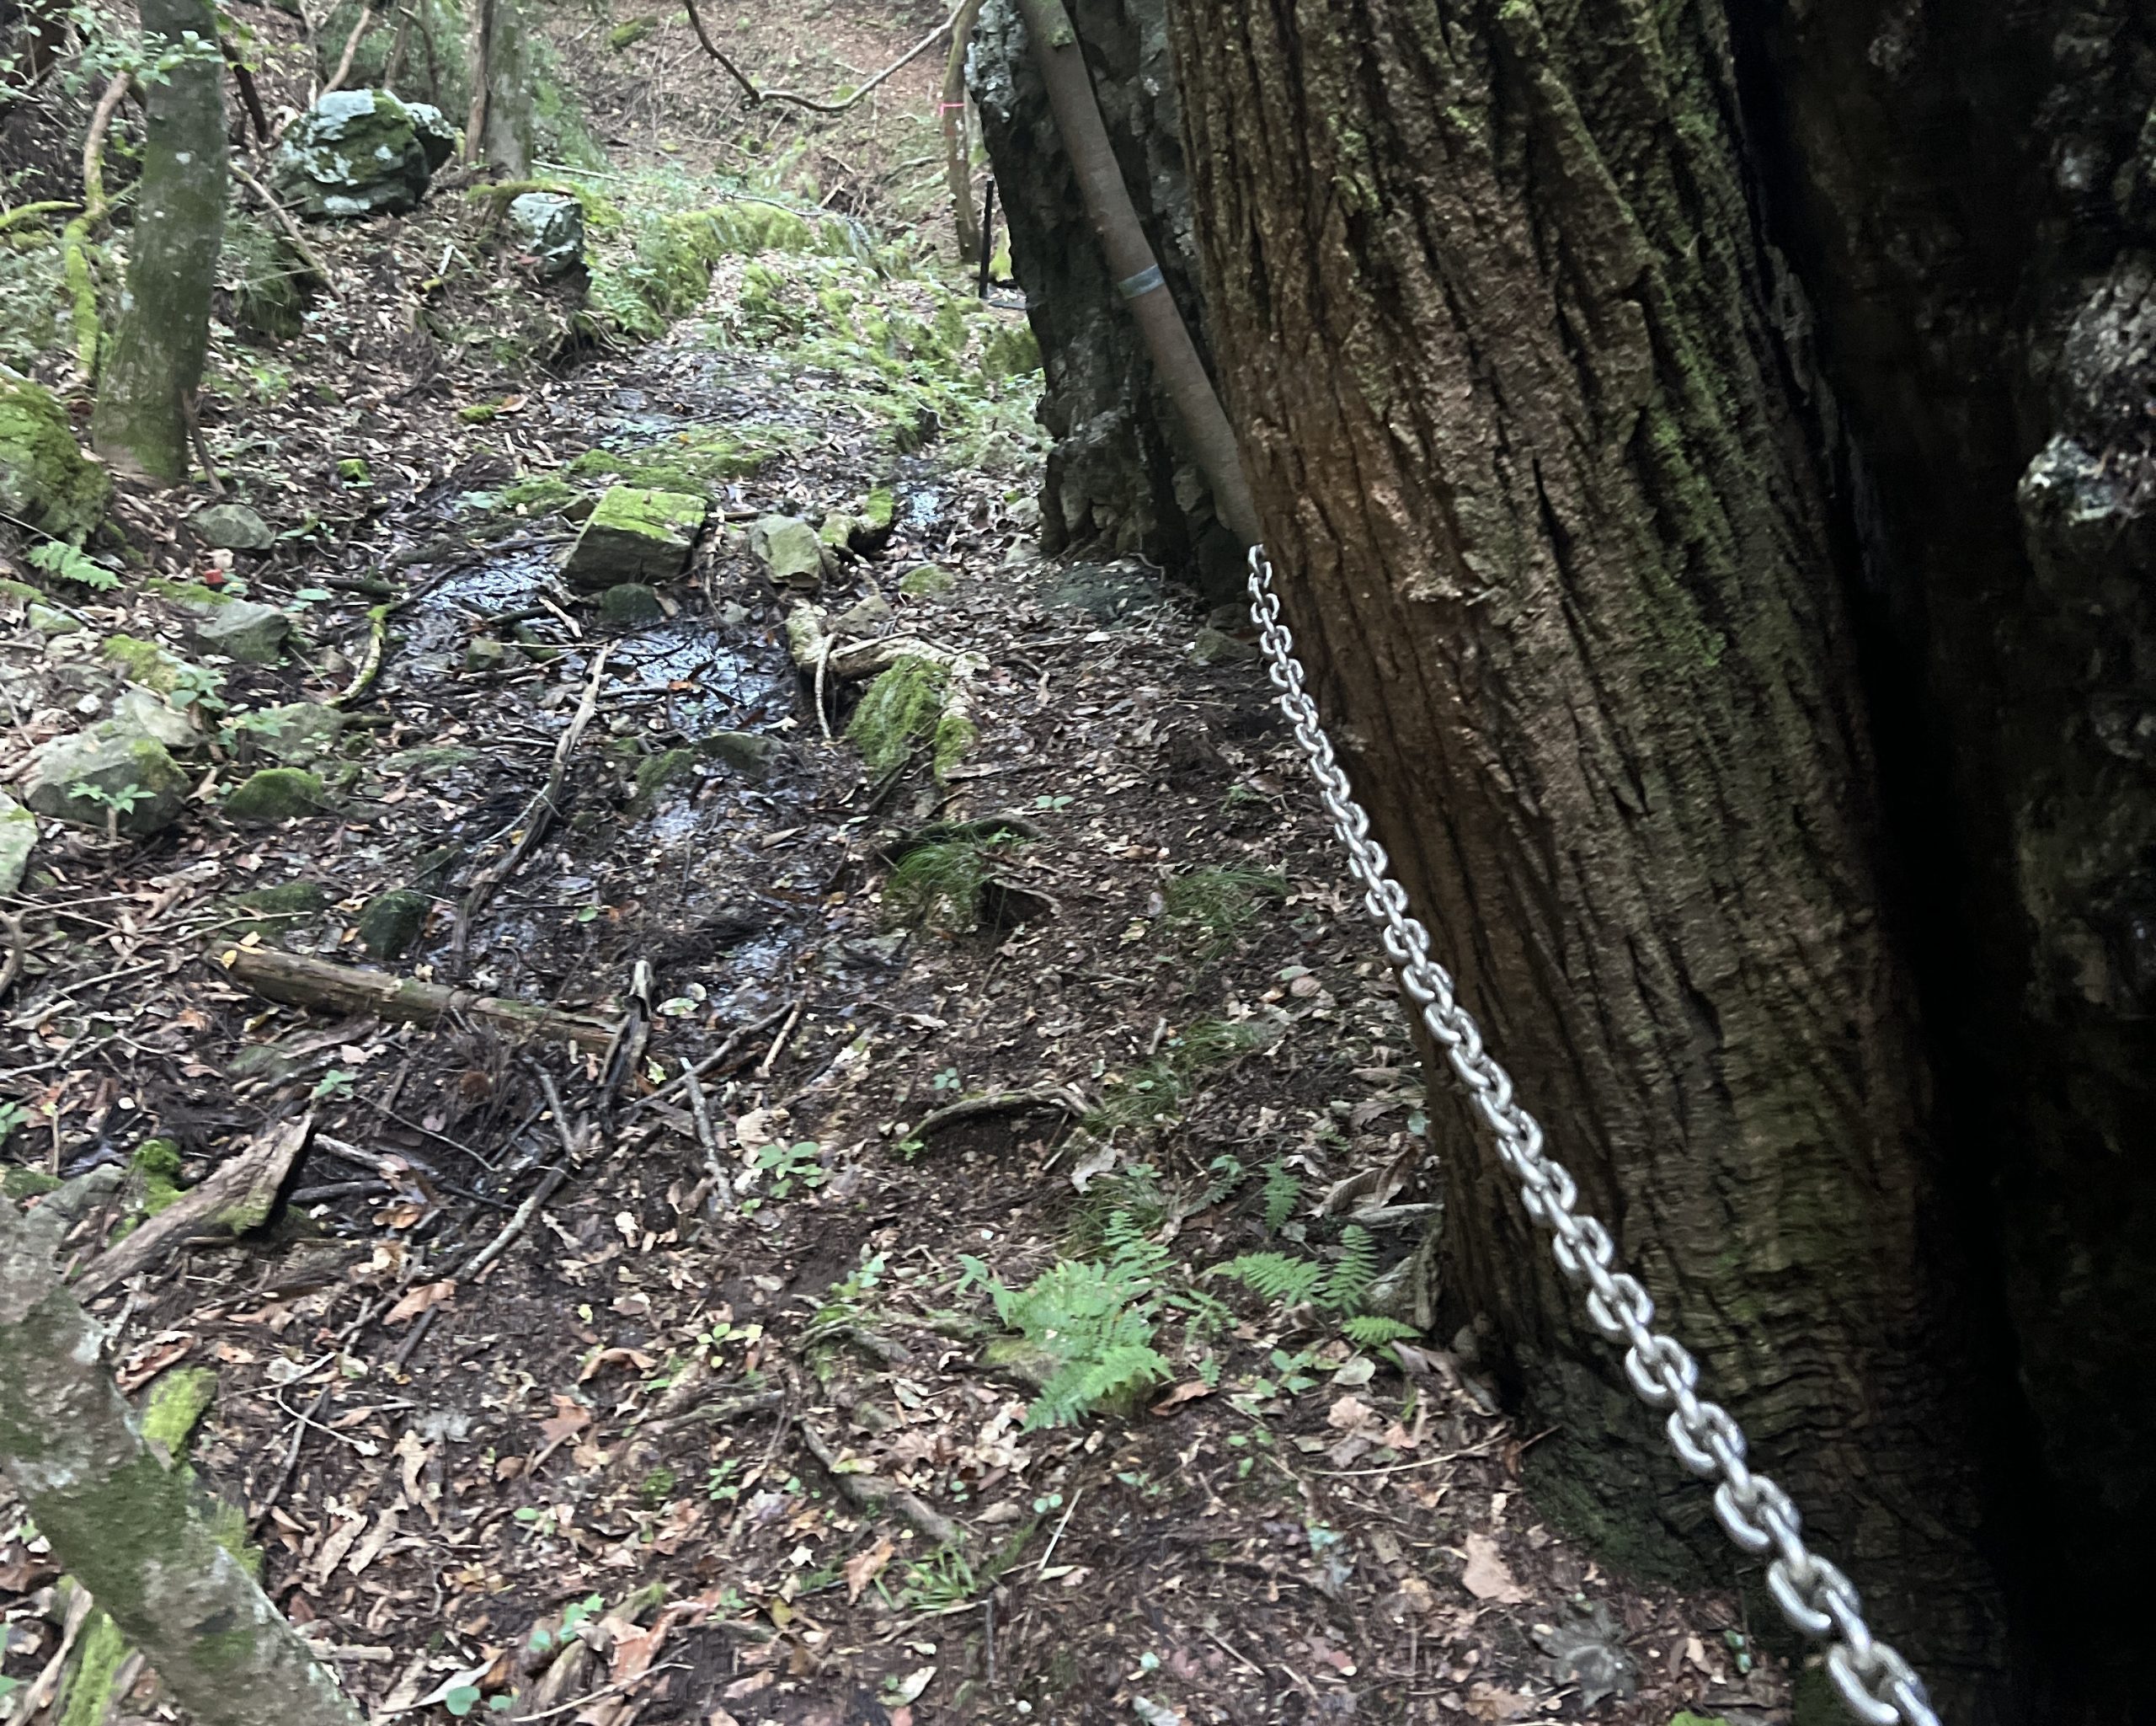
There are chains and ropes for hikers to grab onto along some hazardous sections.
Exits
It’s relatively easy to leave the trail thanks to JR and other private railway lines along the Pacific coast.
From north to south, public transportation options include:
JR Hachinohe Line (Hachinohe–Kuji)
Sanriku Railway (Kuji–Sakari)
JR Ofunato Line (Sakari–Kesennuma)
JR Senseki-Tohoku Line and BRT (Ishinomaki–Sendai)
JR Joban Line (Sendai–Soma)
While these lines are not always near the trail, they are extensive, stretching from one end of the trail to the other. There are also local bus services.
There are a few spots that require extra planning due to longer gaps between services and settlements. Notably: The peninsulas, between northern Miyagi and central Iwate prefectures ー Omoe Peninsula, Funakoshi Peninsula, Hakozaki Peninsula, and Ogatsu Peninsula.
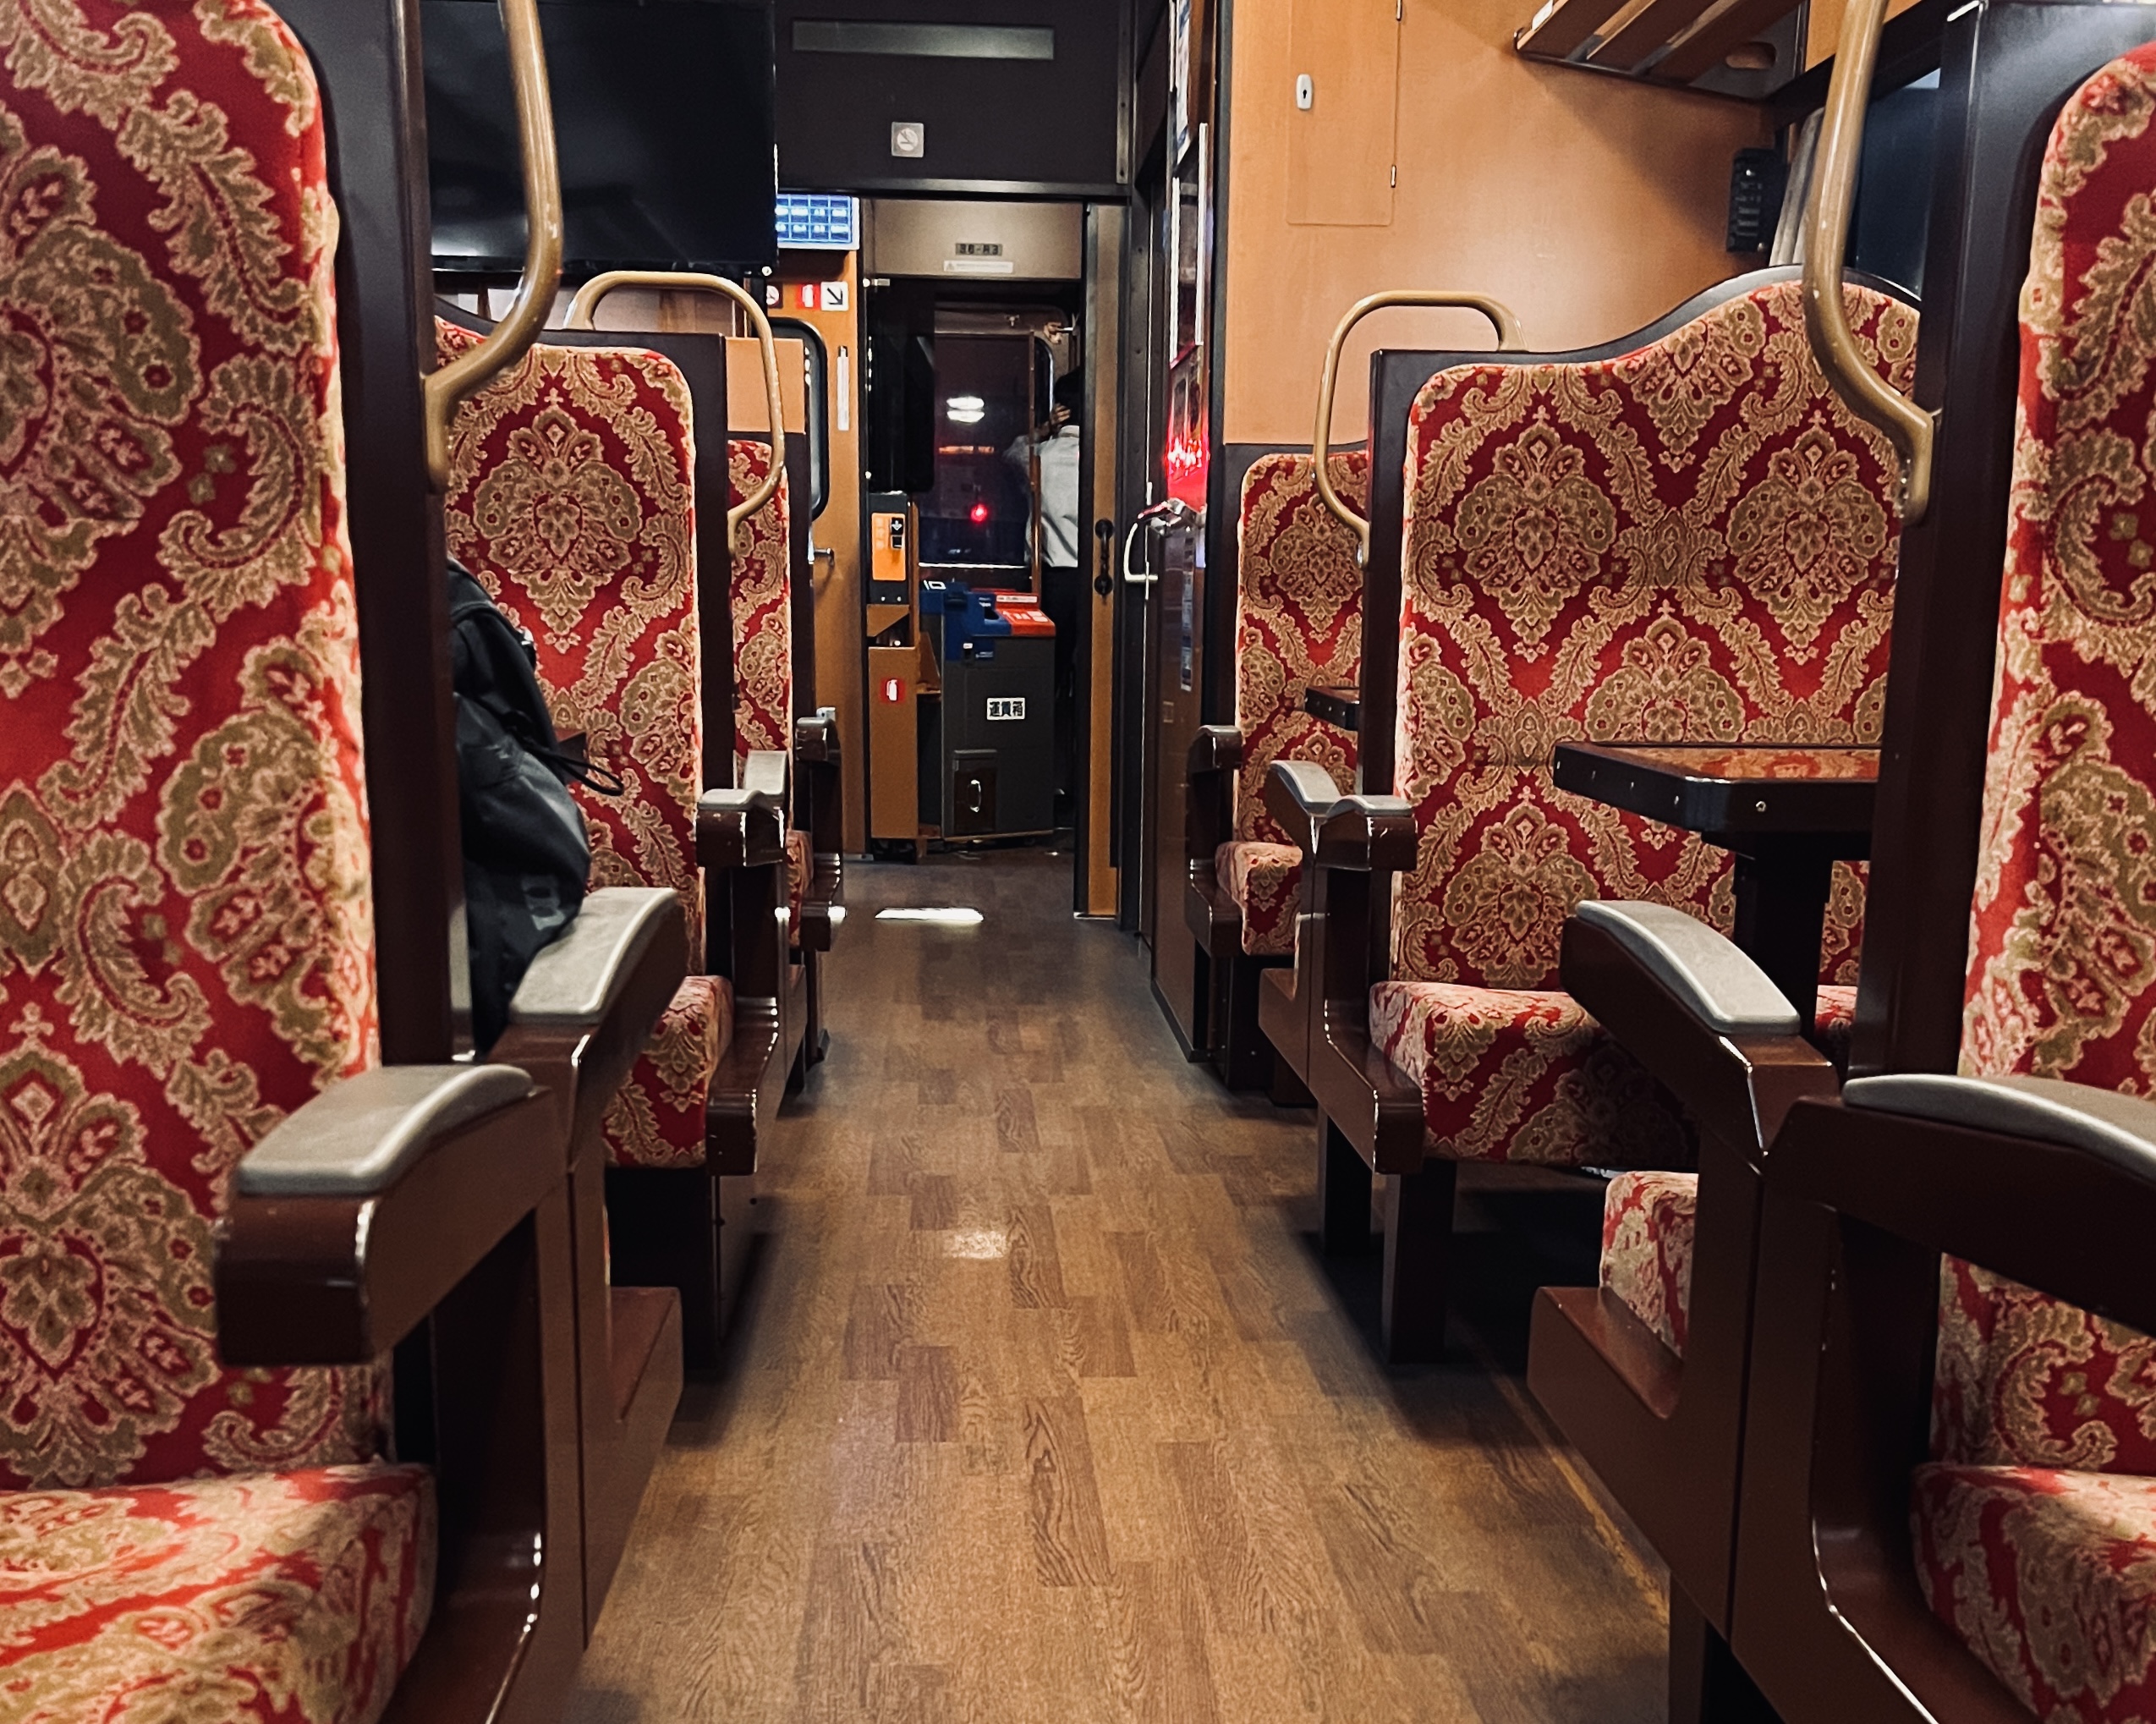
The old-school train cars of the Sanriku Railway, between Kuji and Miyako.
Hazards
Besides places that have been hit by typhoons, heavy rain or other natural disasters, hikers should be aware of the following hazards.
River crossings
On the border between Hirono and Kuji in northern Iwate is the Takaya River. You will need to wade across it. Water depth and current speed vary depending on the season and a safe crossing can depend on a hiker’s size and experience. If it seems risky, take the detour instead. Avoid the crossing during the spring snowmelt season or after a torrential rainstorm, when the river can become dangerously swollen.
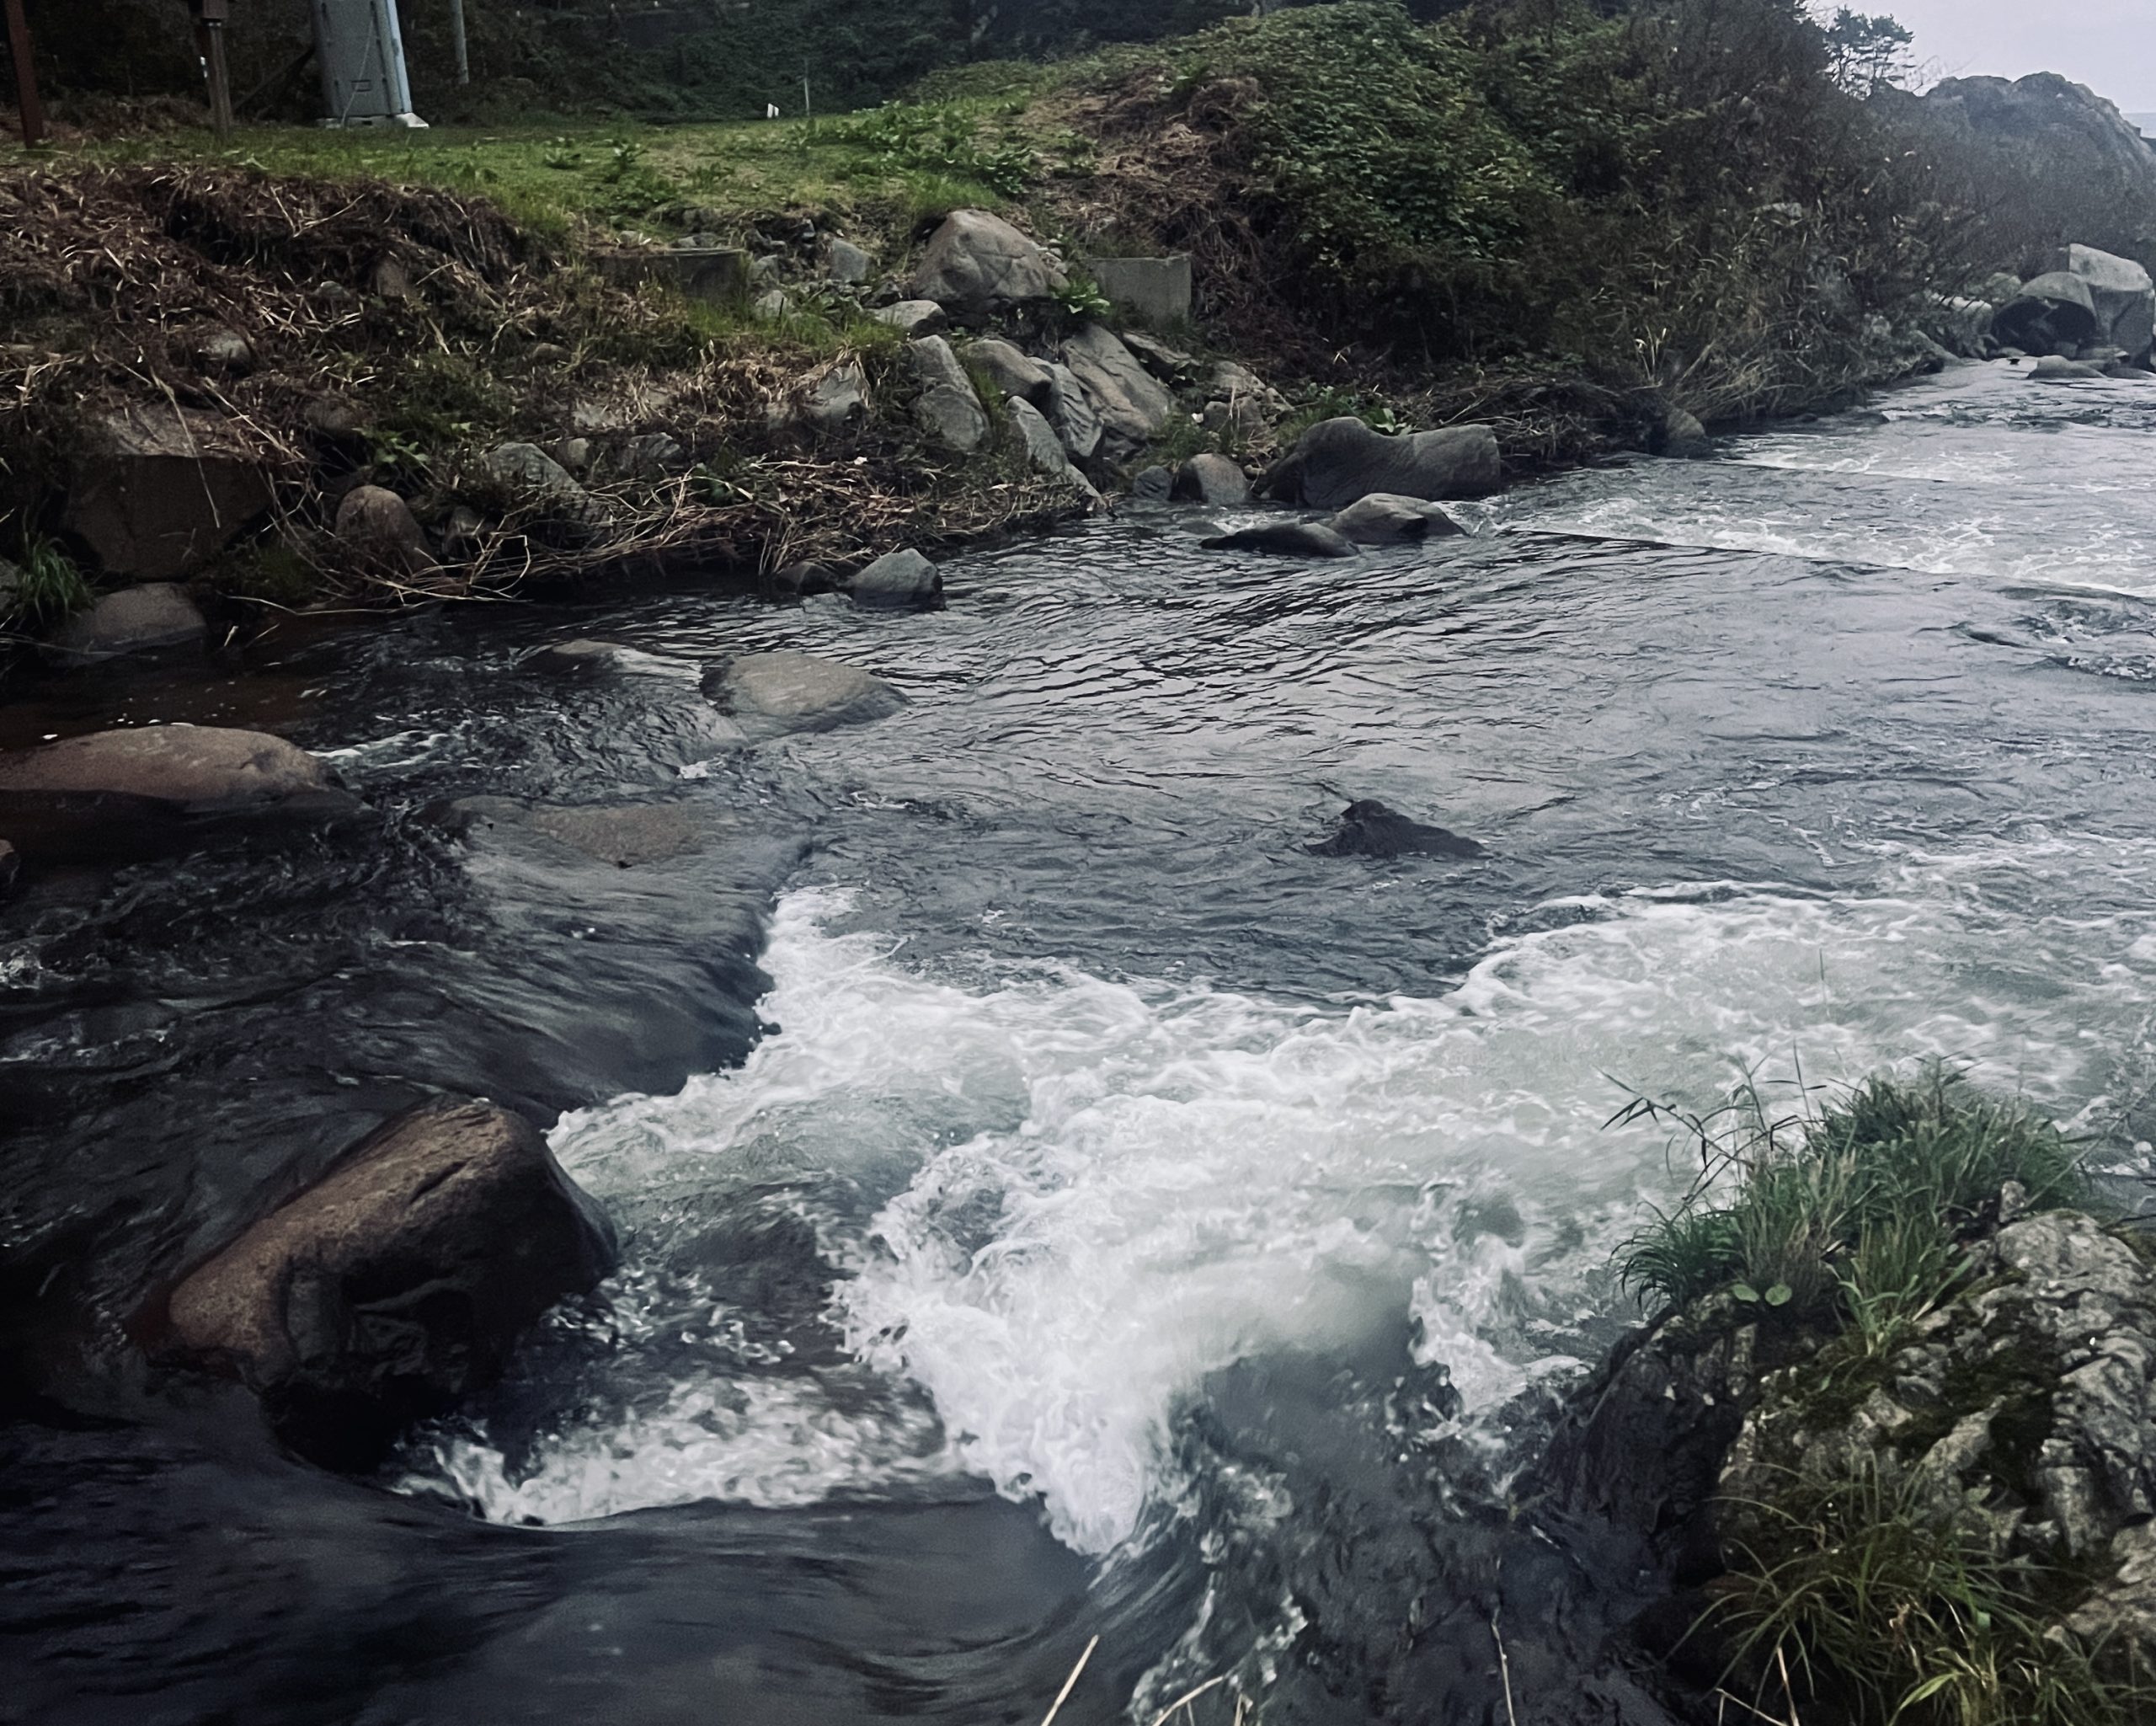
The Takaya River was deep and the current strong when I came up on it, so I decided not to cross here.
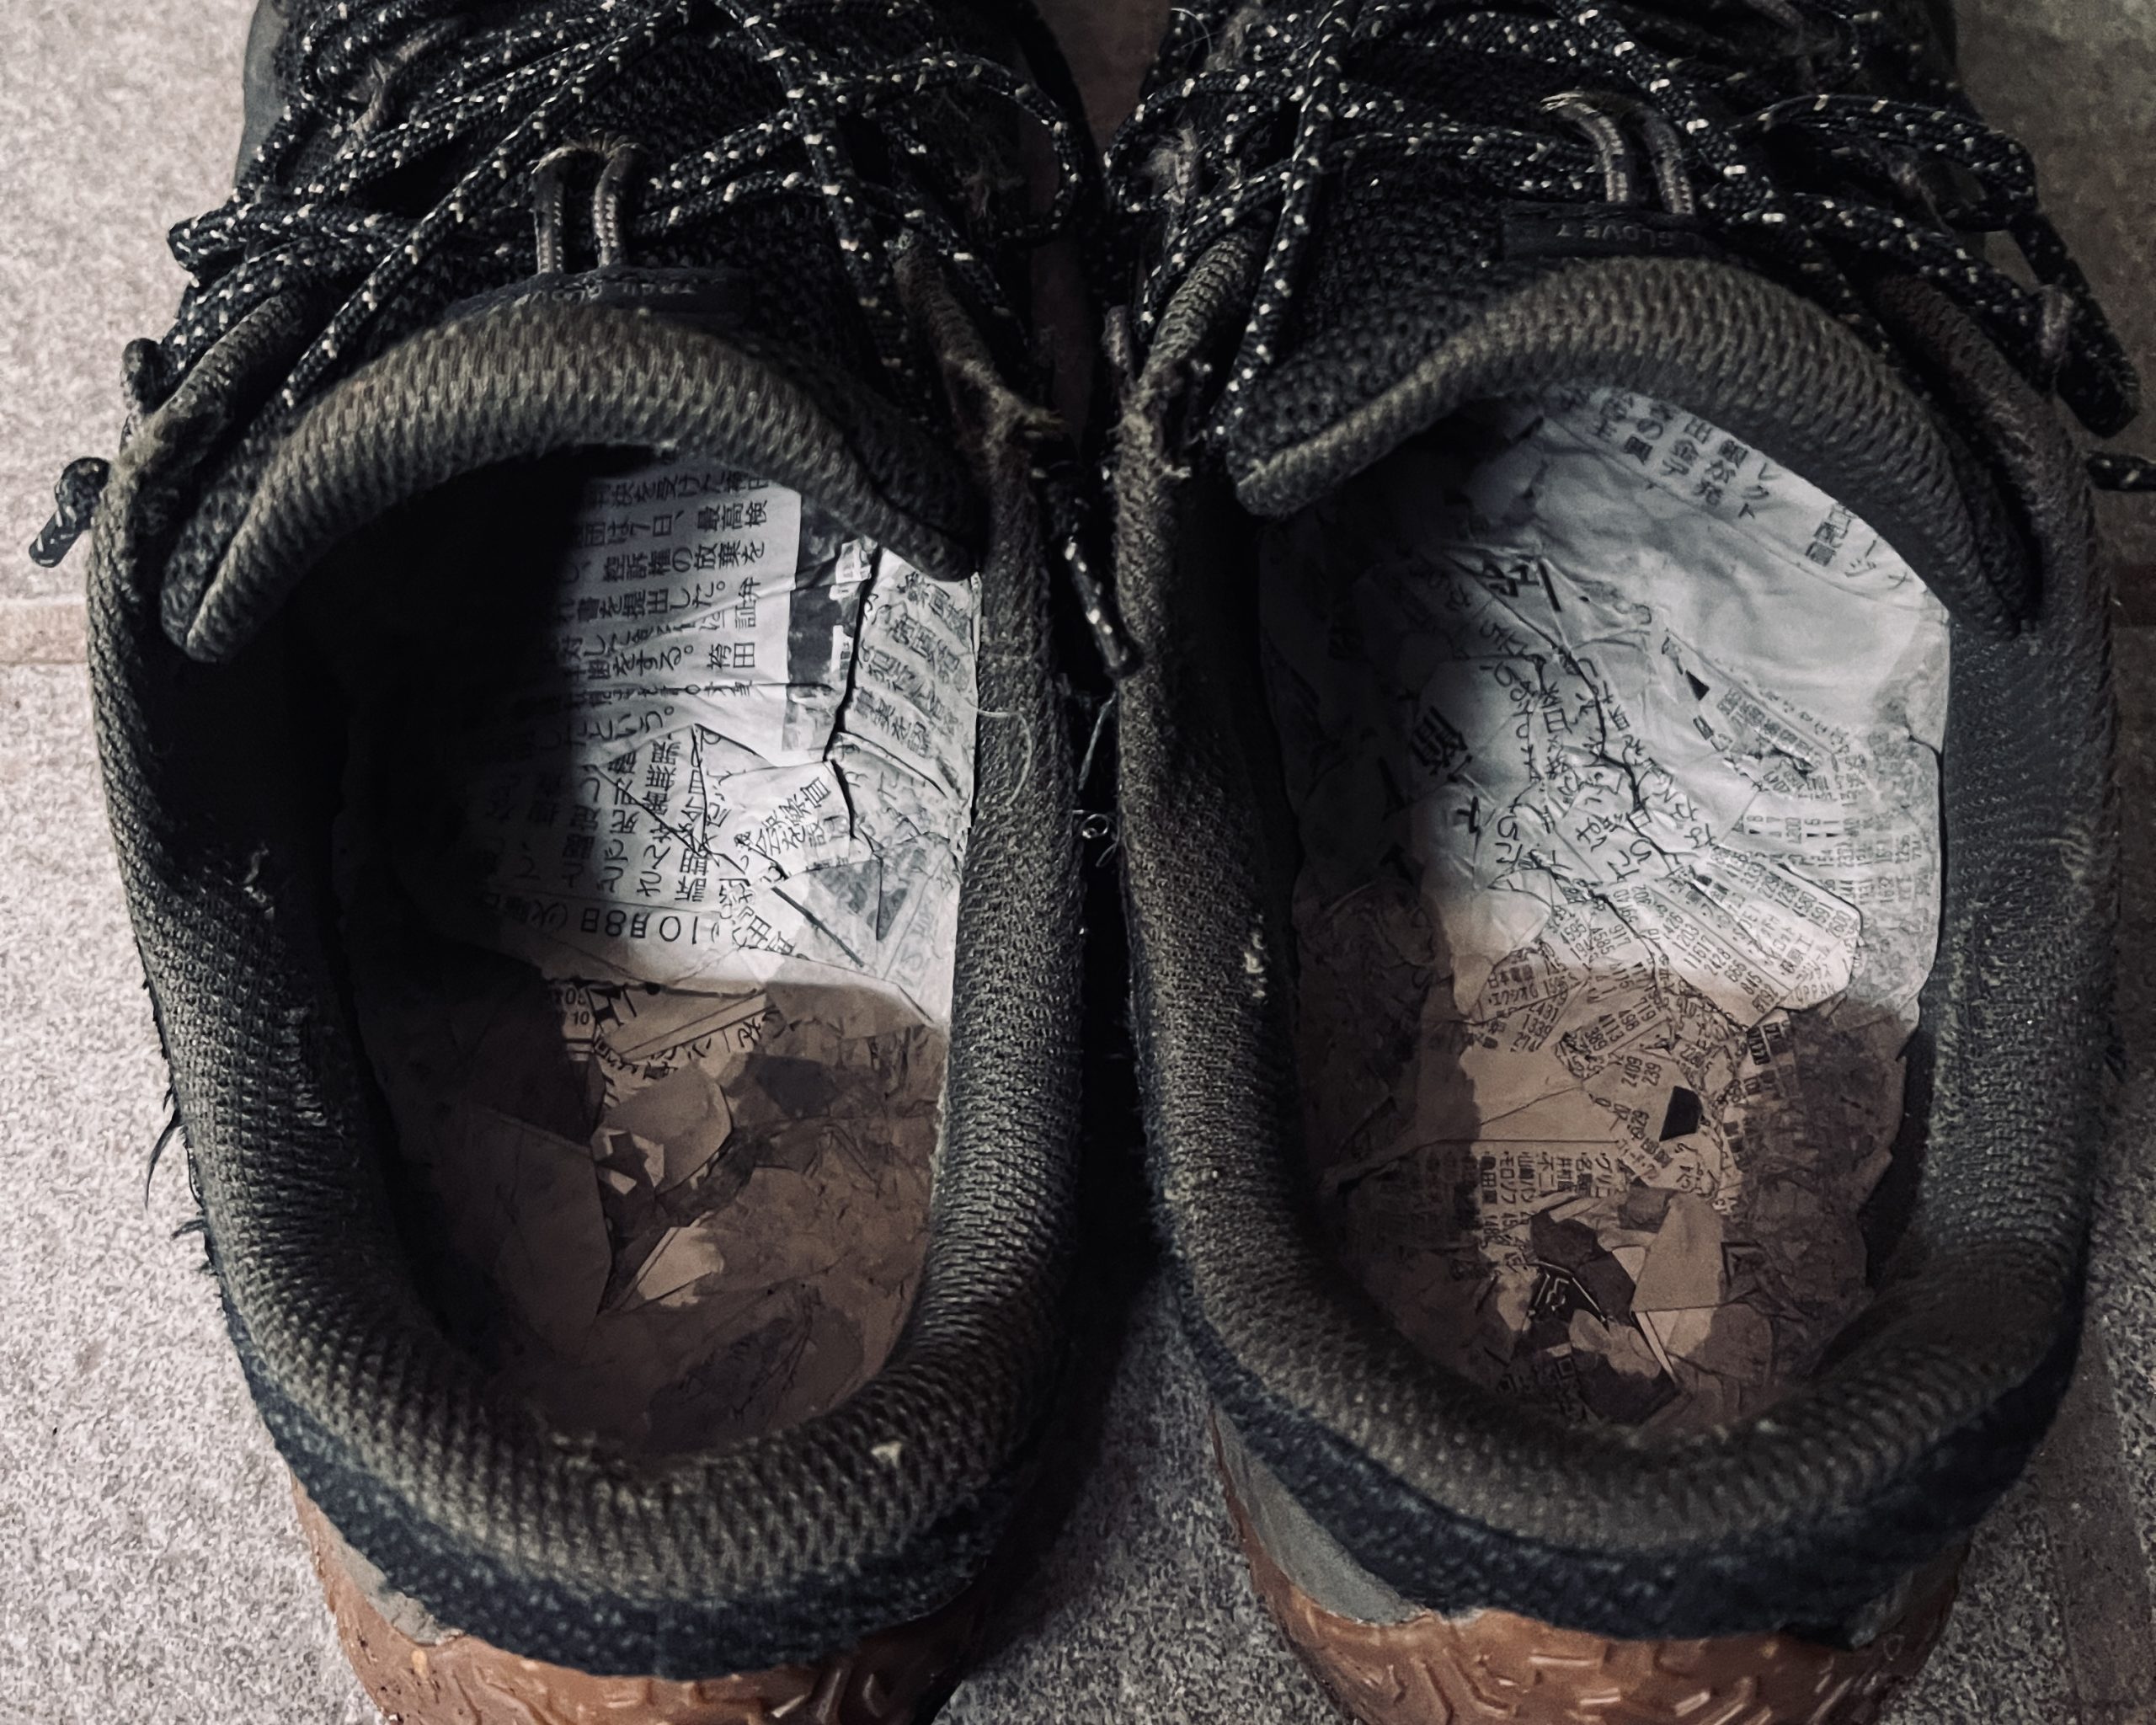
My shoes got soaked during my crossing attempt. I stuffed newspaper inside, and surprisingly my shoes were dry by the next day.
Roads
After dark, it’s best to avoid the sections of the trail on busy highways or roads without sidewalks.
Exercise extreme caution on roads without sidewalks. Drivers may not be expecting to encounter hikers.
Tides
Pay attention to the tides. Several sections in northern Iwate run along the shoreline and may be impassable at high tide.
The Japan Meteorological Agency publishes tide tables for locations throughout the region but only in Japanese. I had to change my route a few times due to high tides. Even so, getting drenched by a wave while walking along the beach is one of my favorite trail memories.
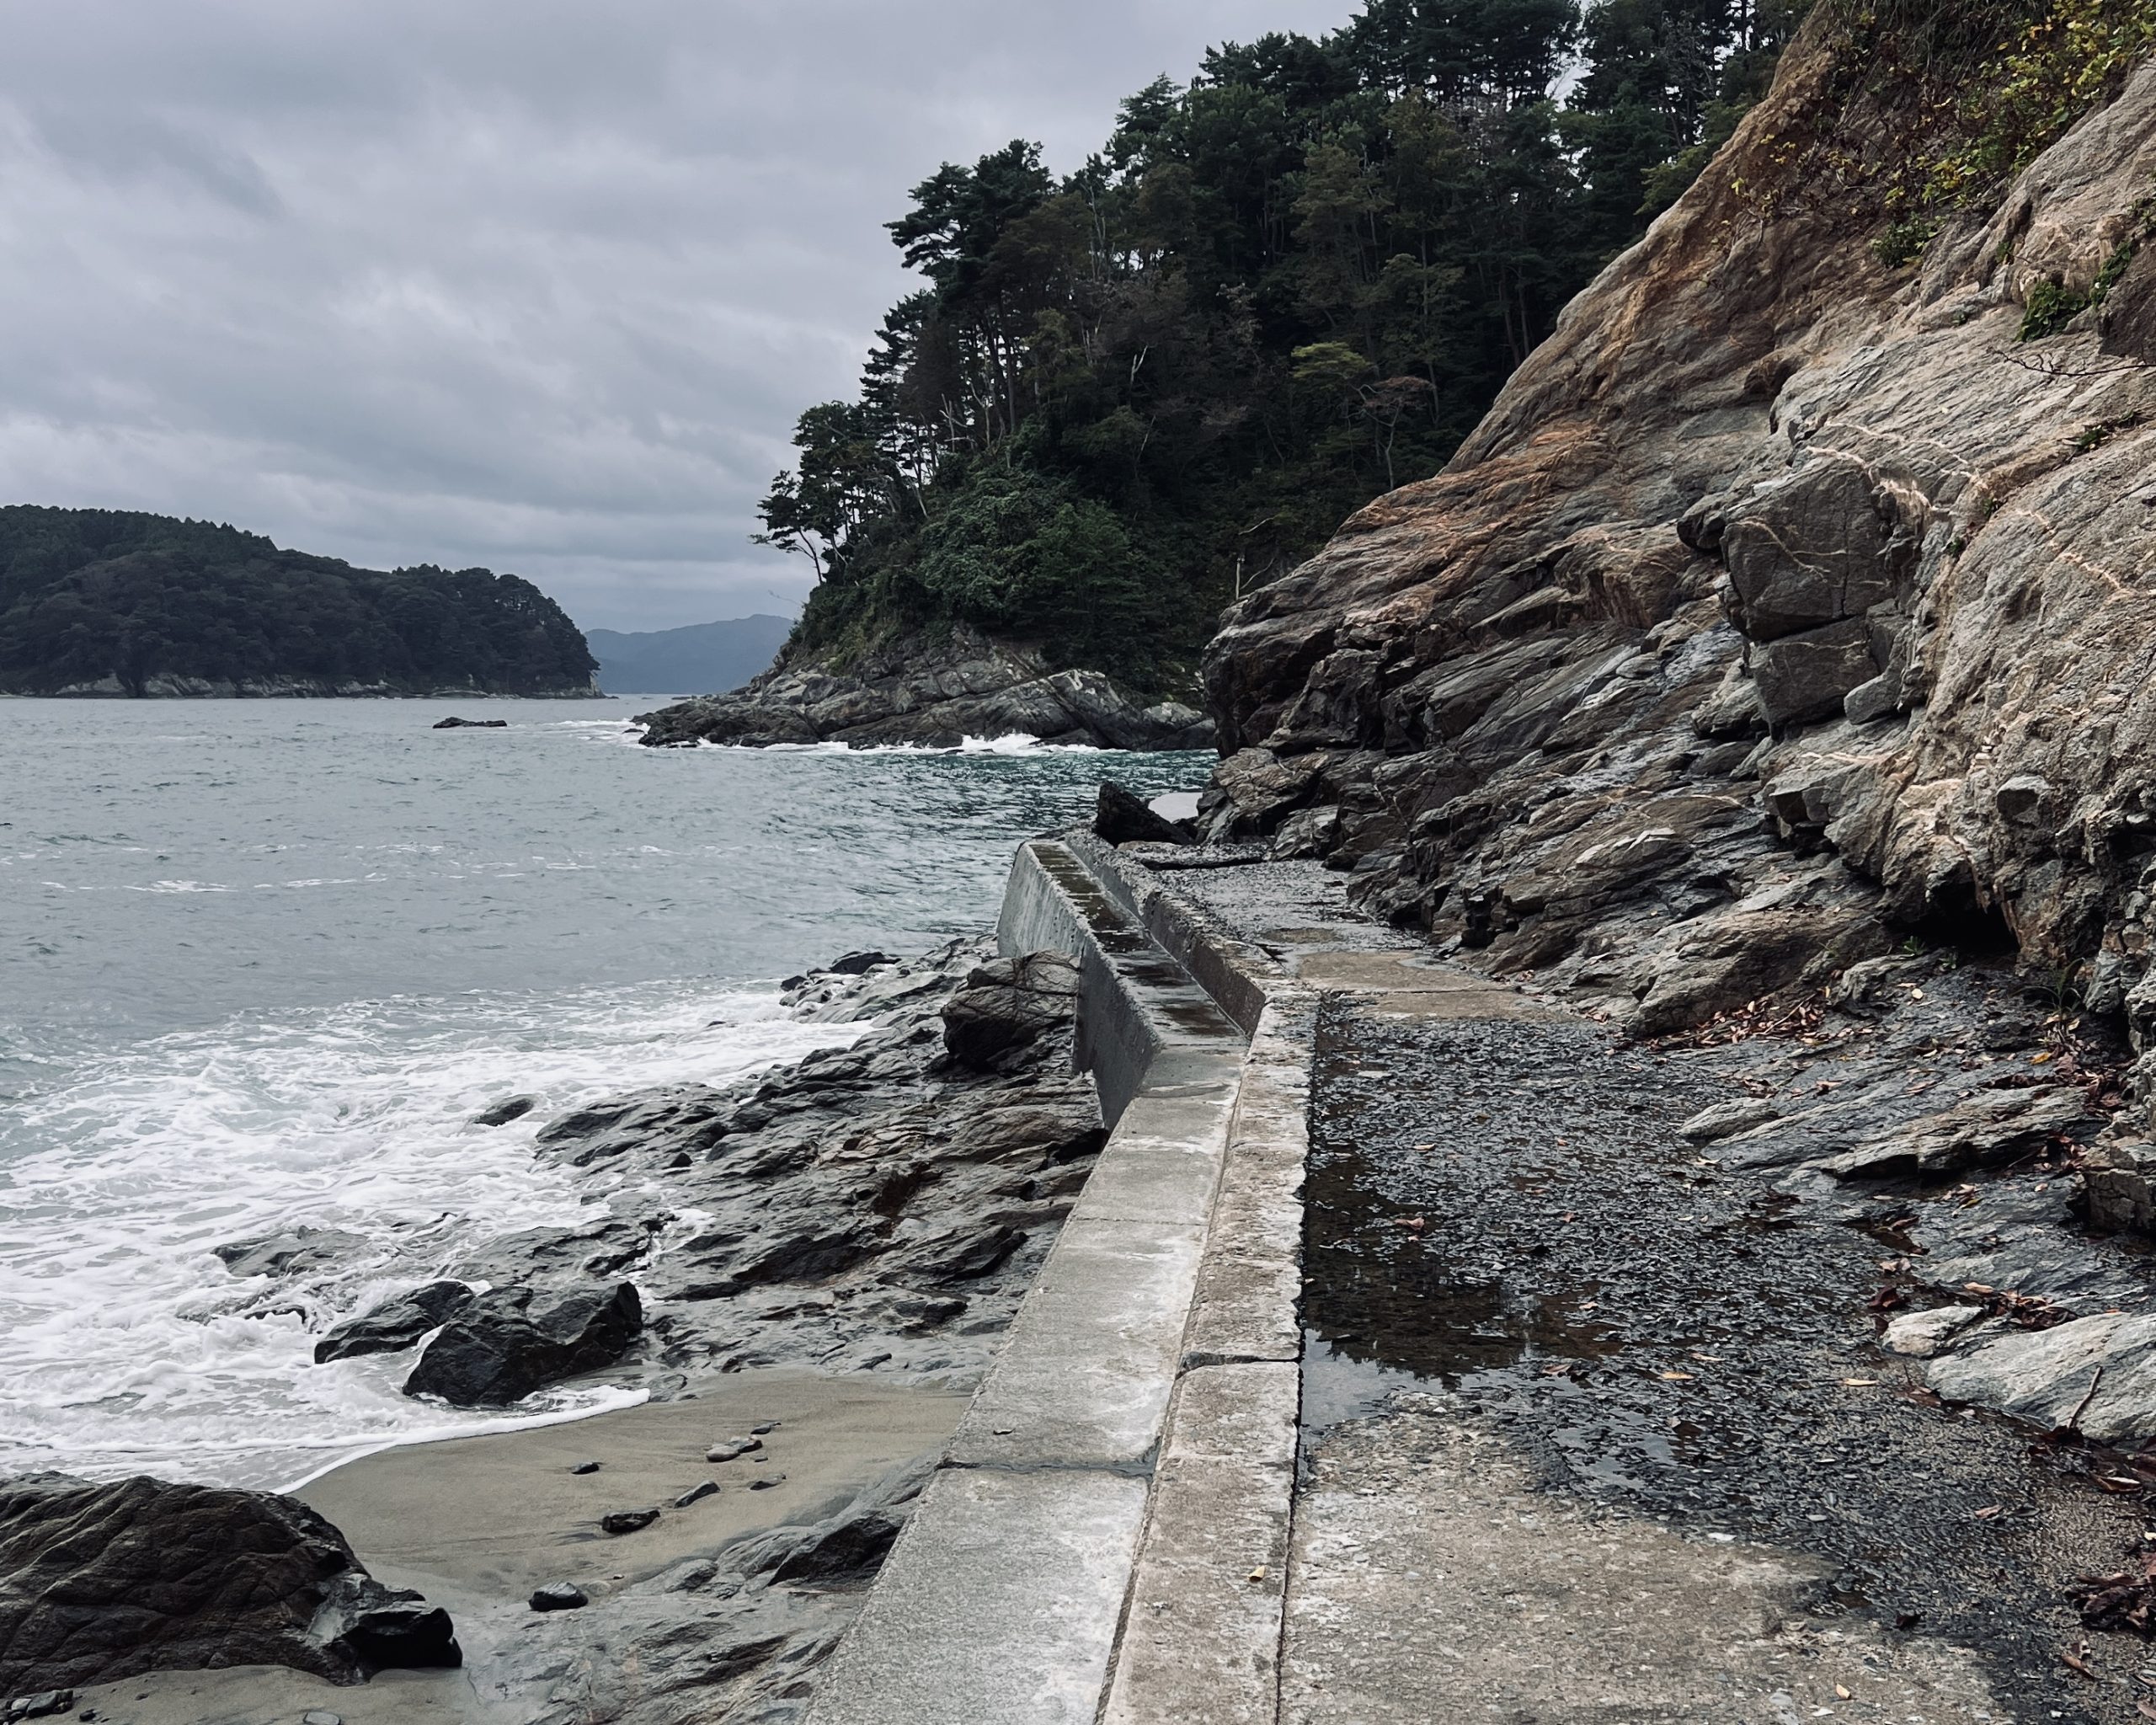
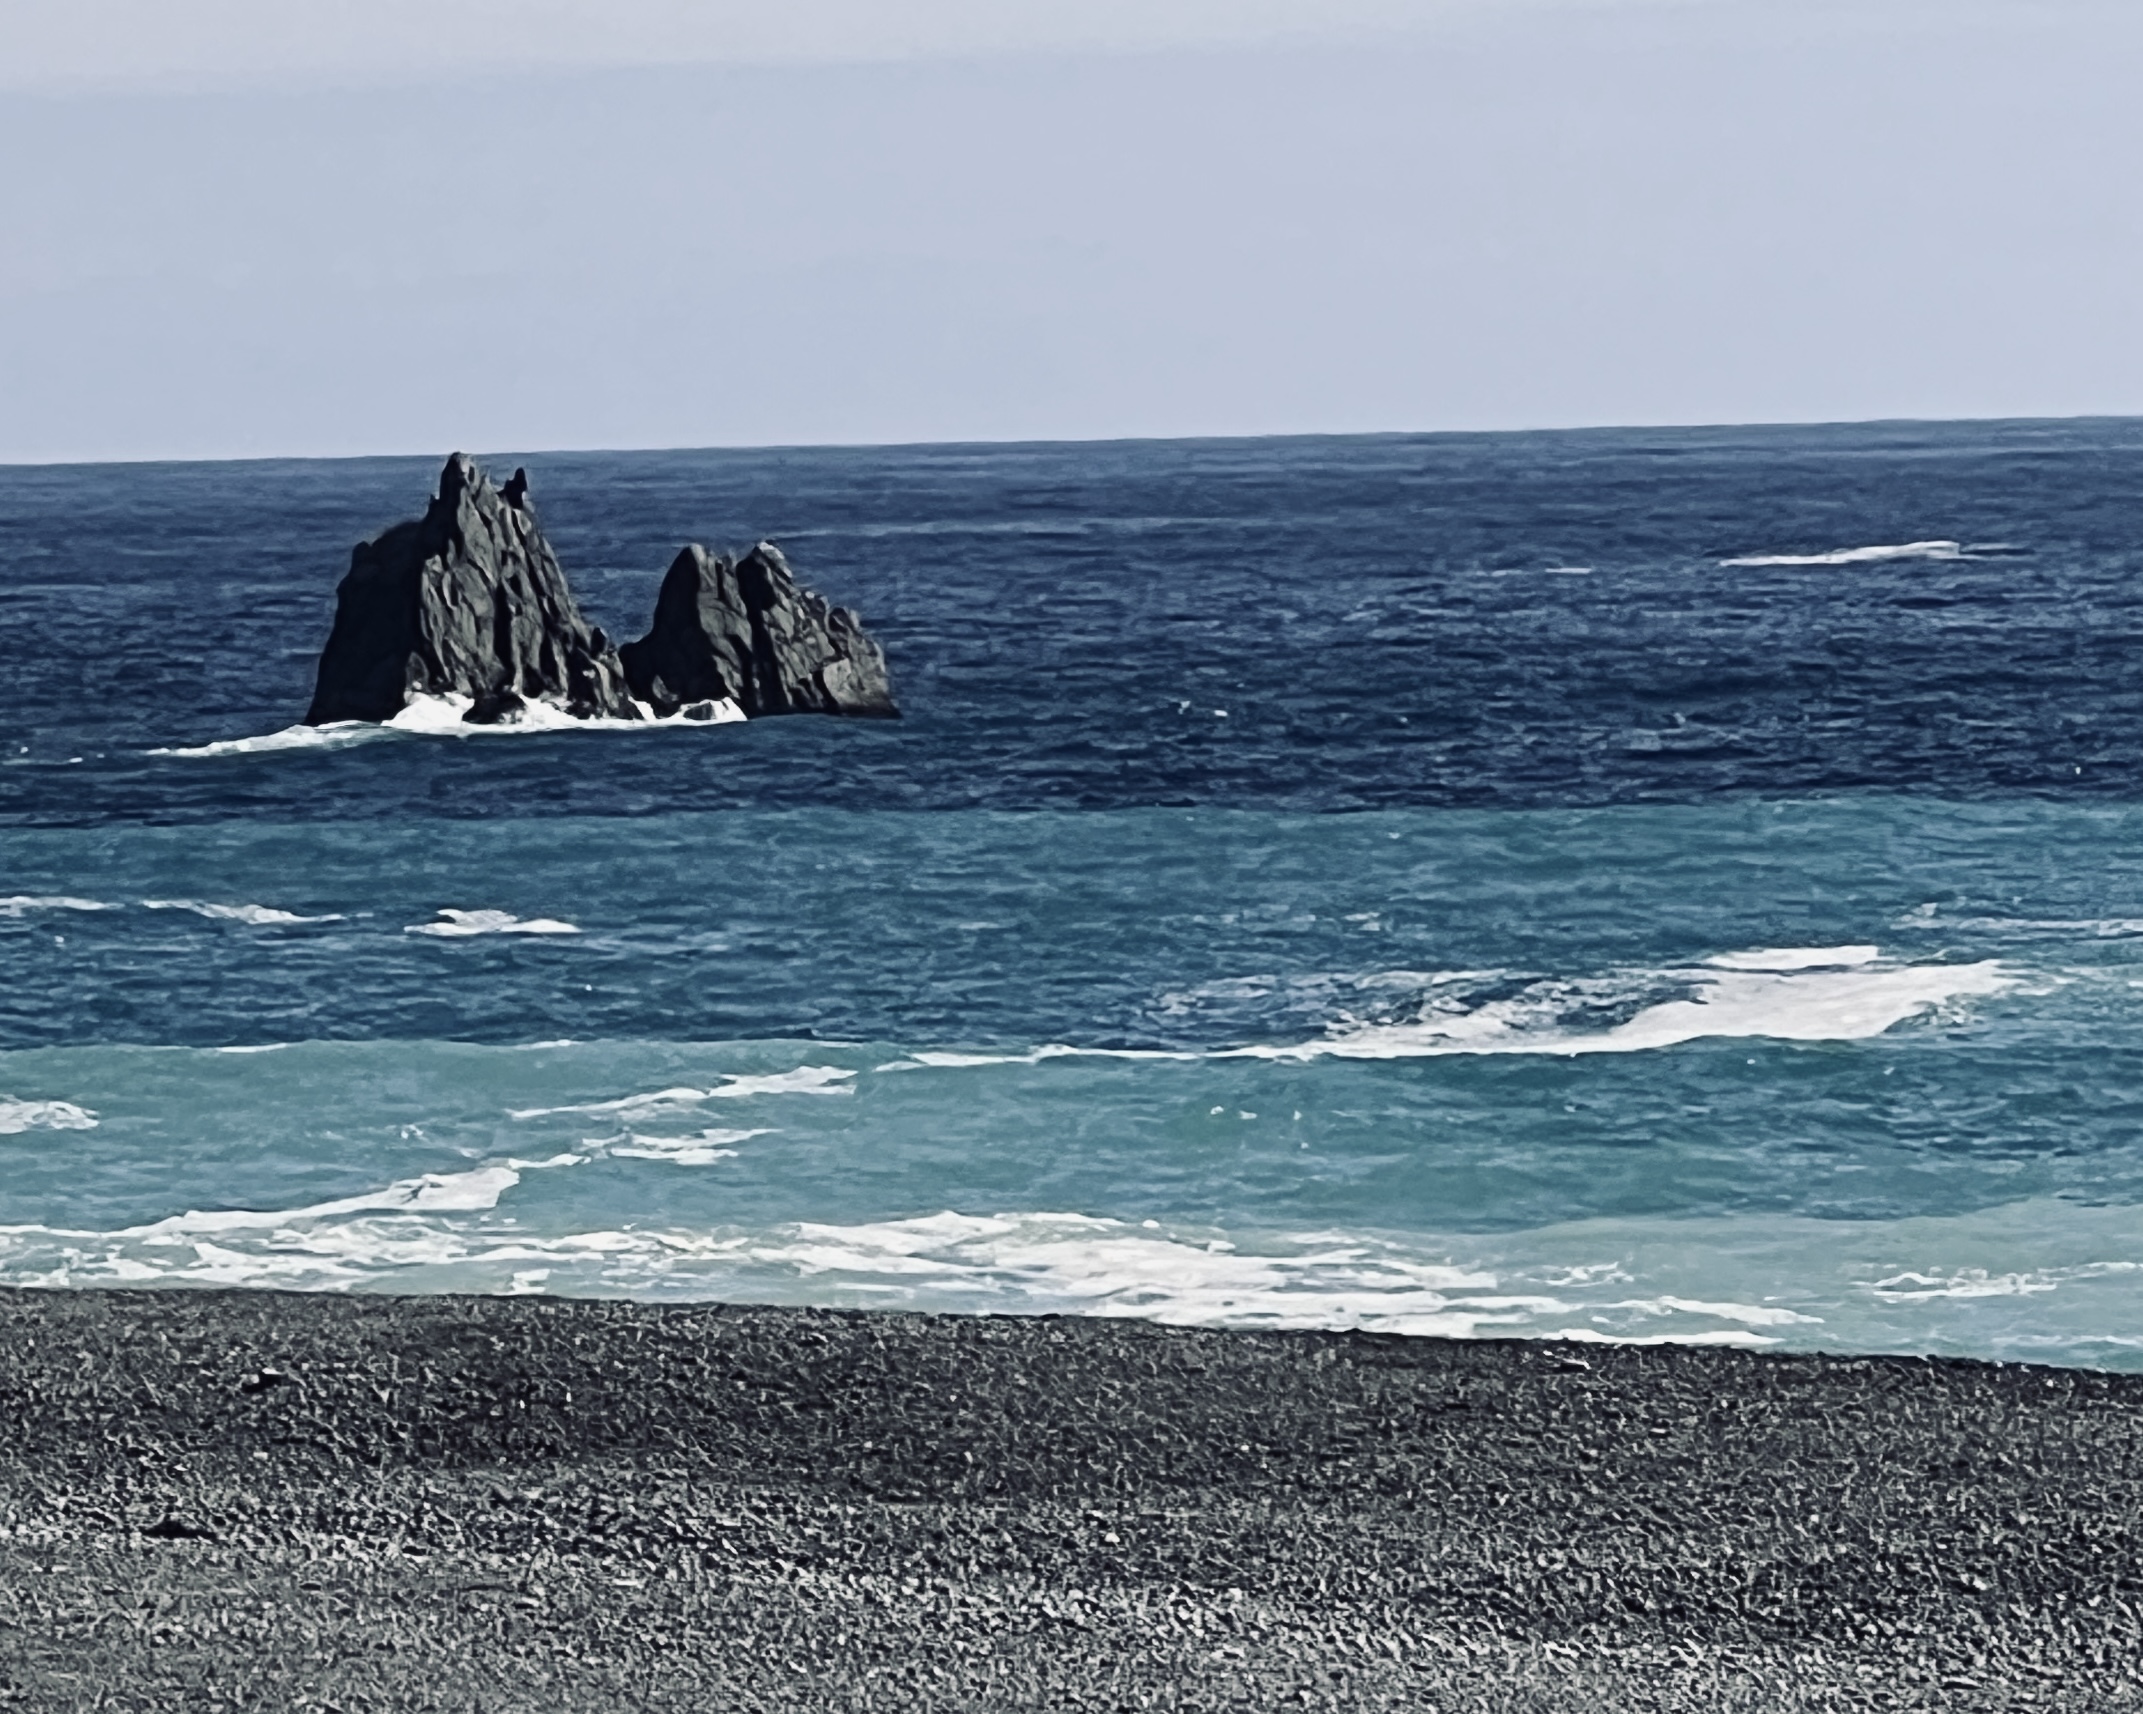
Parts of the trail running along the shore are exposed to the tides.
Wildlife
Asian black bears
Asian black bears inhabit most of the mountainous areas near the trail, and there have been sightings. Hikers should make their presence known using radios, whistles or other noise-makers. Try to avoid traveling at dawn, dusk or nighttime.
I never encountered a bear, but I did come across fresh bear scat several times. Winter hikers should also be vigilant: Bears along the Sanriku coast are thought to skip hibernating during the coldest months.
Encounters with wildlife are part of hiking. Still, steering clear of bears whenever possible is the key to their safety, since encounters can lead the authorities later to hunt down and kill the animal for the sake of other hikers.
Japanese giant hornets
Japanese giant hornets are aggressive, and fatalities from hornet stings reportedly outnumber those caused by bears. They’re most active from May through October, which overlaps with the main hiking season. While I was on the trail, one section was temporarily closed because of hornets. (Japanese giant hornets are just one of the 17 types of hornets in Japan.)
Land leeches
Land leeches inhabit areas along the Michinoku Coastal Trail, especially the Oshika Peninsula in Miyagi prefecture and neighboring Kinkasan Island.
Unlike bears or hornets, leeches are rarely life-threatening for hikers. But they can cause prolonged bleeding, itching and swelling.
When I hiked through the area, it was rainy, and despite my having applied generous amounts of repellent, my legs were covered with leeches. I had anticipated the possibility and hurried through the section at a near jog. Even so, the sight of leeches climbing my legs every time I looked down was psychologically draining.
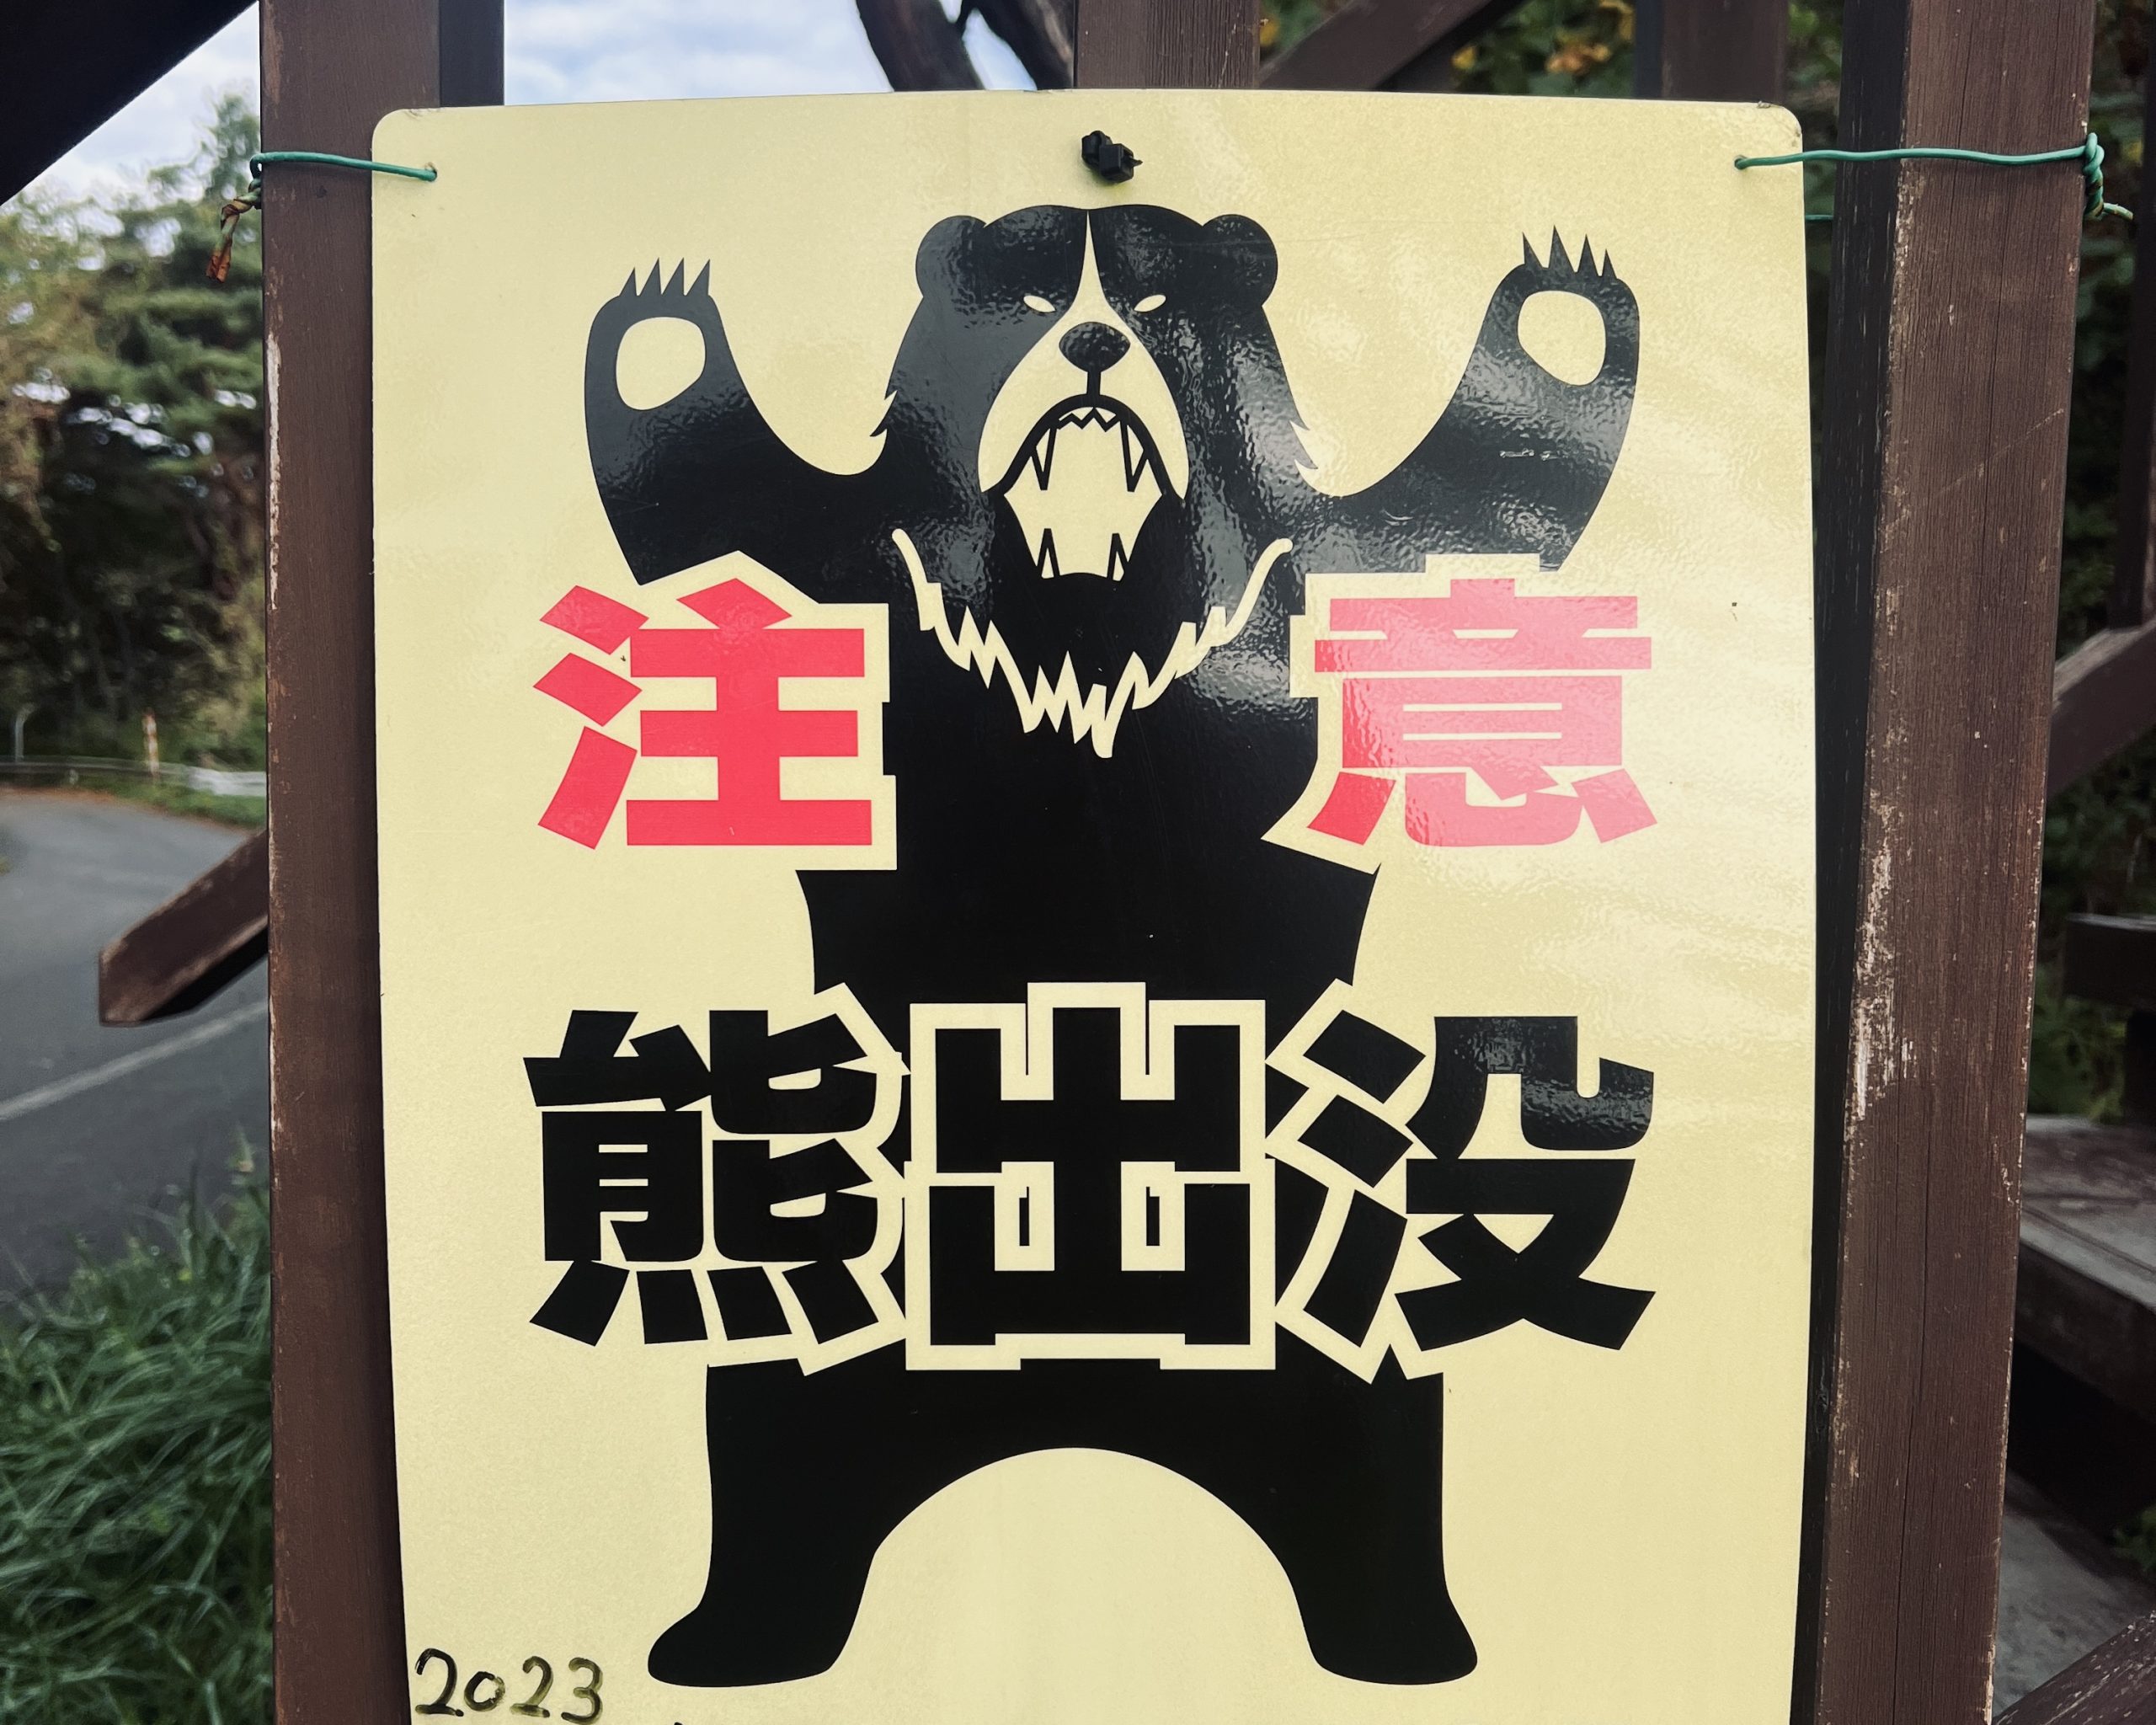
Beware of bears.
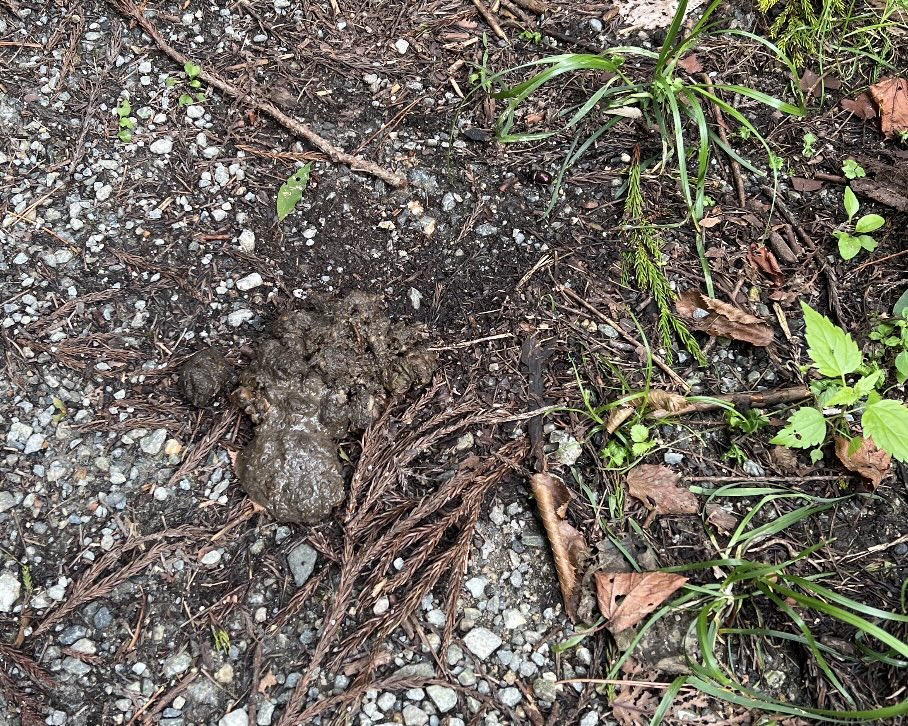
Fresh bear scat spotted on the trail.
Land leeches are particularly active in warm, humid conditions after it rains.
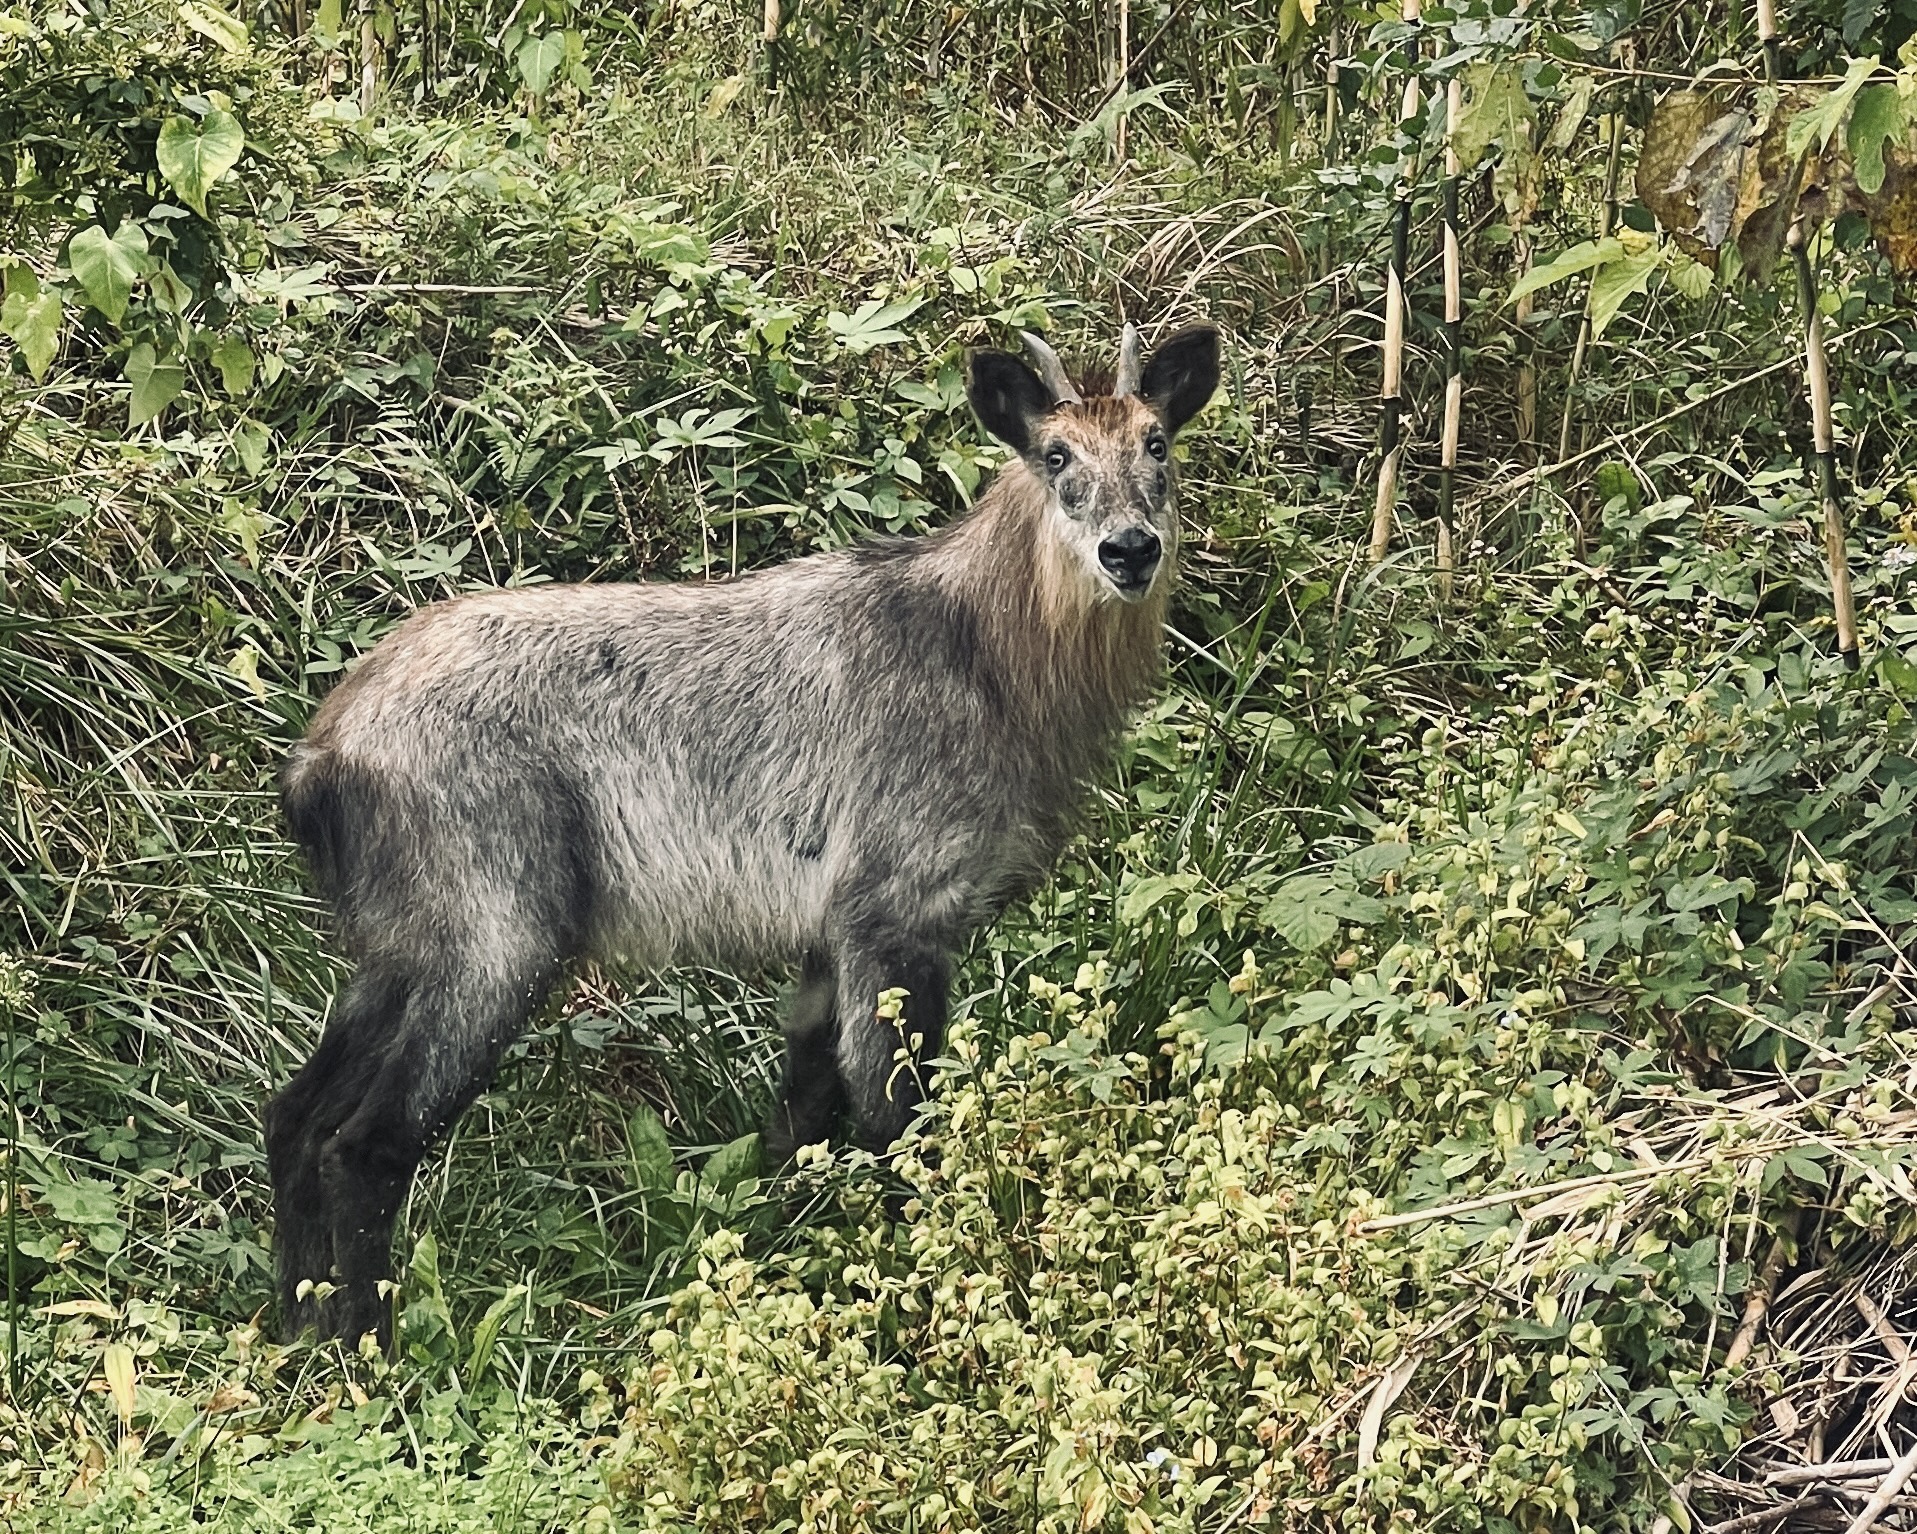
I had staring contests with Japanese serow. They seemed unafraid of humans.
Navigation
The trail is well-marked with signposts, but don’t rely solely on them. In some areas, there aren’t many signposts, and staying on the route can be challenging.
Hiking Map Book
The Hiking Map Book is the official map series published by the Michinoku Trail Club. The trail is divided into ten sections of roughly 100 kilometers (60 miles) each. The maps include route information, elevation profiles, water sources, toilets, resupply points, restaurants and distances between landmarks.
Data Book
This B5-sized guide contains more detailed information than in the Hiking Map Books, showing distances between points. It’s invaluable for planning. I primarily used the Hiking Map Books for route-finding while I relied on the Data Book for calculating distances, planning food and water resupplies and figuring out accommodation options.
Online maps, GPS data
Official route data is available on Google Maps, and GPX files can be imported into other navigation apps. These resources work best as supplements to the official maps. The Google Maps version also includes information on landmarks and camping locations.
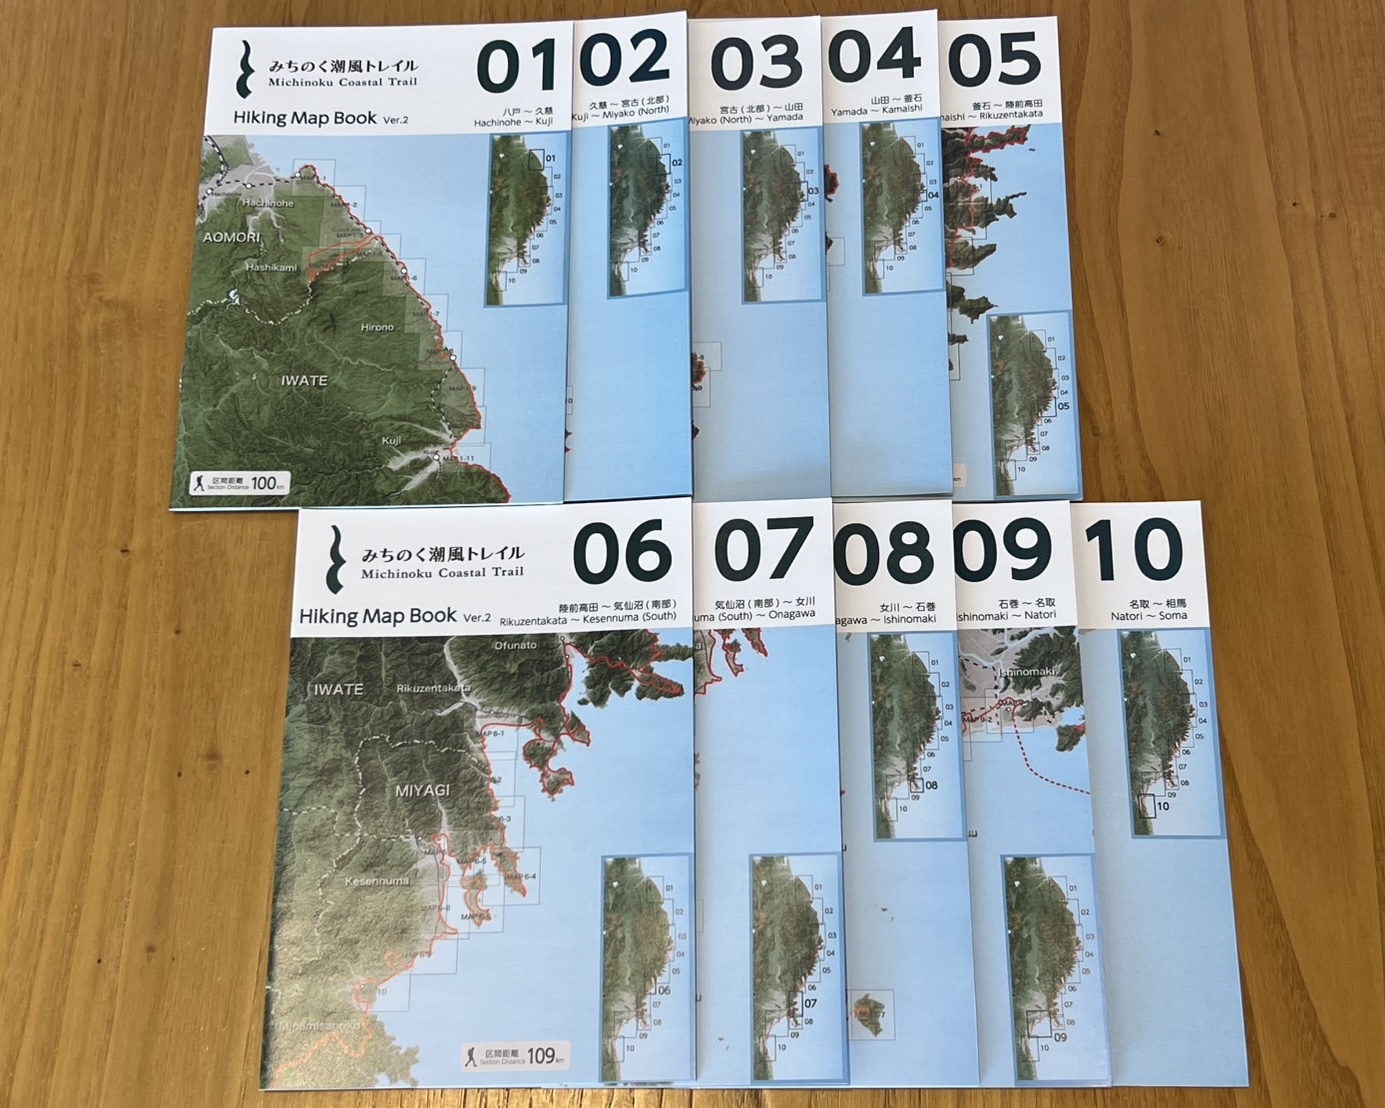
There are 10 Hiking Map Books in the series.
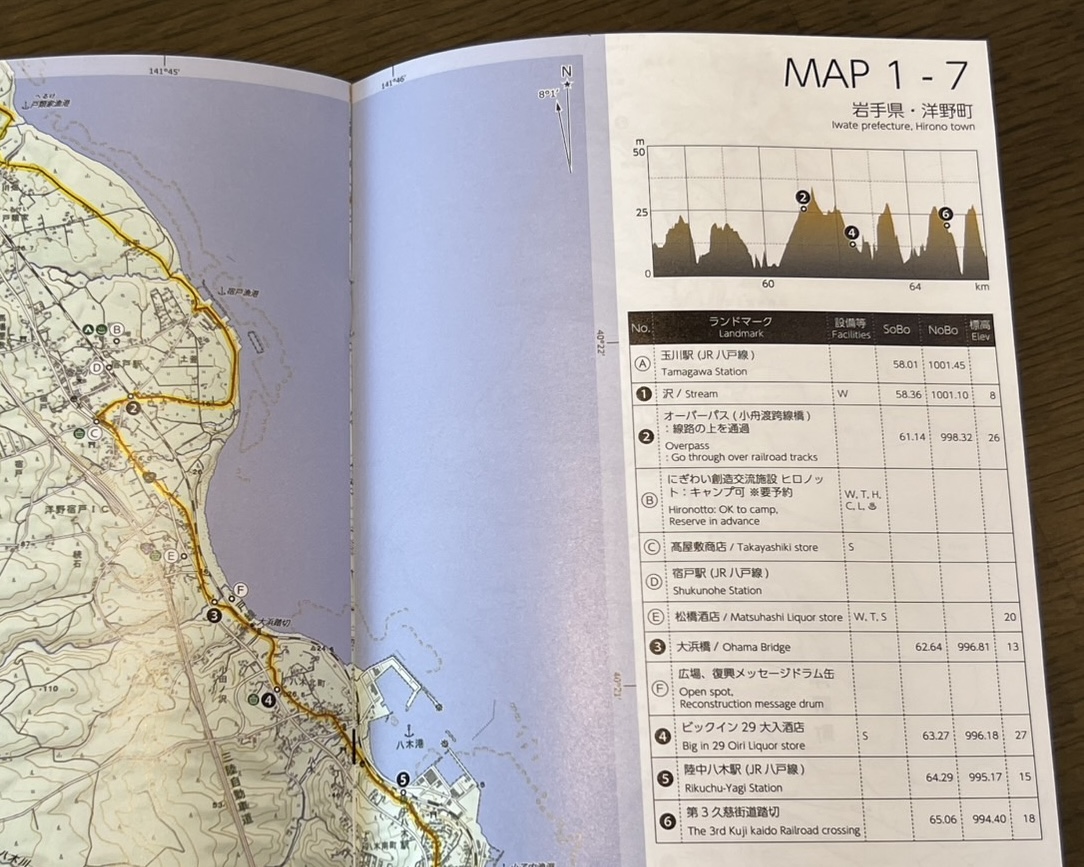
The Hiking Map Books show route information and nearby facilities and distinguish between paved or unpaved sections.
The Data Book contains even more detailed information and covers the entire trail in a single volume.
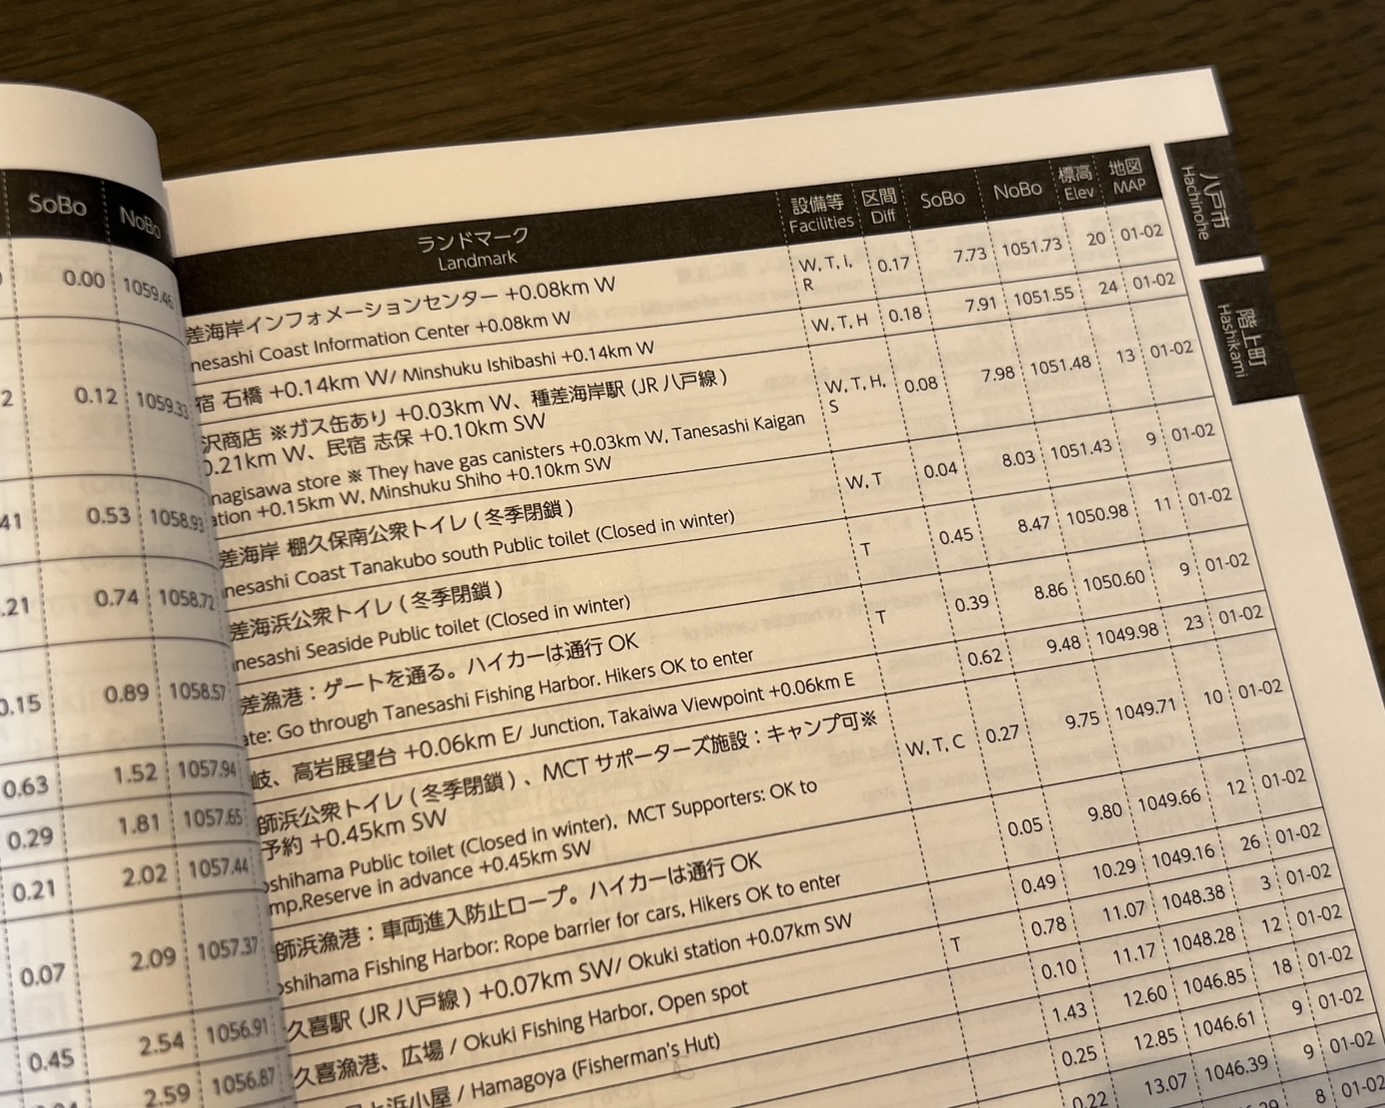
Information about facilities is listed alongside distances and elevation changes, making it useful for both escape planning and section-hike itineraries.
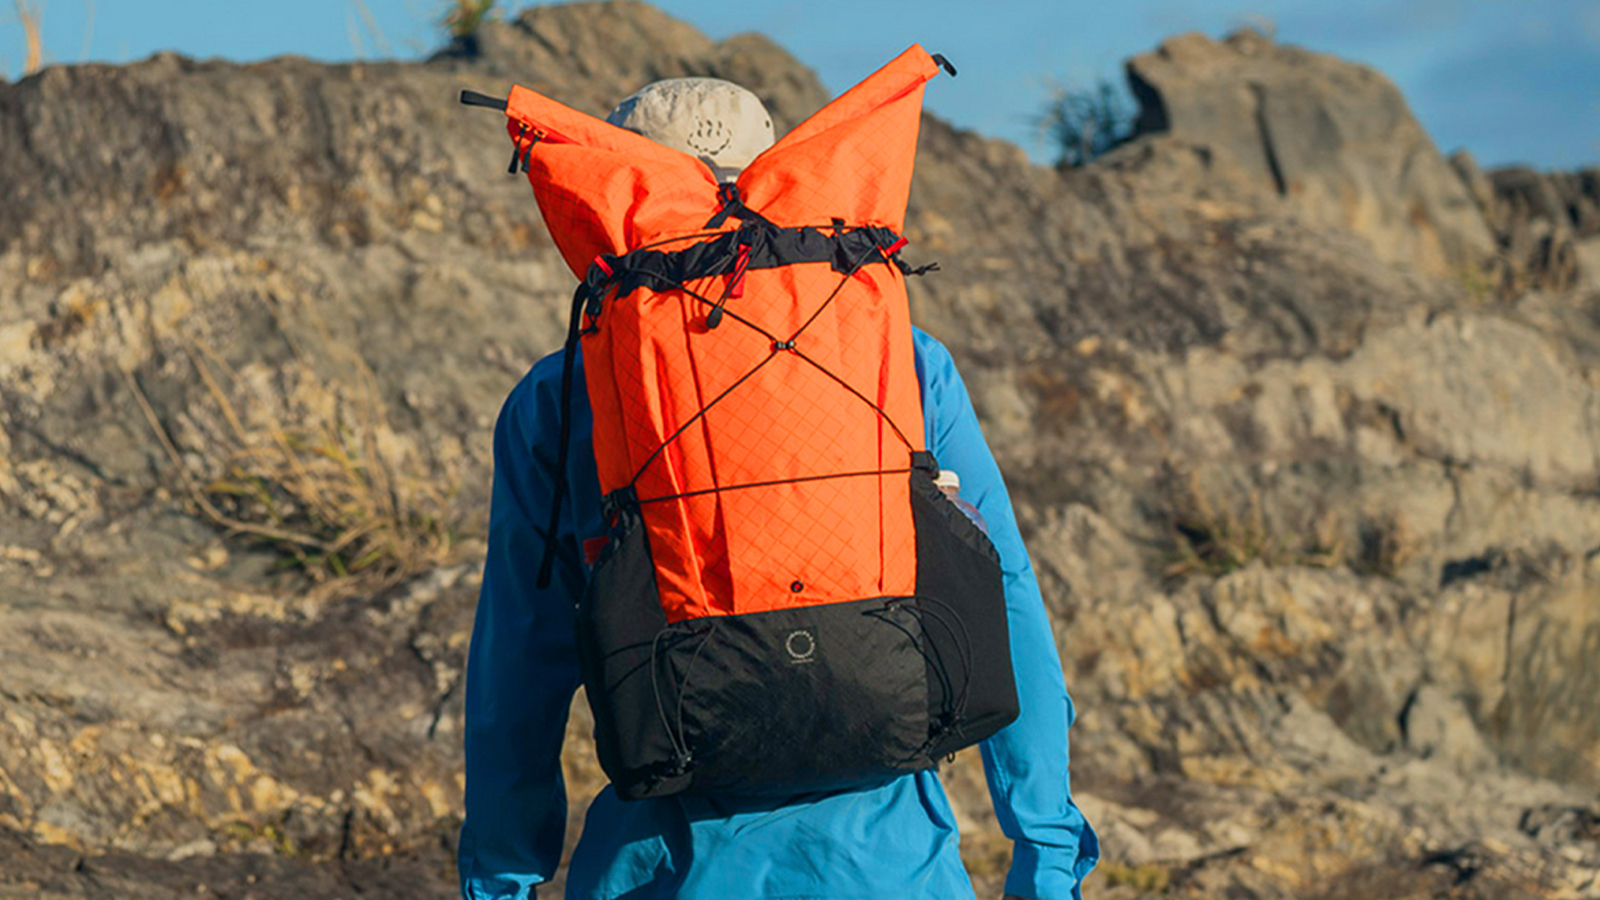
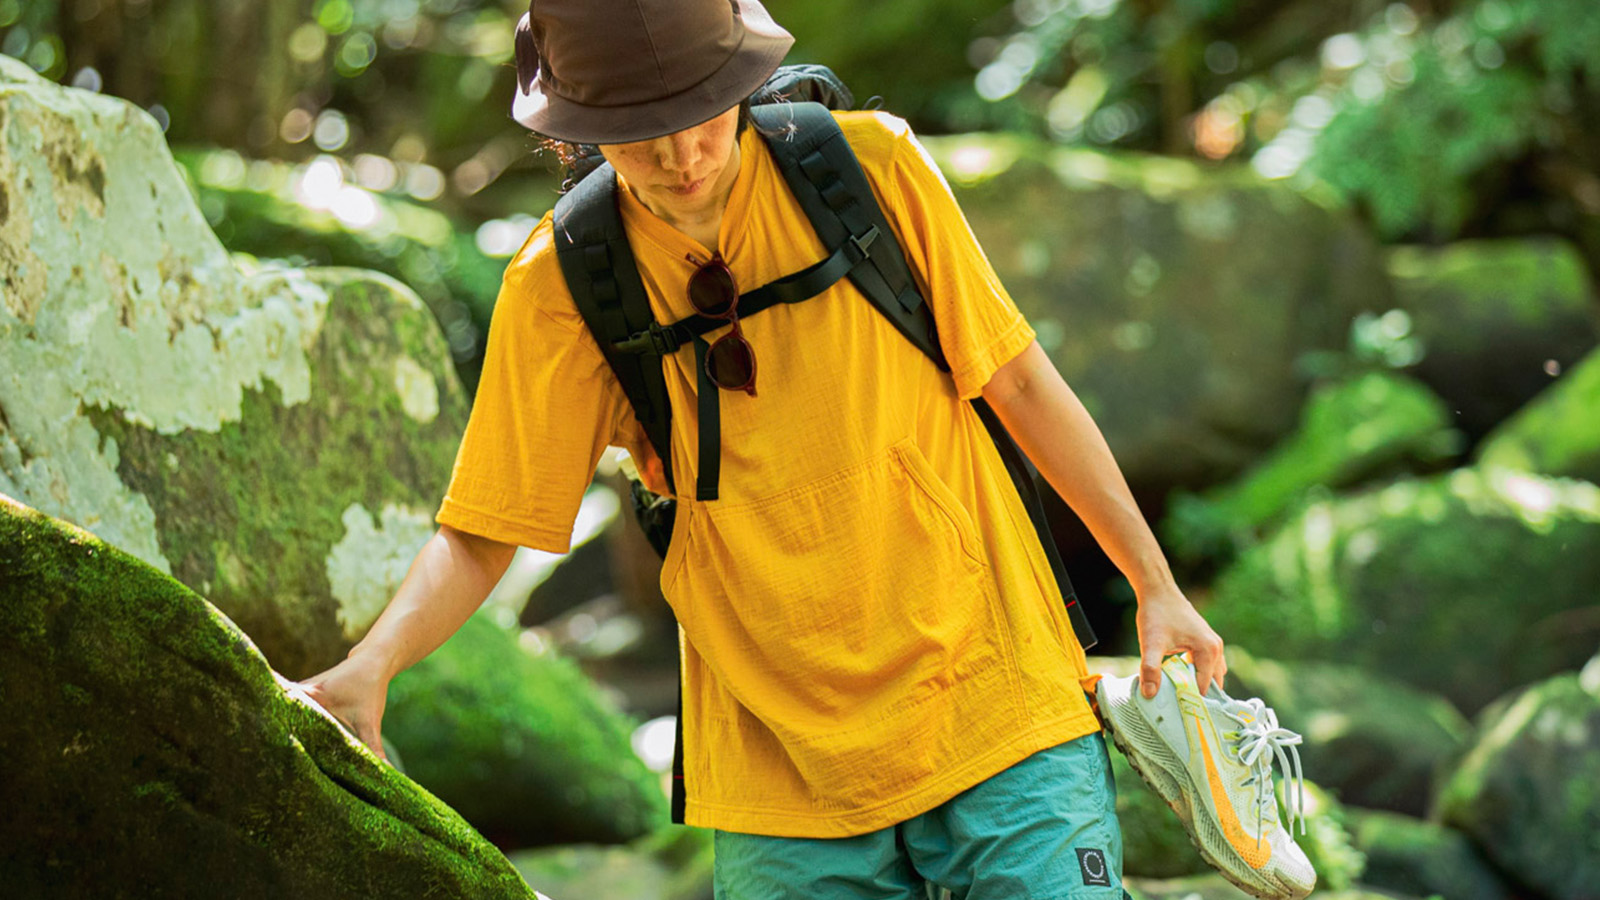
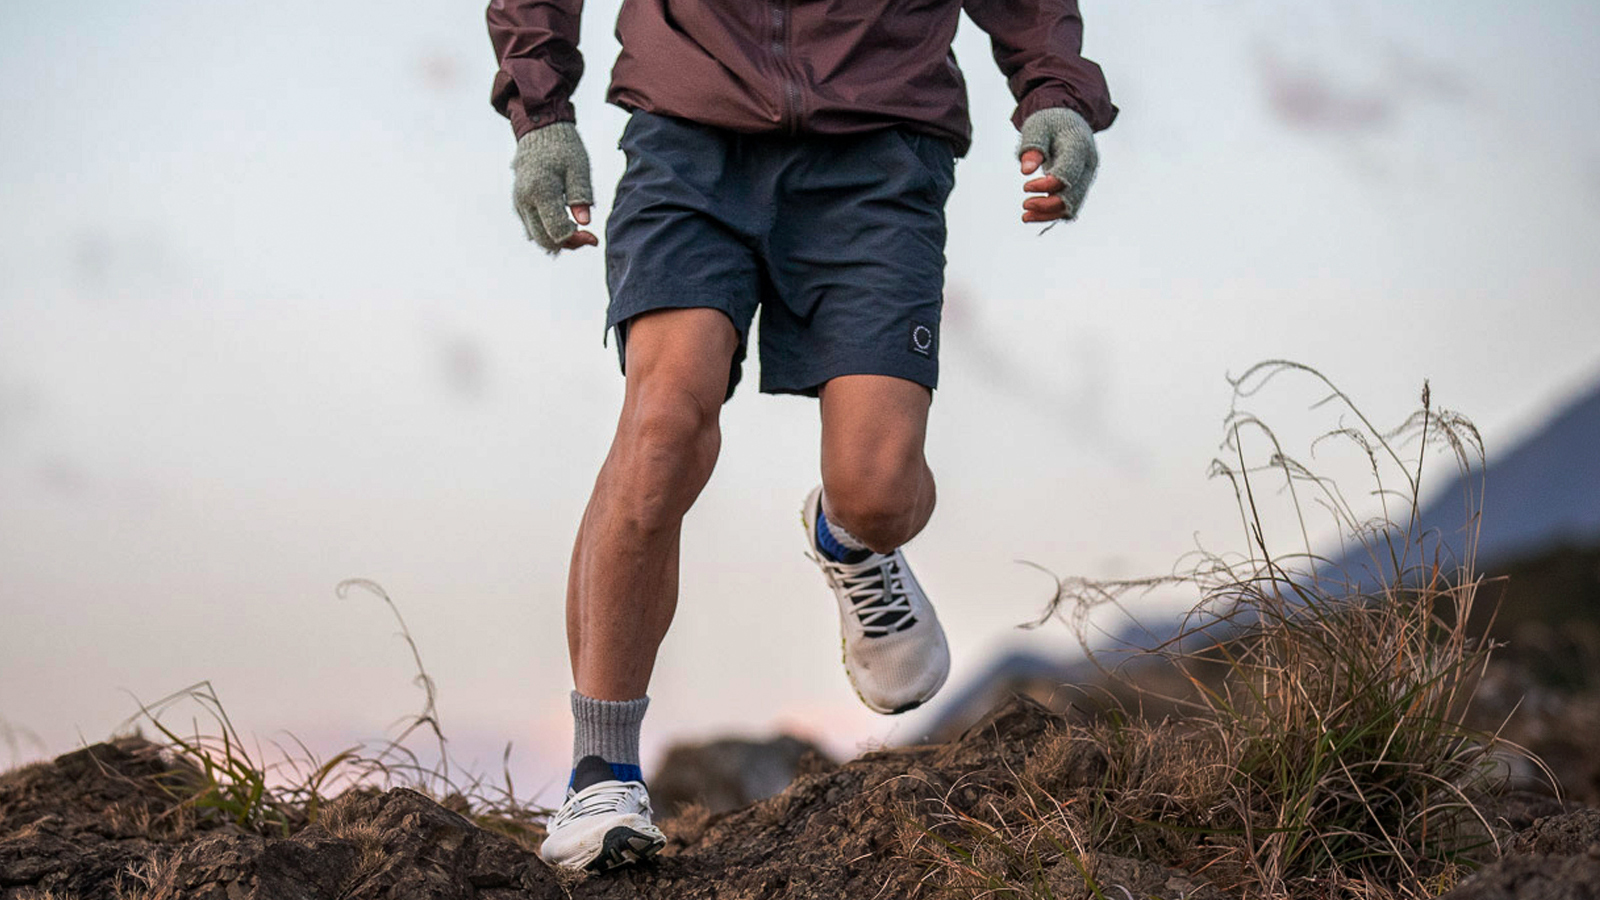
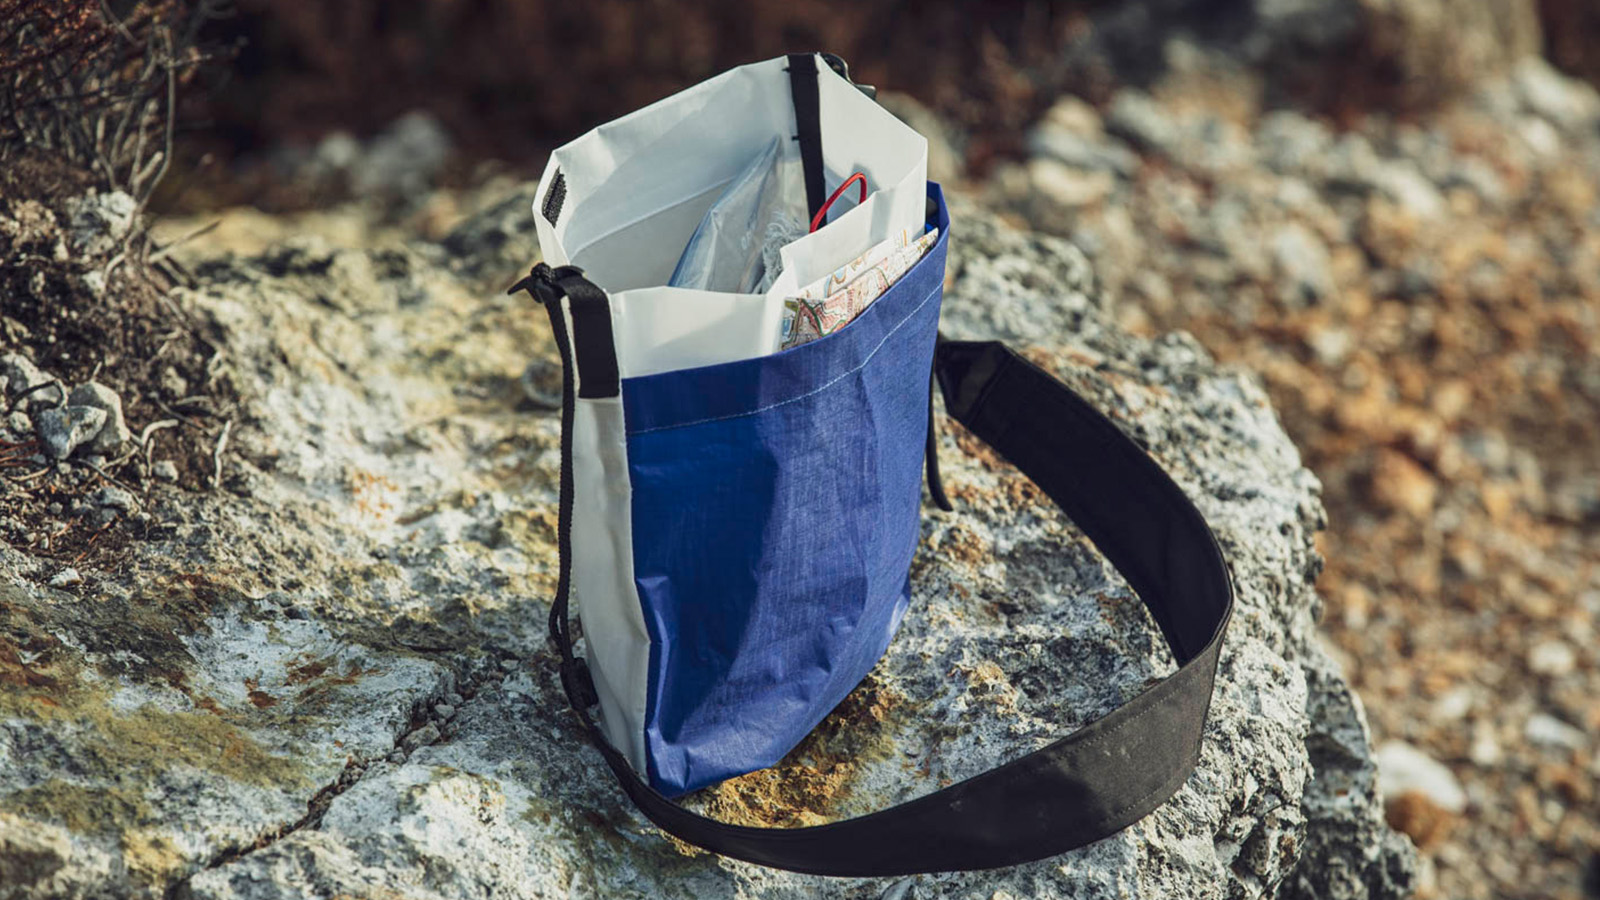
Gear
The Michinoku Coastal Trail runs through relatively low-elevation terrain, so hikers generally don’t need to worry about the severe mountain weather of alpine regions. But on a long-distance hike, you should take emergencies into consideration when choosing your gear.
If you plan to hike during the colder autumn or winter seasons, prepare for cold weather. Even though the trail passes near towns and villages, there are still isolated sections where help won’t be close by. Also, don’t expect to buy or replace gear along the trail.
Below you’ll find a list of the gear that I used. Keep in mind that this should only be a reference. Adjust your own gear list for the season, temperature, weather, your hiking style and your tolerance for hot, cold or wet conditions.
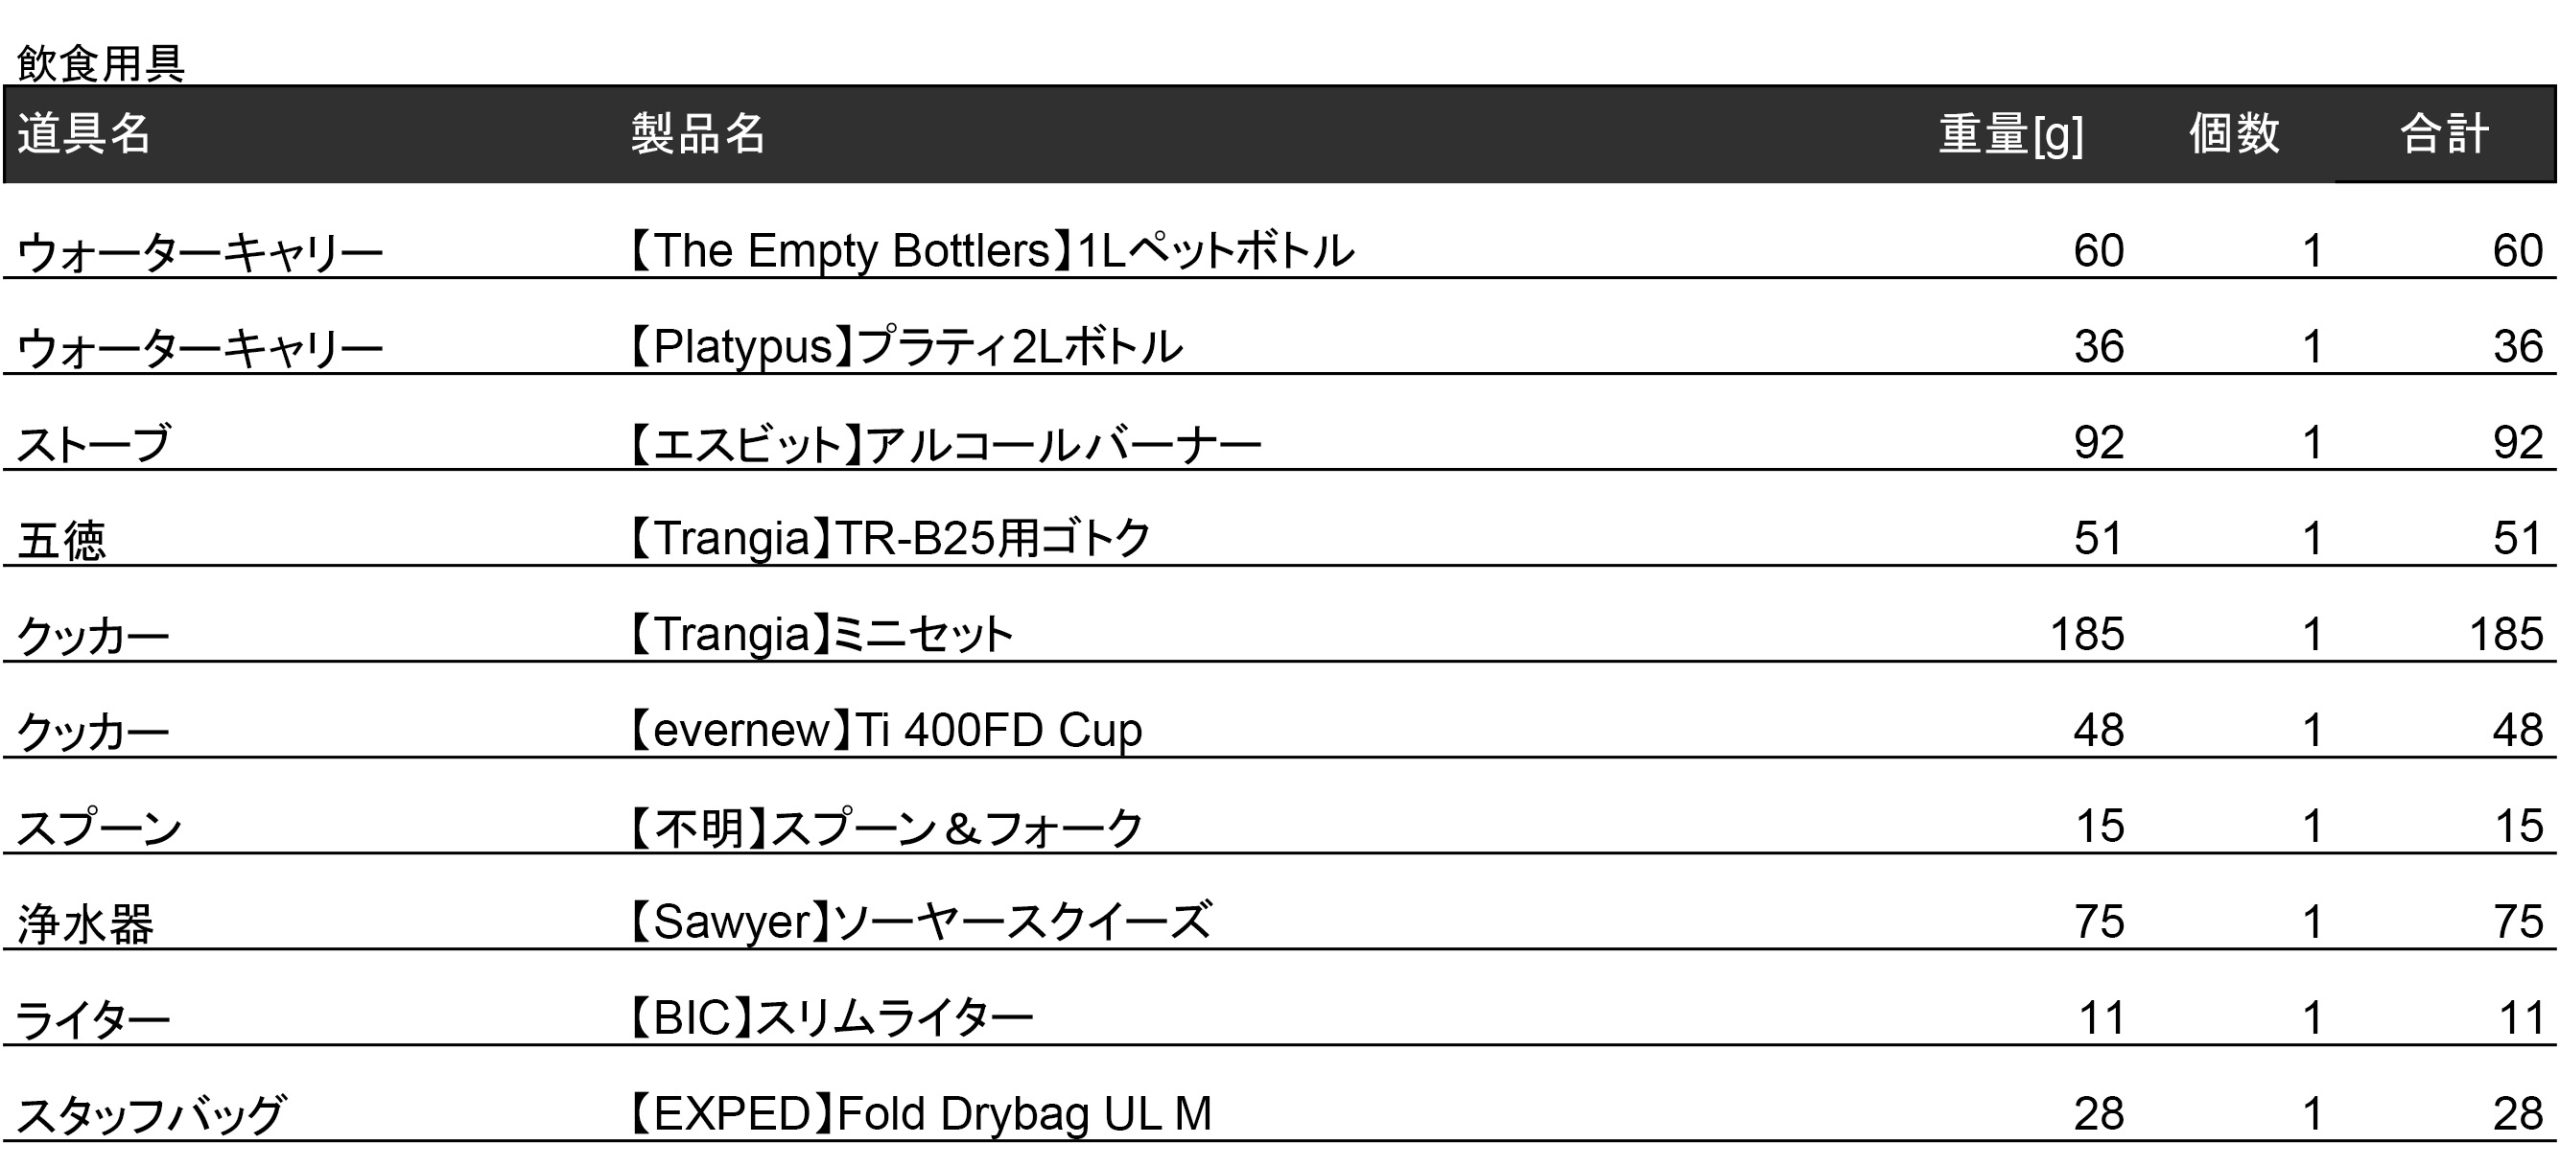
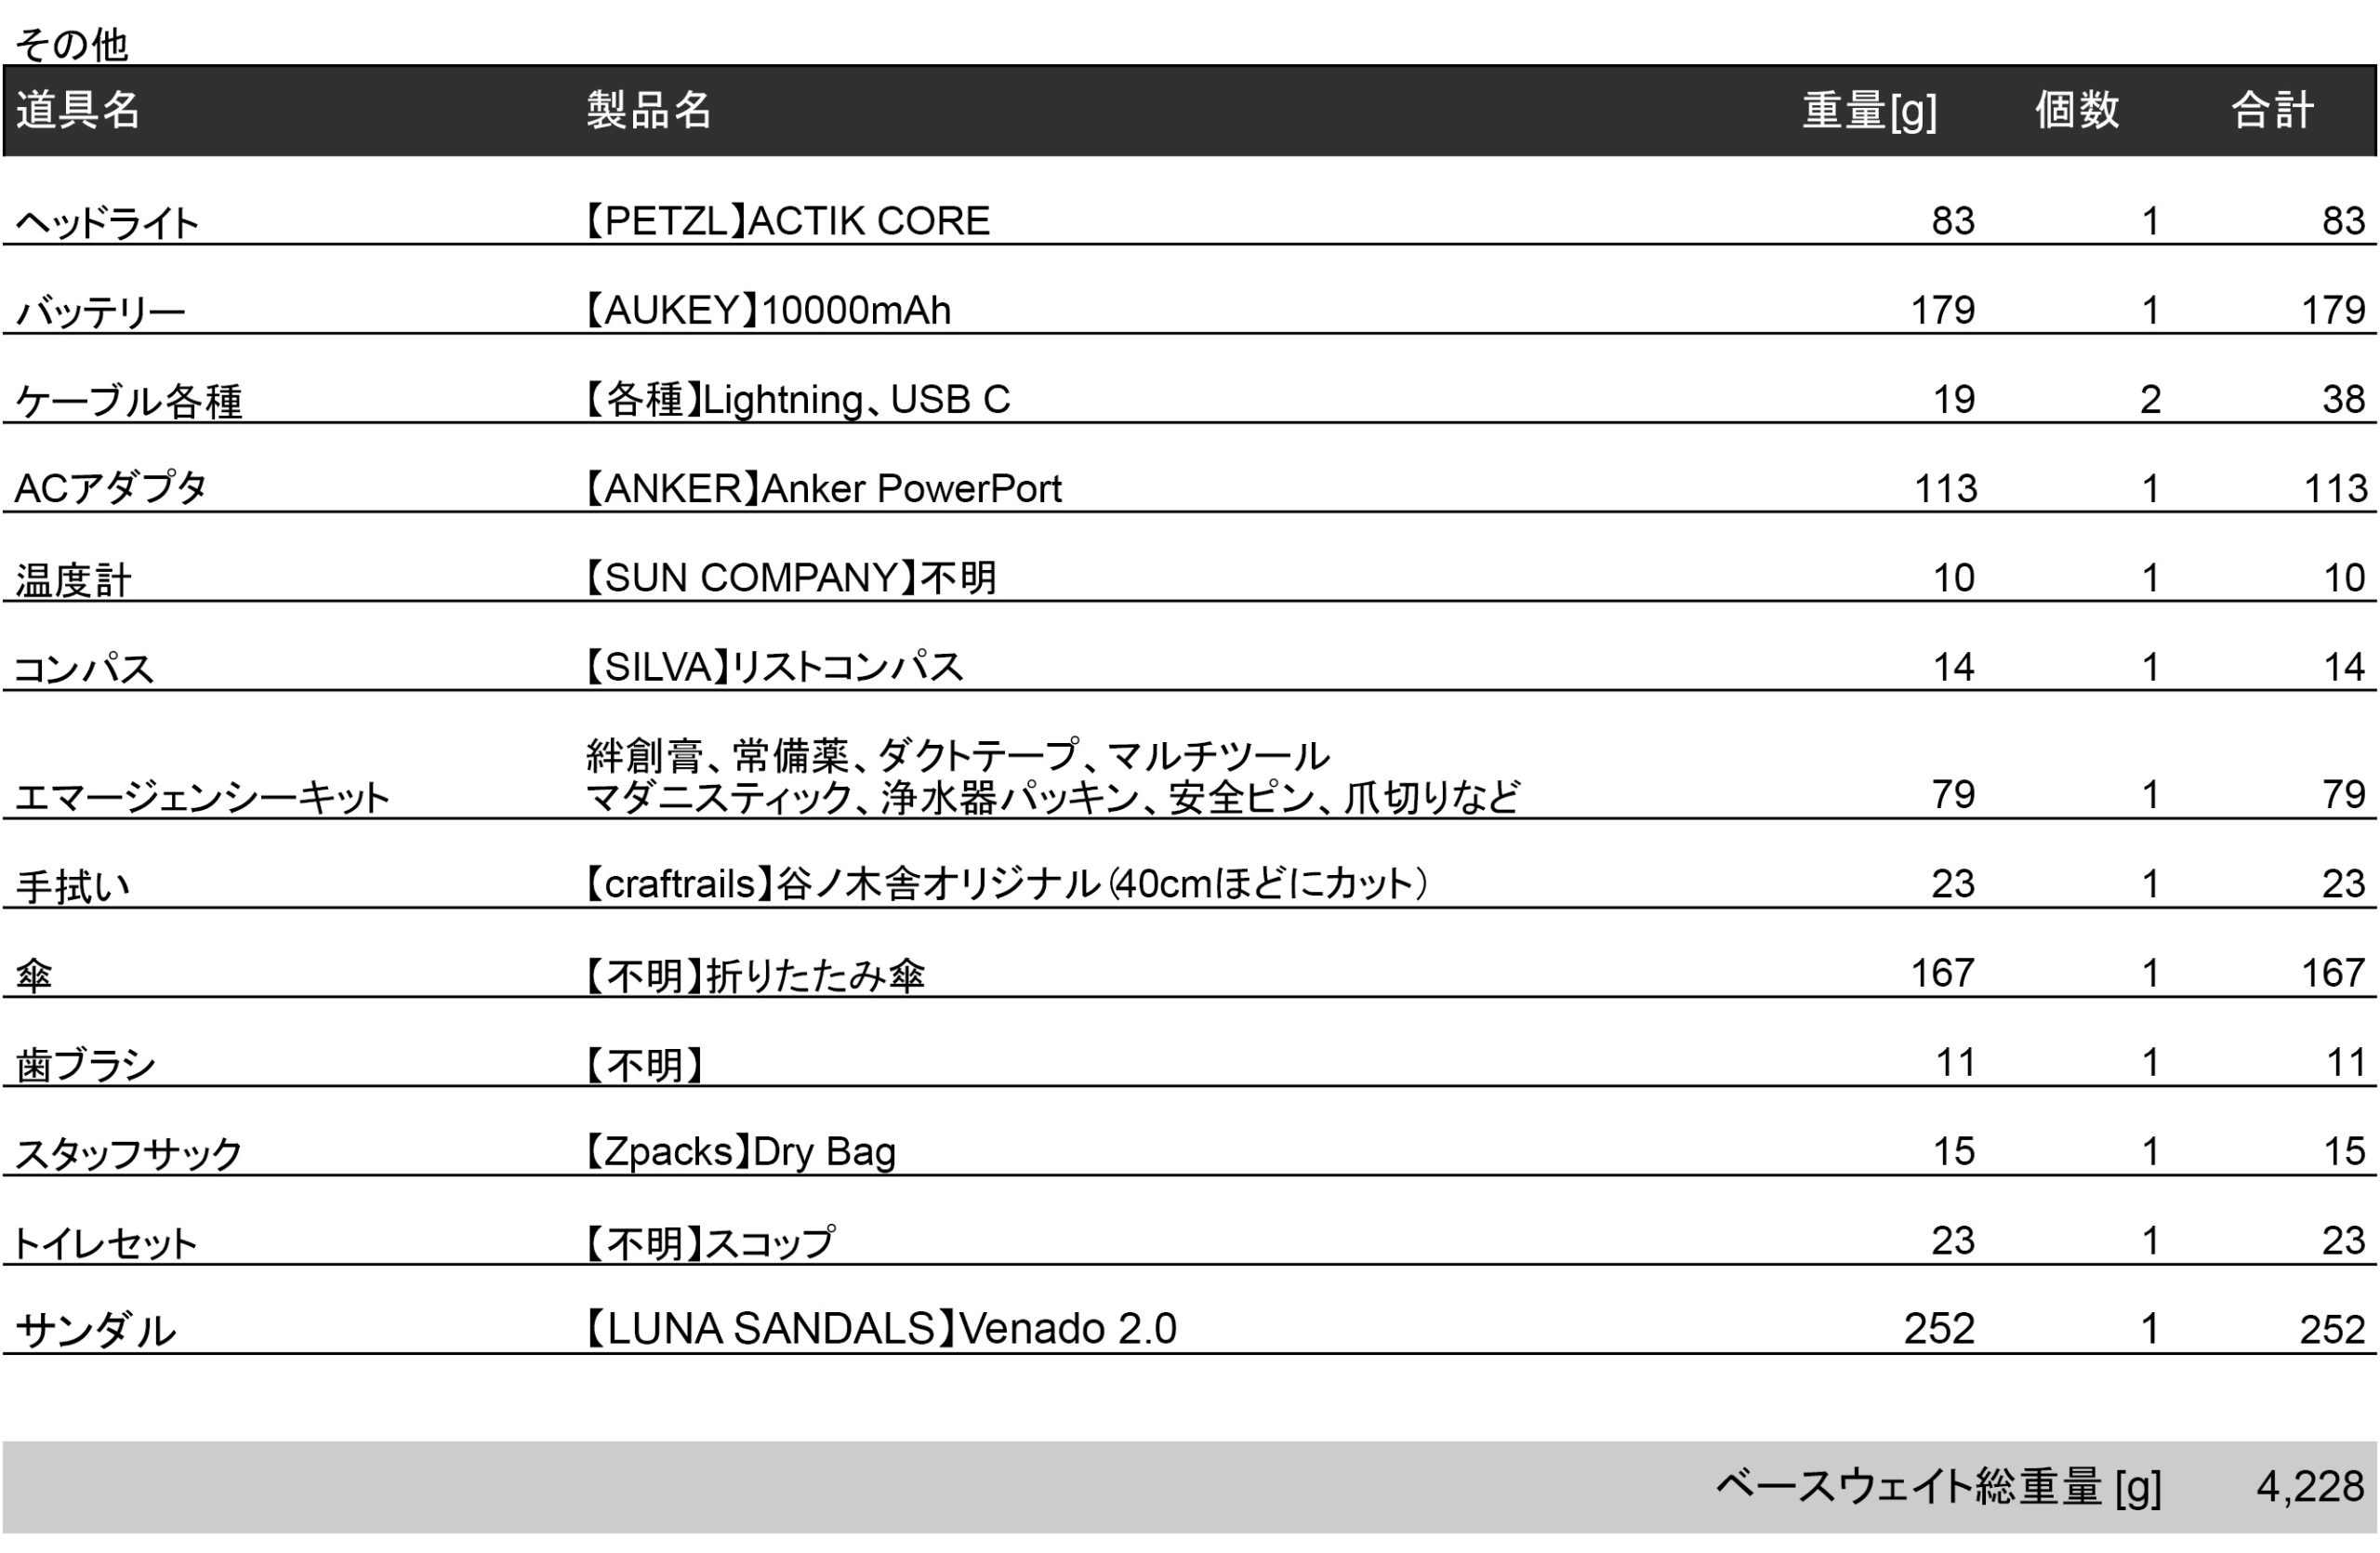
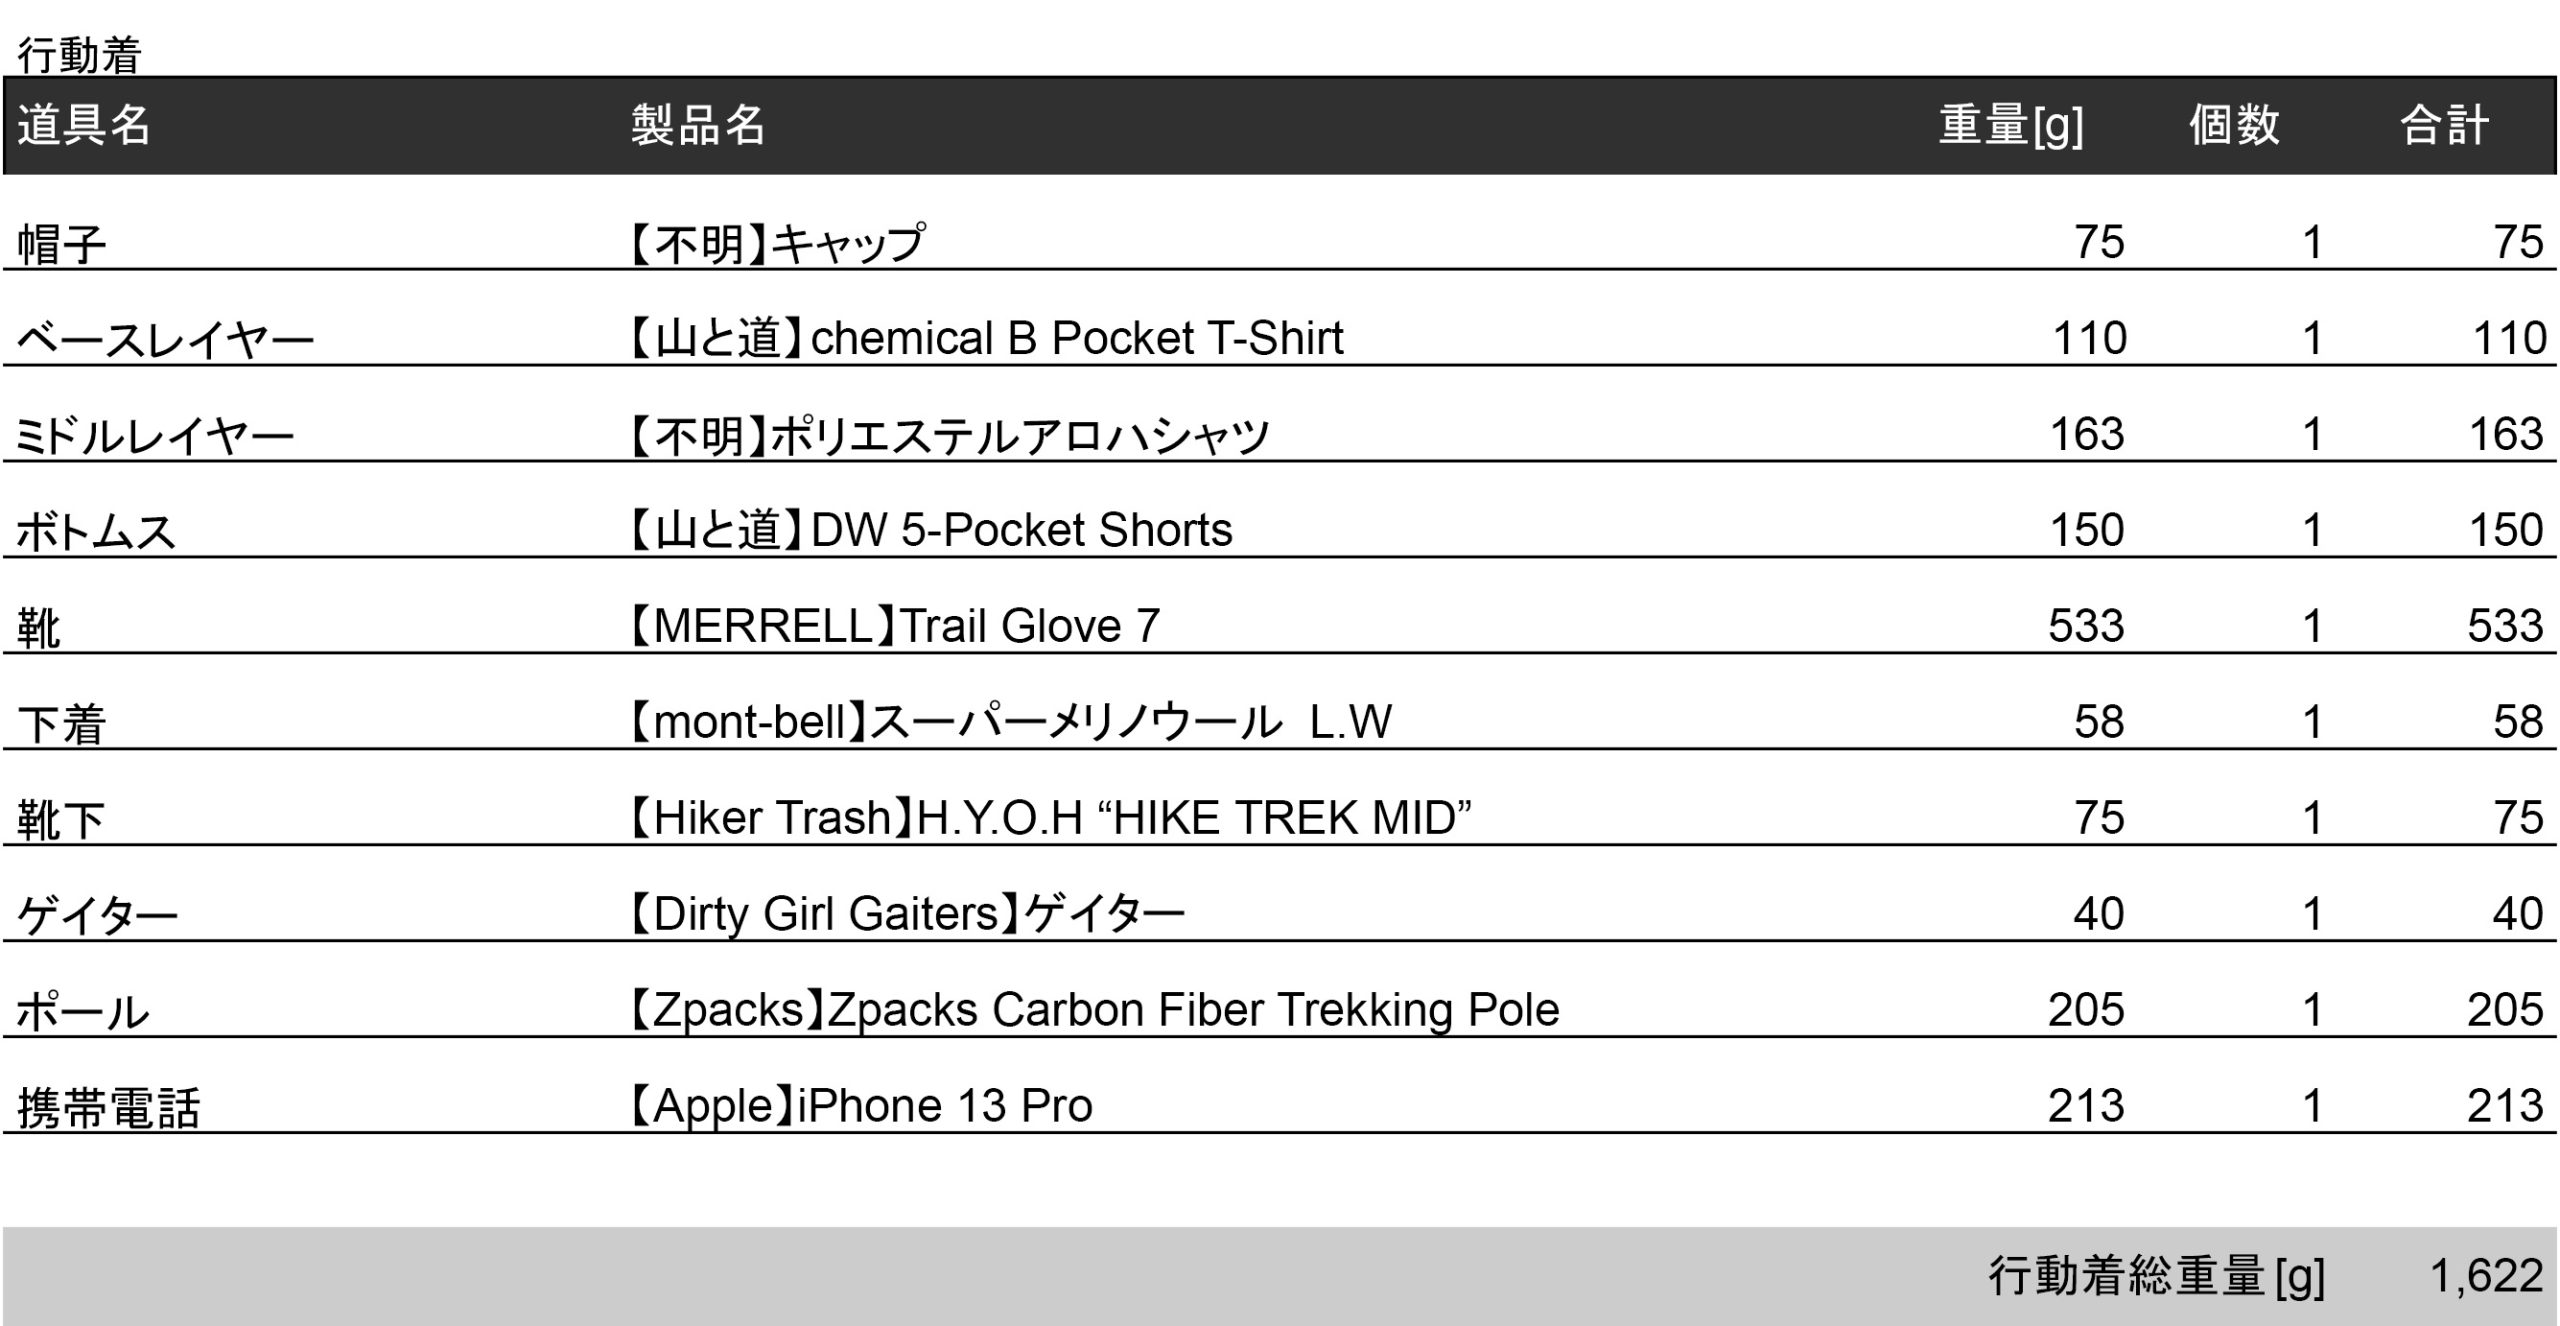
Michinoku Coastal Trail gear list
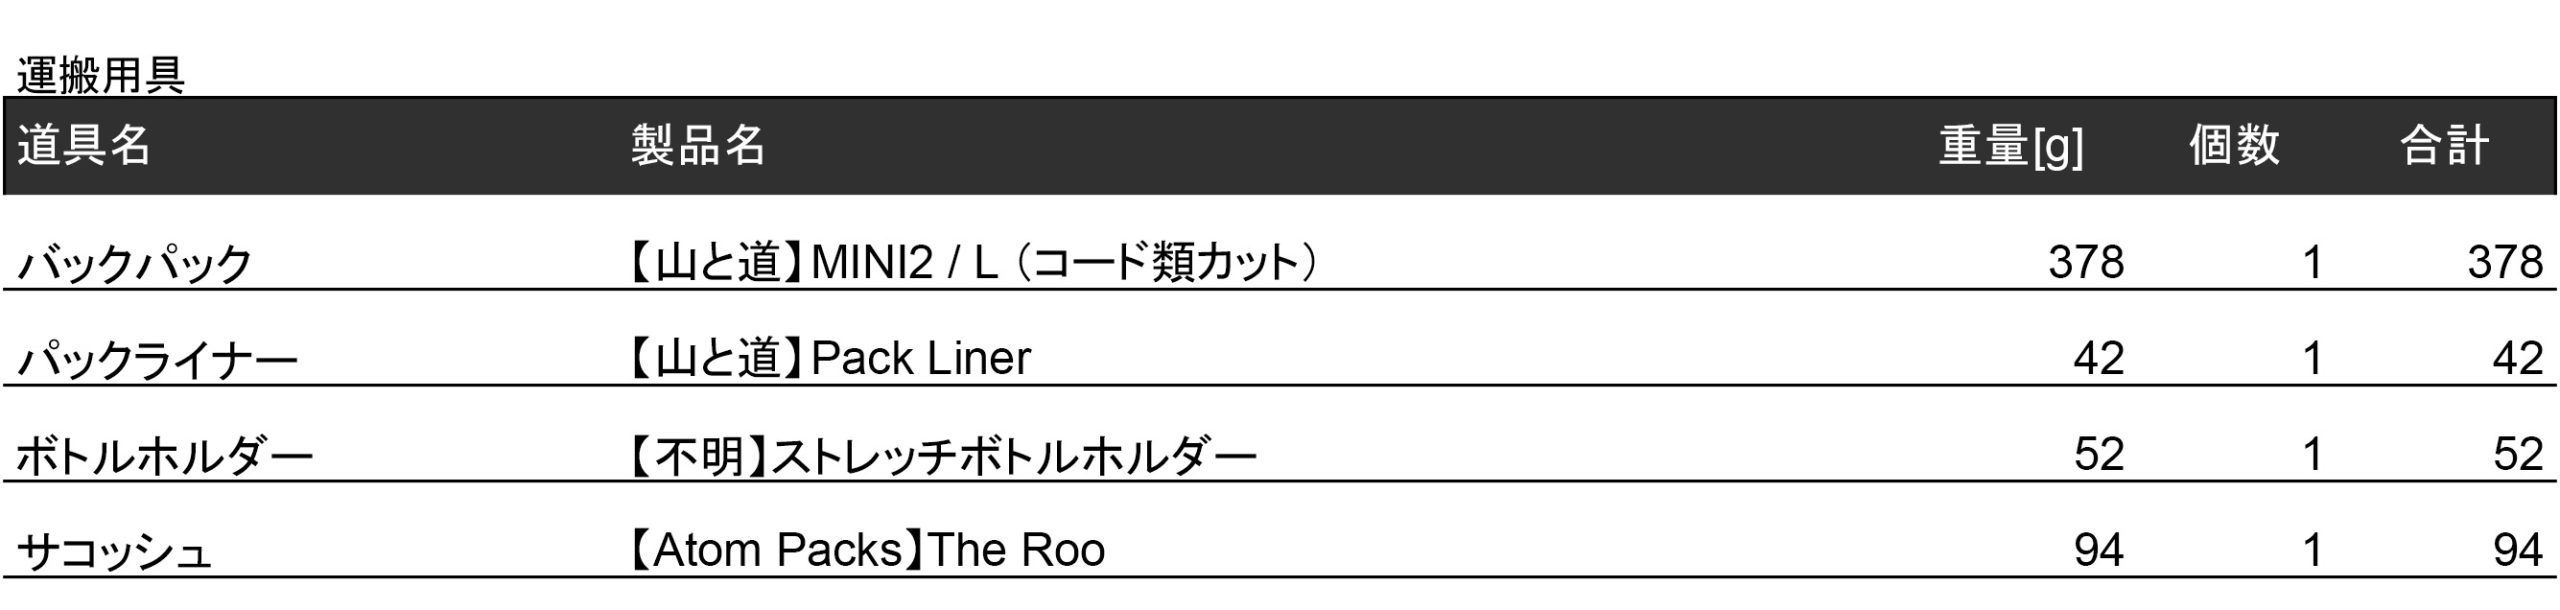
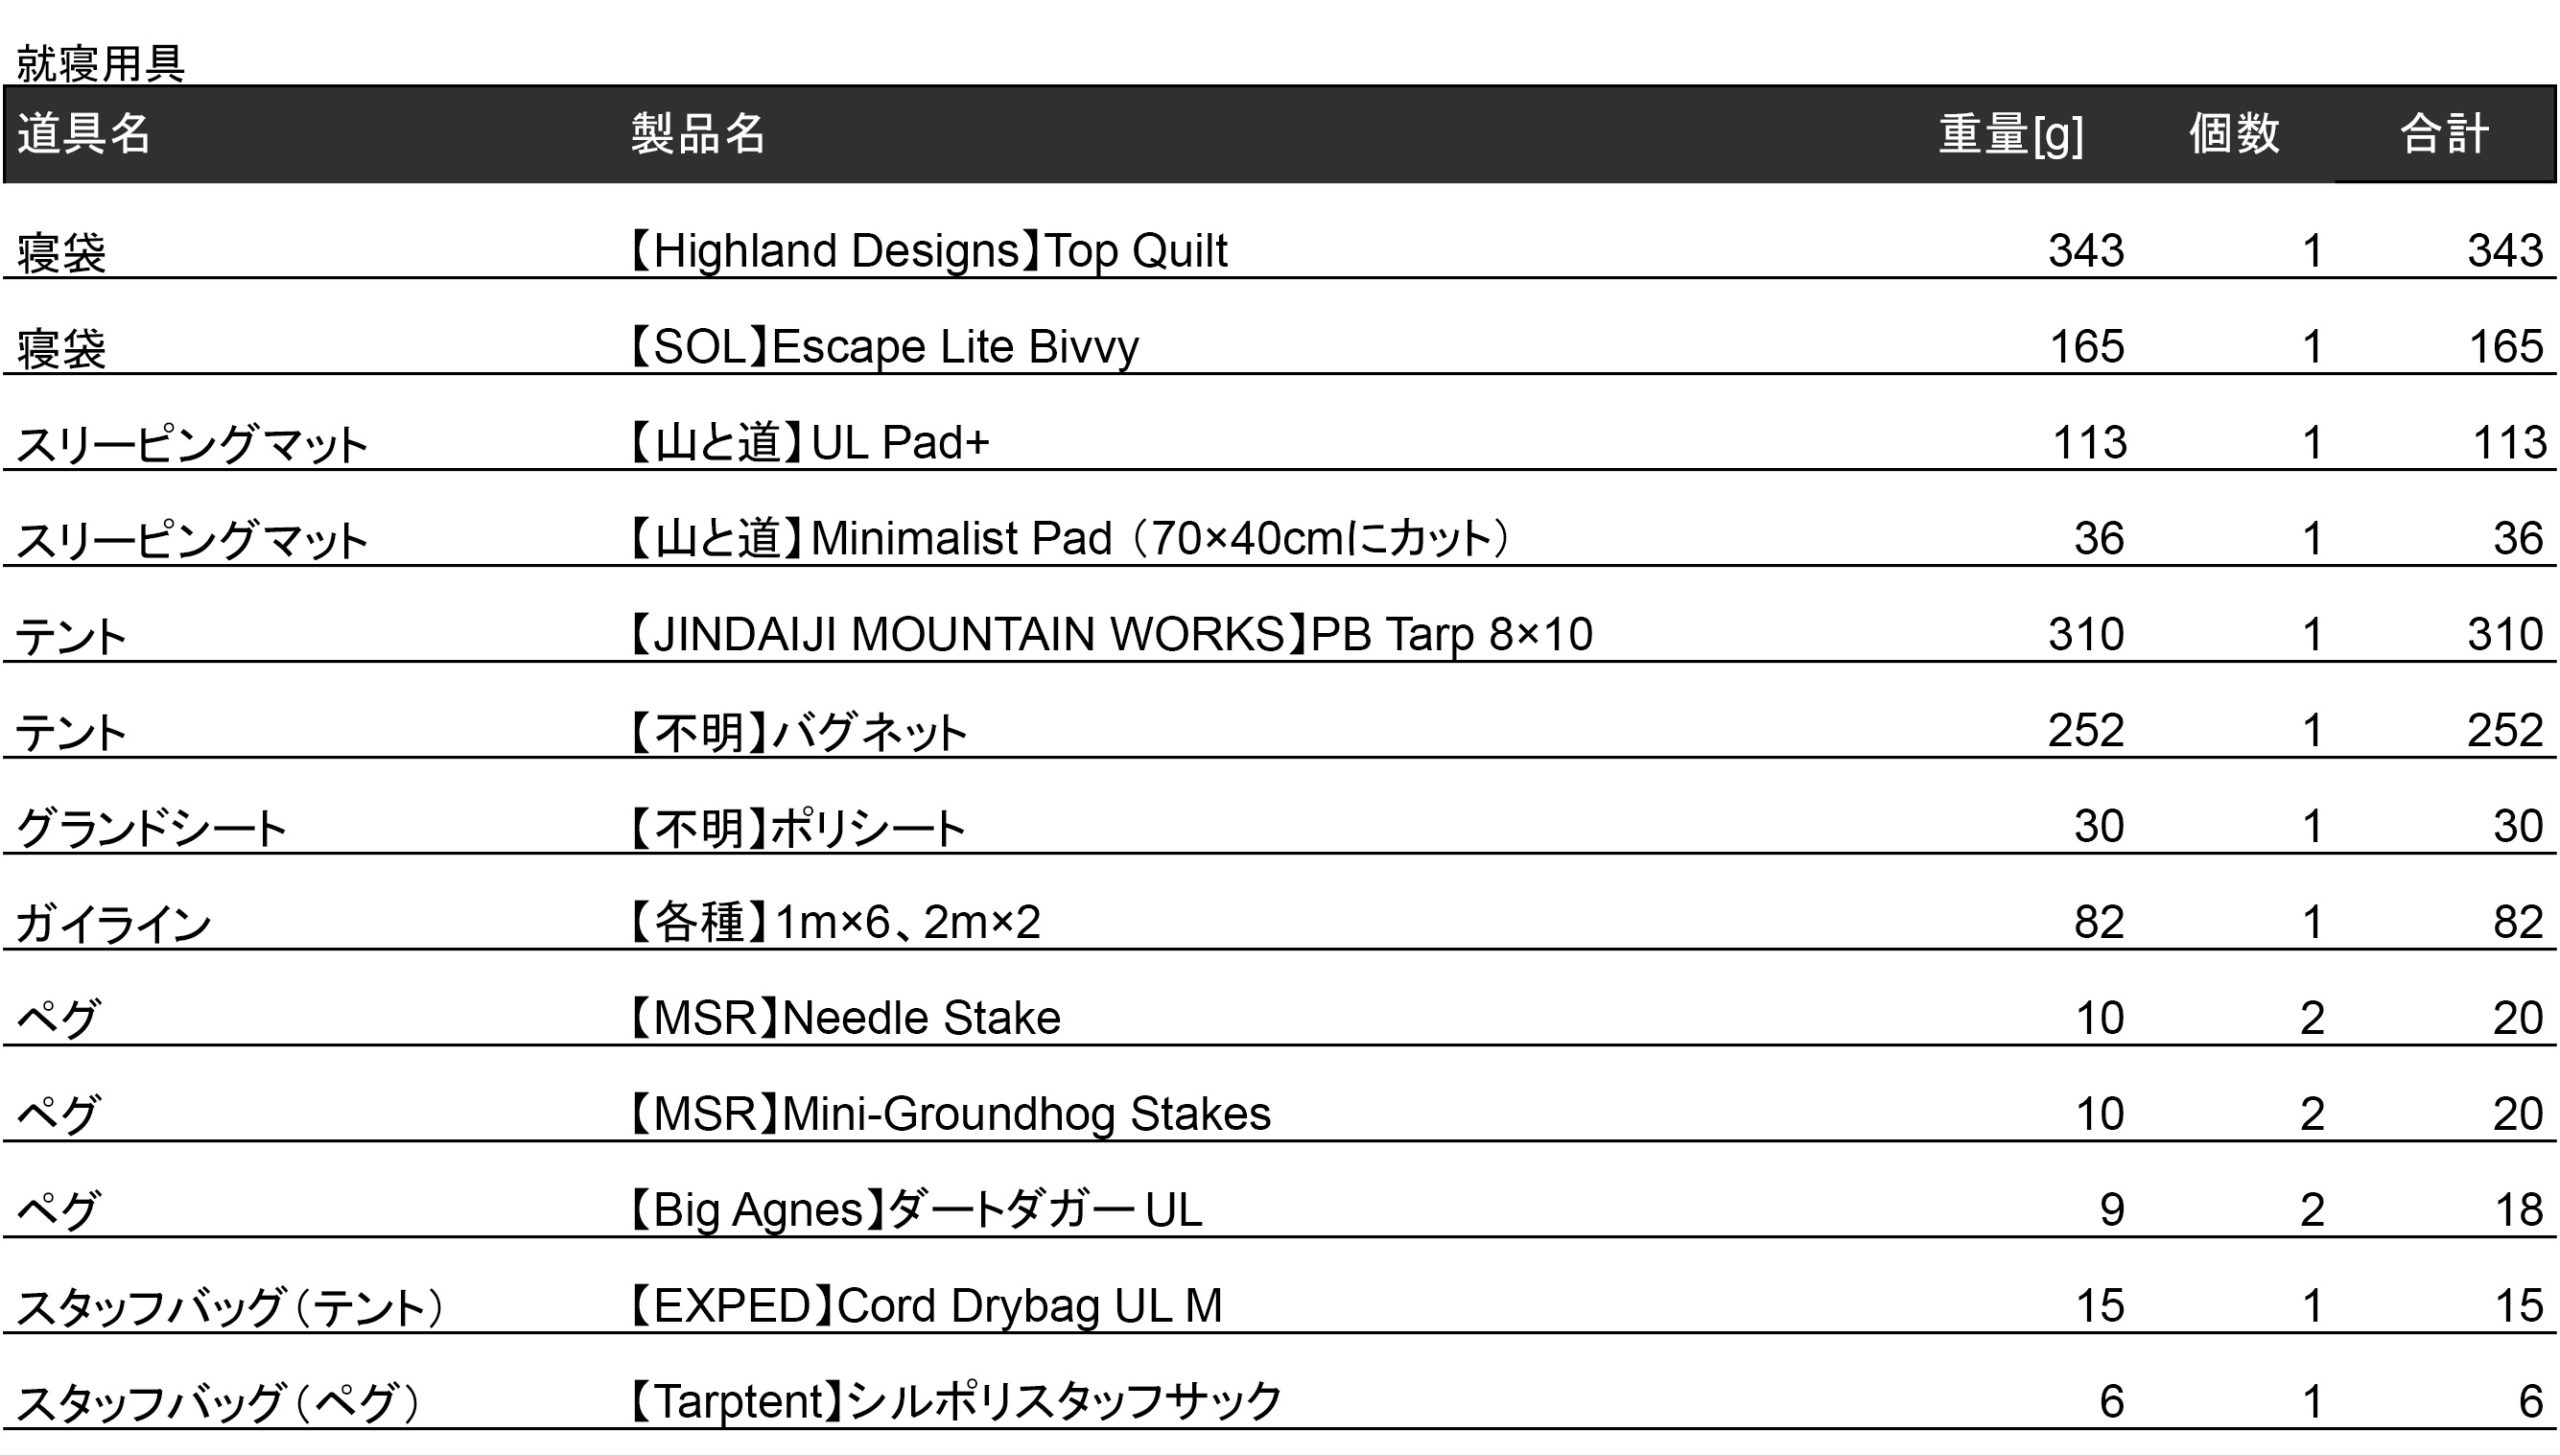
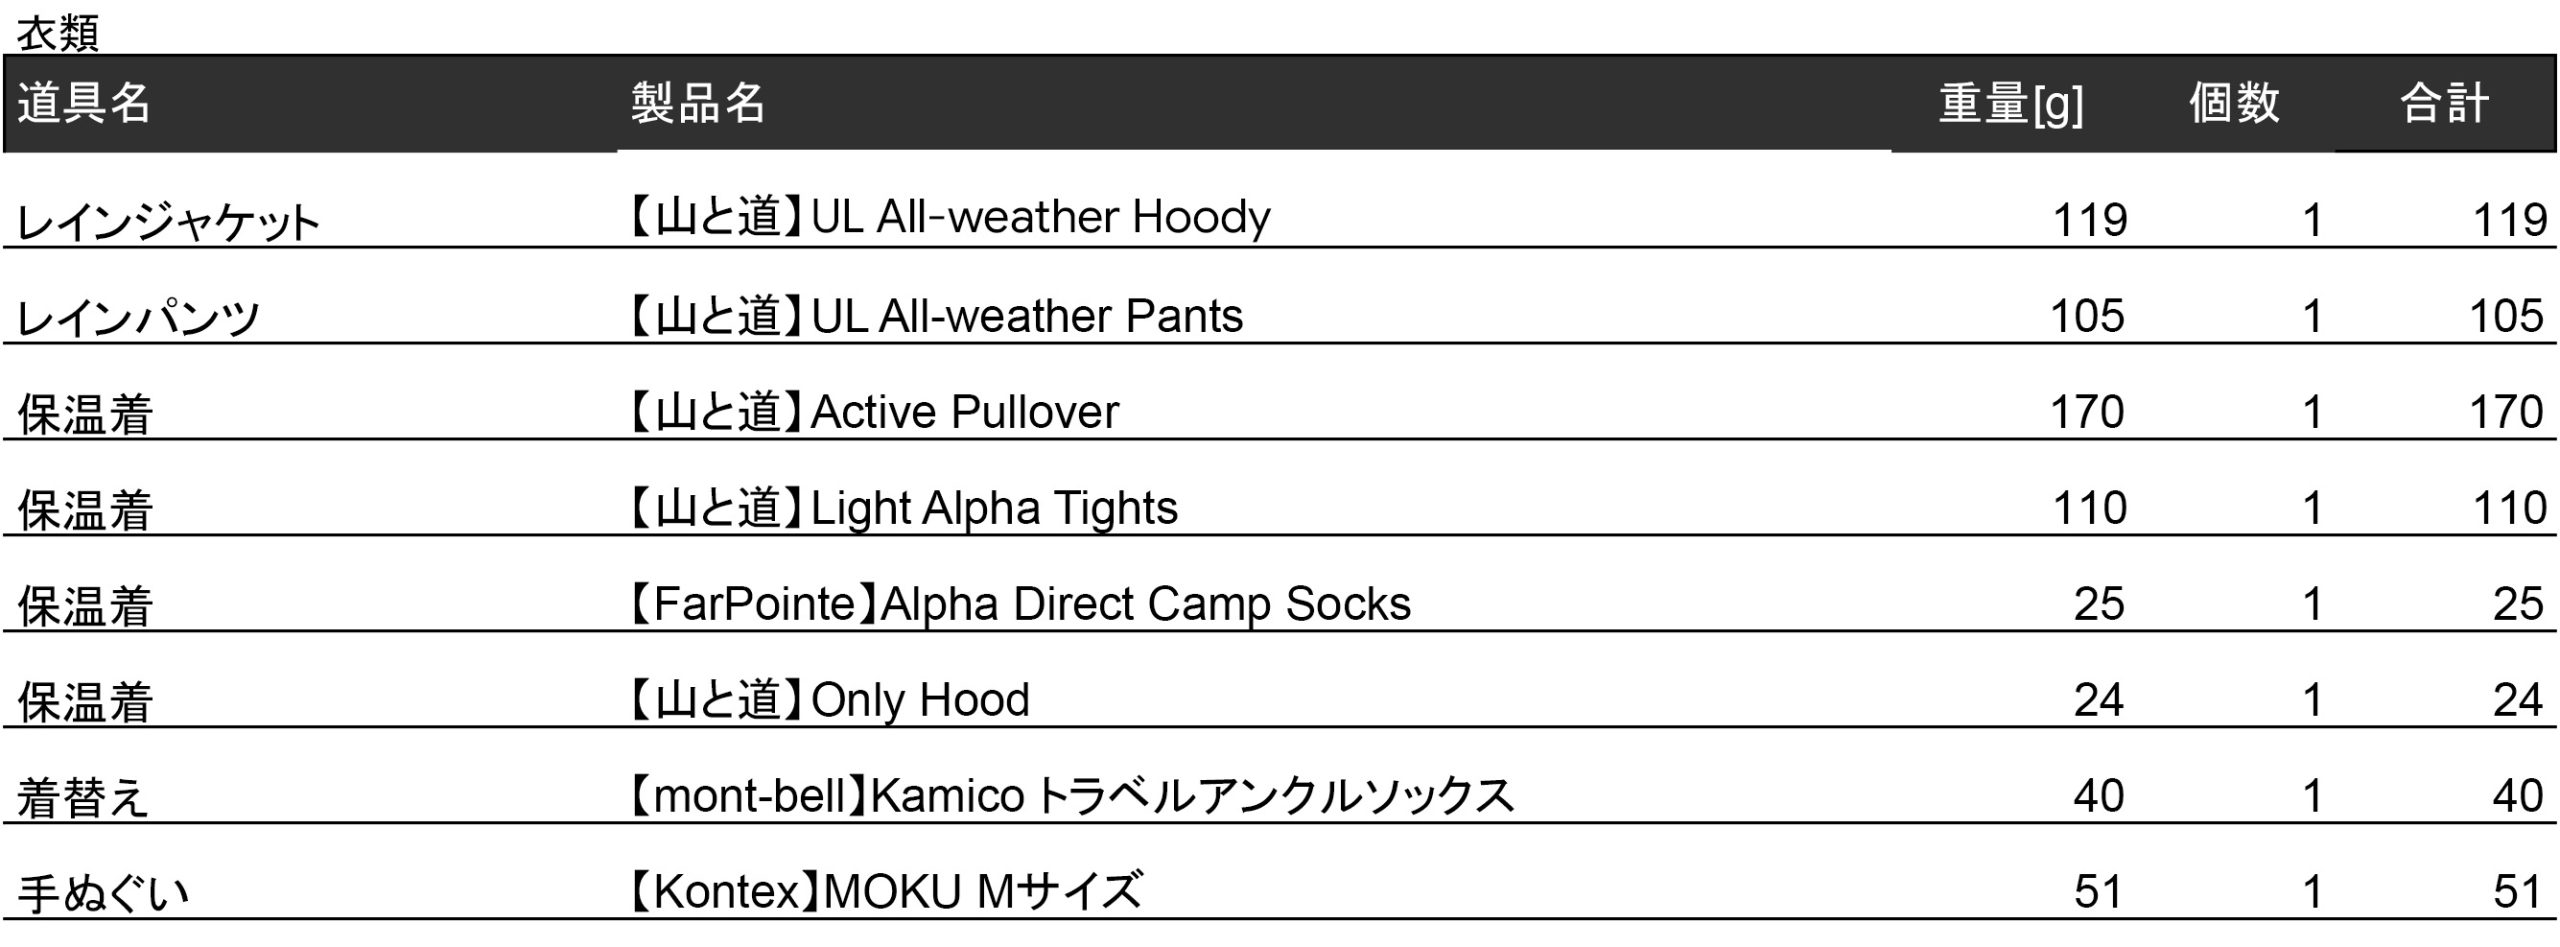
Gear highlights
For long journeys, I usually choose a gas stove. This time, I went with an alcohol stove. The main reason was fuel availability. Towns along the trail are often small, and fuel canisters are not always easy to find. Alcohol fuel, on the other hand, can be purchased at drugstores. Carrying 500 ml (17 fl oz) in a bottle was enough to cover morning coffee and evening meals for more than two weeks without needing to resupply.
People often associate alcohol stoves with ultralight hiking, but this stove is made of brass and weighs about 90 g (3 oz, or 0.2 lbs), so it’s not especially lightweight. Its advantage: flame adjustment, which makes cooking rice and other simple preparations possible.
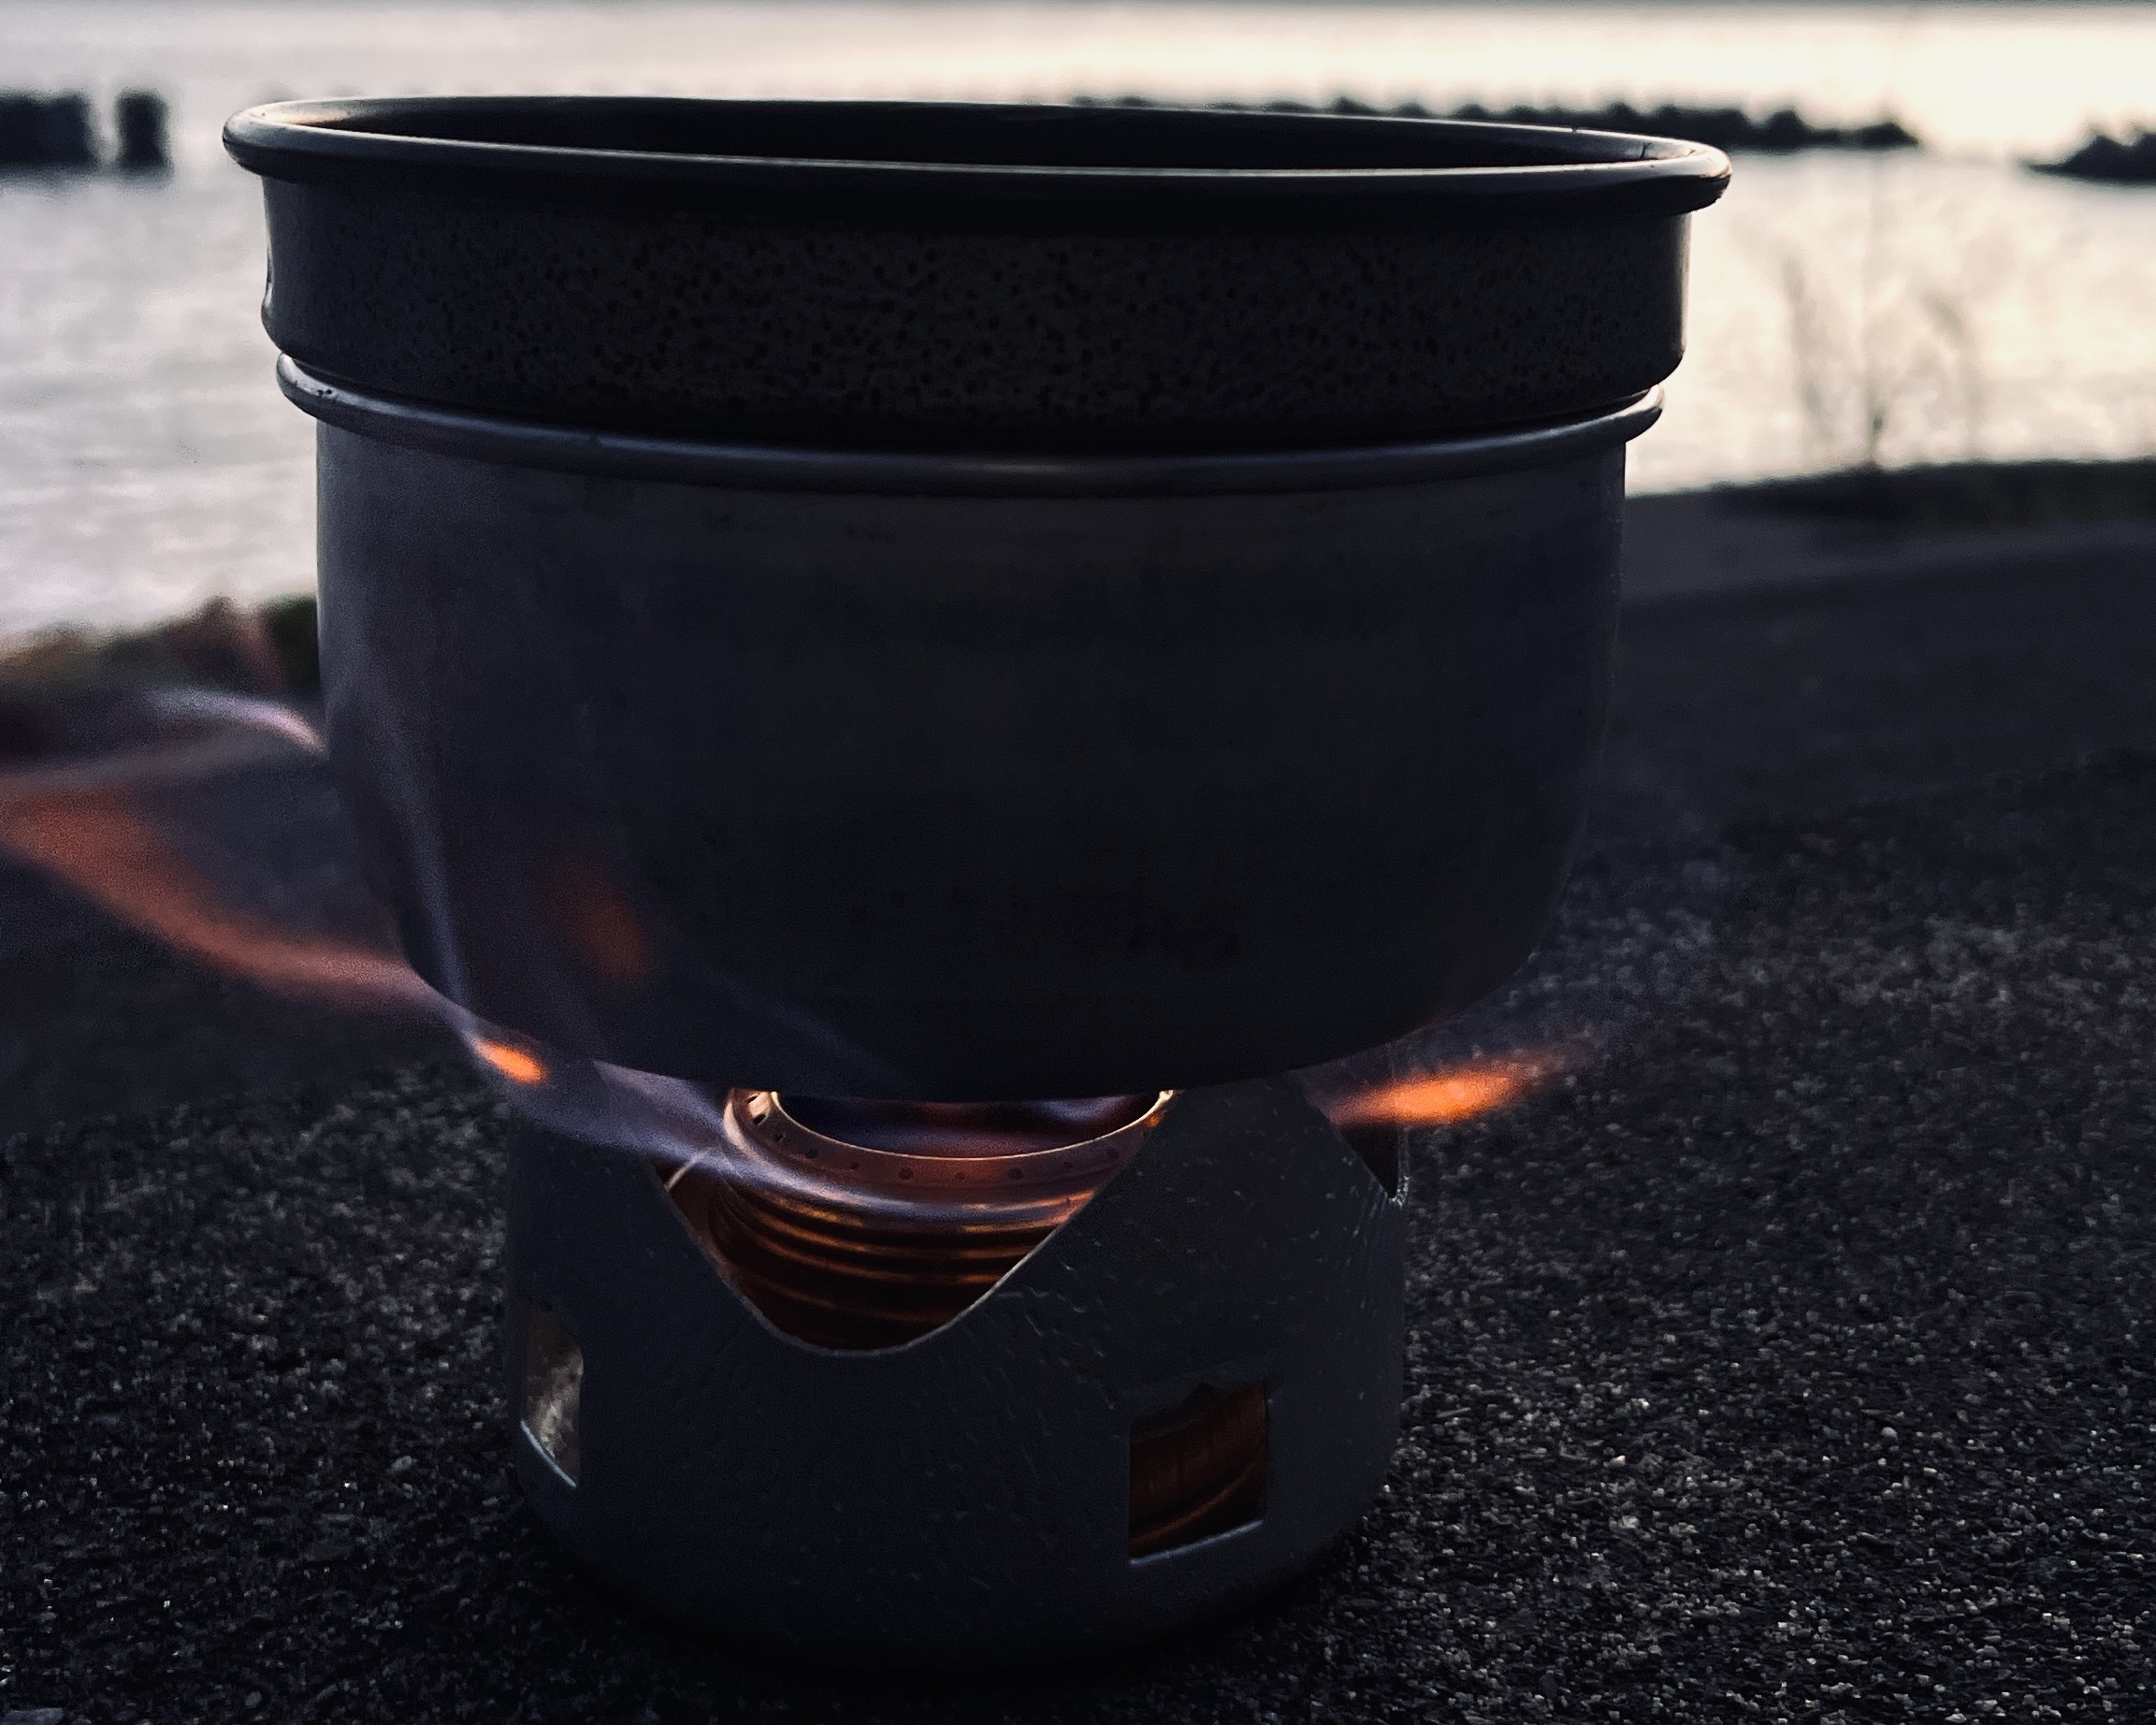
The Esbit stove comes with a lid (not shown) to adjust the flame for cooking.
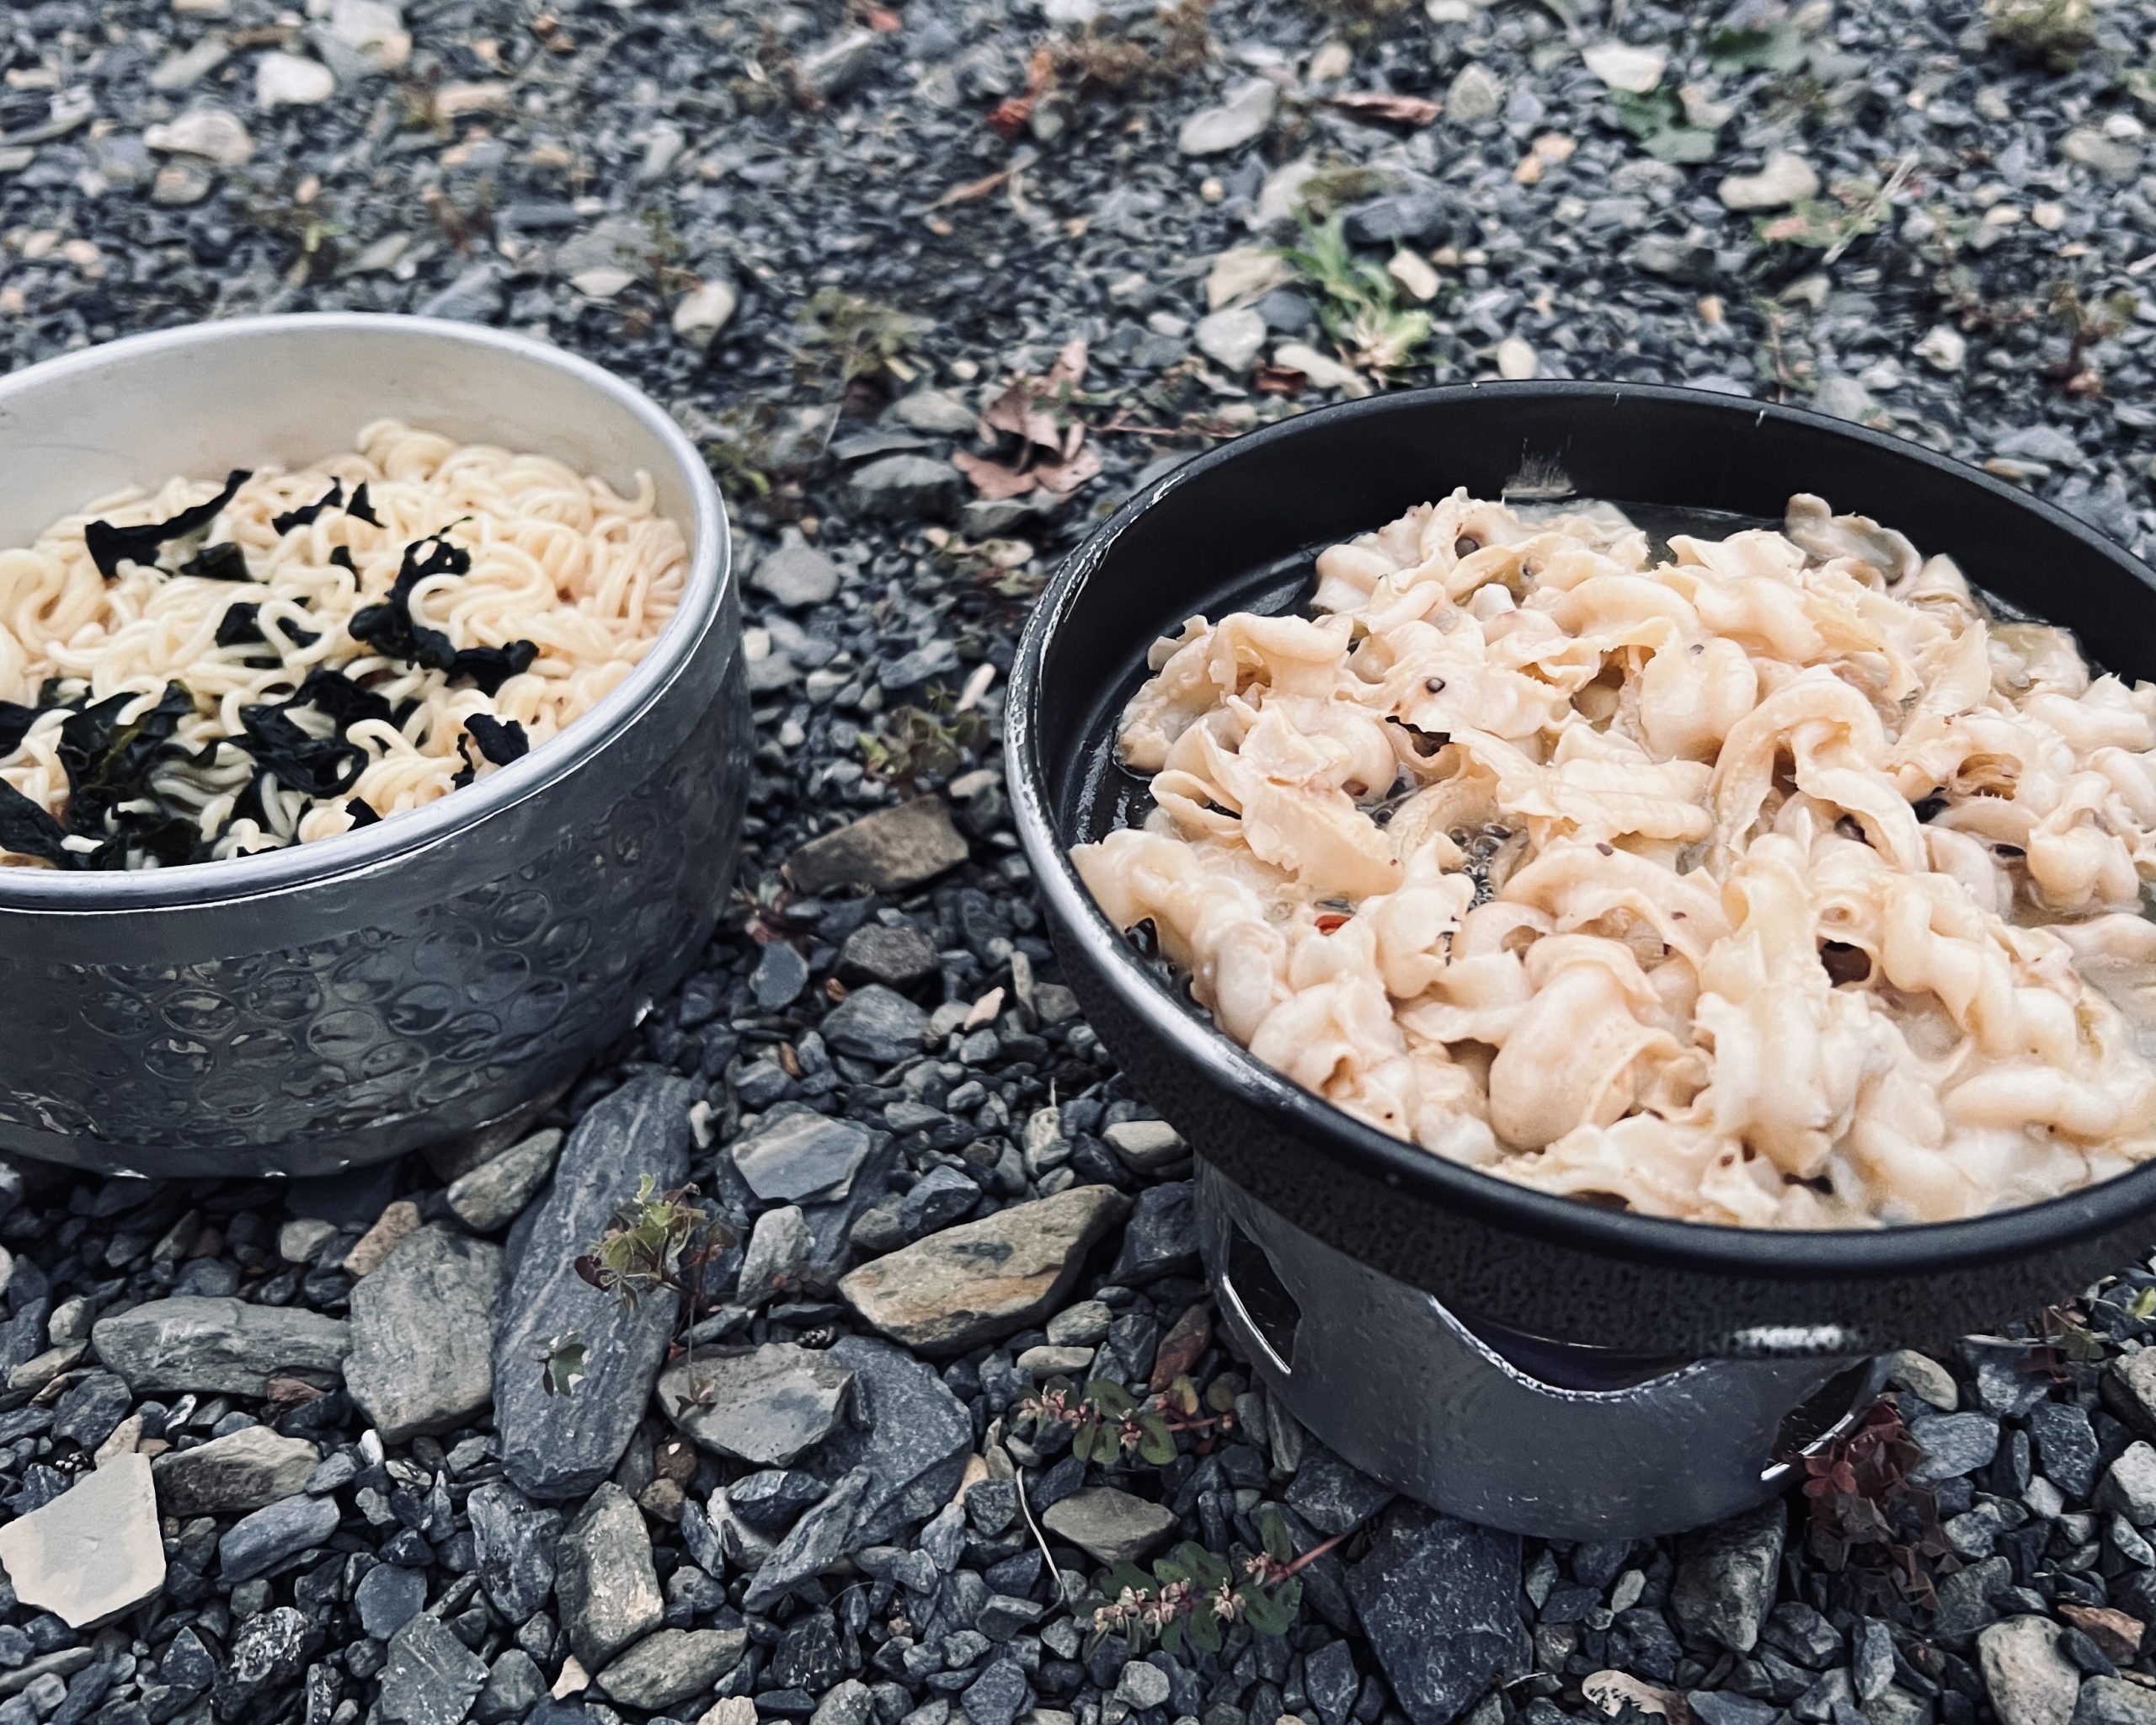
This cooking set consists of an 800 ml (27 fl oz) aluminum pot and a simple frying pan that doubles as a lid. I normally use a lightweight titanium pot for instant noodles on long trails but for this trip I planned meals of rice and whatever unique local ingredients that I could find while passing through towns and villages. I grilled produce that I bought at roadside stations (michi-no-eki) and even made rice cooked with wakame seaweed.
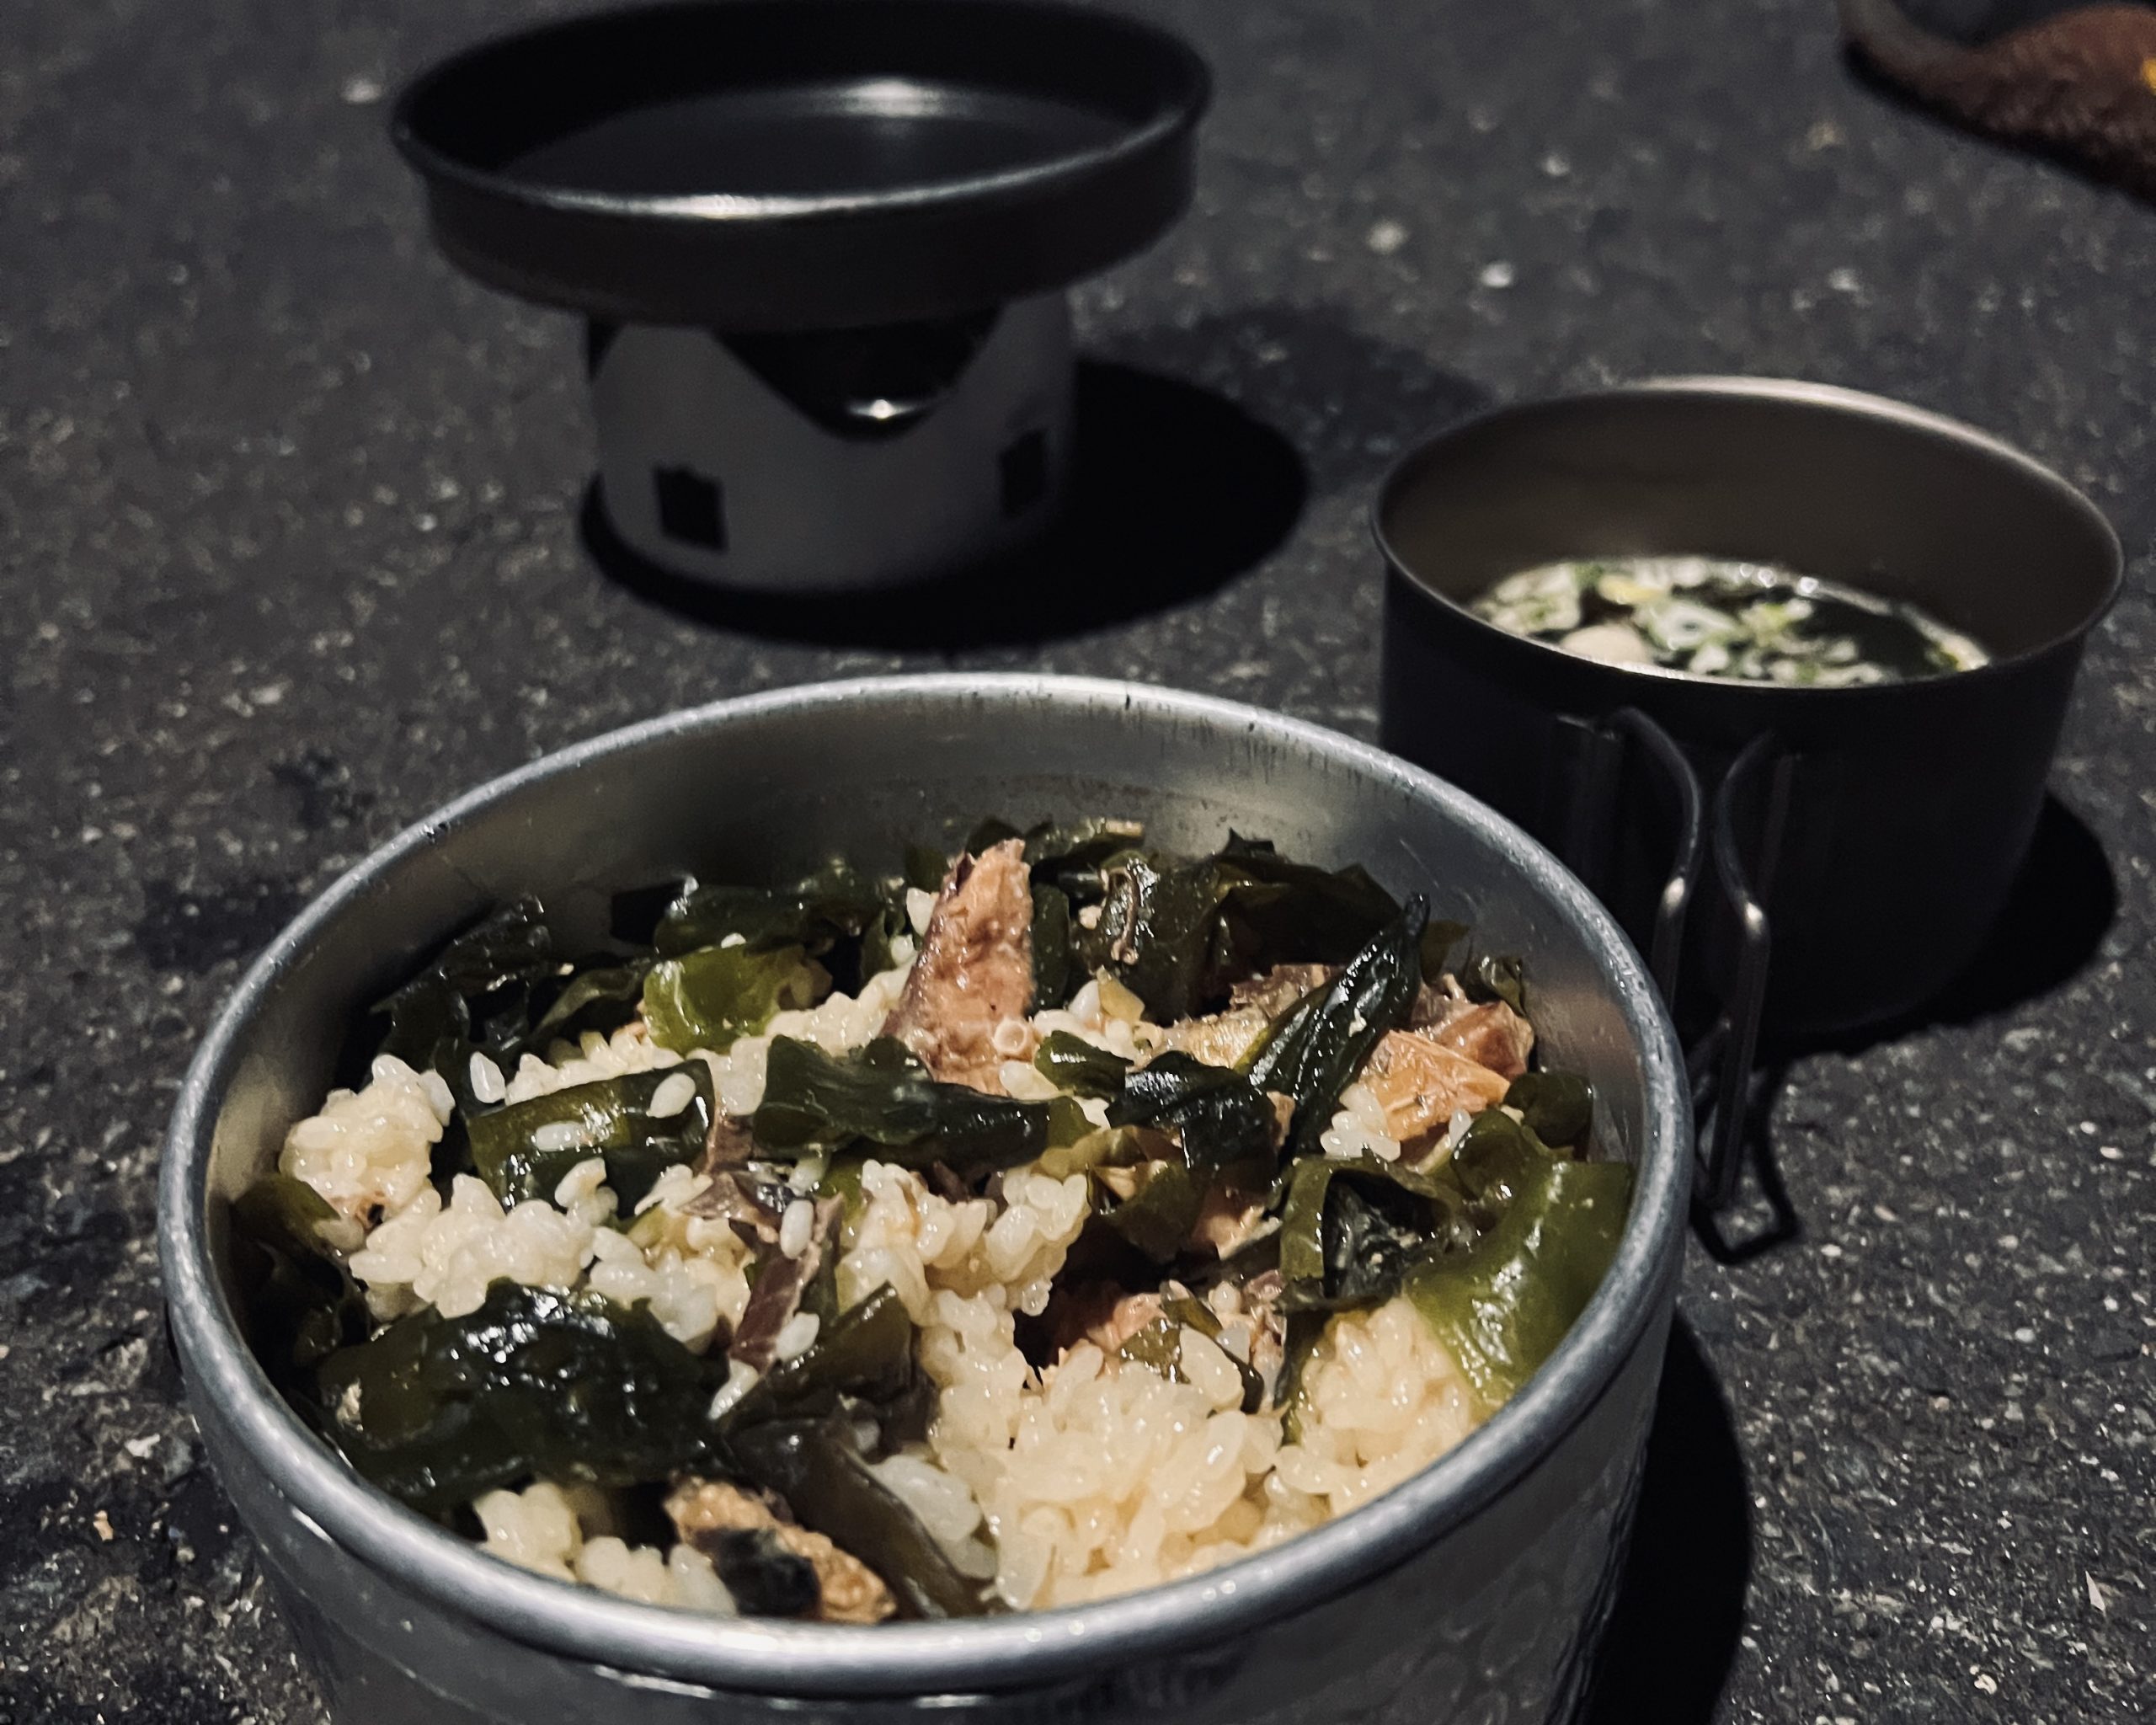
My cooking set. The aluminum pot is good for boiling water but also easy to cook with, so I often bring it on long walking trips.

Smoked beef tongue bought at a roadside station (michi-no-eki).
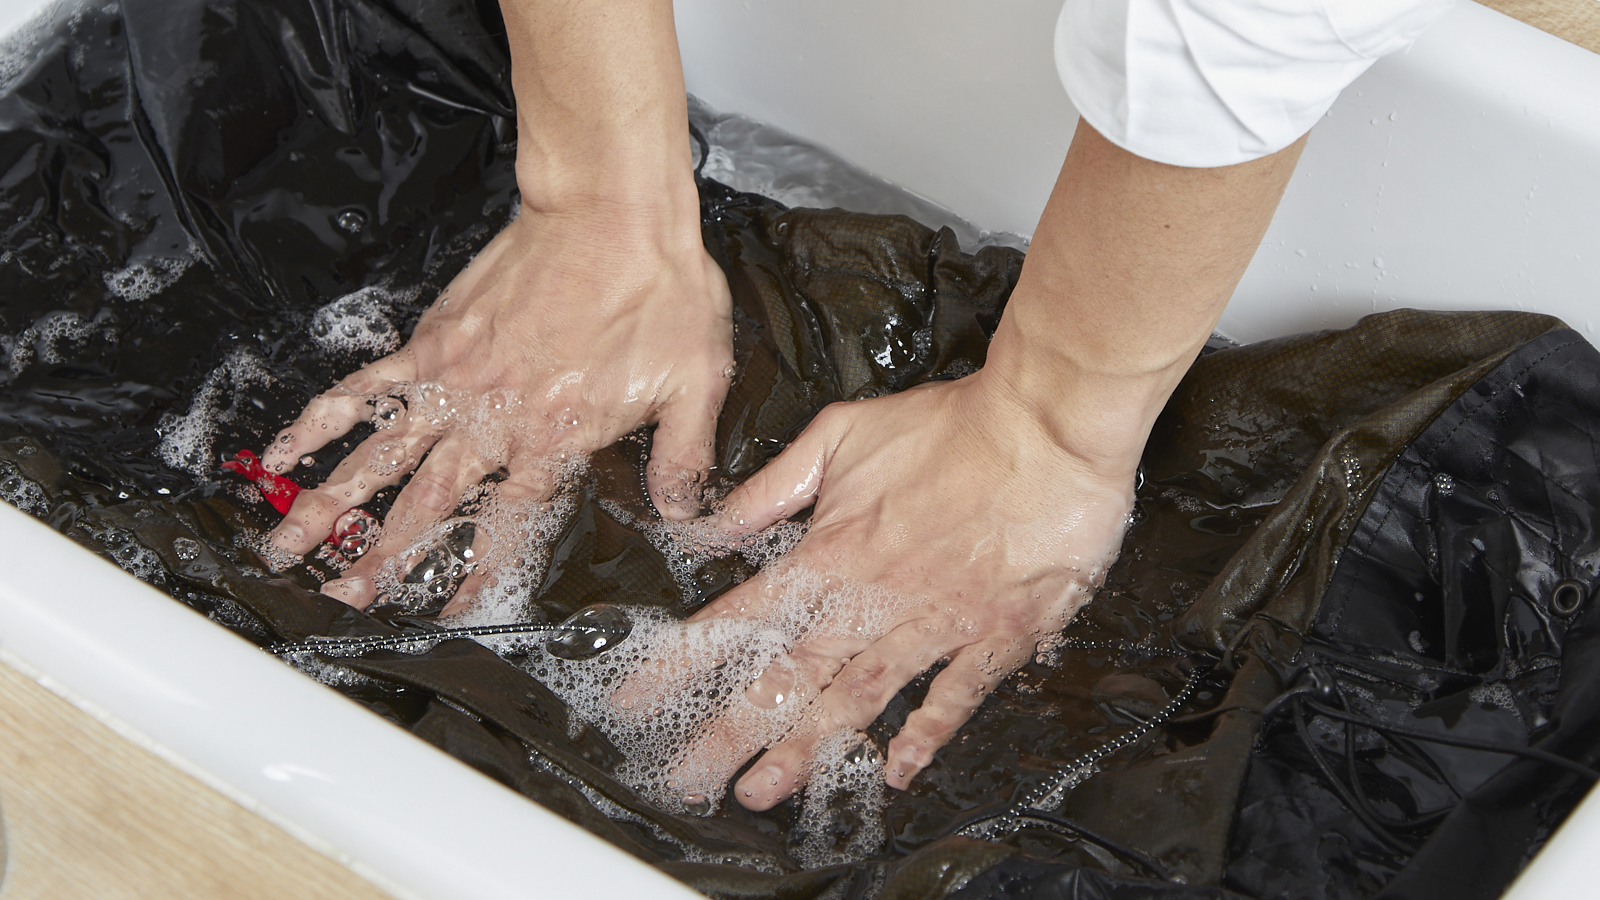
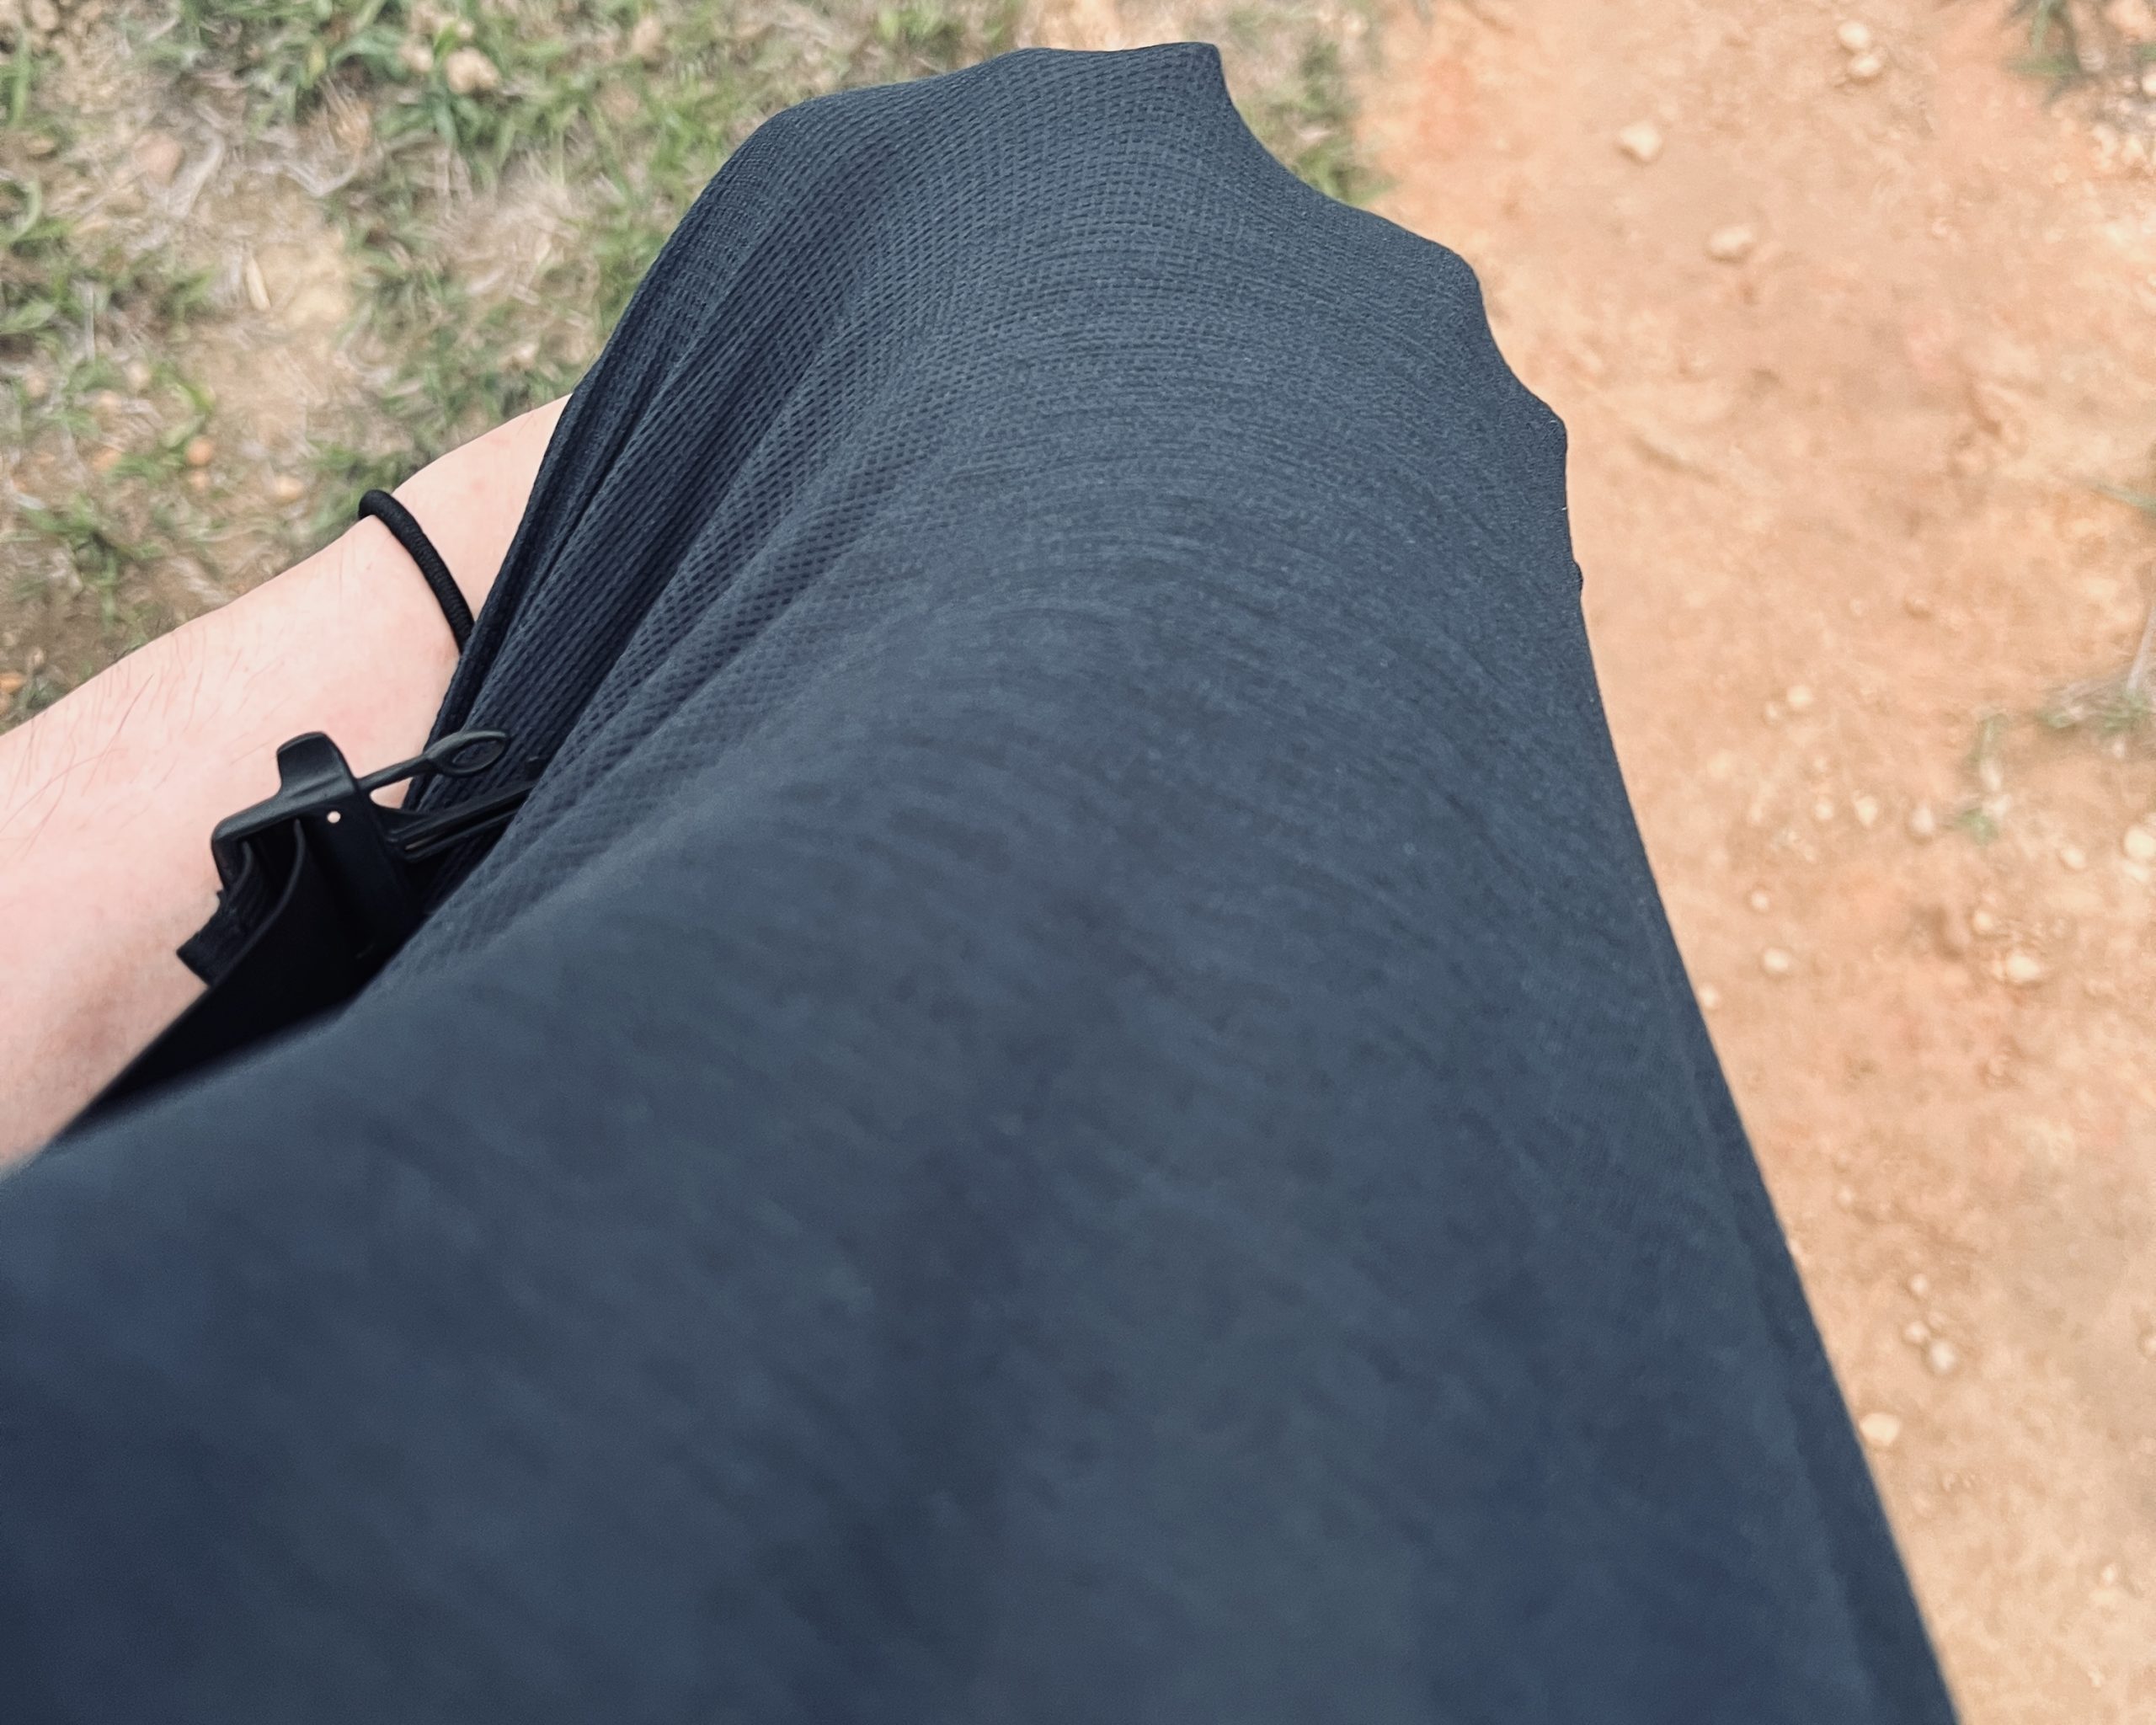
Kontex bills its MOKU as “more than a tenugui (a thin cotton tea towel), less than a towel”. I like how practical and lightweight it is and how quickly it dries. At around 50 g (1.8 oz), it is slightly heavier than a traditional tenugui, with gauze on one side and pile fabric on the other. It has excellent absorbency and is also highly breathable, so it dries quickly. With many bathing facilities near the trail, this towel was ideal.
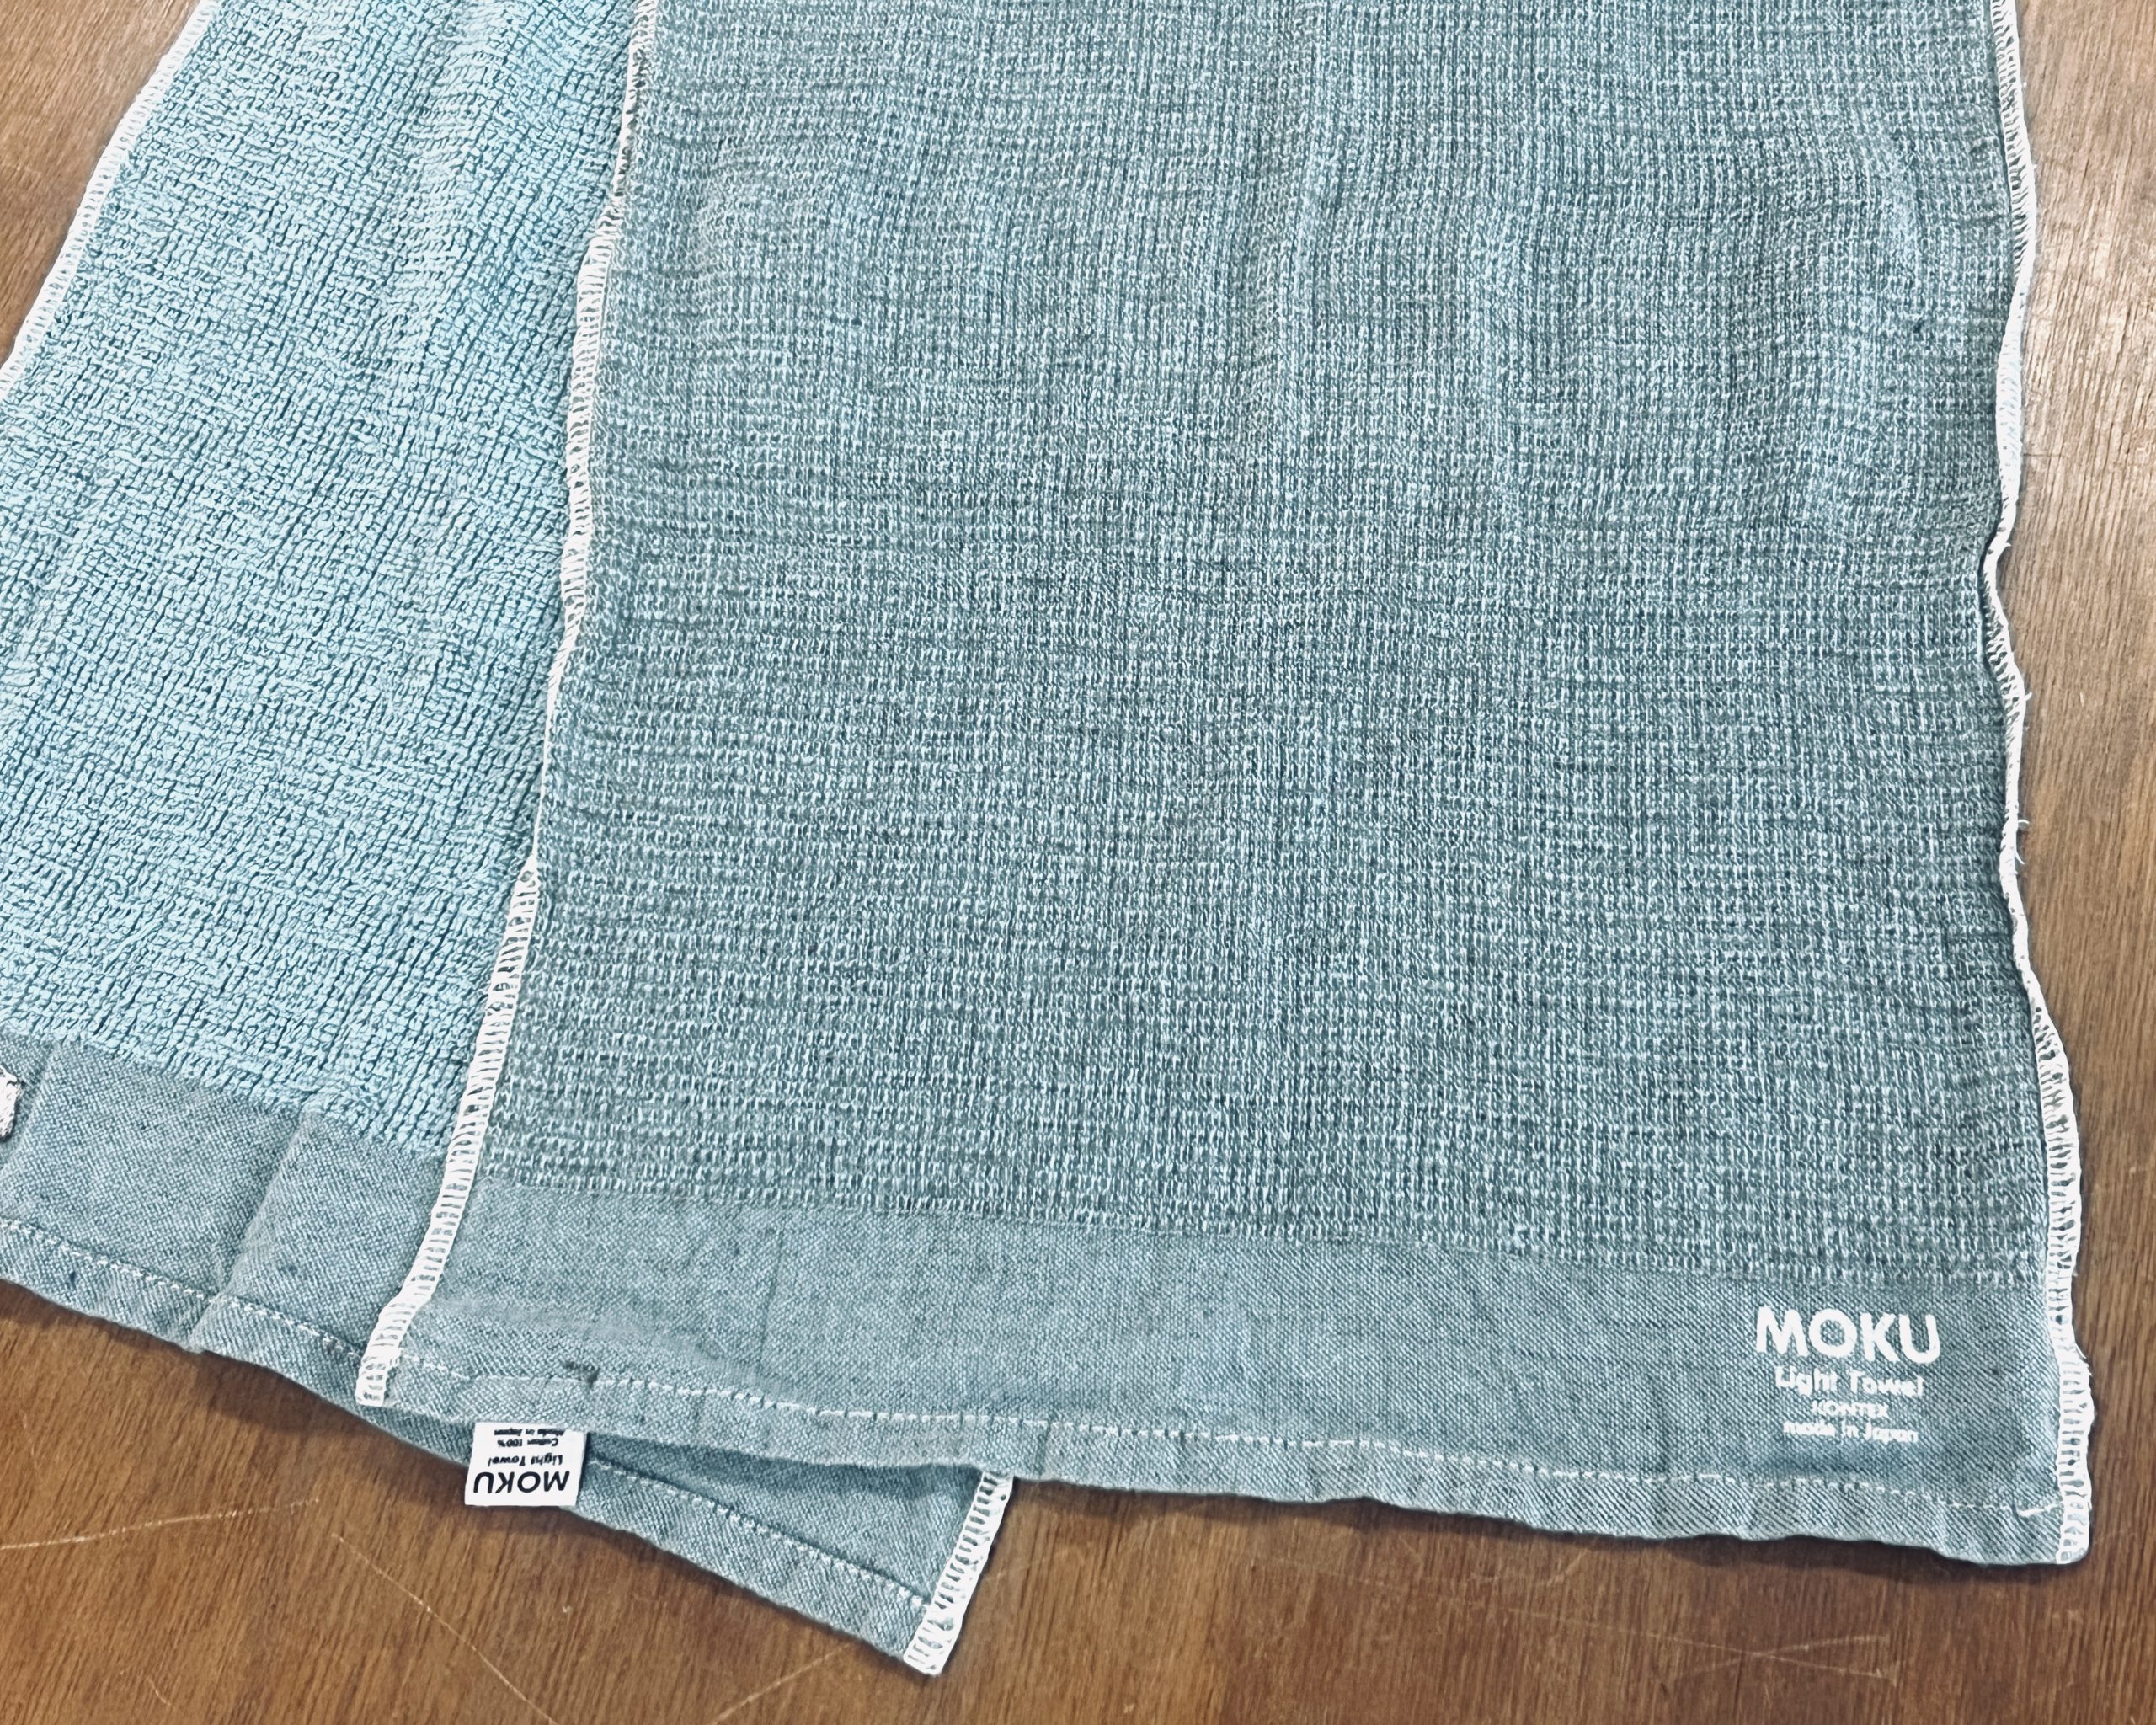
I use the MOKU on long trips in Japan and overseas.
I always bring this versatile midlayer on long hikes. I use it as insulation, active wear and a change of clothes. It’s plenty warm when temperatures dip to around 10°C (50°F) and performs well even when wet. The fabric itself absorbs very little water, so I can comfortably wear it even after getting soaked, which is vital in Japan where getting wet is often unavoidable.
Cutting back on the gear you carry is one of the key principles of lightweight hiking. Carrying fewer items reduces the number of decisions you have to make and can reduce stress on a long journey.
On the Michinoku Coastal Trail, my Yamatomichi Active Pullover was my insulation layer, sleepwear and a spare change of clothing.
【Yamatomichi】Chemical B Pocket T-shirt
I usually wear merino wool base layers. This time, I chose the 100 percent Yamatomichi’s polyester Chemical B Pocket T-shirt.
Even in hot, humid conditions, the shirt performed extremely well: it wicked sweat away instantly, prevented moisture from building up on my skin, minimized contact between the shirt and my skin, and dried quickly. Even when I got wet, the shirt helped to reduce any discomfort I might have felt.
Another major advantage of the Chemical B: odor resistance. Usually, Merino wool works better for me, but the Chemical B shirt performed well. After three or four consecutive days of wear, it had virtually no odor. That’s key when you can’t often stop and do laundry and want to avoid bad body odor while passing through towns and other populated areas on the Michinoku Coastal Trail.
Even in the suffocating humidity, the Chemical B Pocket T-shirt never clung wetly to my skin.
Daisuke Ito is a member of Yamatomichi Kyoto’s staff. Drawn to the idea of traveling abroad from an early age, Daisuke became interested in outdoor culture through encounters on the road. He’s been on canoe expeditions in Canada and treks in Alaska; hiked long-distance trails in the US, including the Pacific Crest Trail (PCT) in 2022 and the Continental Divide Trail (CDT) in 2023; and walked Spain’s Camino de Santiago pilgrimage route. Inspired by the ultralight hiking and trail culture he discovered on his travels, Daisuke joined Yamatomichi hoping to share his experiences with others. He continues to explore new kinds of adventure and long-distance travel.
