*Special offer items include products with updated specifications, older inventory, or items that meet functional standards but may not fully meet our regular quality criteria. These are offered at a special price.
30D HT Silnylon 46g/m²
200D HT PC Coated Ripstop Nylon 139g/㎡
TS White
Technoforce®︎Steel 98g/㎡
3D Mesh 194g/m²
50D PC Coated Ripstop Nylon 69g/㎡
Size 45cm 588g
Size 48cm 590g
Size 51cm 592g
Size 54cm 620g
Size 57cm 622g
TS White
Size 45cm 577g
Size 48cm 579g
Size 51cm 581g
Size 54cm 608g
Size 57cm 610g
114g (Size S)
124g (Size M)
129g (Size L)
- Introduction
- Framed backpack for long hikes
- Why this Is a special offer
- Product story
- For longer hikes
- Form and function
- X-frame for matural movement
- Adjustable load control
- Highly expandable
- Anatomy of ONE
- How to attach the hip belt
- Packing tips
- Material
- 200D HT PC Coated Ripstop Nylon
- Technoforce® Steel
- 70D HT PC Coated Ripstop Nylon
- Size guide
- How to measure your torso
- Notes before use
- Fabric water resistance
- DEET
- Instructions
- Carbon rod warranty
- Care instructions
- Care instructions for Technoforce® Steel
- Repair
Introduction
Framed backpack for long hikes
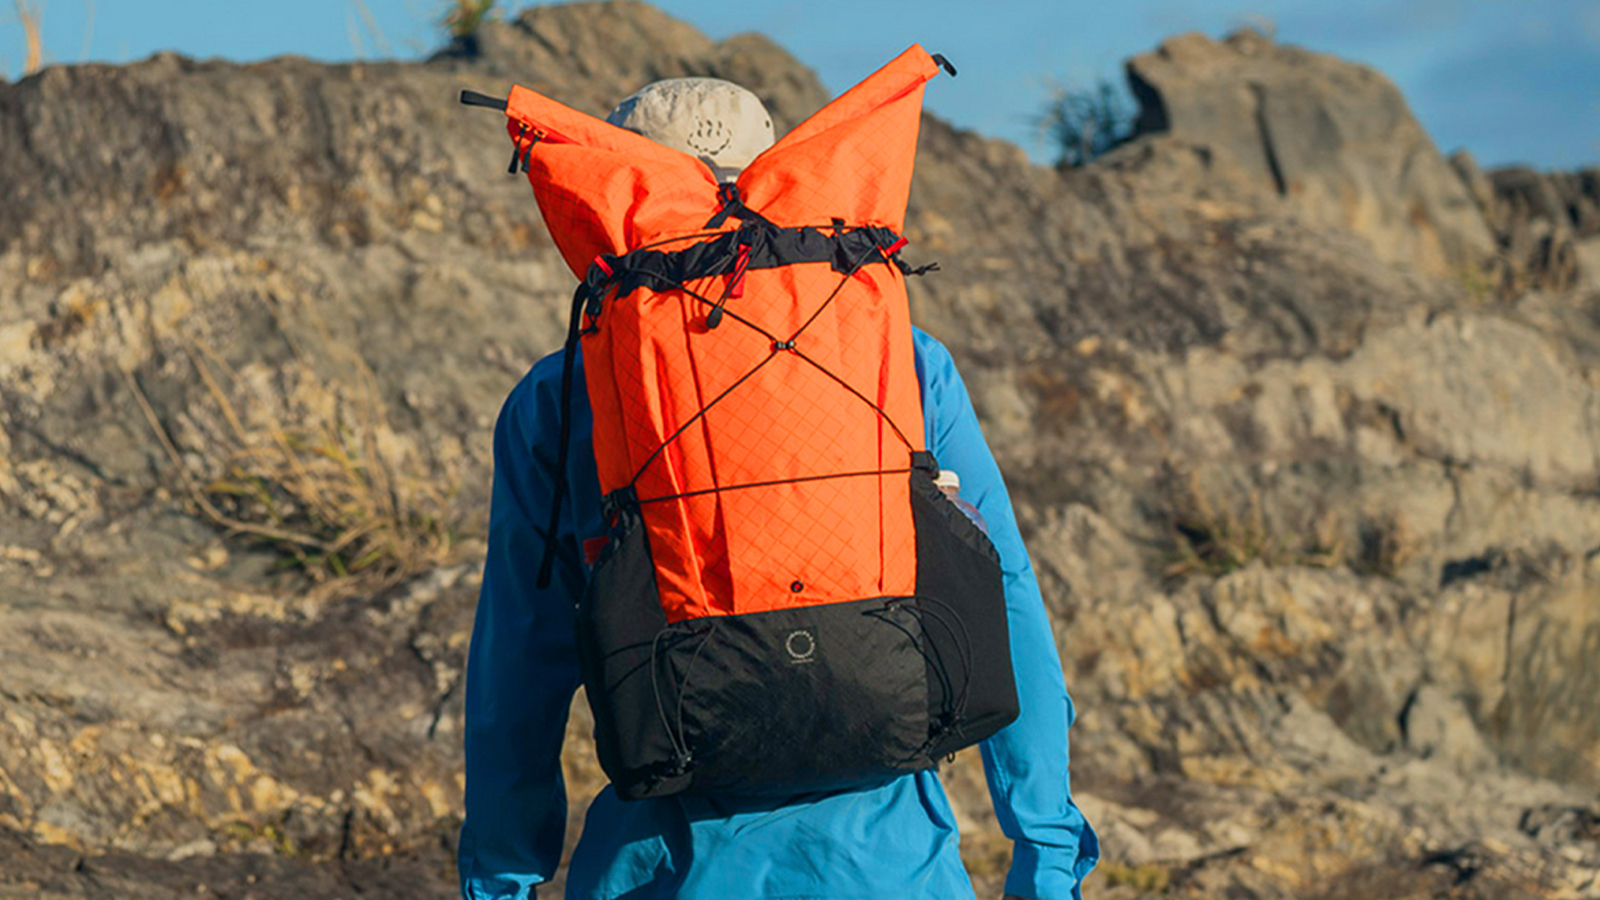
This ultralight frame pack is designed for long-distance hiking, featuring a uniquely engineered X-shaped carbon frame that moves fluidly with your body. It provides exceptional comfort even on Japan’s demanding trails, where you often use your whole body to navigate rocky paths, steep slopes, ladders, and chains.
The pack is made from two premium materials: our proprietary 200D HT PC-coated ripstop nylon, which is highly resistant to hydrolysis, and Teijin Technoforce® Steel—made from 100% ultra-high molecular weight polyethylene—for the front and side pockets, offering exceptional strength.
With five back length sizes and four hip belt sizes available, you can select the perfect fit for your body. The design allows for flexible load distribution control depending on the terrain or conditions, making this the ultimate flagship pack from Yamatomichi, built specifically for long trails.
This is a special offer product available at a limited-time price.
Why this Is a special offer
Due to specification update: differences from the 2025 model
- Body Material: 200D HT PC coated ripstop nylon
- Hip Belt: Stiff hip belt tightened with a single webbing strap
Product story
For longer hikes
Do we really love hiking? Are we fully prepared to start up our own business?
In order to find the answer to these questions, my wife and I hiked the John Muir Trail in Virginia, the USA in 2010. Consequently, we realized that we loved hiking so much and decided to quit our jobs and start Yamatomichi. We also realized that Japanese trails are quite different from the ones in North America.
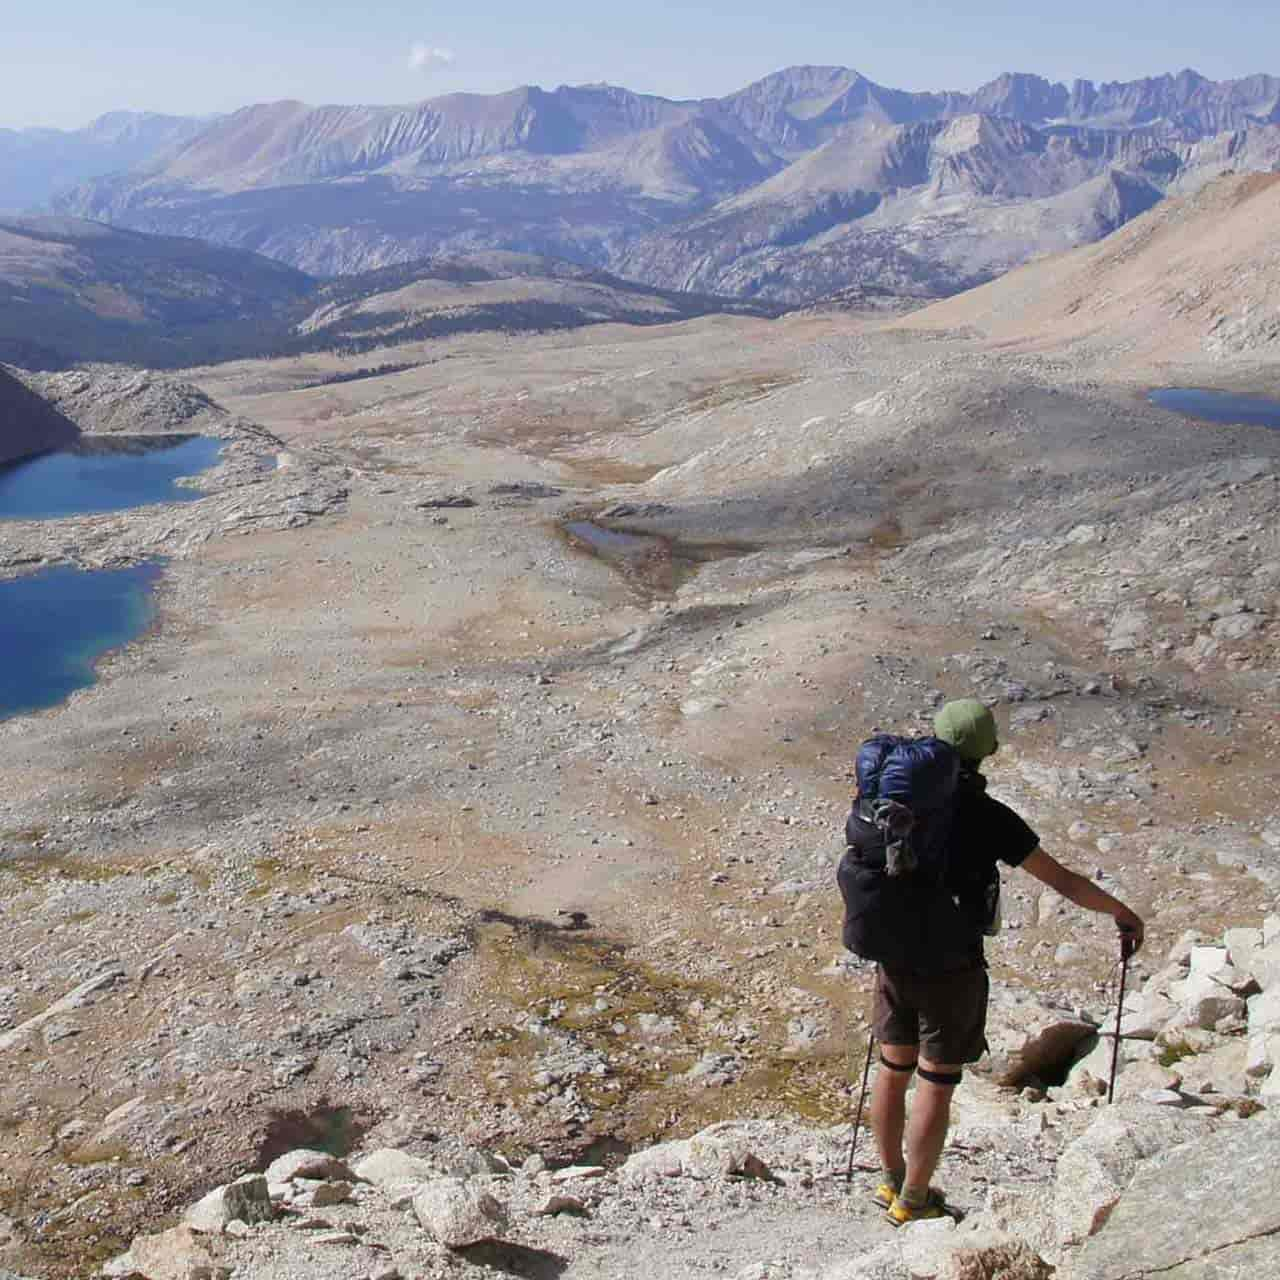
Photo by Akira Natsume, JMT, 2013
The John Muir Trail is very well maintained, but unlike in Japan, rocky sections, ridges with chains, or steep uphill sections are rare. This means that in North America, a backpack is less likely to get scratched by rocks or branches that make holes, even when made from ultra-thin fabric. Also, the items in mesh pockets were unlikely to drop out accidentally on these gentle trails. And since the weather in North America is dry with little rainfall, you are less troubled by sweat even when a closed-cell foam pad directly touches your back or the pack’s back panel is not made from some kind of mesh material.
At the time, I realized that the ultralight hiking gear I was using back then was designed specifically for the American climate, environment, and trail conditions.
When my wife and I were about to start Yamatomichi, no ultralight backpack taking into consideration the conditions of the Japanese trails existed.
Even if the ultralight movement originated on the Californian trails, I realized that I did not have to just copy what was happening in the US, but I could use the ultralight theory and match with the conditions of the Japanese mountains to create a unique backpack made specifically for ultralight hiking here in Japan.
As we started Yamatomichi as a very small brand, we were super flexible and I decided that the ONE backpack should be a made-to-order, semi custom-made item that no other mass-production maker could match.
That’s why after ordering, still, our customers need to wait for several months before receiving the finished pack. But I firmly believe that each hiker will find the wait worthwhile and excited to become the owner of his or her unique one-of-a-kind backpack.
It’s been years since we released ONE but it is still one of our core products. There have been many small modifications and upgrades and the robustness and overall durability of the pack have improved since our first version.
So for anyone setting out on a longer hike with a need to carry a somewhat substantial amount of gear, ONE is still the backpack I recommend. (2017)
Form and function
The product images shown below are from the 2023 model and may differ slightly in details from the current version.
X-frame for matural movement
A special X-shaped carbon frame sits inside the pack, wrapping comfortably around your torso and moving naturally with your body.
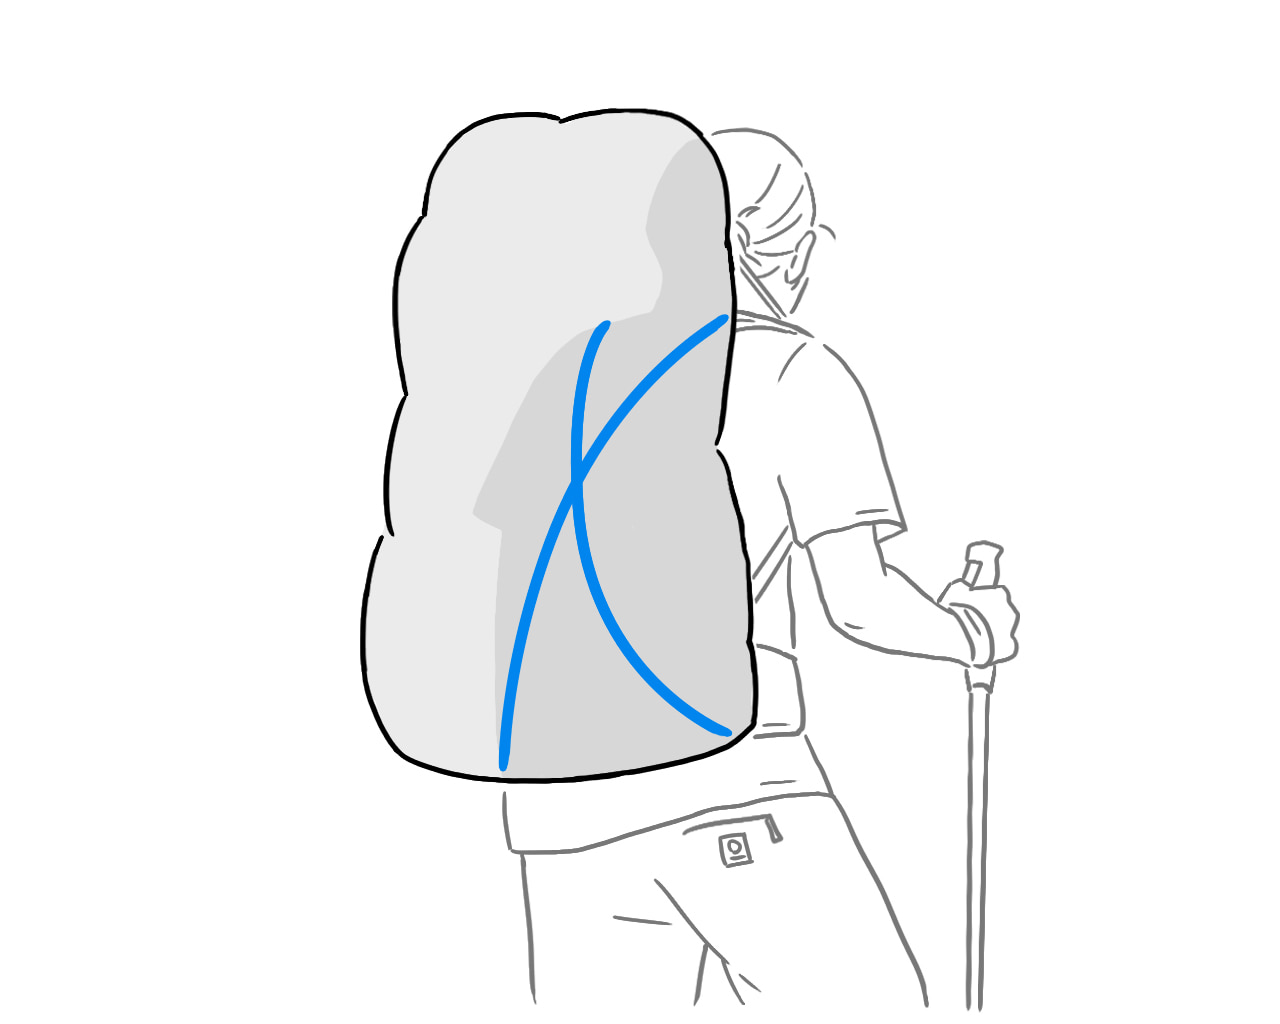
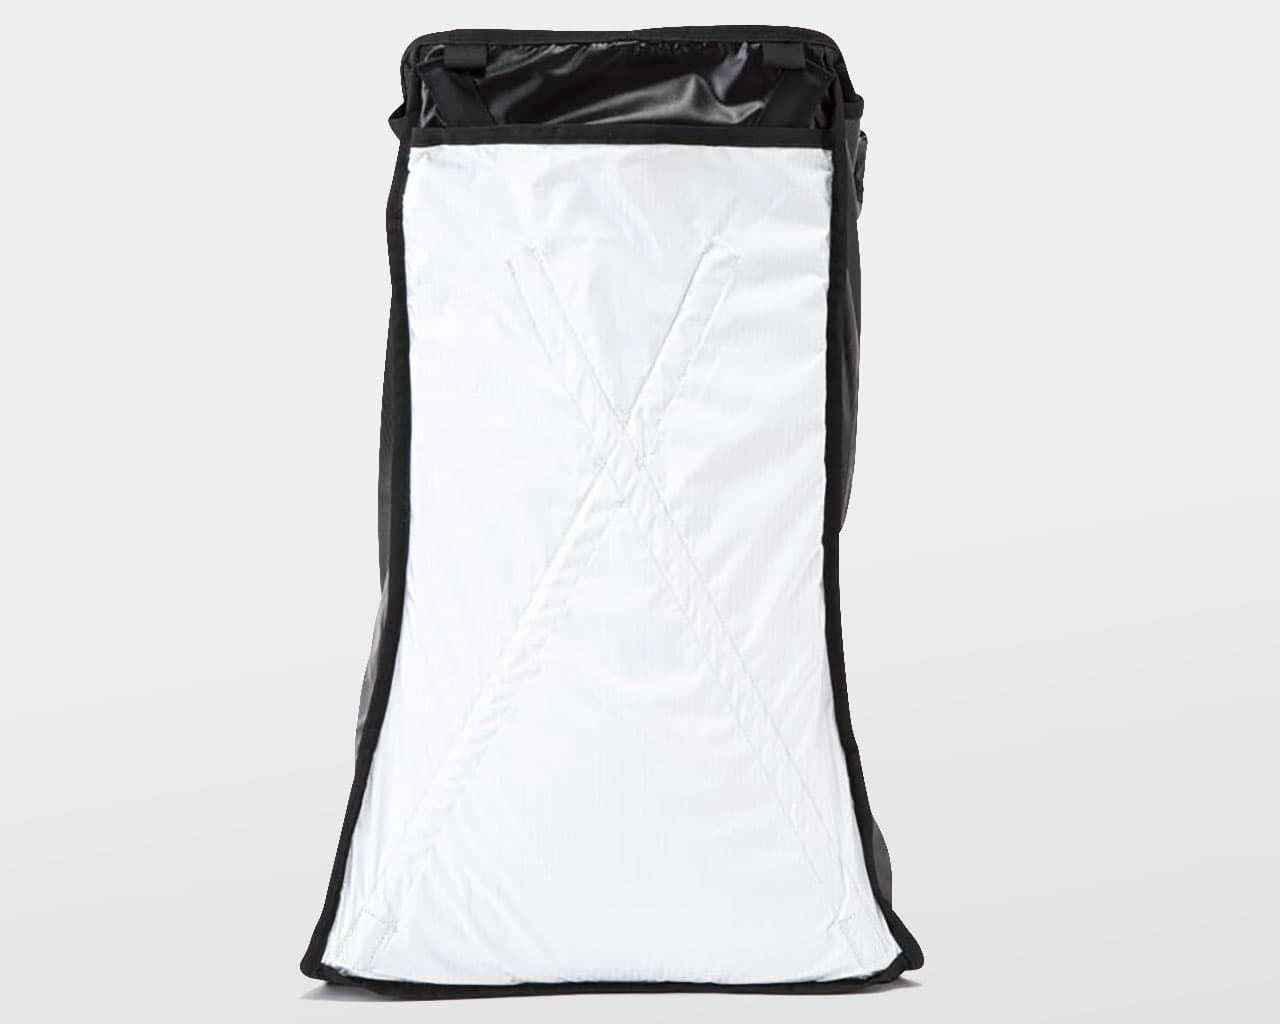
The carbon rods are installed inside the back pocket. Carbon fiber is prone to fraying. Wear gloves when inserting and removing to avoid injury.
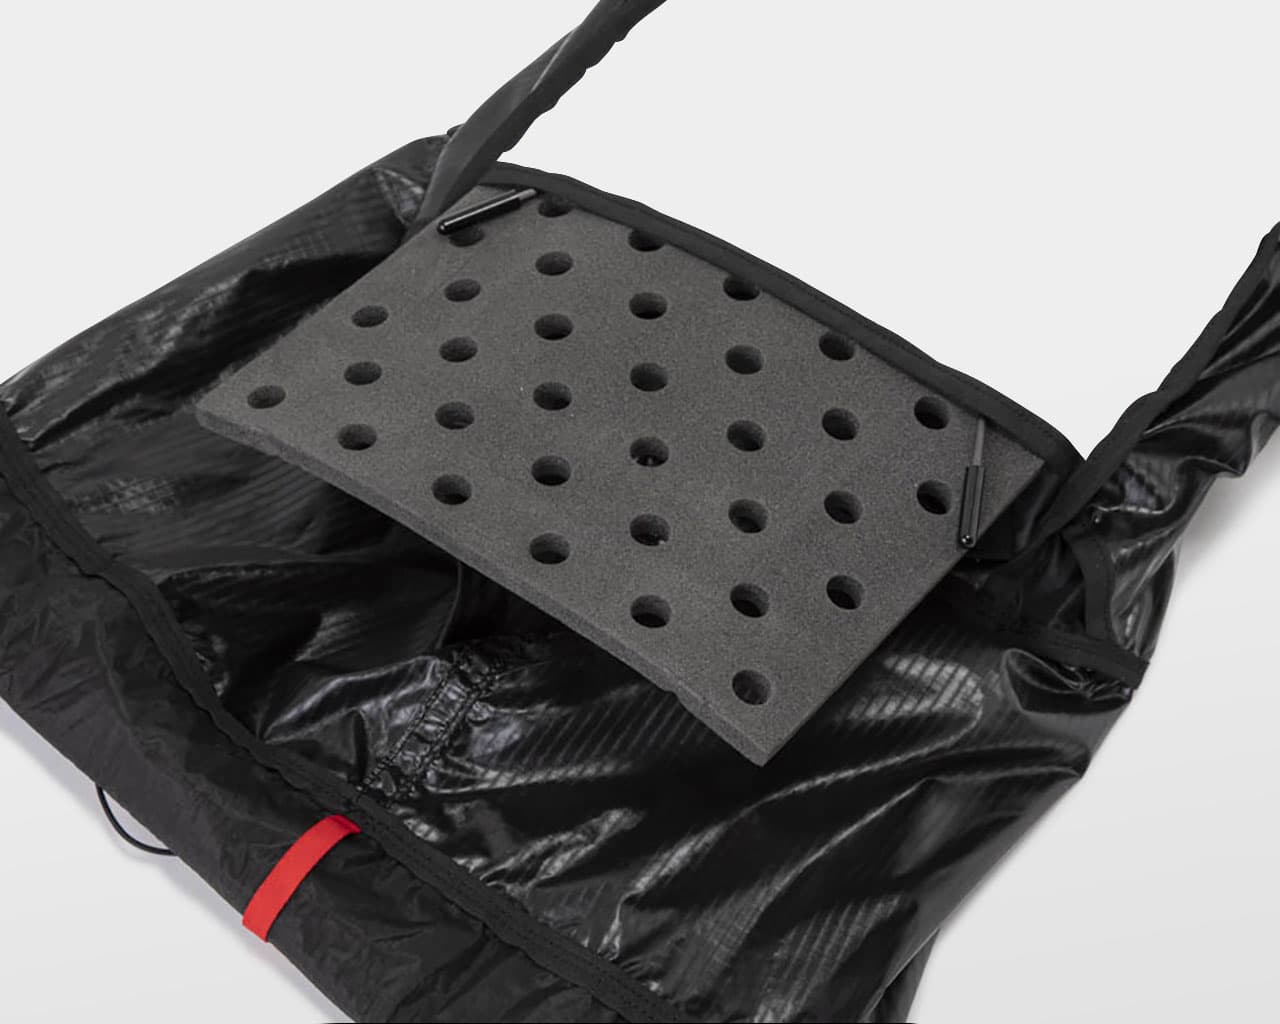
The perforated pad is installed in the pocket. When sweat causes odor, remove the rods, take the pad out and wash it in cold water.
Adjustable load control
Unlike typical high-volume backpacks that shift most of the weight to your hips, the ONE features an X-shaped carbon frame, waist stabilizers, and shoulder lifters that let you fine-tune how the load is distributed. Whether you prefer the weight on your waist or higher on your back, you can adjust for the most comfortable balance that suits your body and hiking style.
*This feature is made possible by the highly flexible carbon frame. However, please note that the frame is not built for heavy loads—we recommend a comfortable maximum load of 11 kg.
Upper torso load distribution
On steep climbs or rugged terrain, shifting the load to your upper torso helps free up your lower body for better mobility and comfort. Here’s how to adjust the pack:
- Loosen the waist stabilizer straps.
- Tighten the shoulder straps to bring the pack closer to your body.
- Tighten the shoulder load lifters.
Waist Load distribution
When your upper body starts to feel fatigued, shift the load to your waist to reduce strain and keep going comfortably. This setup is also ideal for walking on flat terrain.
- Slightly loosen the shoulder straps.
- Tighten the waist stabilizer straps to bring the carbon frame snugly against your waist.
- Tighten the shoulder load lifters to keep the pack close to your back — but avoid over-tightening.
Highly expandable
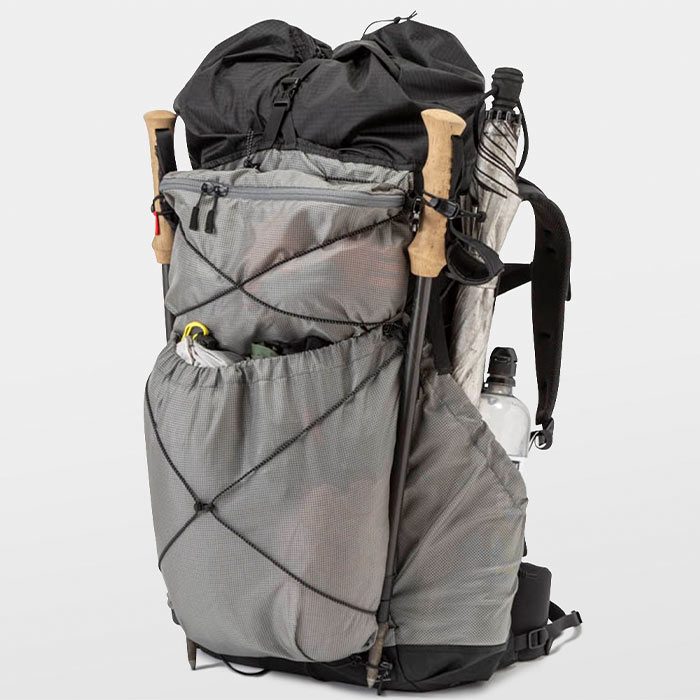
The ONE is built for multi-day hikes, with plenty of options to carry extra gear. Use the top strap, bungee cords, and bottom attachment loops to expand your load—perfect for when you need to pack a little more.
Anatomy of ONE
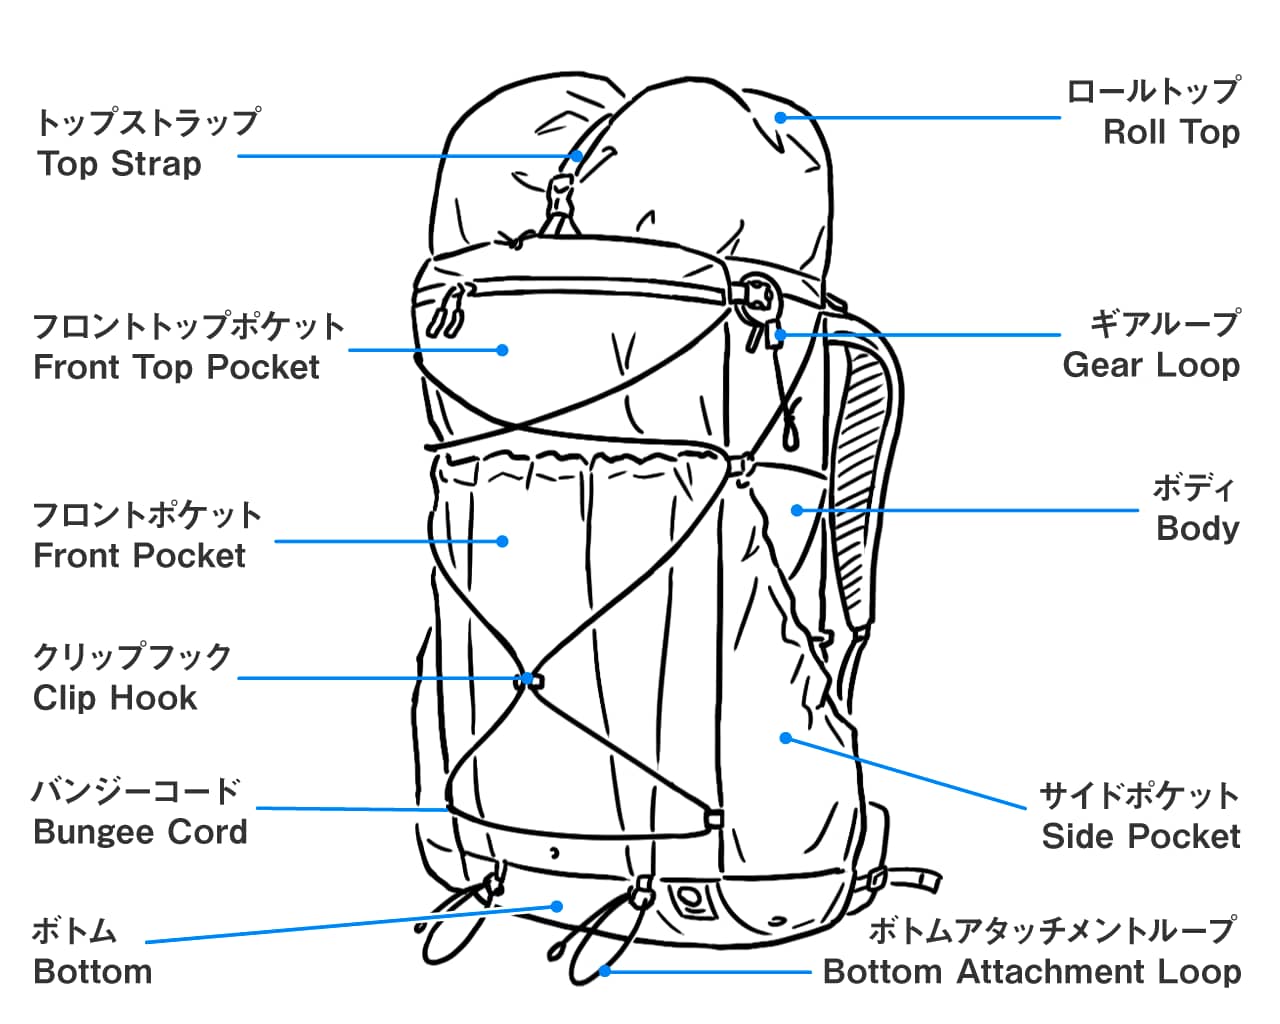
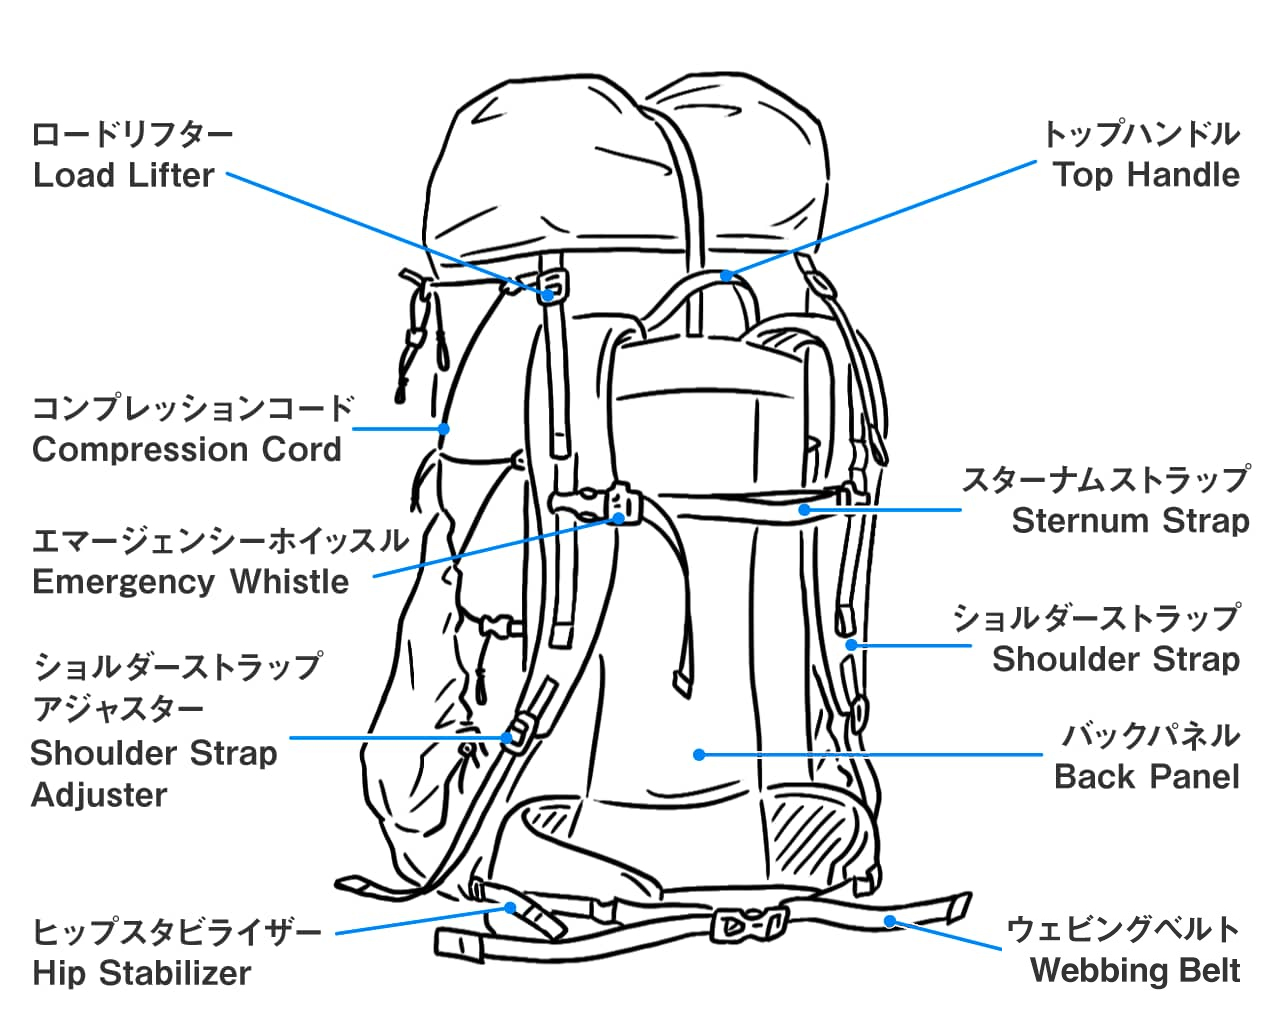
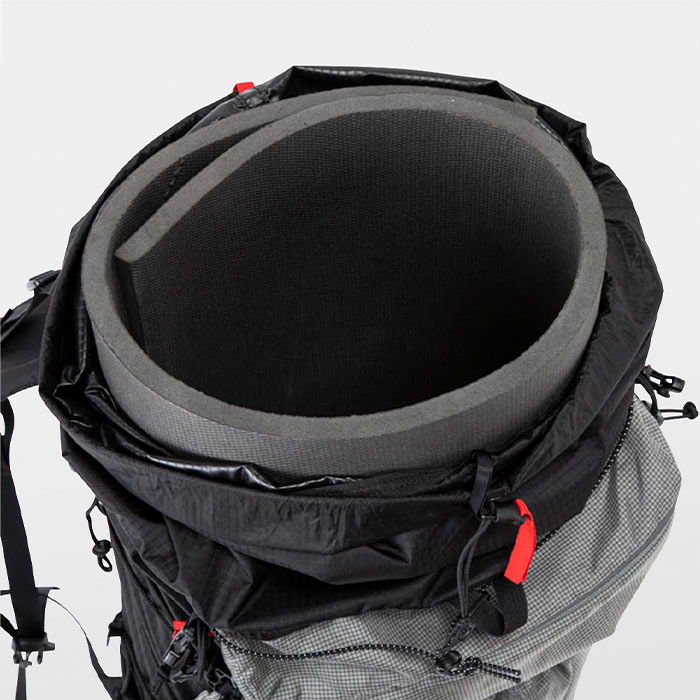
Hold the red tape and pull the tab to close/open the roll top.
Each side pocket has a capacity of approximately 2 liters and is designed for easy access while walking. If you find it difficult to reach, loosen the shoulder strap to lower the backpack for easier access to the pocket. The side pockets have elastic cords to adjust the openings.
The front bungee cord can be unclipped in a single action.
A light sleeping pad can be attached to the bottom attachment loops. It can also be fixed vertically where branches are dense for easy walking.
The gear loops and bottom attachment loops can hold trekking poles without obstructing the use of the front and side pockets.
To fix an ice ax, slide the shaft into the bottom attachment loop and rotate it so the spike faces upwards, then fix the shaft with the gear loop.
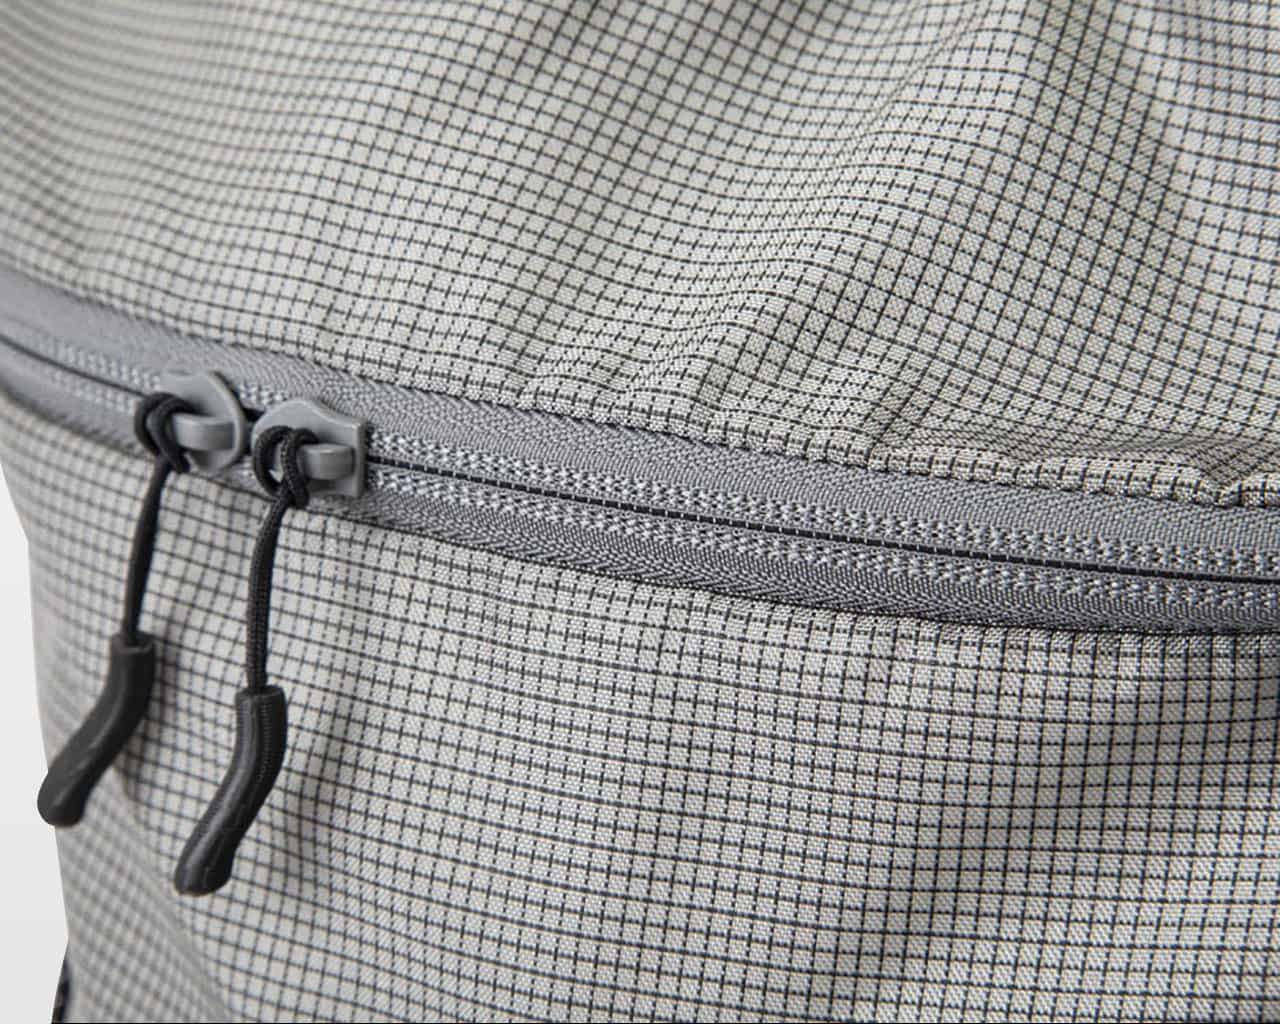
YKK #5 coil zipper moves smoother and more durable than the water repellent zipper.
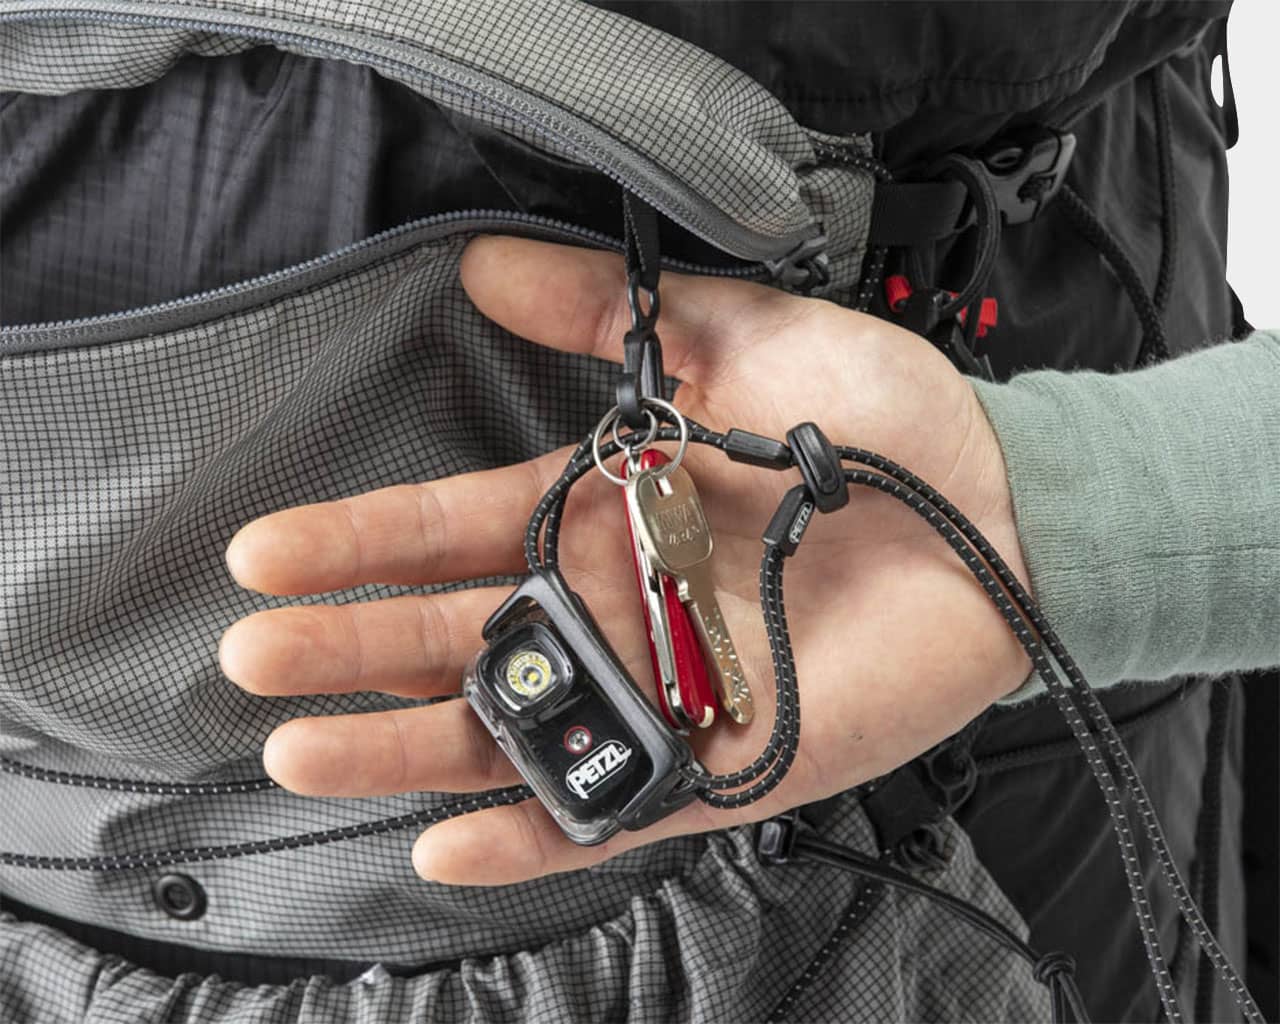
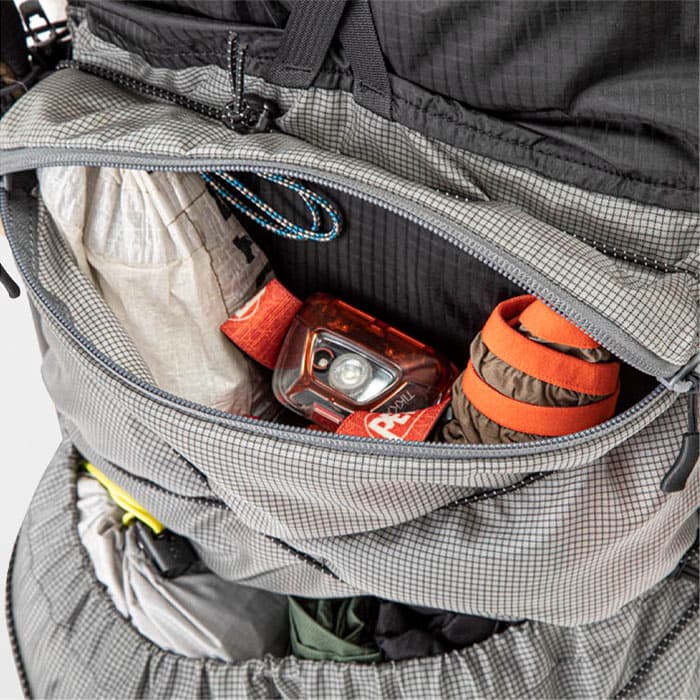
The front pocket has a key hook, where the headlight and multi-tool can be attached.
After packing everything, draw the compression cords on both sides to keep the items closer to your back, increasing the stability.
The sternum strap can be easily opened/closed with a single hand when your other hand is busy.
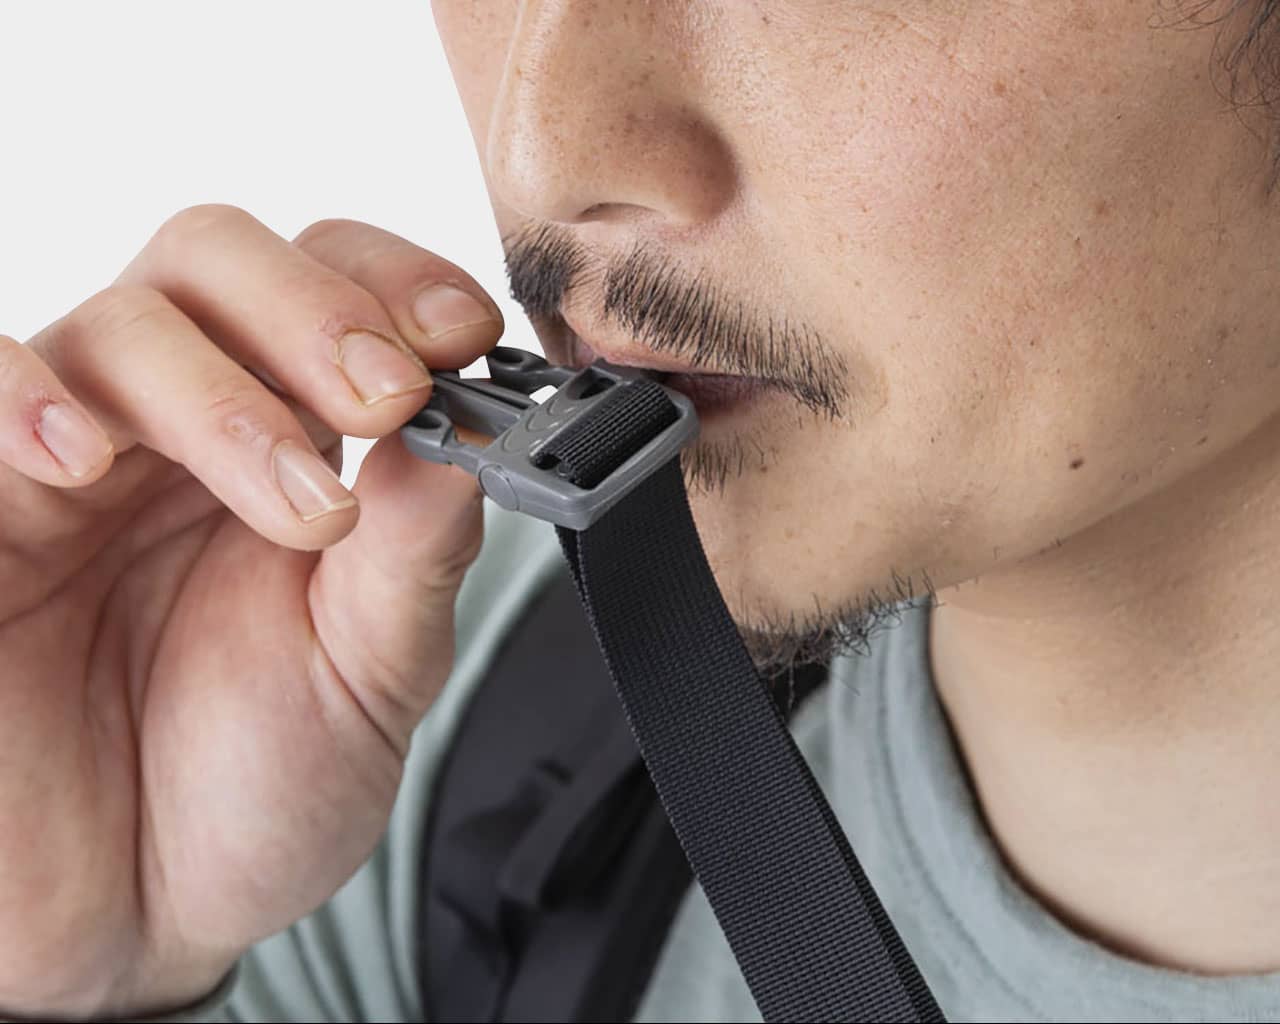
A small emergency whistle is incorporated in the buckle.
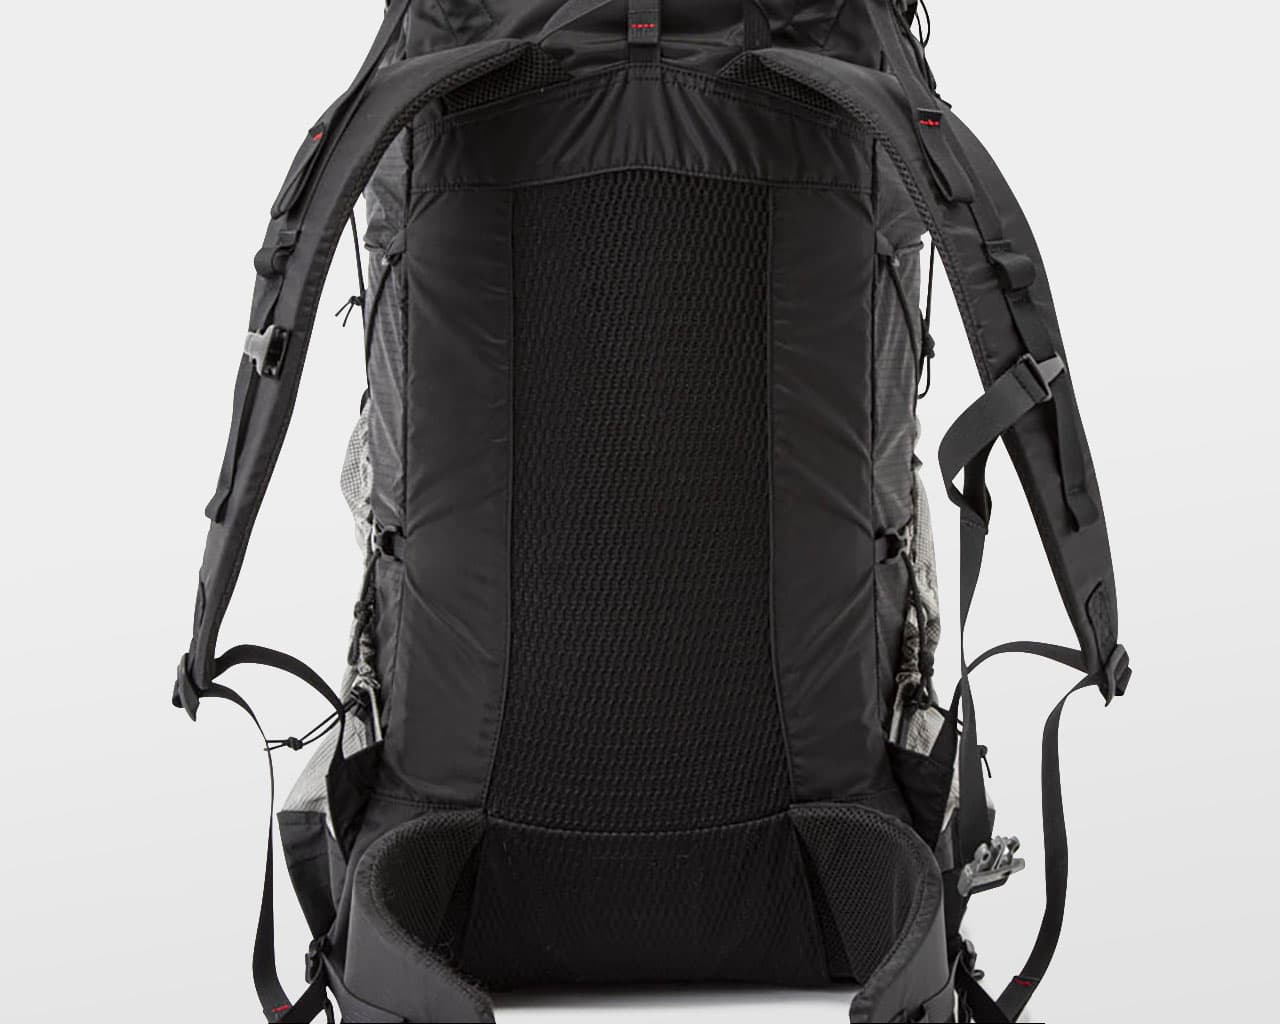
The back uses a mesh material for better grip and stability.
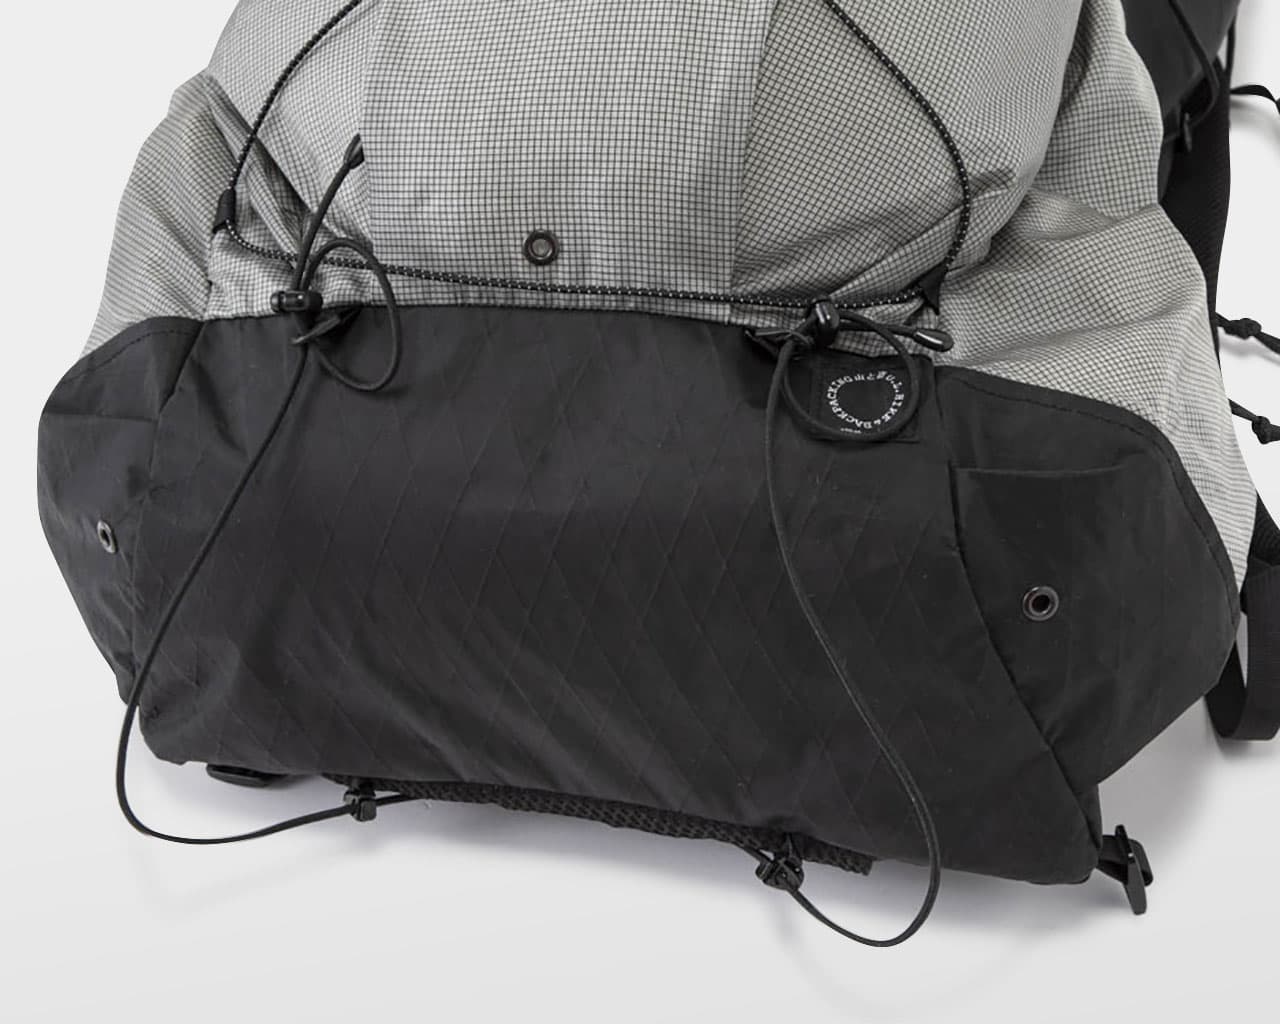
The bottom section of the product uses ECOPAK, a highly waterproof material.
How to attach the hip belt
- Make sure the hipbelt is facing the right way.
- Thread the hipbelt through the attachment point on the pack.
- Press the Velcro fasteners on the hipbelt and pack body together.
- Thread the hip stabilizer strap through the adjuster.
Packing tips
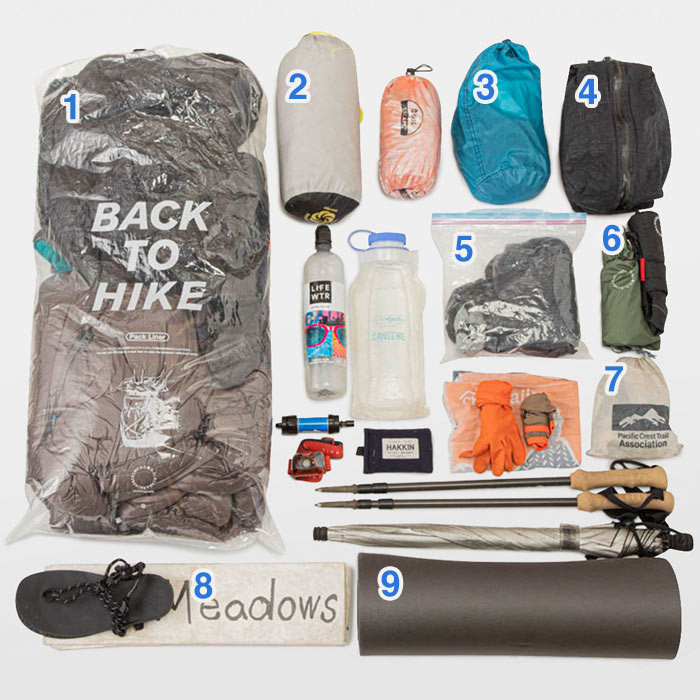
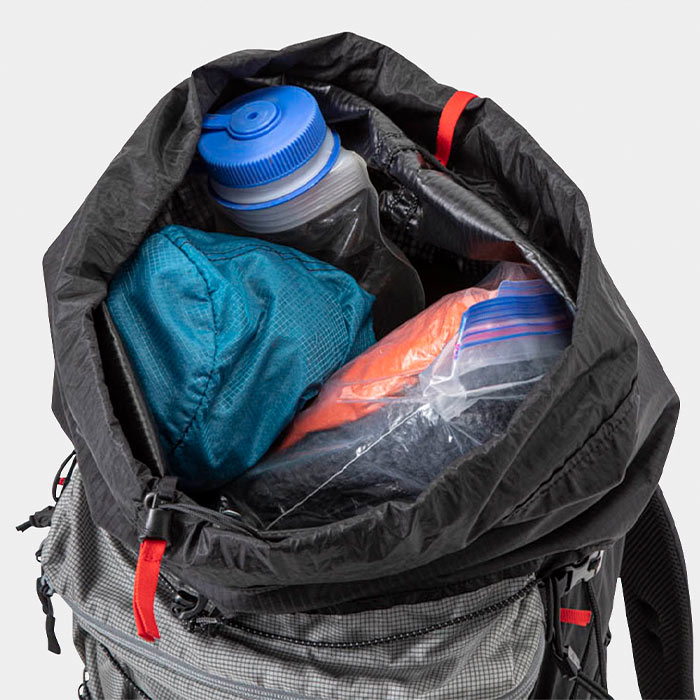
In the below section, we will show you a packing example in the no-snow season from one of our good friends.
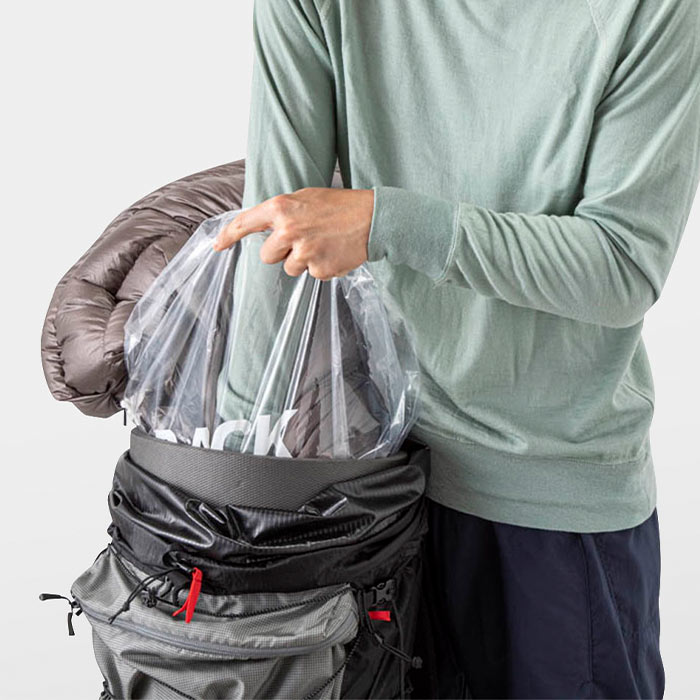
The best way to pack the ONE depends on each hiker. It depends on when, where, why, and how long you hike. Below is just one example of how you could pack the ONE.
*For the reasons below, it is recommended to pack a sleeping bag directly, without its stuff sack:
- By packing without the stuff sack, the fill power of the sleeping bag stays fresh.
- The softness of the sleeping bag enhances the comfort around the hip.
- The bottom part becomes softer and makes it easier to access the water bottle in the side pockets.
- The sleeping bag swells and fills the gap inside the pack, thus improving the stability.
- The light sleeping bag is allocated at the lower part, while the heavy items are at the upper part, providing a good load balance and comfort.
Material
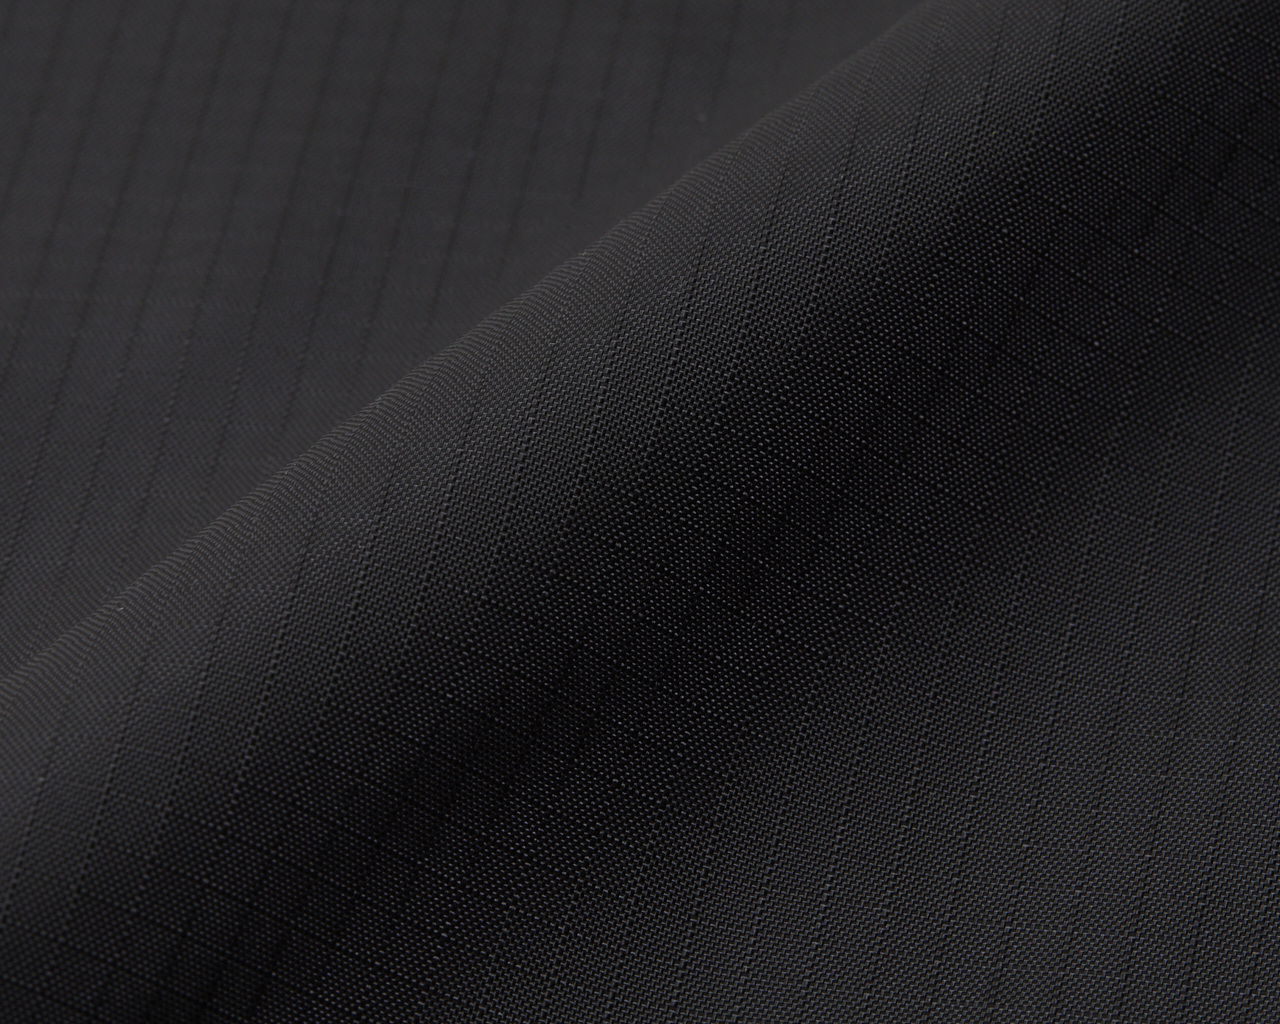
200D HT PC Coated Ripstop Nylon
This 200 denier high-tenacity (HT) nylon, interwoven with ripstop threads, boasts excellent tear resistance for its weight. The fabric has a water-repellent coating on the surface and a polycarbonate (PC) coating on the back which is significantly resistant to hydrolysis, ensuring minimal degradation even after 10 years in “jungle tests.”
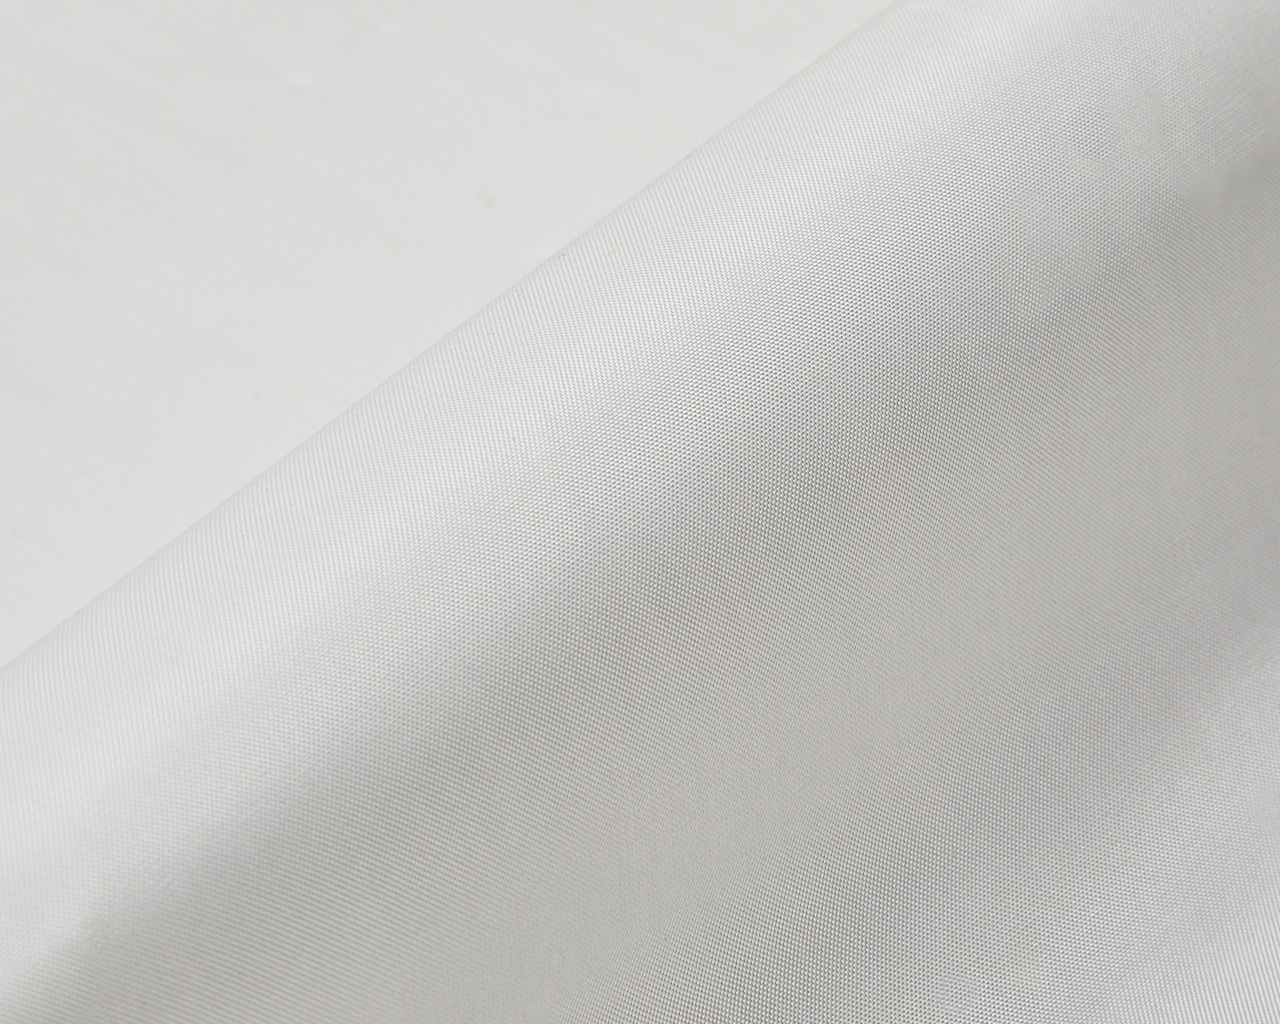
Technoforce® Steel
The fabric made from 100% ultra-high molecular weight polyethylene (UHPE) is exceptionally lightweight yet strong; light enough to float on water yet theoretically capable of supporting around 20 tons with just a 10 mm diameter. This high-density woven fabric offers world-class tear resistance, tensile strength, and abrasion resistance. Its hydrolysis-resistant PC coating on the back further enhances long-term durability, with “jungle tests” showing no significant changes after 10 years. UHPE does not retain water, preventing the fabric from becoming heavier when wet.
The fabric will become more soft and wrinkles will decrease with use.
58kg
Material Spec Comparison with Standard Backpack Fabrics
In the chart below, higher blue values indicate heavier fabric weight, while higher black values indicate greater strength. As shown, TECNOOFORCE® Steel offers exceptional strength while remaining remarkably lightweight.
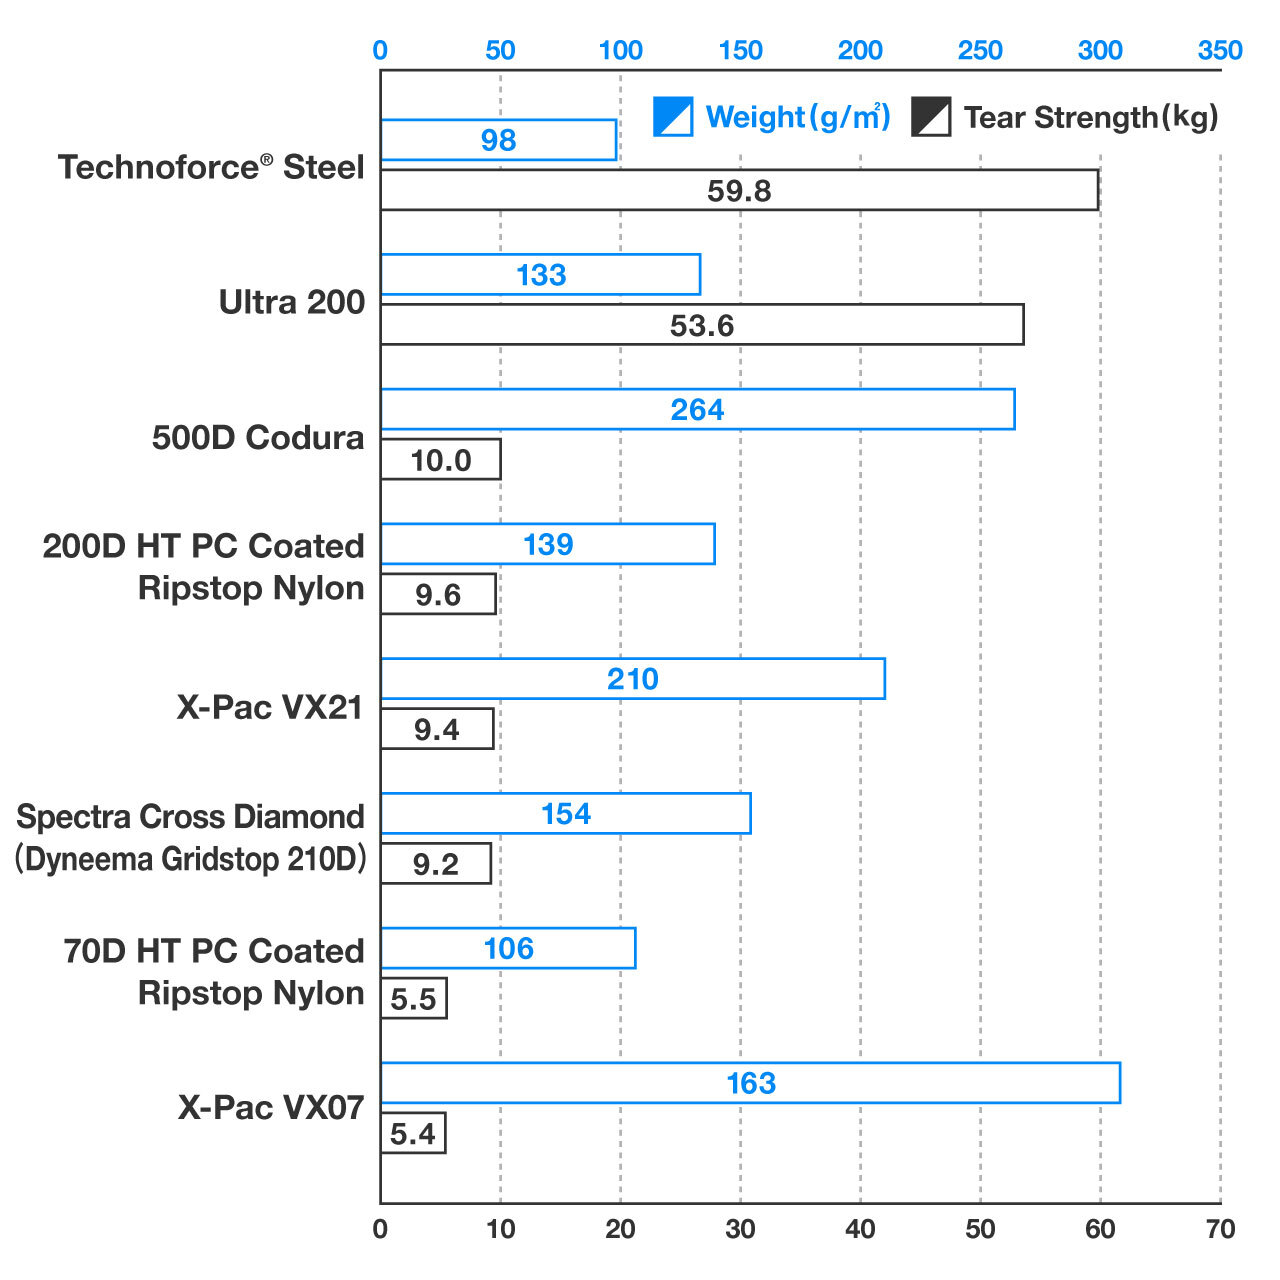
Tear strength (the force required to tear the fabric) is represented by average values. The figures for Ultra 200, X-Pac VX07, and X-Pac VX21 are based on manufacturer’s data (ASTM D2261), while others are from in-house testing (JIS L1096A).
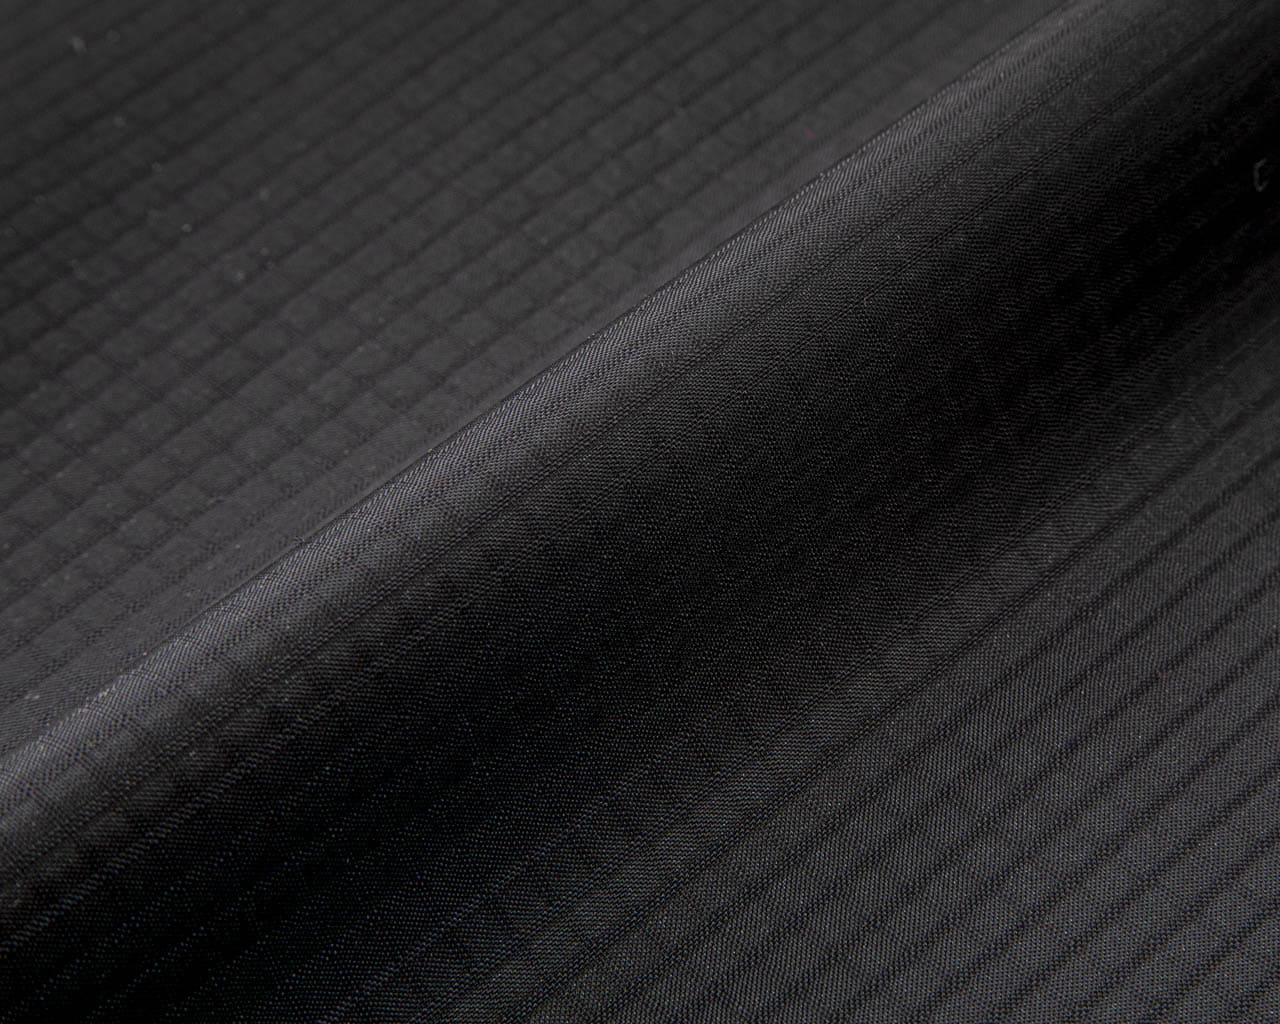
70D HT PC Coated Ripstop Nylon
This 70 denier HT (high-tenacity) ripstop nylon fabric is our proprietary material with enhanced strength and durability compared with conventional nylon. The surface is DWR (durable water repellent) finished, and the backside is polycarbonate coated, achieving a much better anti-hydrolyzation performance than regular polyurethane-based fabrics.
Size guide
We offer five sizes of torso lengths and four sizes of hip belts. To define the size correctly, we recommend that you try on the product before purchase.
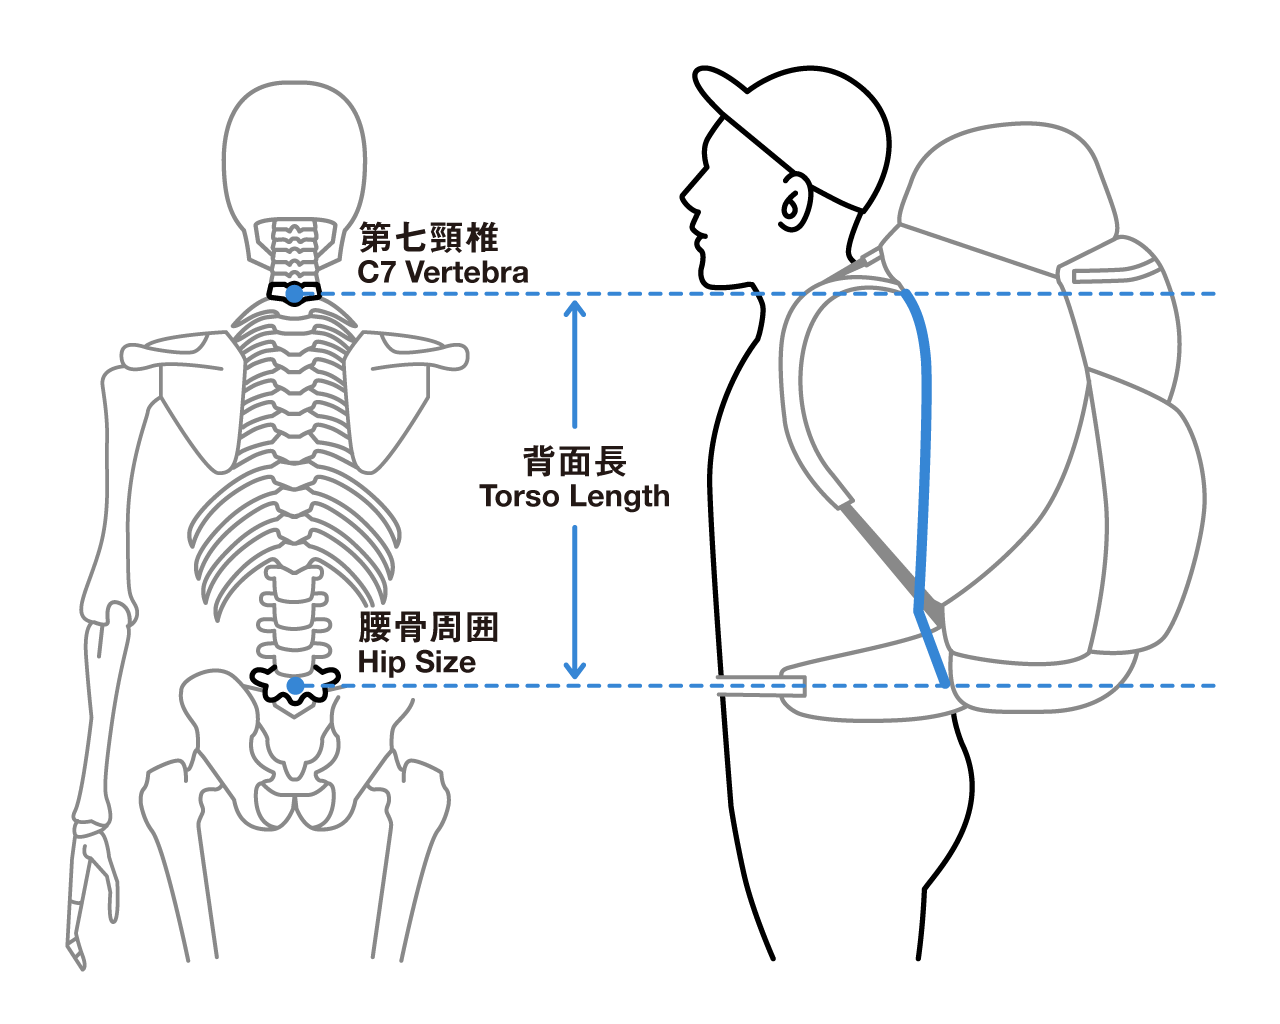
*The torso length refers to the length of the back bone, which we define as the length measured from the C7 vertebra to the hipbone.
| TORSO LENGTH | ||||
|---|---|---|---|---|
| 45cm | 48cm | 51cm | 54cm | 57cm |
| HIP BELT(cm) | |||
|---|---|---|---|
| XS | S | M | L |
| 72-79 | 78-85 | 84-92 | 91-100 |
*The hip belt size is not your waist size. To define the hip belt size correctly, make sure you wrap your tape measure around your hipbone.
If you can’t decide between two sizes of the hip belt, we usually recommend the smaller size so that you can tighten it firmly.
How to measure your torso
Decide your torso length based on the jutting, upper edge of the pelvic bone at each side of your hipbone.
- Find the most prominent part of your hip bone and align the top edge of your pants with it.
- Use your hand to locate the bony bump at the base of your neck (the seventh cervical vertebra, C7).
- Tilt your head slightly forward, then measure the distance from the C7 vertebra to the top edge of your pants using a tape measure.
- The length from the top edge of your pants to the C7 vertebra is your torso length.
Size chart
Unit:cm
| Torso Length | 45 | 48 | 51 | 54 | 57 |
|---|---|---|---|---|---|
| Height | 150-160 | 158-170 | 168-175 | 173-180 | 178-190 |
*The above should only be used as a rough guide. Please note that torso length may vary depending on your body shape. Wrap your tape measure around your hipbone. Your hip belt size cannot be determined by your weight and height.
Notes before use
Fabric water resistance
While the fabric used is highly water-resistant, the backpack is not waterproof. We recommend using a waterproof pack liner or a rain cover.
DEET
Insect repellents containing DEET can degrade the coating of the fabric components, so please do not let them come into contact with this product.
Instructions
Carbon rod warranty
If the X-shaped carbon rod frame located in the back panel is damaged, we offer a free replacement within one year of purchase.
Please contact us through our support form and include your order number.
Care instructions
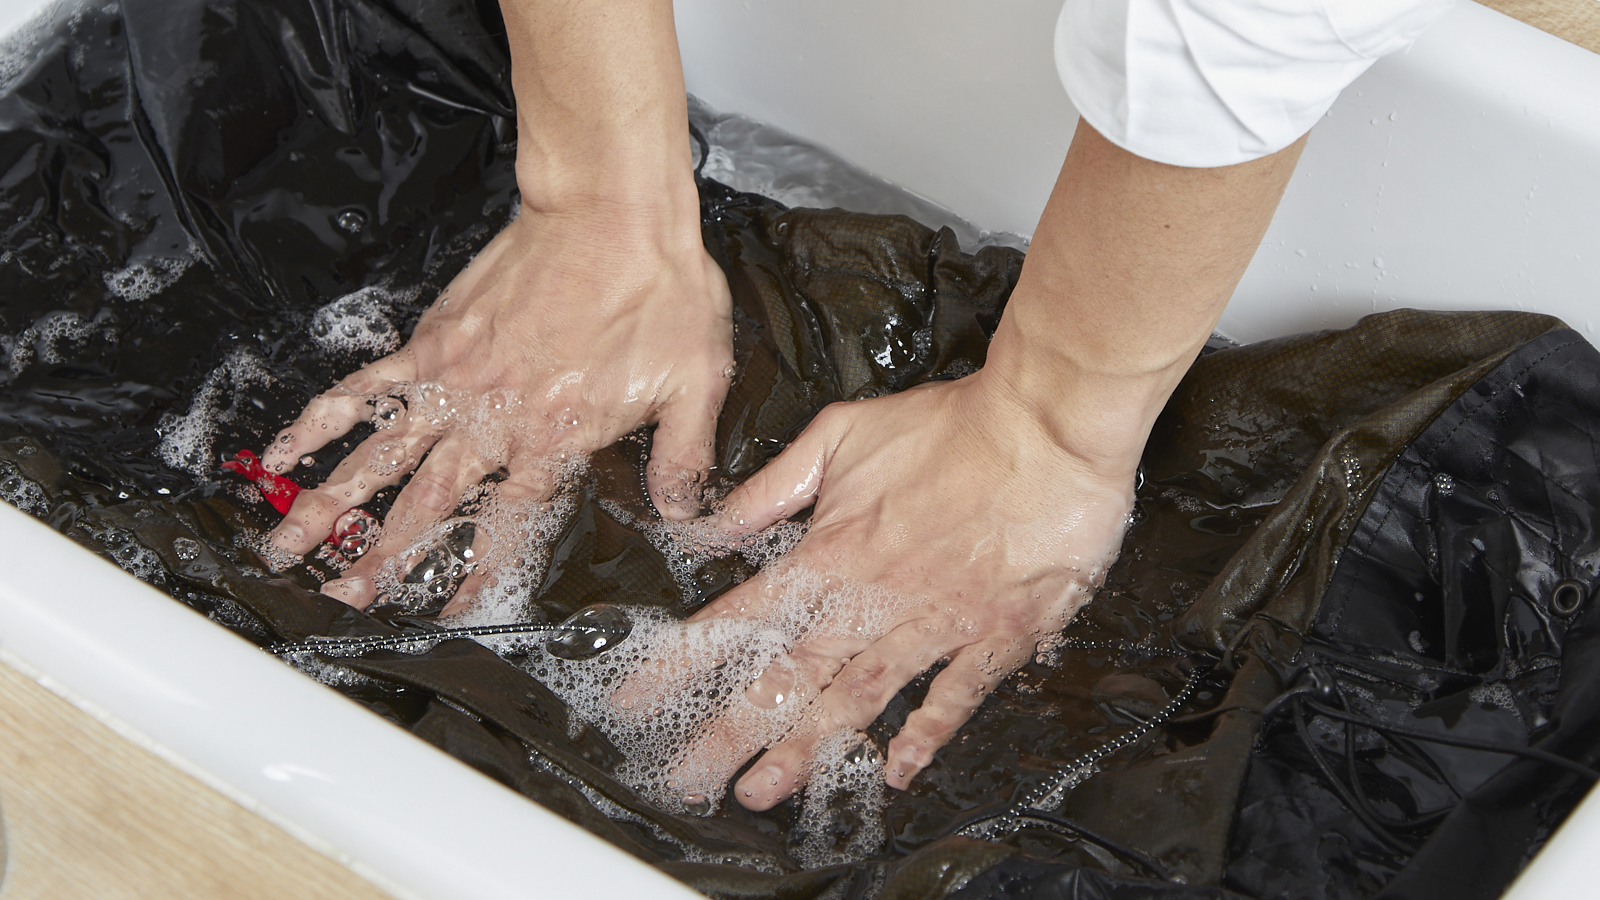
- Hand-wash only. Do not machine wash.
- Submerge the product in lukewarm water with a correct amount of neutral detergent, and hand-wash it.
- Do not bleach. Do not use fabric softener.
- Remove any optional parts such as pads before washing.
- Wash off any noticeable stains or smudges with a washing brush or soft sponge.
- Rinse well so that no detergent remains.
- Drain the backpack with the mouth down. Keep dry in a shade.
- Store in a dark, well-ventilated place.
- Do not iron.
- Hand-wash the pad gently, rinse well and keep dry in a shade.
Care instructions page
For detailed tips on how to wash, store, and take care of your gear, visit our Care Instructions page.
Care instructions for Technoforce® Steel
Technoforce® Steel with hydrophobic properties is naturally a stain-resistant fabric, but due to its white color, dirt becomes noticeable. Here are care methods for three common types of stains.
The longer a stain remains, the harder it is to remove. Clean as soon as possible to keep clean.
Dirt stains
- Spot Cleaning
Gently scrub the stain using laundry detergent and a laundry brush or toothbrush.
*Note: Small particles of sand that have entered the gaps in the fabric may remain.* - Rinsing
Rinse the cleaned area with lukewarm water. Make sure to rinse thoroughly with running water to remove all detergent. - Drying
Hang to dry completely in a well-ventilated, shaded area.
Food stains
- Spot cleaning
Use dishwashing detergent that is effective against grease stains, and gently scrub the stain with a laundry brush or toothbrush. For stubborn grease stains that cannot be removed with dishwashing detergent, apply make-up remover to get the grease to lift, then gently scrub using laundry detergent.
*Note: Stubborn grease stains with strong pigments, such as curry, may leave a slight residue.* - Rinsing
Rinse the cleaned area with lukewarm water. Make sure to rinse thoroughly with running water to remove all detergent. - Drying
Hang to dry completely in a well-ventilated, shaded area.
泥油汚れ(自転車チェーン油など)
- Spot cleaning
Apply make-up remover to lift the grease and dirt, then scrub gently with a laundry brush or toothbrush using laundry detergent.
*Note: Small particles of sand that have entered the gaps in the fabric may remain.* - Rinsing
Rinse the spot-cleaned area with lukewarm water. Make sure to rinse thoroughly with running water to remove all detergent. - Drying
Hang to dry completely in a well-ventilated, shaded area.
Payment
- We only accept payment by credit card. We currently do not accept payment via bank transfer from overseas accounts.
- We accept the following Credit Cards: Visa, Master, American Express, and JCB.
- To download your receipt, please click the link included in the Dispatch Notice, which we will send by email as soon as the items are dispatched.
- Bank transfer is only availble for those that own a Japanese bank account.
Delivery
- Order Confirmation will be sent after the order.
- The items will be dispatched within 3 days after the payment is confirmed.
- The dispatch notice will be sent by email as soon as the items are dispatched.
- The delivery may be delayed by unforeseeable reasons such as natural disasters and other logistics issues. We appreciate your patience and understanding.
- We cannot ship multiple orders in one package due to how our delivery system is currently set up.
- We will ship to regions in North America, Oceania, and Europe (excluding Russia) via DHL. For regions in Asia, the Middle East, Central and South America, Africa, and Russia, we use EMS (International Express Mail Service) for shipping.
- Shipping fees and delivery times vary depending on the shipping destination as well as the size and weight of the items.
Size exchange
- Overseas customers who need to change the size of their order, should note that the time needed for shipping will vary greatly depending on your country of residence.
- We only accept exchanges when the item is unused (except for fitting).
- If you wish to exchange the size of the item, please contact us within seven days of receiving your order.
- Exchanges can only be made for the same color in a different size.
- If the size you wish is out of stock, we will suggest a different color.
- If the product is out of stock, we may simply have to ship the item back to you.
- All shipping costs to be carried by the customer.
- We will only send the exchanged item to you, upon receipt of return shipping cost via PayPal.
- Please be aware that some countries charge customs duties depending on the price of the item.
- We are unable to answer any questions on local customs. Please contact your local customs bureau.
Repair
We accept repairs for all of our Yamatomichi products. For inquiries on repair services including patching the holes, repairing with extra components, or fixing the items damaged over time, please feel free to contact us from the “Repair” section of the SUPPORT page.
Repair Tape
- For temporary repair, please keep the repair tape in your emergency kit.
- The repair tape should be patched up on both the front and back sides of the fabric. The tape must be larger than the damaged or torn part of the fabric.
- If you round the edges of the patch, it will last longer.
Repair diary
We’ve featured a repair example of the ONE backpack in our Repair Team Report.
For details, please see: Repair Diary #3 Overhalling the ONE backpack.


