






Lecture 5: A History of Outdoor and Hiking Stoves
Photos / editing: Masaaki Mita
Photos: Go Kakizaki, Hikaru Otake
Lecture 5: A History of Outdoor and Hiking Stoves
Photos / editing: Masaaki Mita
Photos: Go Kakizaki, Hikaru Otake
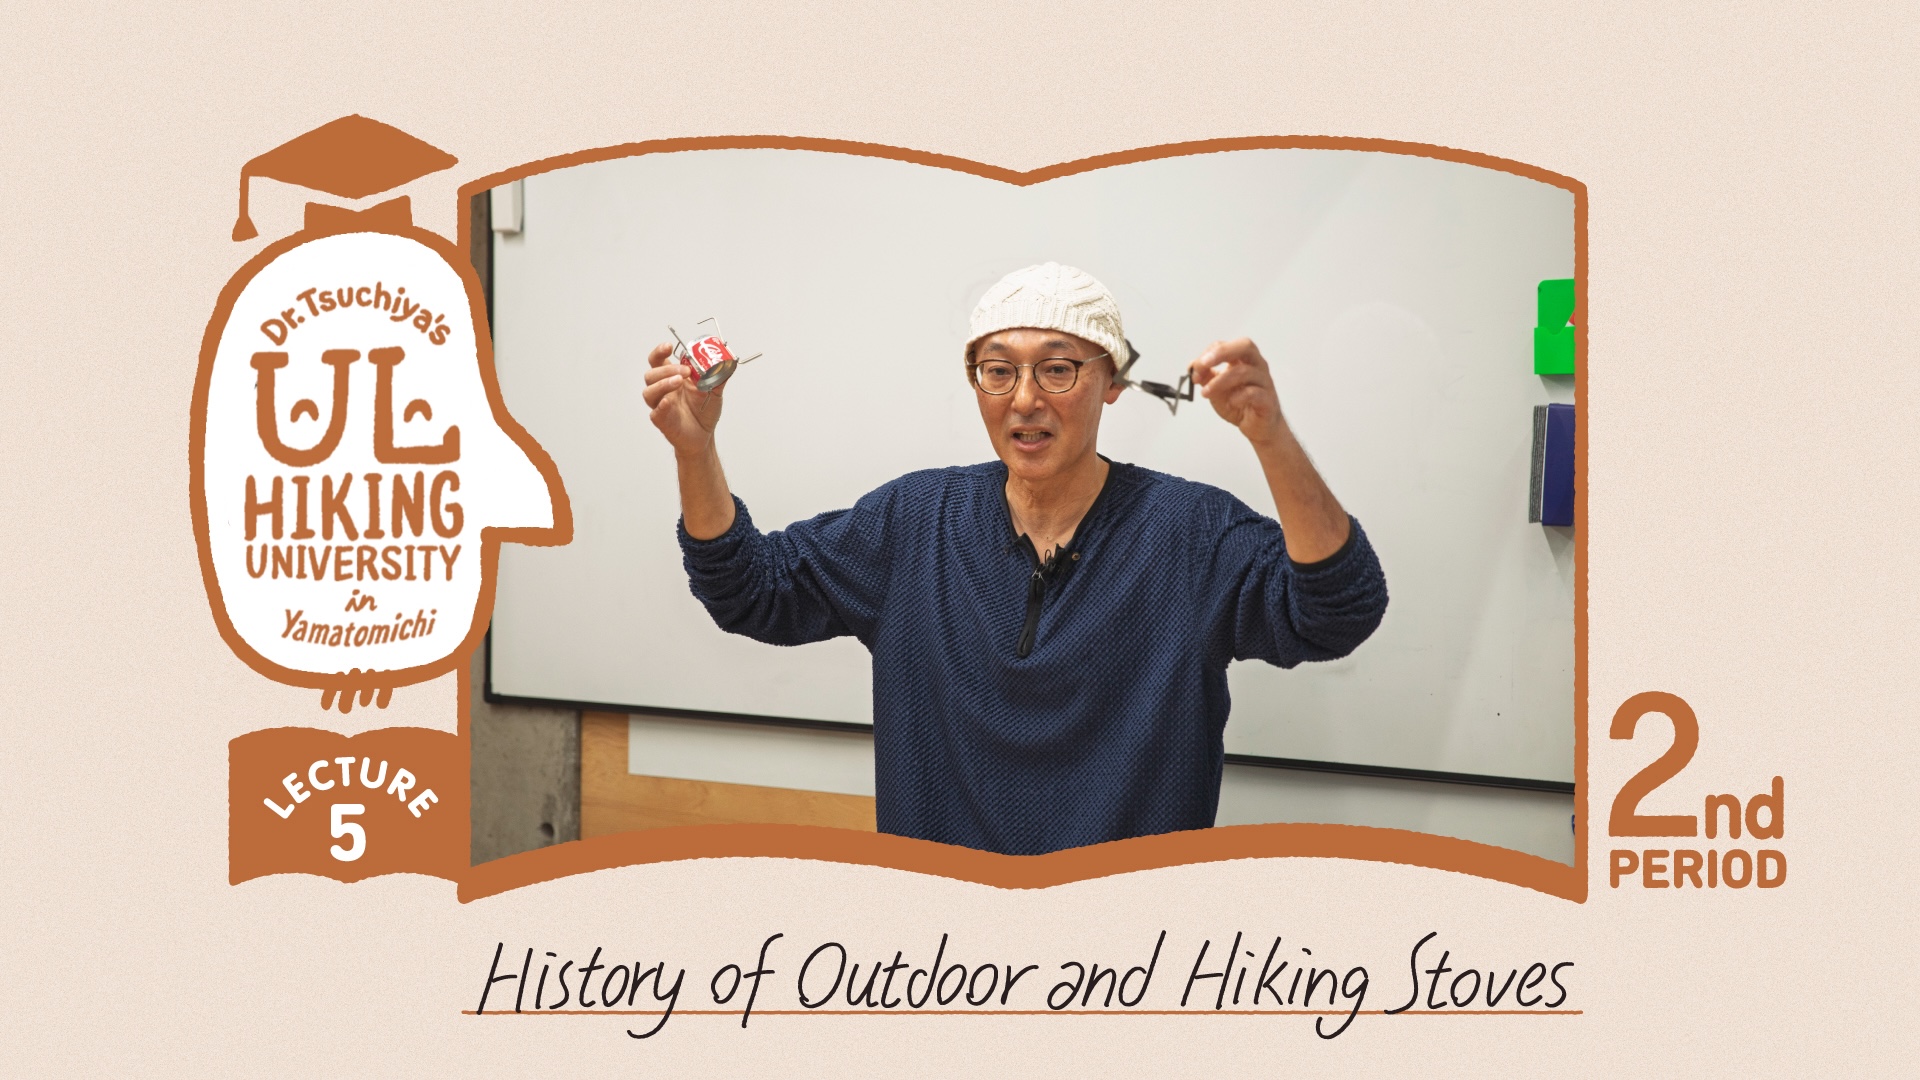
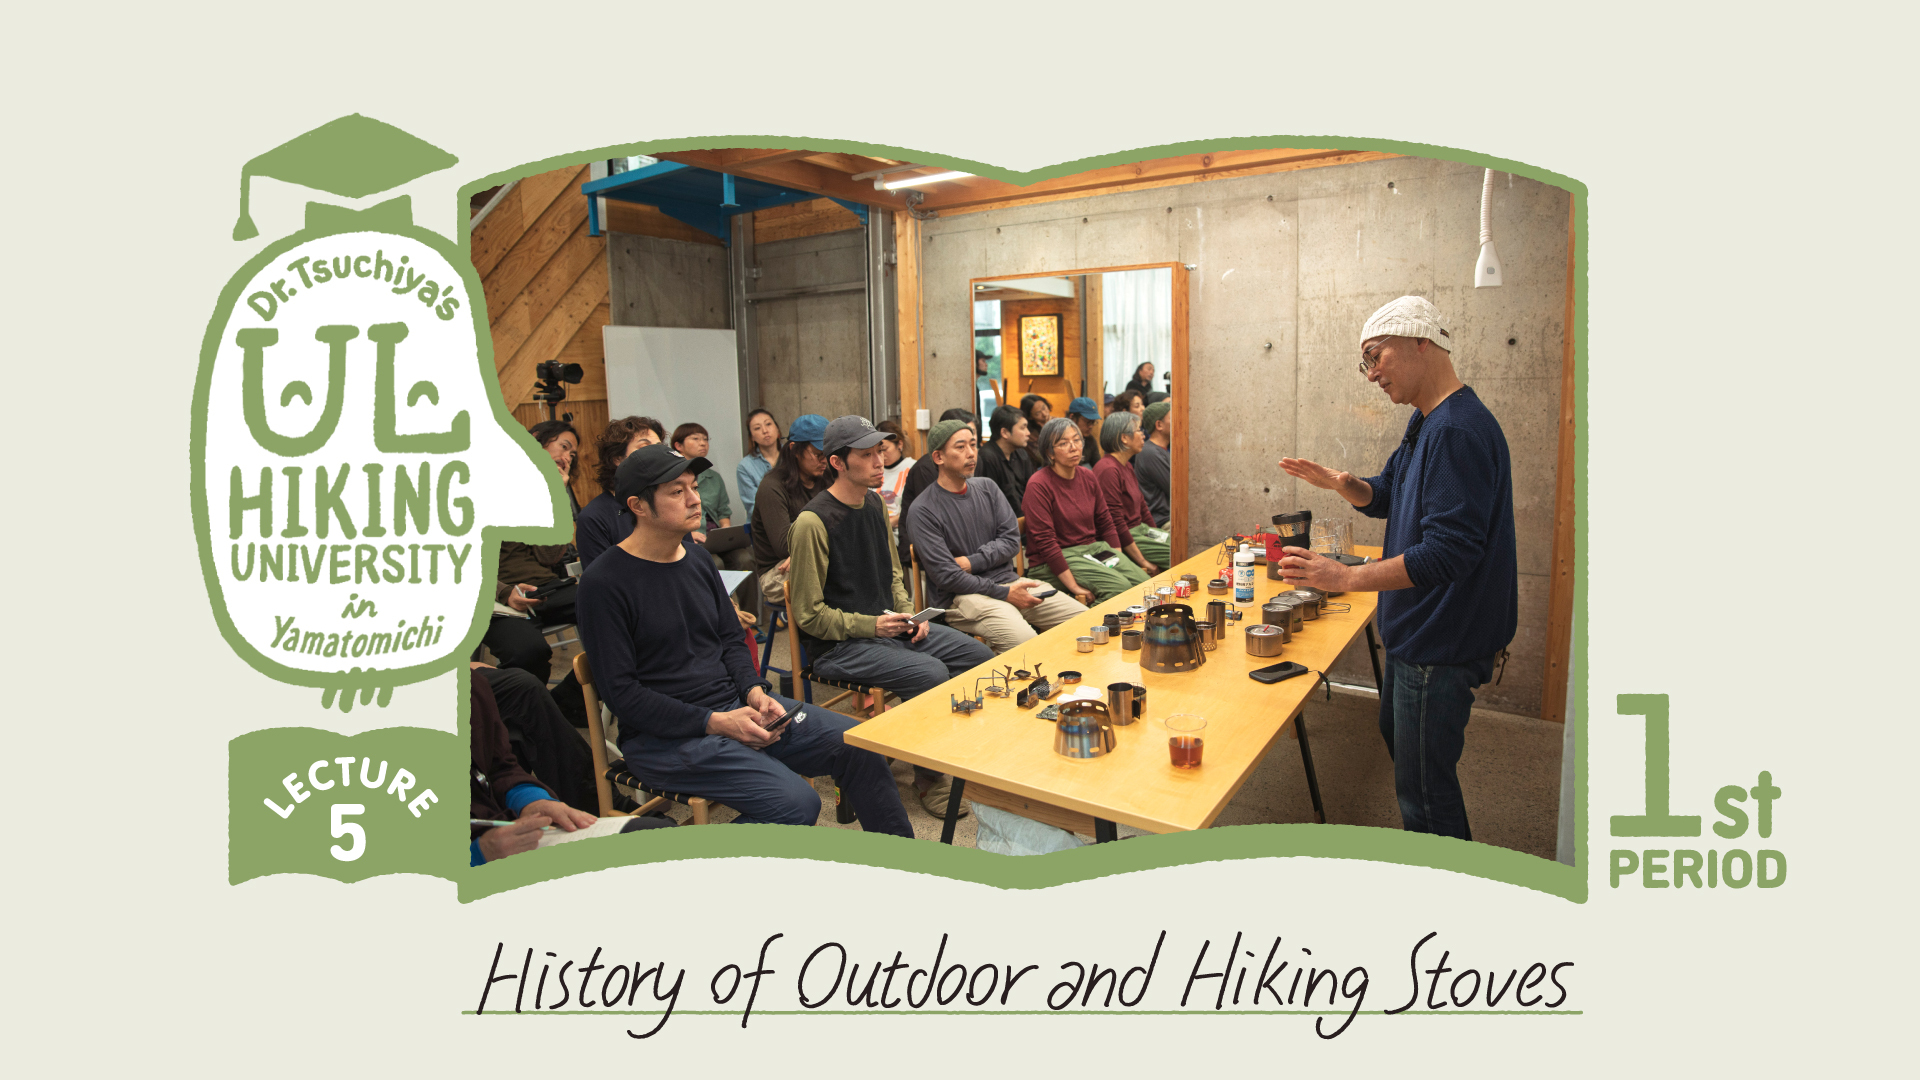
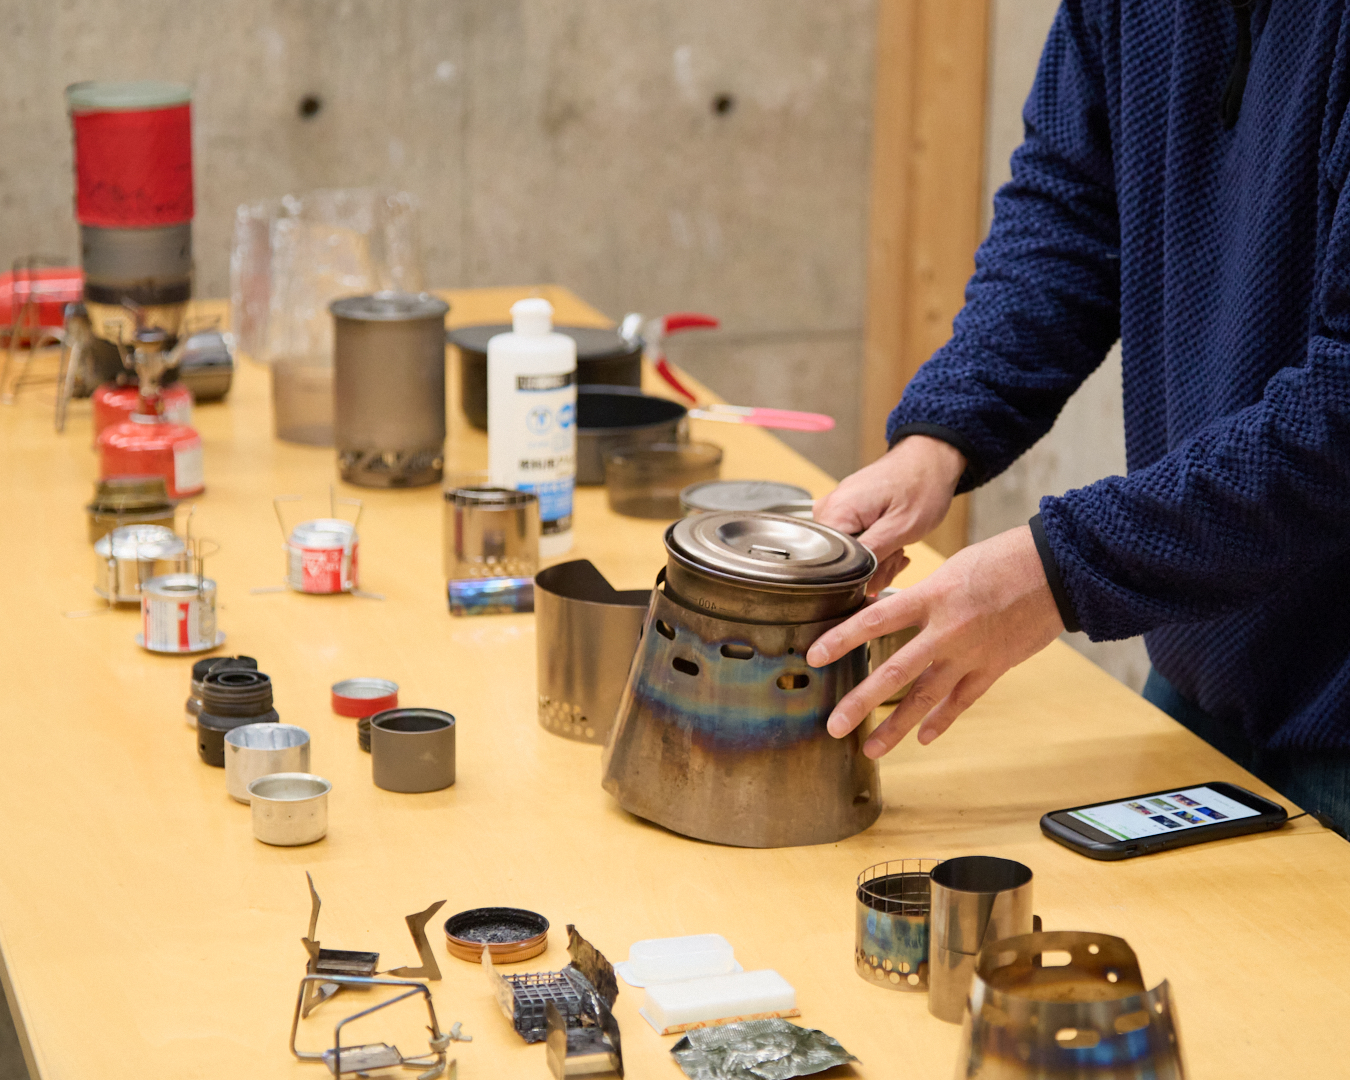
Tomoyoshi Tsuchiya, owner of Hiker’s Depot in Tokyo and one of Japan’s ultralight hiking pioneers, is the author of Ultralight Hiking (2011) and a frequent Yamatomichi collaborator. Every few months, Tsuchiya hosts a lecture at Yamatomichi’s Laboratory, in Kamakura, covering the history of ultralight hiking and the evolution of its practitioners’ gear, from packs and tents to shoes and sleeping bags. His fifth lecture delves into the origins and innovations of outdoor stoves. In the first period, he explored gasoline and kerosene stoves, explained why alcohol stoves won over ultralight hikers and looked at stove-and-cookware sets that are optimized for boiling water. In this second period, he examines different kinds of alcohol stoves, explains the pros and cons of solid-fuel stoves and gives a breakdown of how windscreens and pot supports matter in the pursuit of maximum combustion efficiency.
- Japan's DIY beverage-can stove master inventor
- Pressurized alcohol stoves
- Air intake/exhaust alcohol stoves
- The Caldera Cone and alcohol stoves
- Carbon felt stoves
- Capillary hoop stoves
- Evernew’s Blue Note Stove boils water
- Solid-fuel stoves
- Solid fuel types and traits
- Pot supports, windscreens and combustion efficiency
- Choosing cookware: what and how much will you eat?
Japan's DIY beverage-can stove master inventor
How did alcohol stoves made from beverage cans get their start?
One comprehensive resource for everything you need to know about alcohol stoves is ZenStoves (“Zen and the Art of the Alcohol Stove”). On Zenstoves, you’ll come across someone called JSB. During the 2000s, JSB was one of the greatest of Japan’s alcohol stove builders.
JSB (also his ham radio call sign) was an engineer who asked a lot of questions. For instance: How can an alcohol stove burn? His questions weren’t always the most practical but they never failed to be thought-provoking.
JSB’s approach reflected the values of the ultralight hiking scene back then. In his mind, lighter was better. Whether it was practical to use was up to the individual. In Japan’s ultralight hiking world of stoves, he was the mad scientist, an irrepressible experimenter with a following.
Let’s look at some of JSB’s creations and track the evolution of alcohol stoves made from reused beverage cans.
Pressurized alcohol stoves
Pressurized alcohol stoves made up one branch of DIY stoves.
Some DIY tinkerers who started building sealed stoves had a thought. If pressurizing liquid fuel increases heat output, why not pressurize alcohol?
One type of pressurised alcohol stove is filled with alcohol and sealed with a cap. To preheat the stove, a small amount of alcohol is poured into a depression in the lid and ignited.
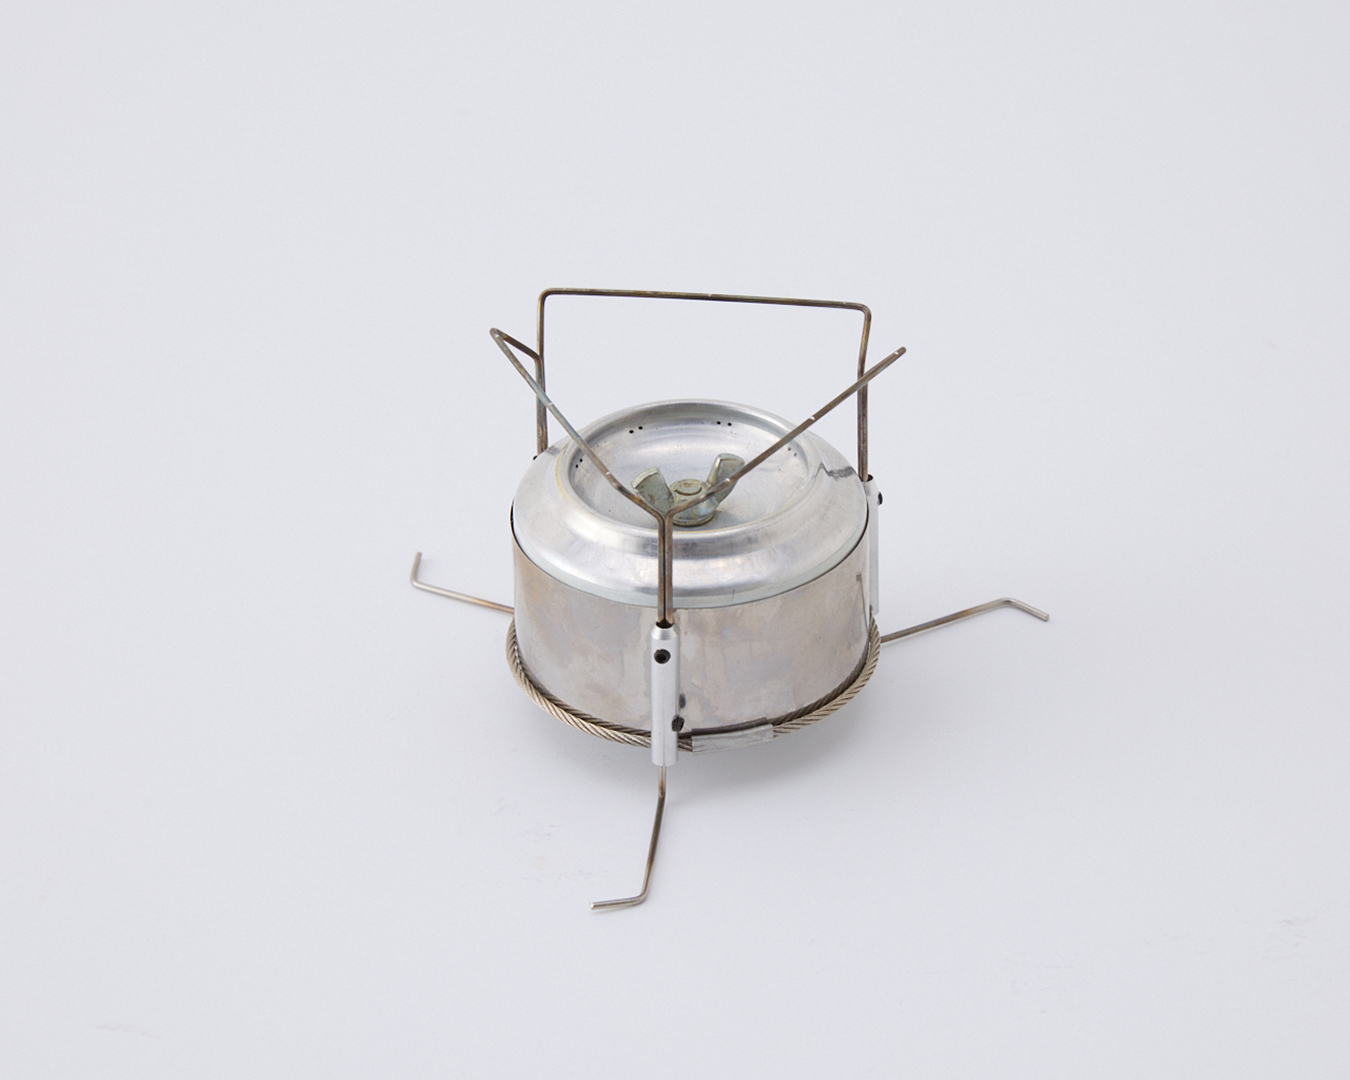
T’s Stove “Yoroi” Twin Jet. Alcohol is poured in through the central screw opening, while alcohol placed in the recessed bottom of the can is ignited for preheating.
But there’s a downside to pressurized alcohol stoves. There’s no way to adjust the flame, so thermal runaway can occur ー resulting in an uncontrollable increase in temperature and an out-of-control fire. Under certain conditions, the aluminum can that stove is made of might even melt.
Even so, there was plenty of trial and error to figure out how much heat an alcohol stove could churn out. Among pressurized stoves, the Blast Burner by Freelight was a well-executed commercial product.
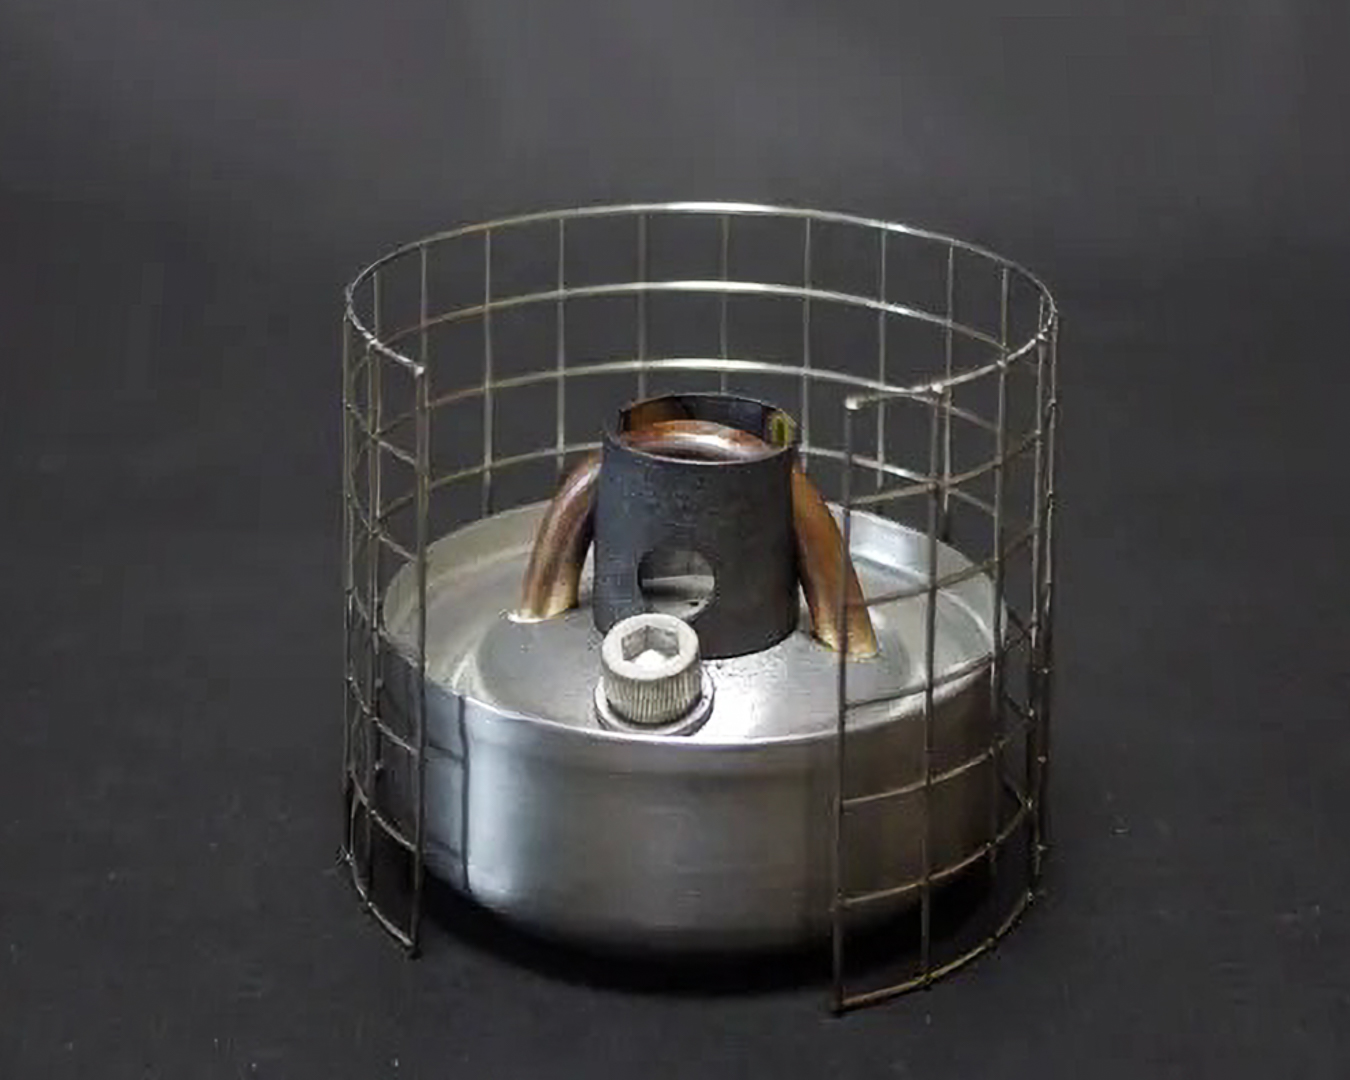
Freelight Blast Burner. (Photo credit: Freelight)
Freelight founder Junichi Takahashi’s engineering background was key. Structurally, the Blast Burner is almost identical to a kerosene stove. But the stove required careful handling, and Freelight’s product came with specific safety precautions. Even so, for a pressurized alcohol stove, the Blast Burner’s design remains one of the most refined.
One characteristic of alcohol stoves is their quiet flame. The Blast Burner is the opposite. It produces a distinct roaring sound and burns much like a conventional gasoline or kerosene stove.
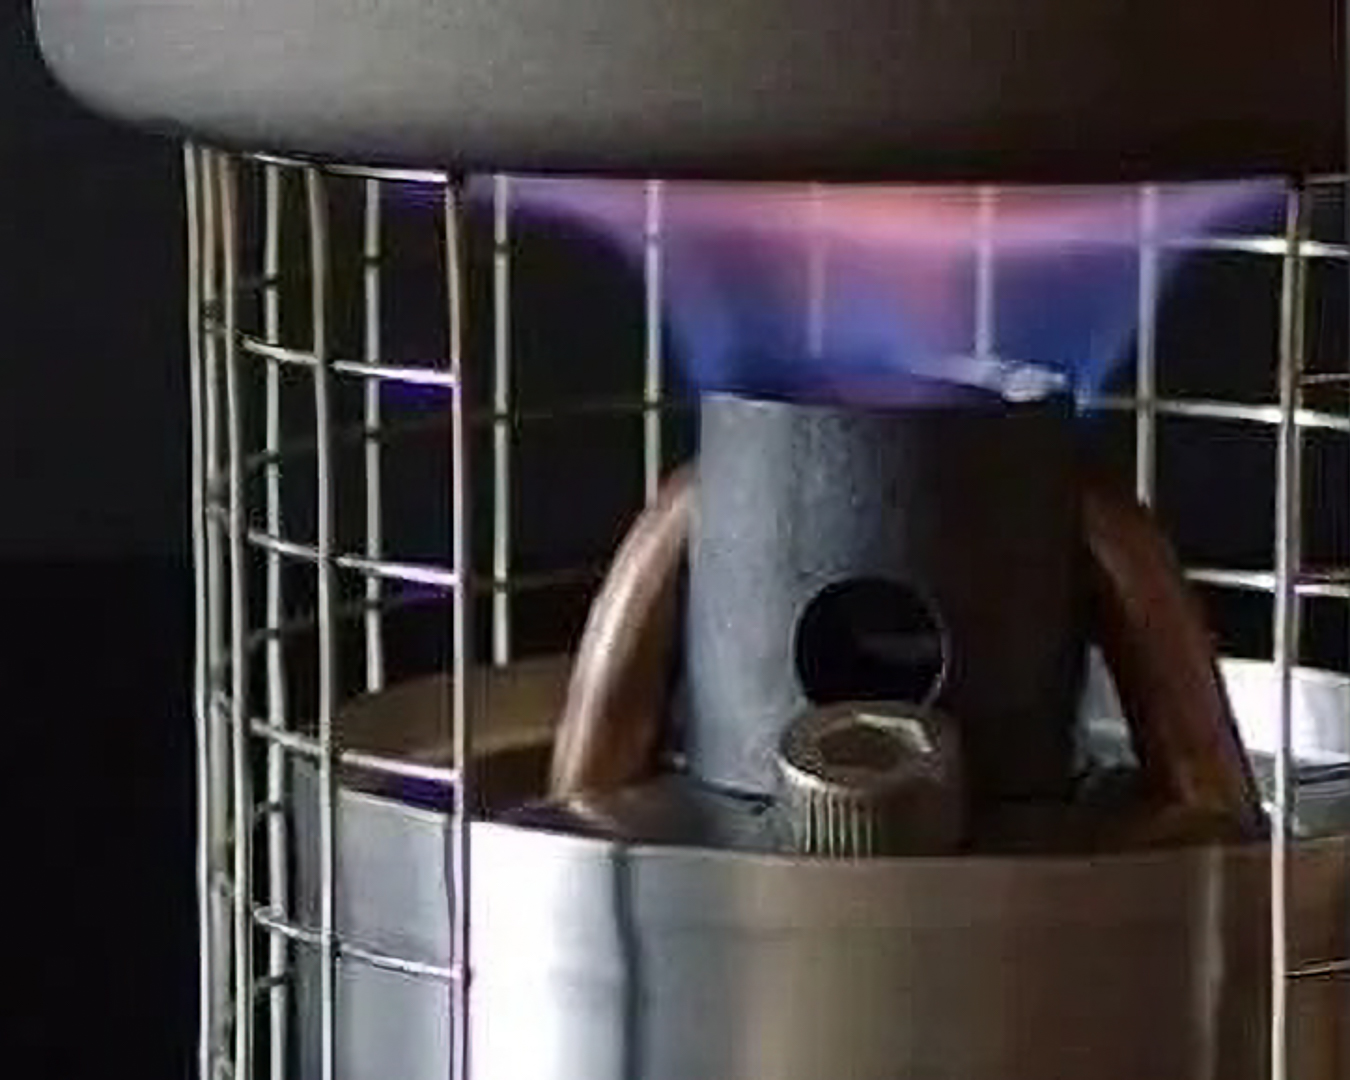
Blast Burner in operation. (Photo credit: Freelight)
Air intake/exhaust alcohol stoves
Another area of experimentation: air intake/exhaust alcohol stoves.
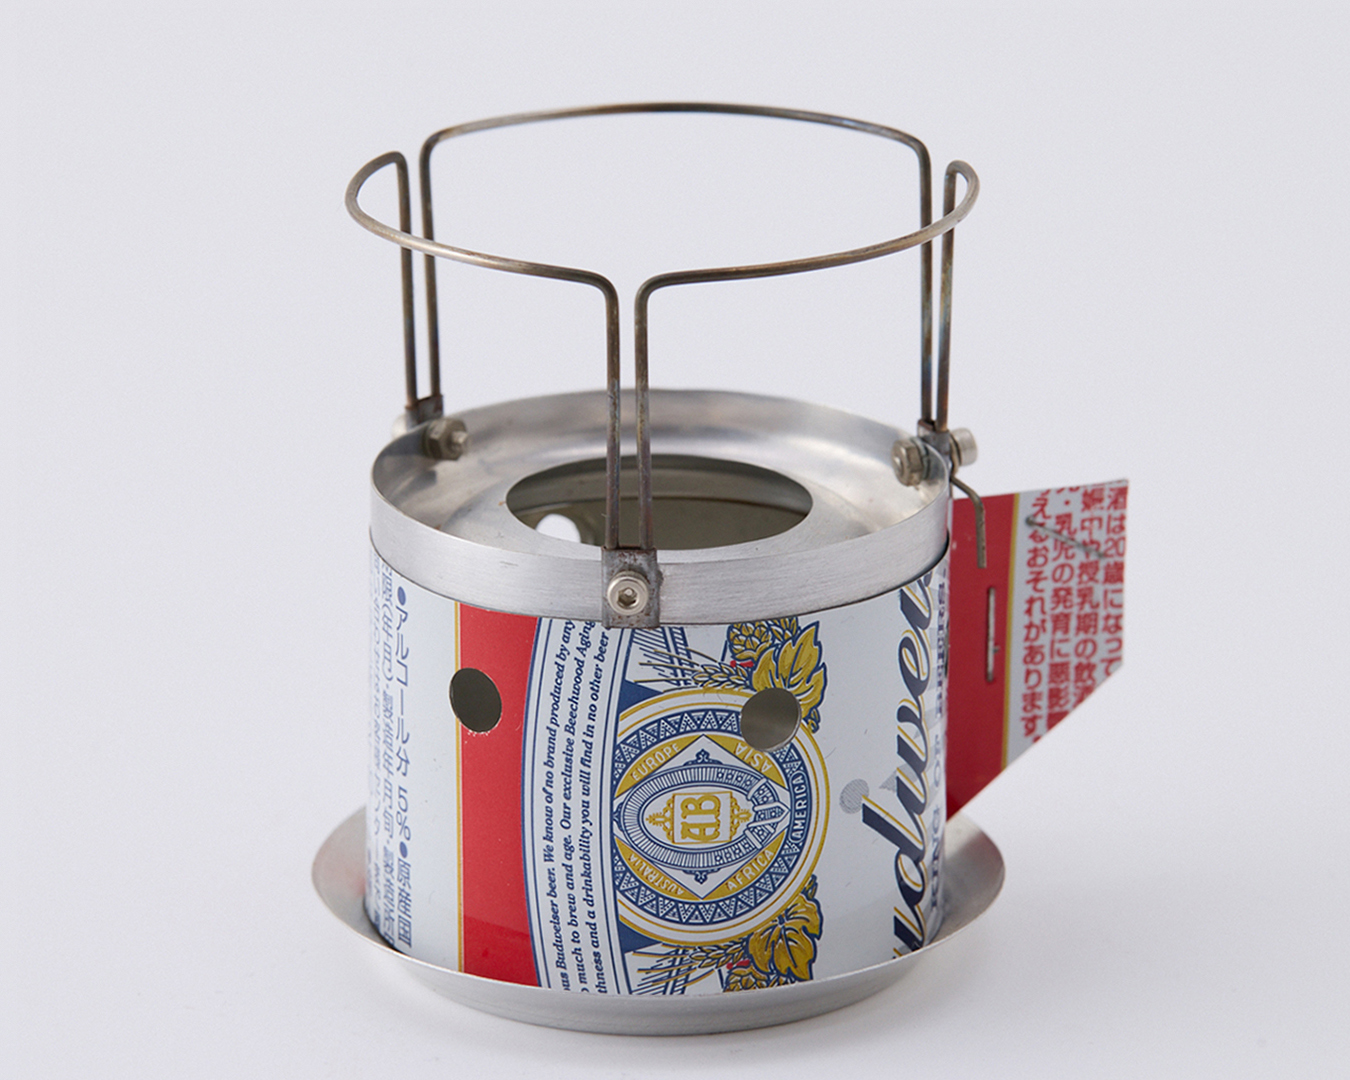
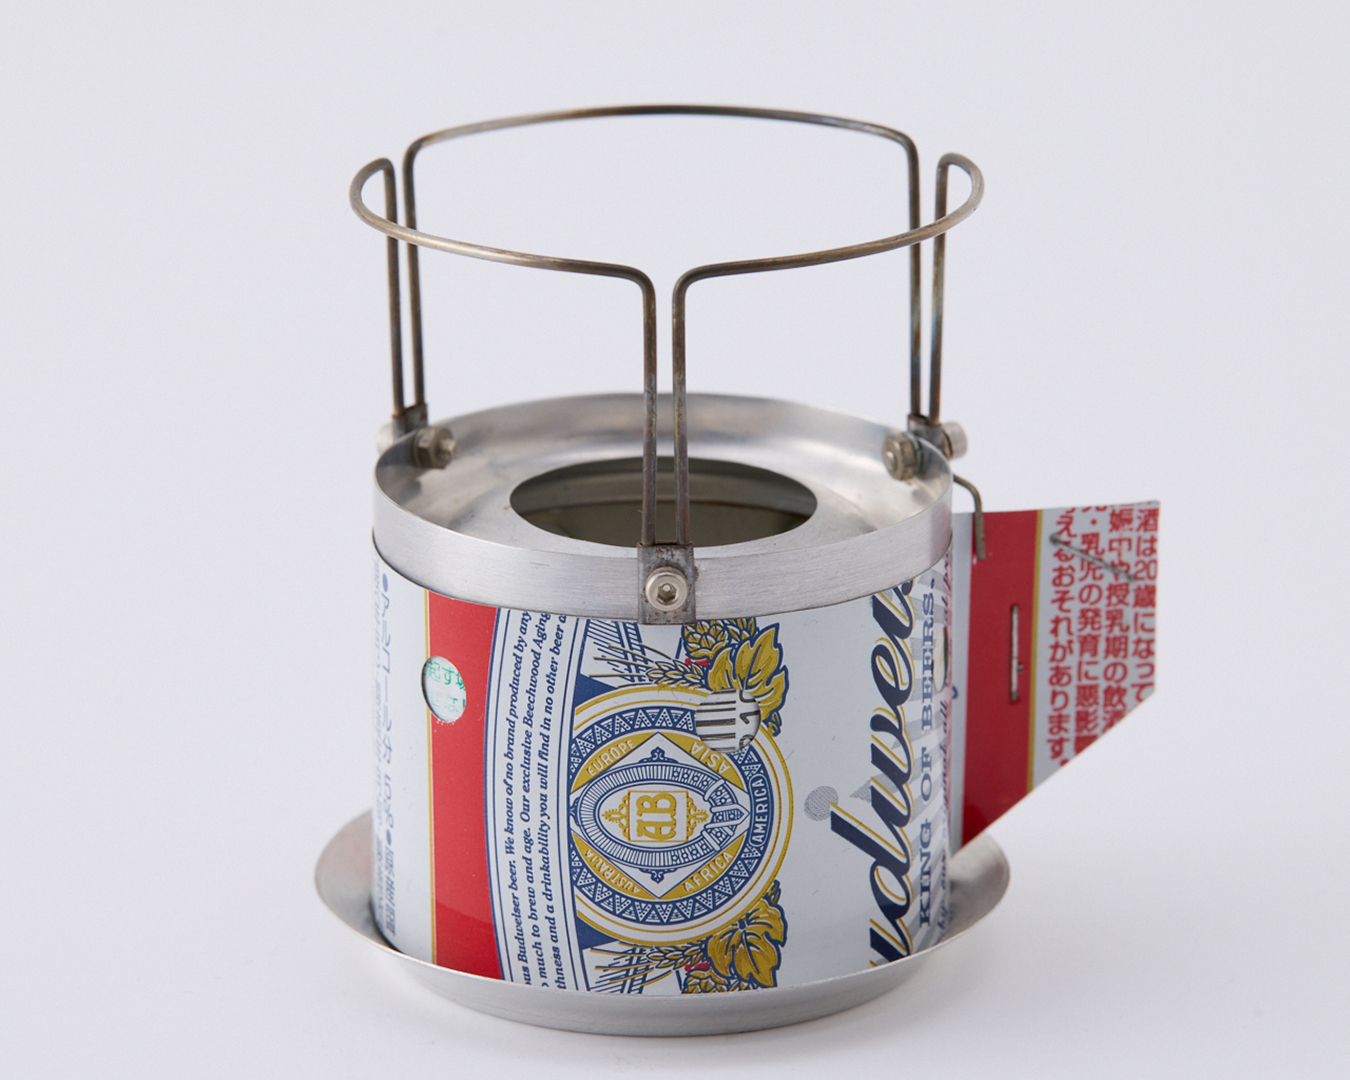
A prototype air intake/exhaust alcohol stove made by T’s Stove. A sliding valve opens and closes the air intake hole.
You’ll recall my mentioning the Trangia Storm Cooker in the first lecture. It improves combustion efficiency by circulating air through openings (for intake and exhaust) in the body, and is based on the idea that a fire needs oxygen. Allowing air to flow in and out of the stove through adjustable openings would make it possible to control the flame. Around 2010, prototypes like these were built, but their practical use was debatable.
The Caldera Cone and alcohol stoves
The fact is that increasing air intake is an extremely effective way of boosting heat output.
Take the Caldera Cone by Trail Designs. It’s a titanium windscreen that doubles as a pot support. It has been sold in numerous sizes to fit popular cookware from Evernew, TOAKS and other manufacturers.
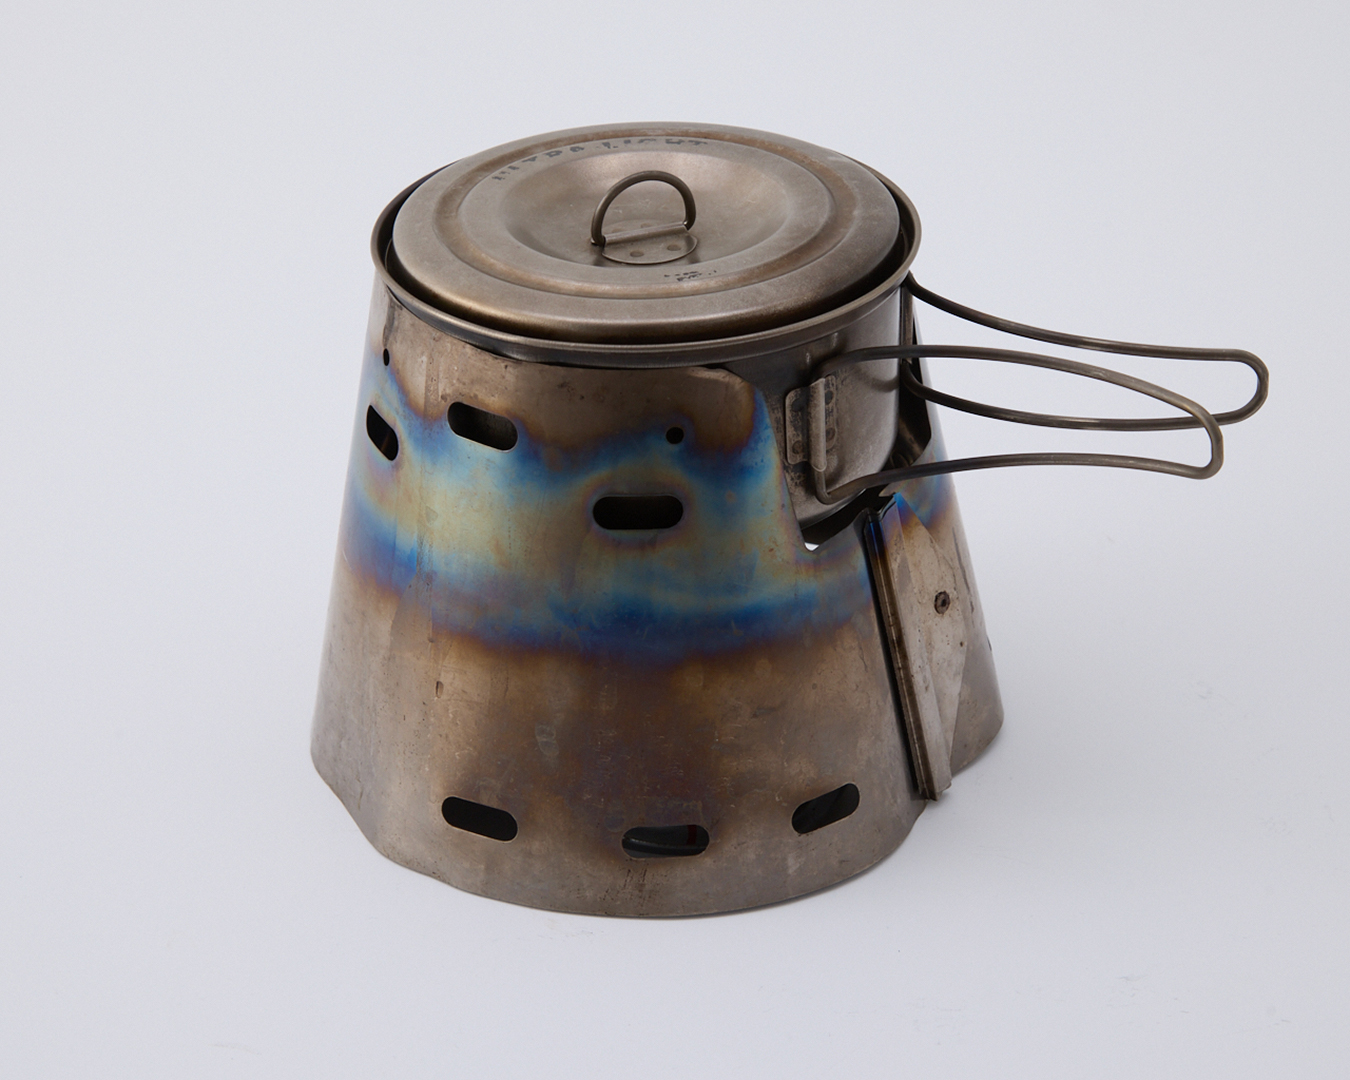
Trail Designs’ Caldera Cone. Evernew Titanium UL Pot 600 and Sidewinder Ti-Tri.
Beginning in the early 2000s, the Caldera Cone was popular among ultralight hikers. Its distinctive cone-shaped pot support and windscreen, paired with an alcohol stove, formed a cooking system that achieved exceptional stability and combustion efficiency. It’s been called the Jetboil of alcohol stoves.
The bottom of the windscreen has holes. Air flows in through these intake holes, circulates heat and exits through vents near the top. The cone encloses the sides of the pot, facilitating efficient heat flow and resulting in high thermal efficiency.
But a Caldera Cone isn’t ideal with a conventional alcohol stove because it doesn’t allow enough oxygen to flow in. Usually, for a setup with a pot on an alcohol stove, there has to be a gap between the pot and windscreen. If the gap is too small, the stove won’t get enough oxygen. The problem with the Caldera Cone is that it encloses the pot almost completely, so the alcohol stove has to be designed with intake and exhaust openings to account for this.
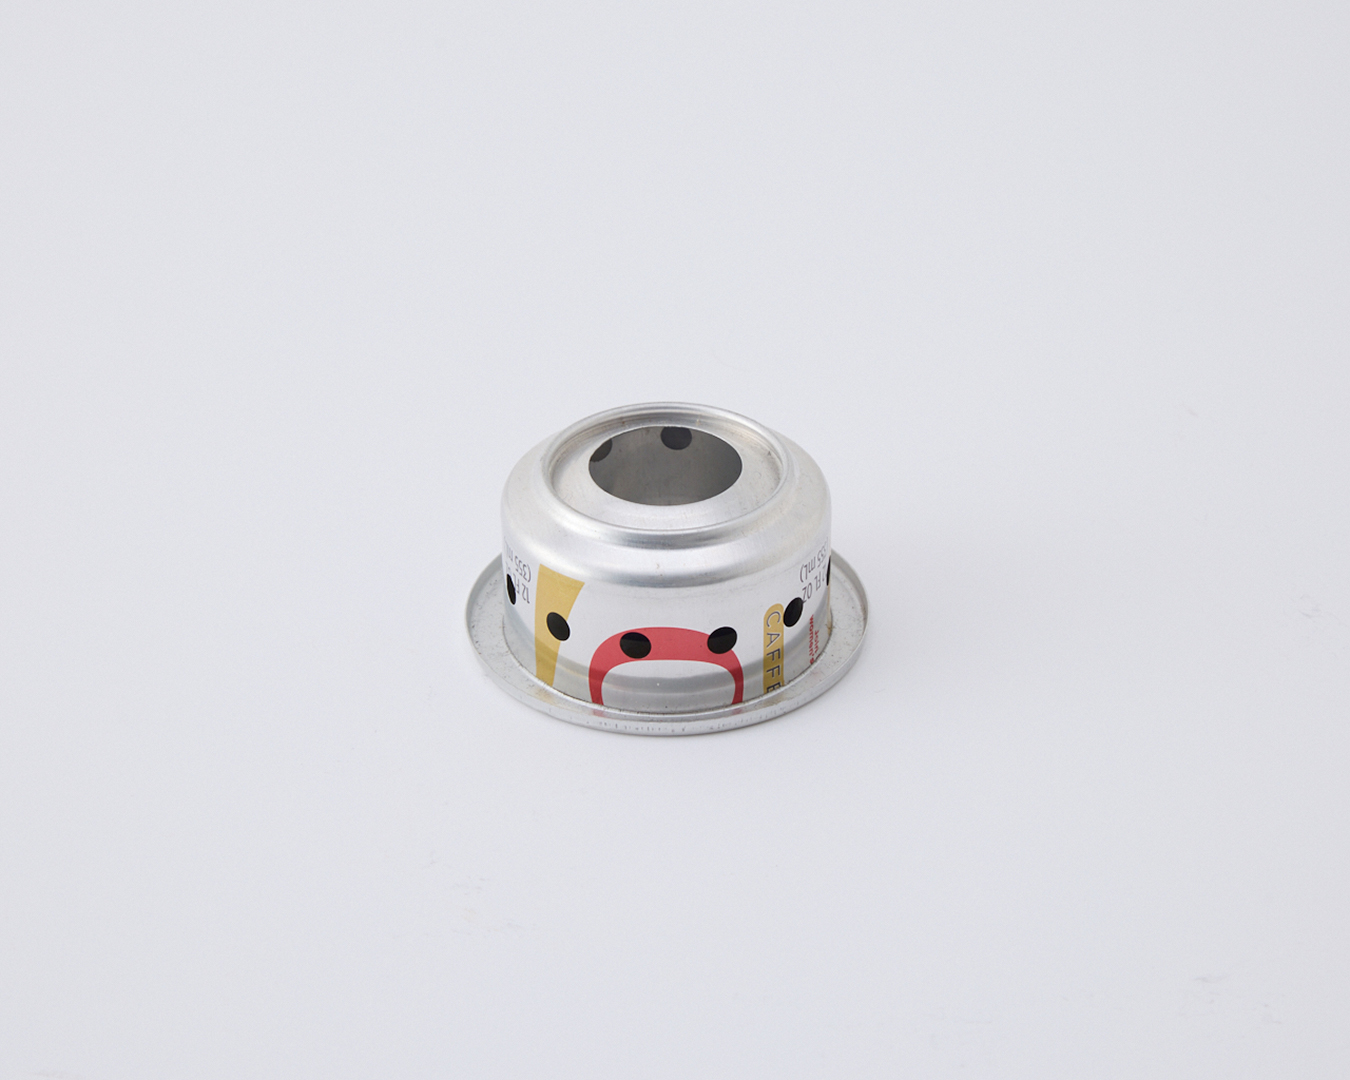
Alcohol stove equipped with dedicated intake and exhaust openings for use with the Caldera Cone.
Trail Designs’ founder Russ Zandbergen holds a doctorate in engineering. The cone structure appears simple, but Zandbergen made detailed calculations of the combustion process to perfect the design.
The Caldera Cone’s biggest structural drawback is that each model is optimized for a specific type of pot. People often assume that they can use another pot as long as it has the same diameter as the one the cone is meant to be used for. Not true.
If the height of the pot changes, so will the point where the flame hits the pot. As a result, the heat efficiency of the stove setup will change, since combustion efficiency hinges on the distance between the alcohol stove’s flame and the bottom of the pot.
Carbon felt stoves
There were open-jet, pressurized and intake/exhaust stoves. Next came the carbon felt stove. It was JSB who wondered whether carbon felt could be used for alcohol combustion.
Carbon felt is a nonwoven sheet made by carbonizing flame-resistant fibers. It has excellent heat resistance and insulation and is used to insulate high-temperature furnaces, as a welding spark blanket and as a protective ground sheet beneath fire pits.
After JSB’s early realization about carbon felt, many people were making their own carbon-felt stoves or soaking pieces of carbon felt with alcohol and placing them on solid-fuel stove bases to burn.
The best thing about a carbon-felt stove is how easy it is to use. While it doesn’t produce as high heat as a conventional open-jet stove, a carbon-felt stove’s flame is remarkably consistent (like an alcohol lamp or kerosene lamp). Compare that to early pressurized alcohol stoves, which risked thermal runaway, and open-jet stoves, which produced flames that got progressively stronger then gradually tapered off.
With an alcohol lamp or kerosene lamp, exposing more wick increases the burning surface and produces a stronger flame; retracting the wick reduces it. If the wick has a fixed length, the flame keeps the same intensity. As long as the burning surface doesn’t change, the heat output stays nearly constant.
Sanpo’s Fun Lite Gear once sold a stove called the Sanpo CF Stove whose output could be adjusted by extending or retracting the exposed carbon felt, much like adjusting the wick of an alcohol lamp.
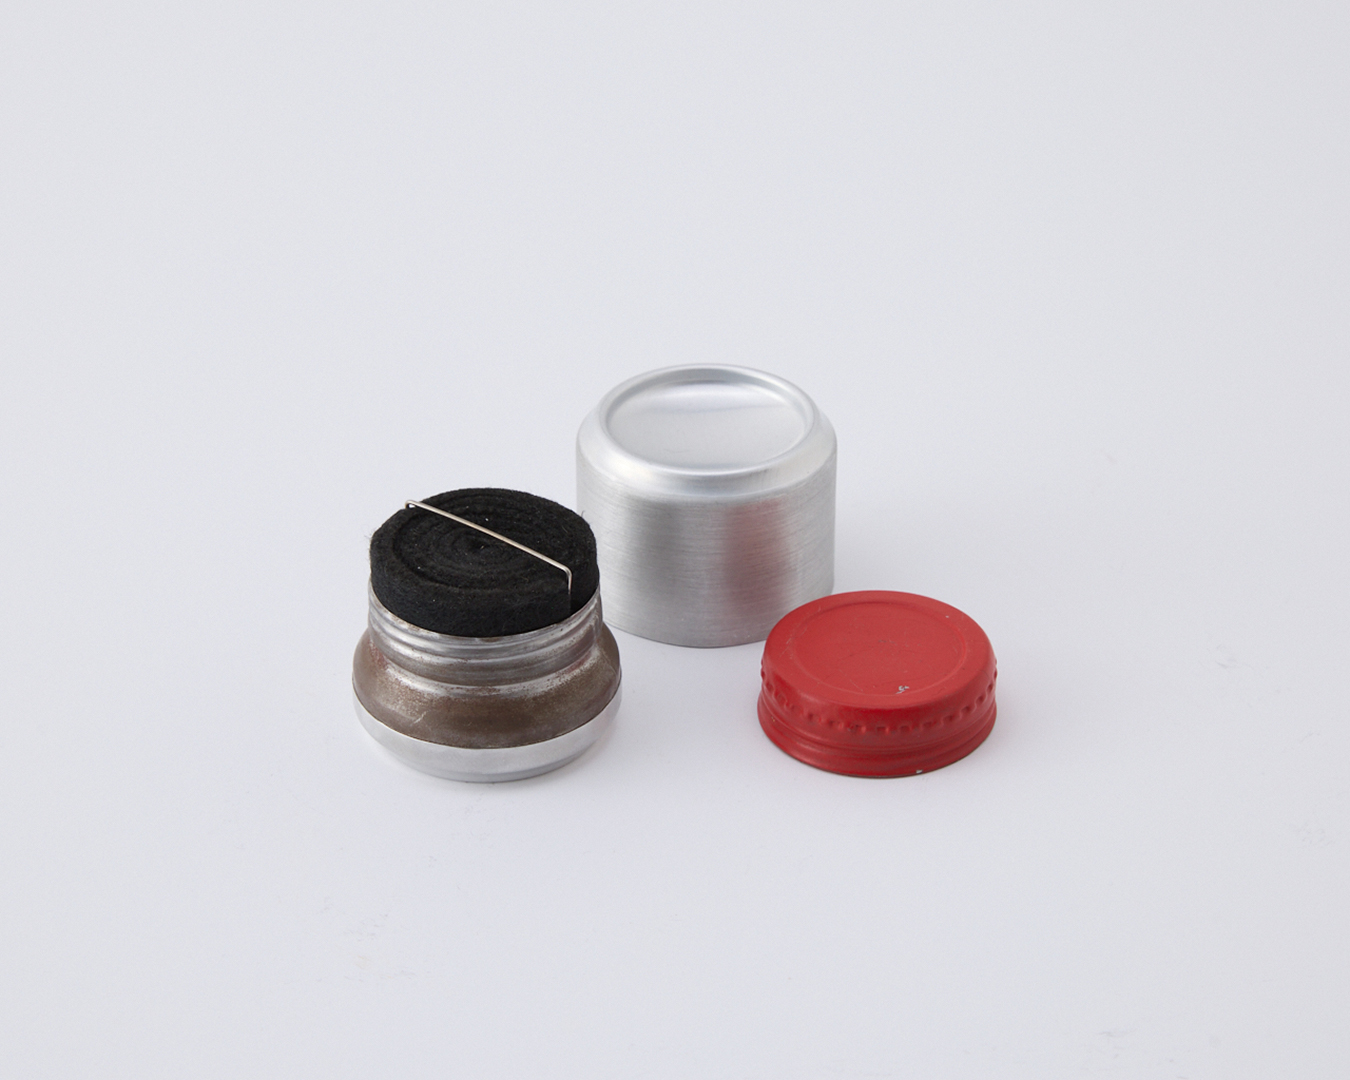
Sanpo’s Fun Lite Gear Sanpo CF Stove. The lid also functions as a simple snuffer, and by closing the inner screw cap, the stove can be transported even with alcohol inside.
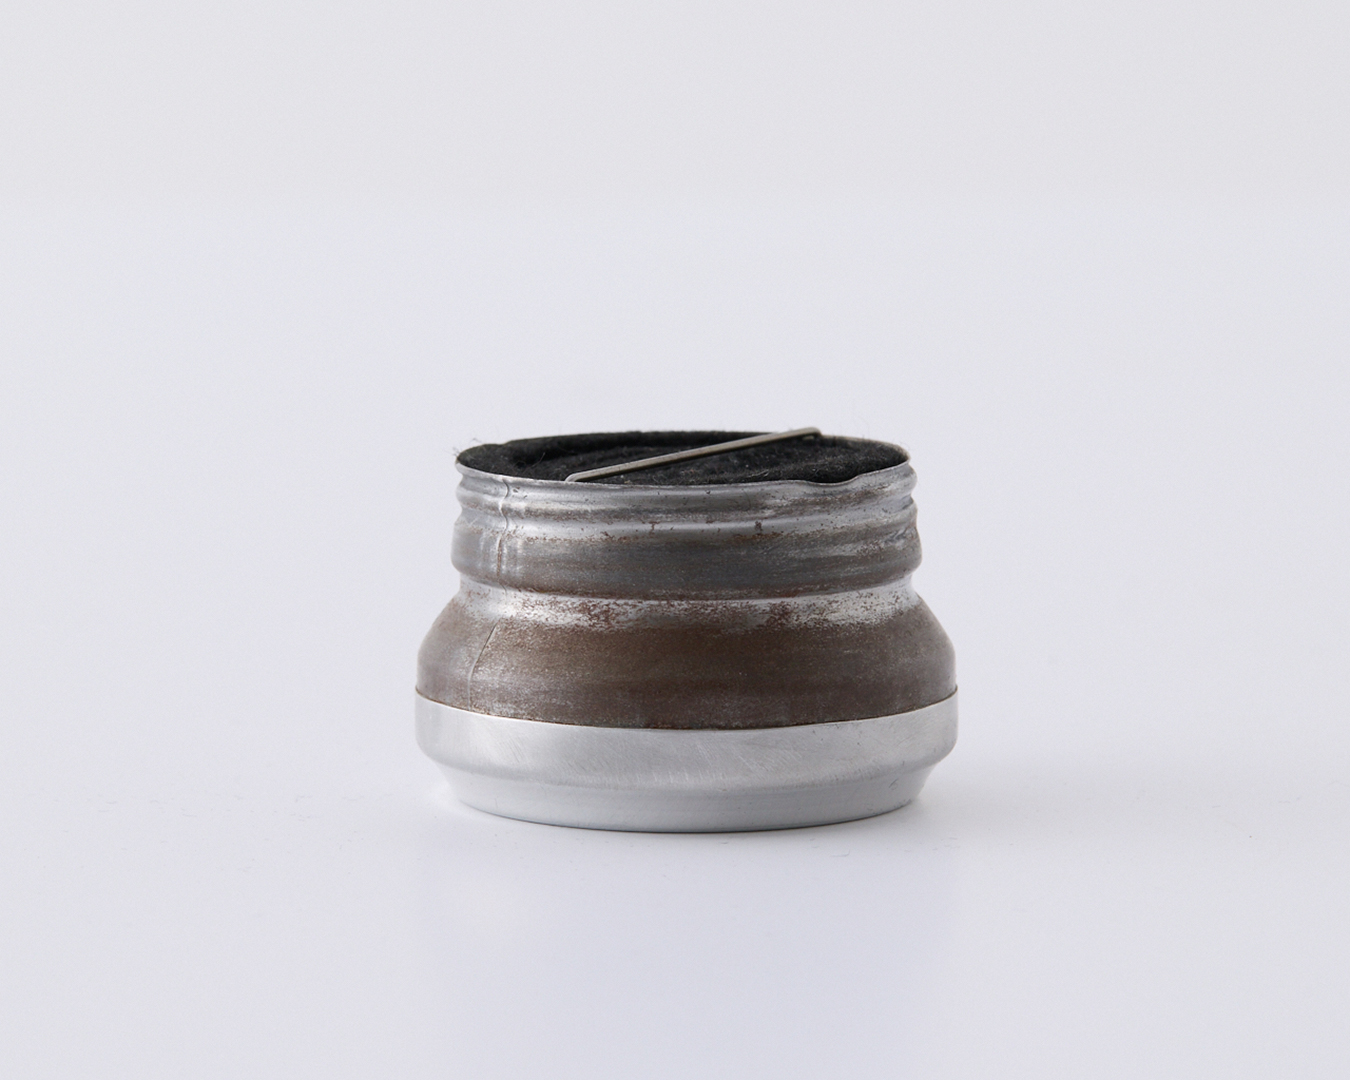
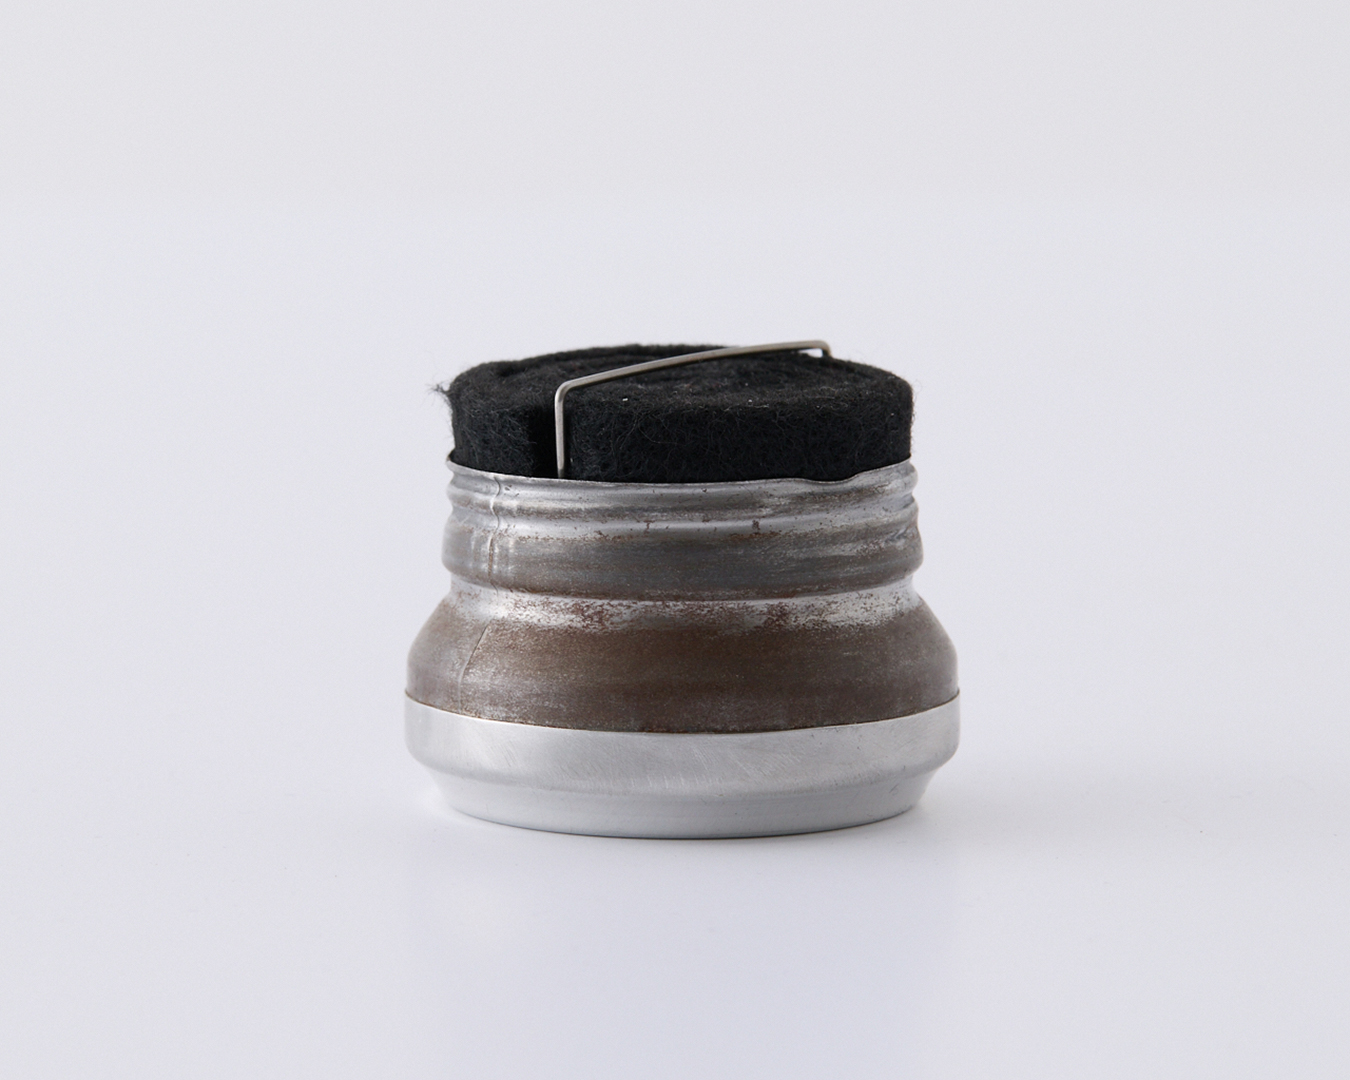
The flame output can be adjusted by changing how much carbon felt protrudes.
Most alcohol stoves don’t have a built-in extinguishing mechanism and aren’t easy to put out. (Trangia stoves are the exception, since they come with a standard snuffer cap.) Integrated stove-and-pot-support designs present a problem. Covering the stove with a pot may put out the flame, but if there’s still a gap between the stove and the ground, the flame may continue to burn.
On the other hand, a carbon-felt stove’s consistently stable combustion is a lot easier to use. Which is why adapting carbon felt for use in alcohol stoves was such a big deal.
For a while, there were hybrid models that combined intake/exhaust systems with carbon-felt burners. One example was the Revolve Stove by the now-defunct Shara Project. It used carbon-felt combustion while also drawing intake air from below.
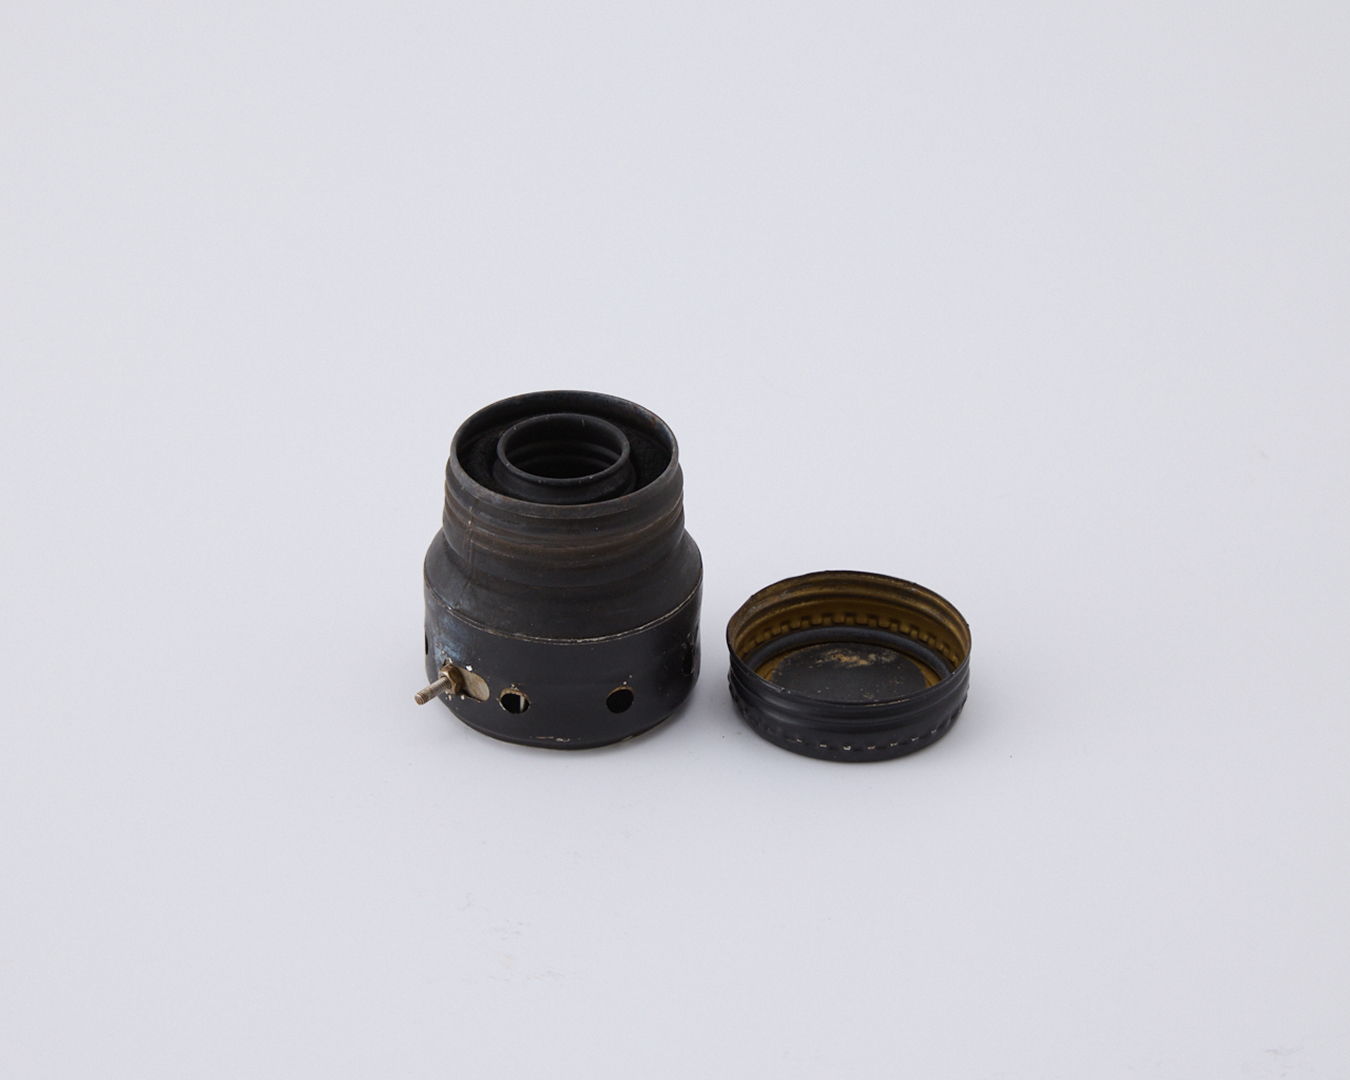
Shara Project’s Revolve Stove.
Capillary hoop stoves
The next major leap for alcohol stoves: shorter preheating times.
It can take a while after lighting the fuel of an open-jet alcohol stove before you get flames from the jet holes. That’s because the stove body itself has to heat up first. The question was: Could the preheating part be shorter? Was it possible to get the stove working almost immediately after igniting the alcohol?
Once again, JSB stepped in to tackle the problem.
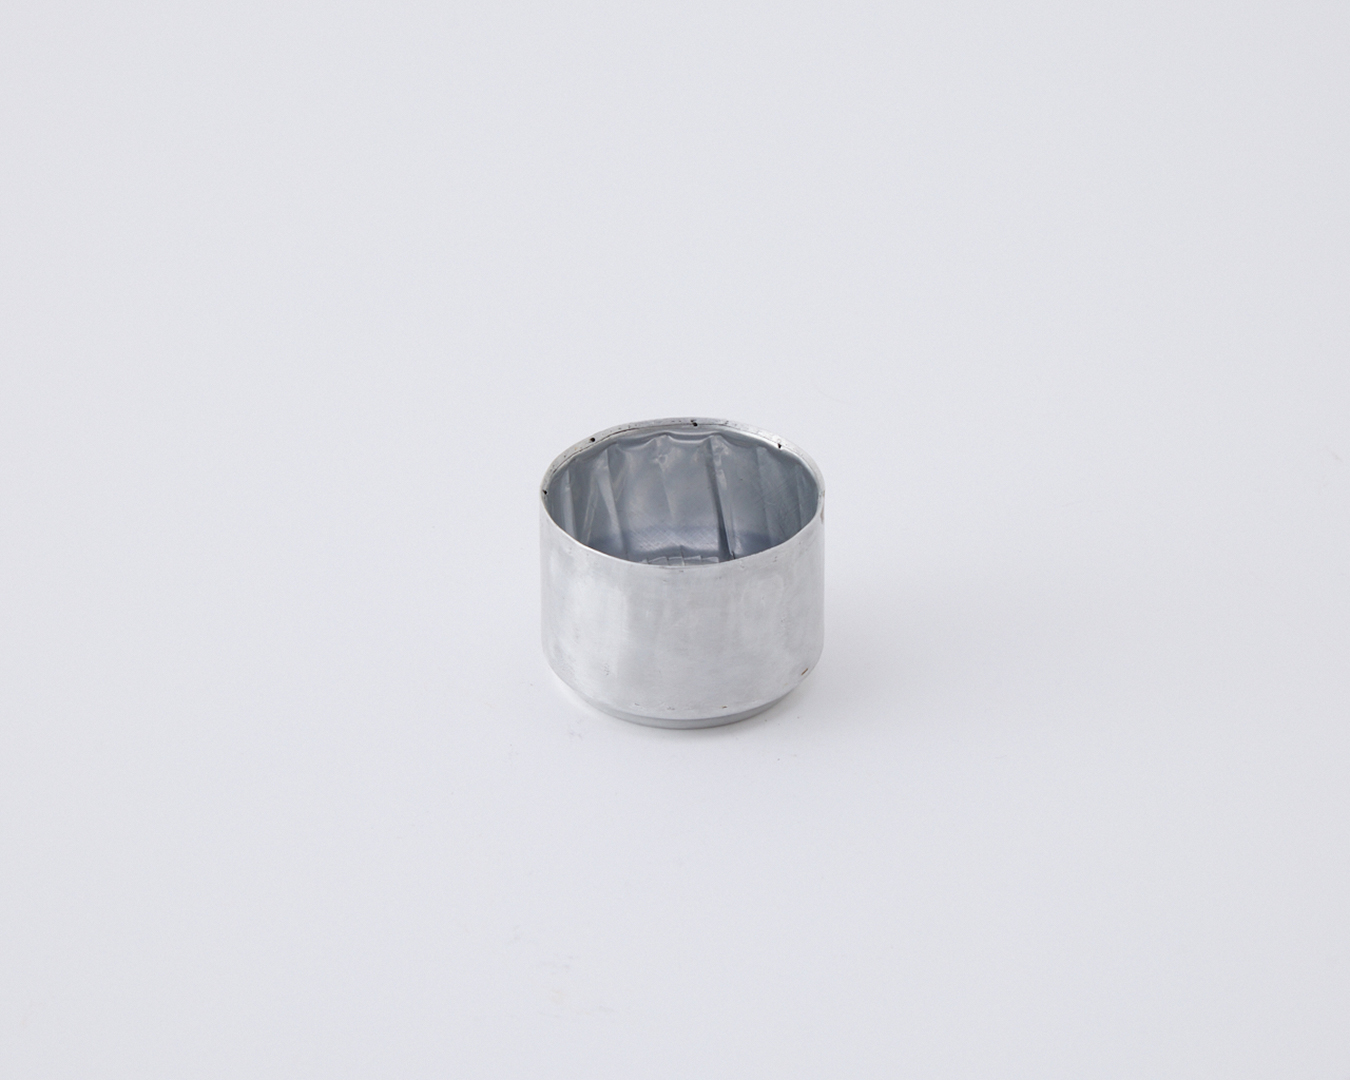
One of JSB’s prototypes was an aluminum-can alcohol stove featuring what became known as the “capillary hoop stove” structure.
JSB’s solution was to make an extremely thin secondary chamber.
The inner and outer walls were close enough that capillary action drew the alcohol upward. Once lit, the stove heated and vaporized the fuel, so full combustion happened almost immediately.
JSB also reworked the traditional design. Previously, stoves had directed their flames outward, but JSB built a stove whose flames were directed inward.
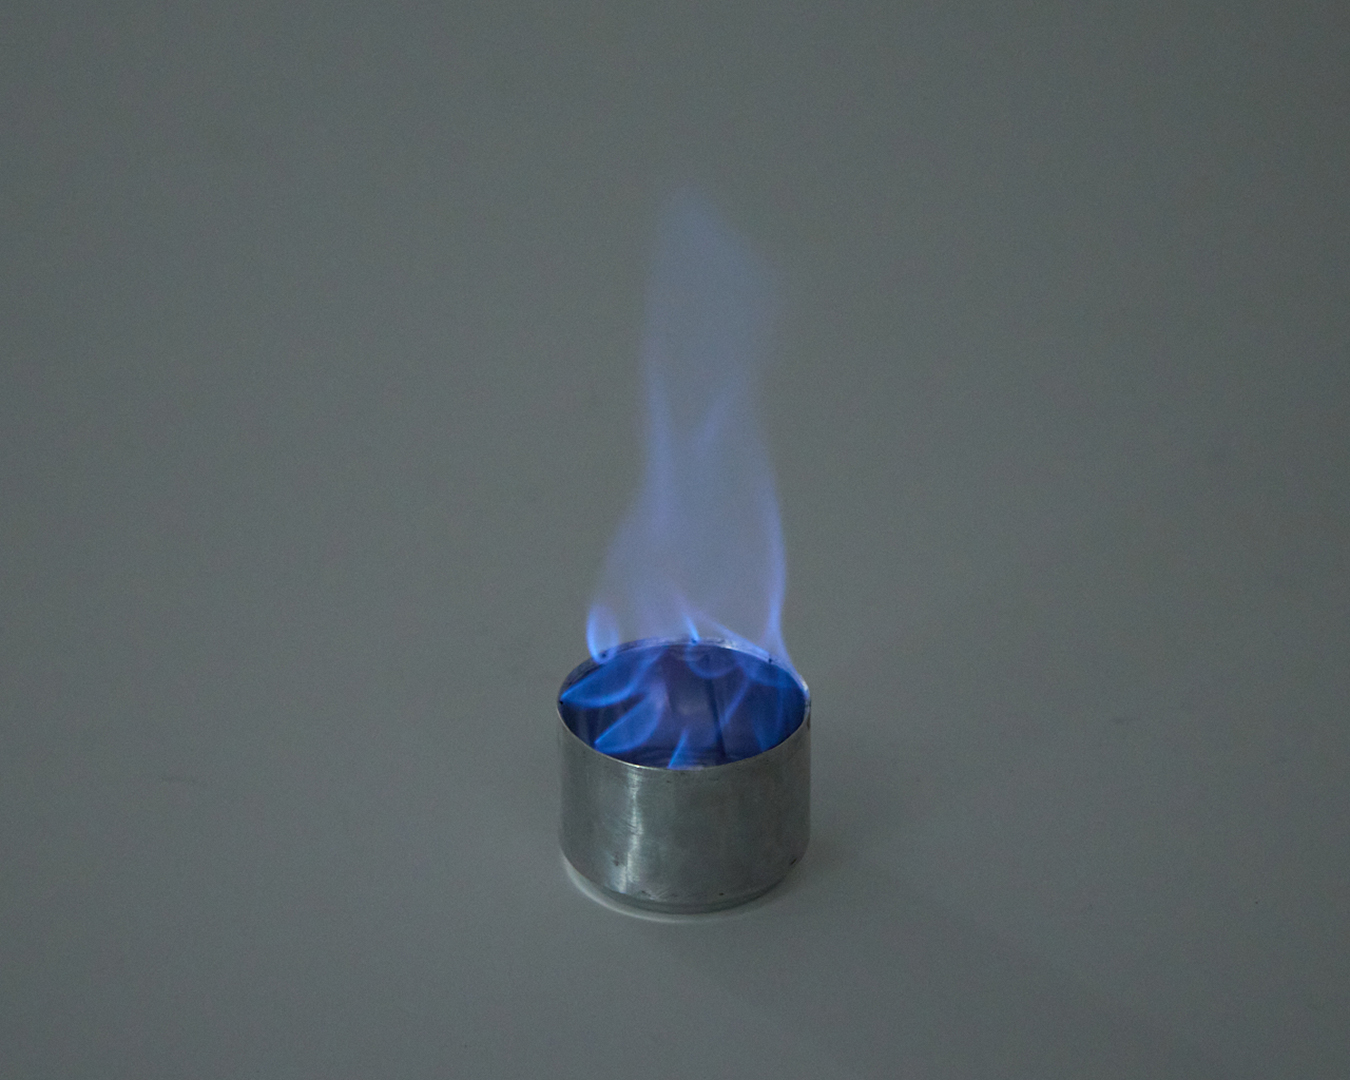
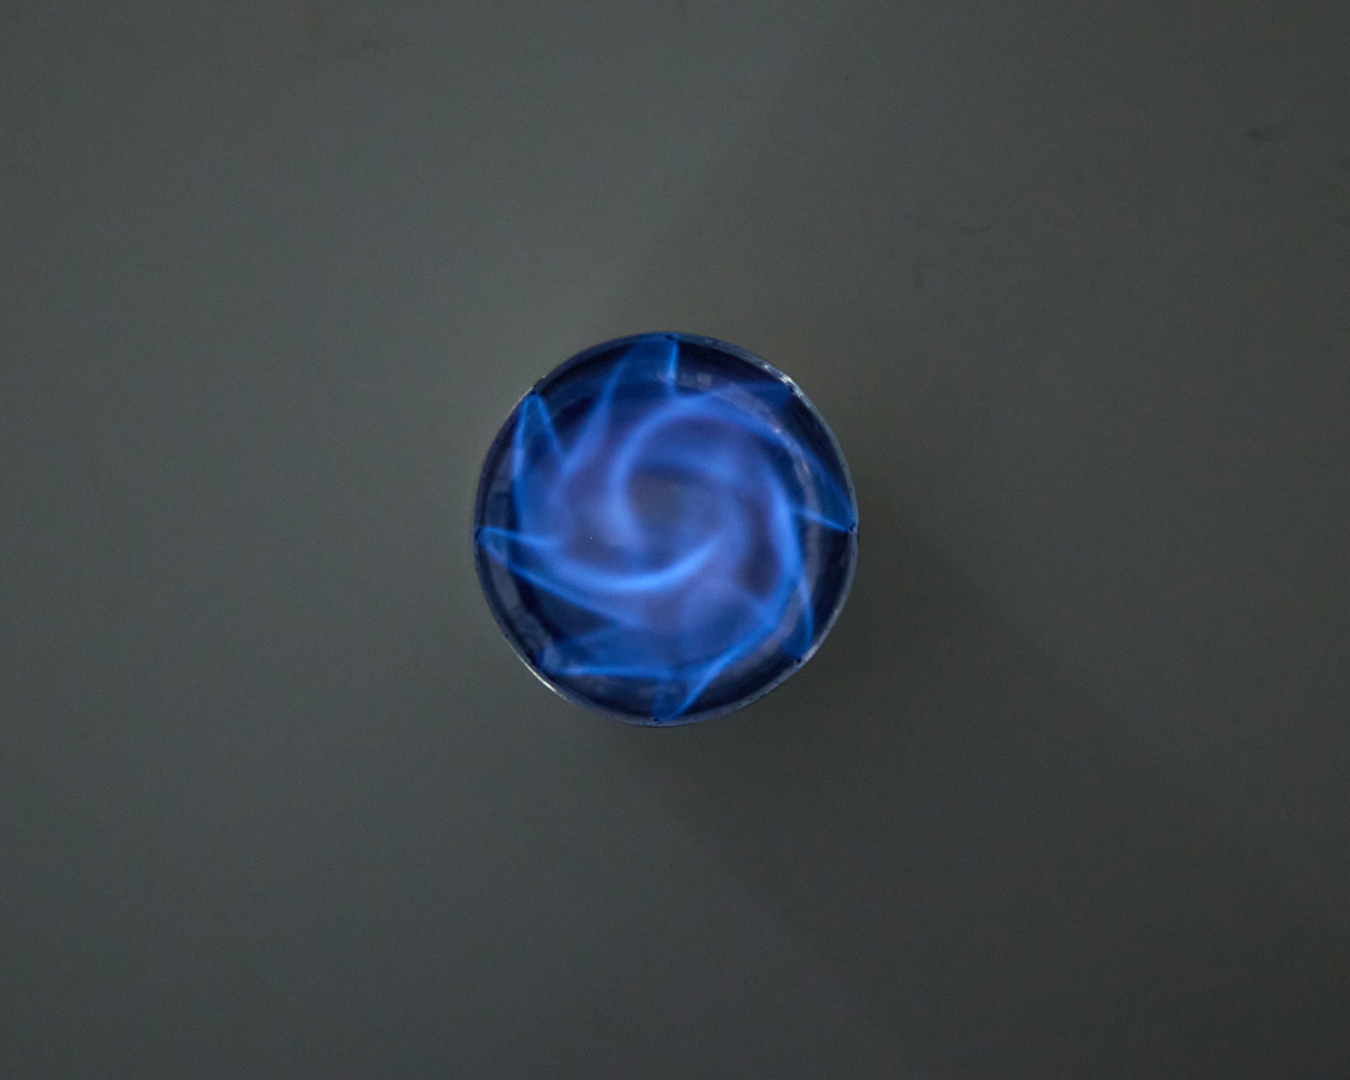
The flames spiral upward from the center like a cyclone.
Most hikers only need to boil enough water for a meal. At some point, many of us have tried getting by with nothing more than a mug, which has a small base. If the flames spread outward beyond the bottom, the heat gets wasted. JSB’s idea of directing the flames inward improved the setup’s combustion efficiency.
JSB arranged the jet holes so the flames rose in a swirling inward-facing “cyclone combustion” pattern. It took extensive experimenting with the spacing and angle of the jet holes to maximize heating efficiency.
In the late 2000s, JSB and Junichi Takahashi of Freelight were both building experimental prototypes of this type and sharing their results with each other. You see some similarities in the TOAKS Titanium Alcohol Stove, though it’s not a capillary hoop stove.
Since then, alcohol stove advancements have stagnated.
Later, outdoor gear manufacturers introduced open-jet aluminum-can stoves paired with pot supports or lightweight titanium models (Evernew’s Ti Alcohol Stove is one example), types that became the industry standard. The focus had shifted to refining existing designs and making the stoves easier to use, rather than exploring new concepts.
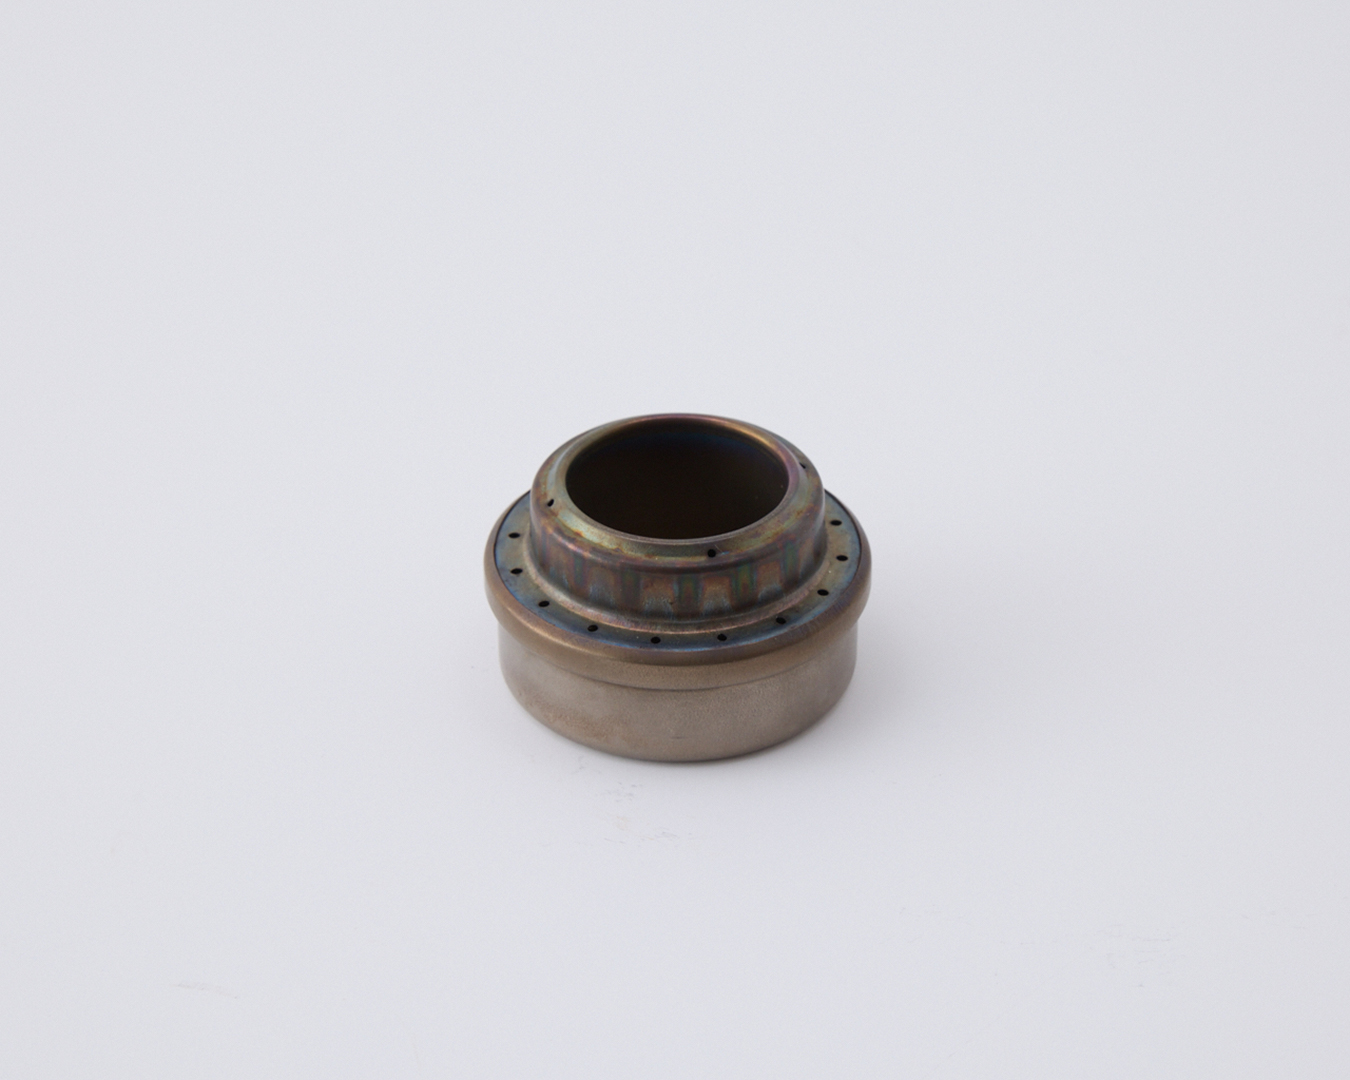
Evernew’s Ti Alcohol Stove.
Recently, small garage manufacturers have been at the forefront, combining existing alcohol stove designs or blending various features. There’s also been a revival of classic designs as a new generation has grown attached to alcohol stoves.
Evernew’s Blue Note Stove boils water
Examples of optimized alcohol stove designs abound. Take Evernew’s Blue Note Stove.
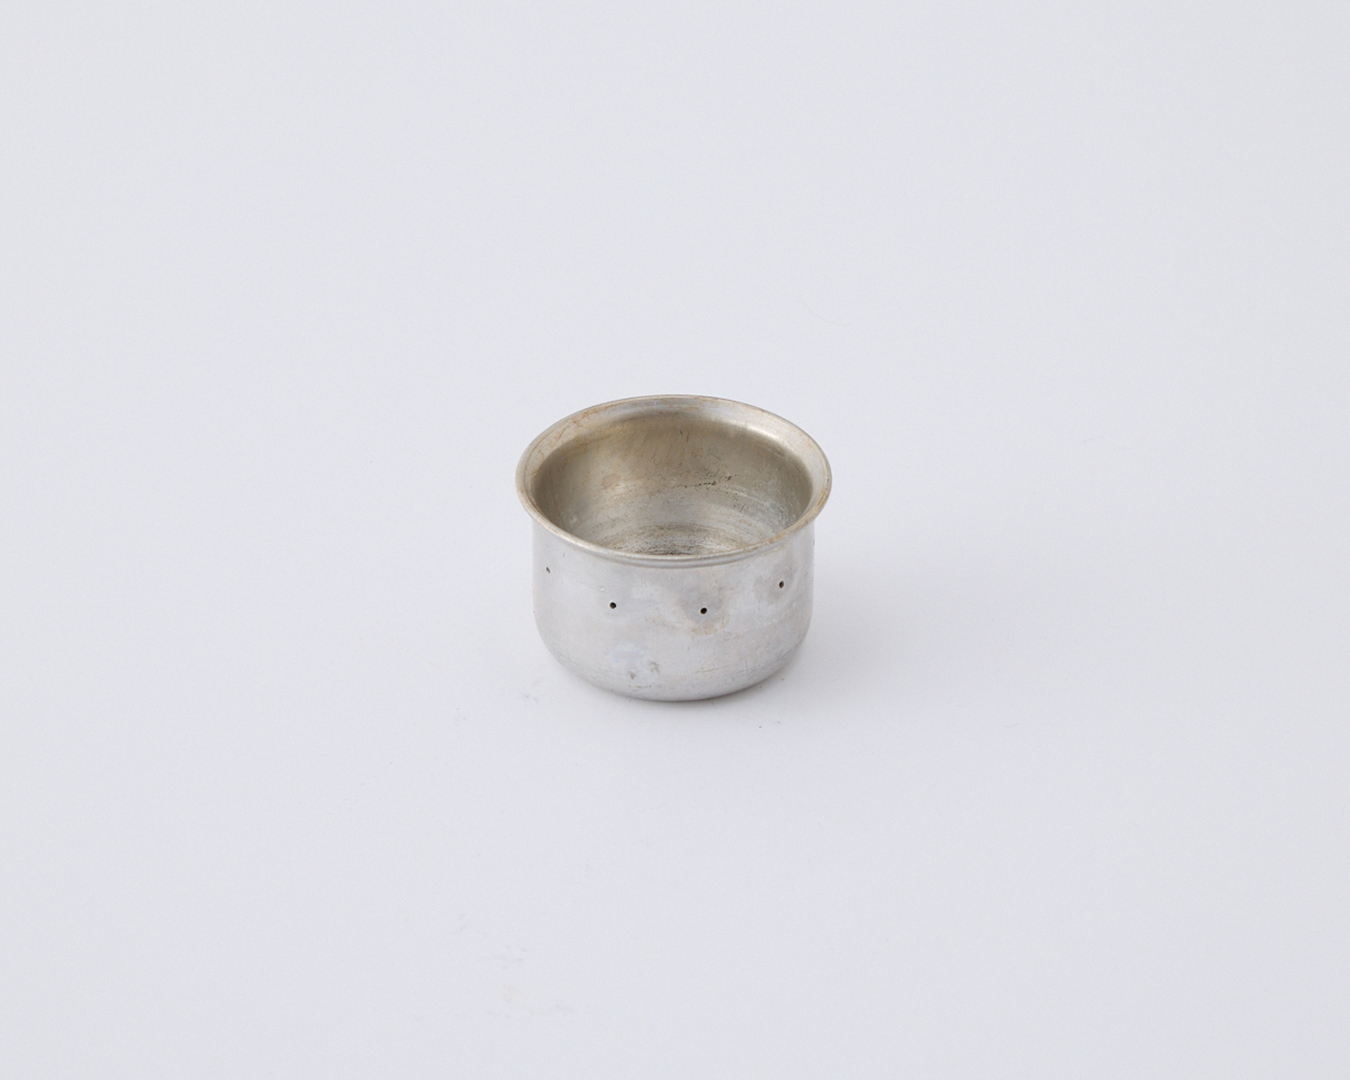
Evernew’s Blue Note Stove.
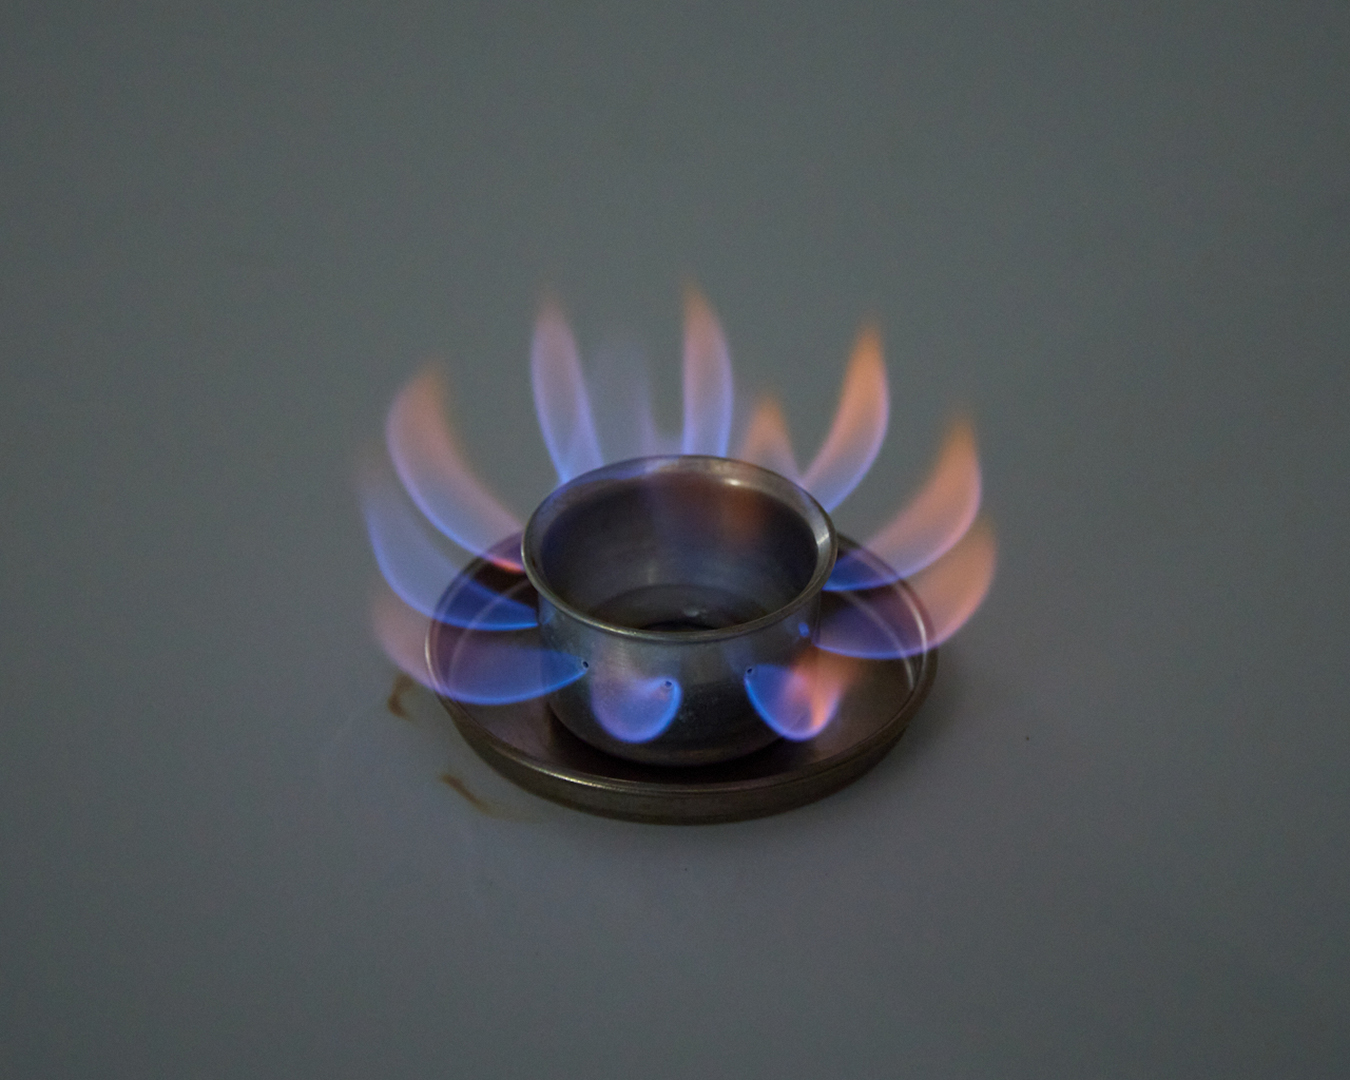
When lit, the stove’s flame has a distinctive flower-like pattern. A pot can be placed directly on the stove without a separate pot support.
The Blue Note Stove has one purpose: boiling 300 milliliters of water. Its design maximizes fuel efficiency for the task, without the need for a pot support. With 300 milliliters of water, you can make ramen or a cup of coffee. While it’s not groundbreaking, it does the job.
Ultralight hiking has always occupied a niche. It’s a mountaineering counterculture, not the mainstream, and the alcohol stove, in its many forms and iterations and innovative advances and false starts, perfectly represents the ultralight mindset.
I’d love to see more. I believe stoves can still evolve. The Blue Note Stove shows one way of doing that, albeit narrowly. Maybe someone will develop a specialized alcohol stove that’s solely for cooking rice.
Solid-fuel stoves
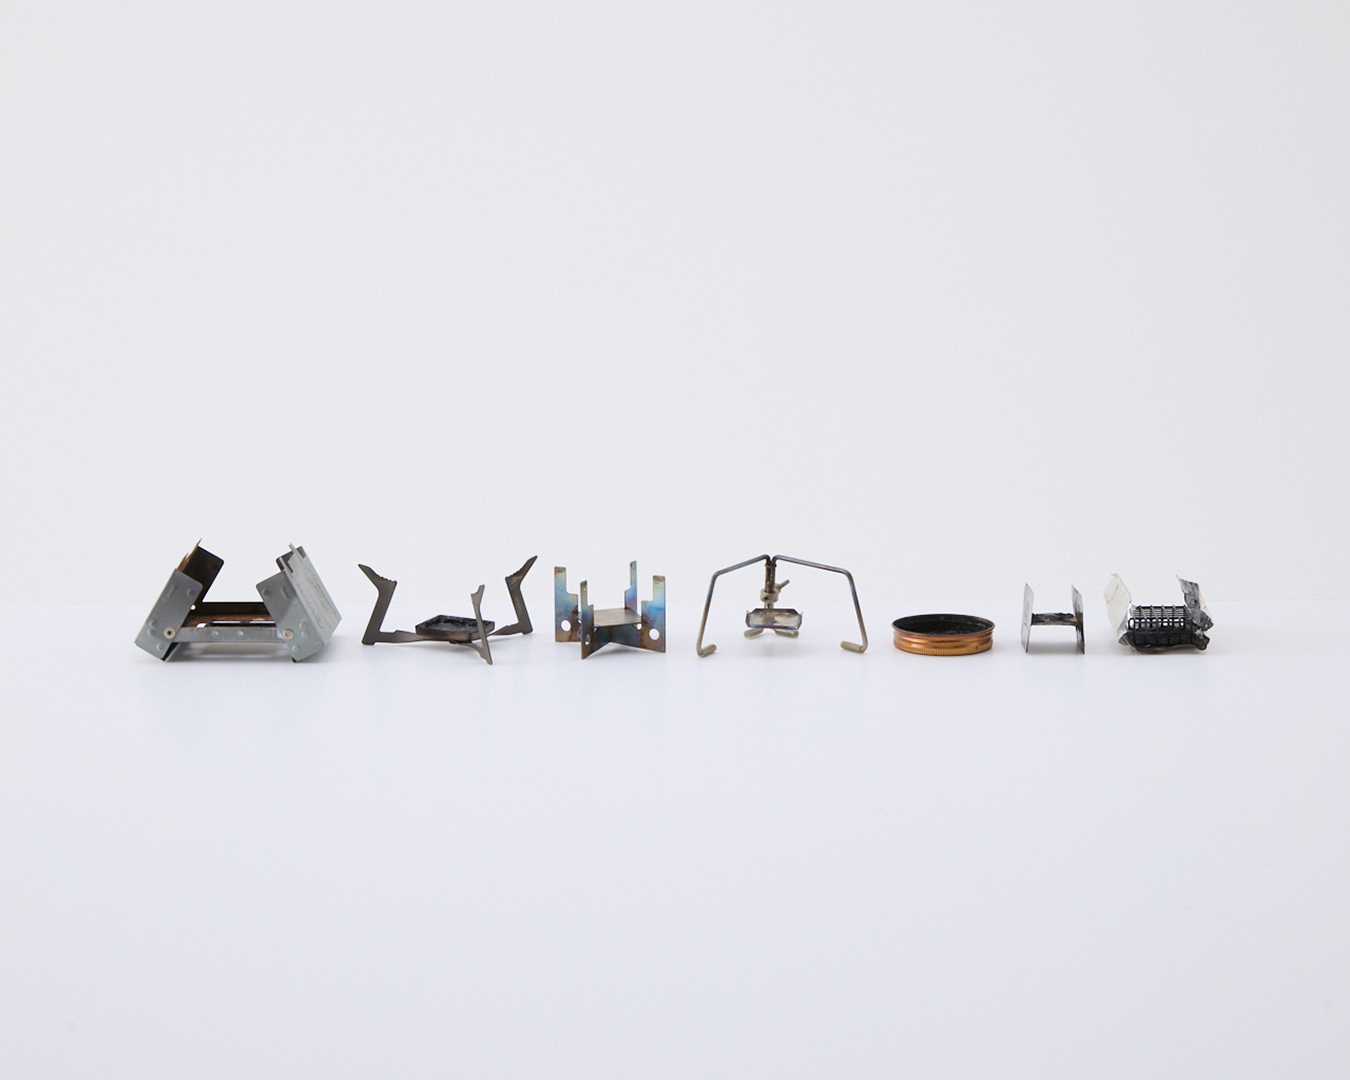
Next, let’s look at solid-fuel stoves.
I’ve always been more of a solid-fuel stove user than an alcohol stove user. Mention solid-fuel stoves, and people think of Esbit’s Pocket Stove Standard, with its distinctive folding design.
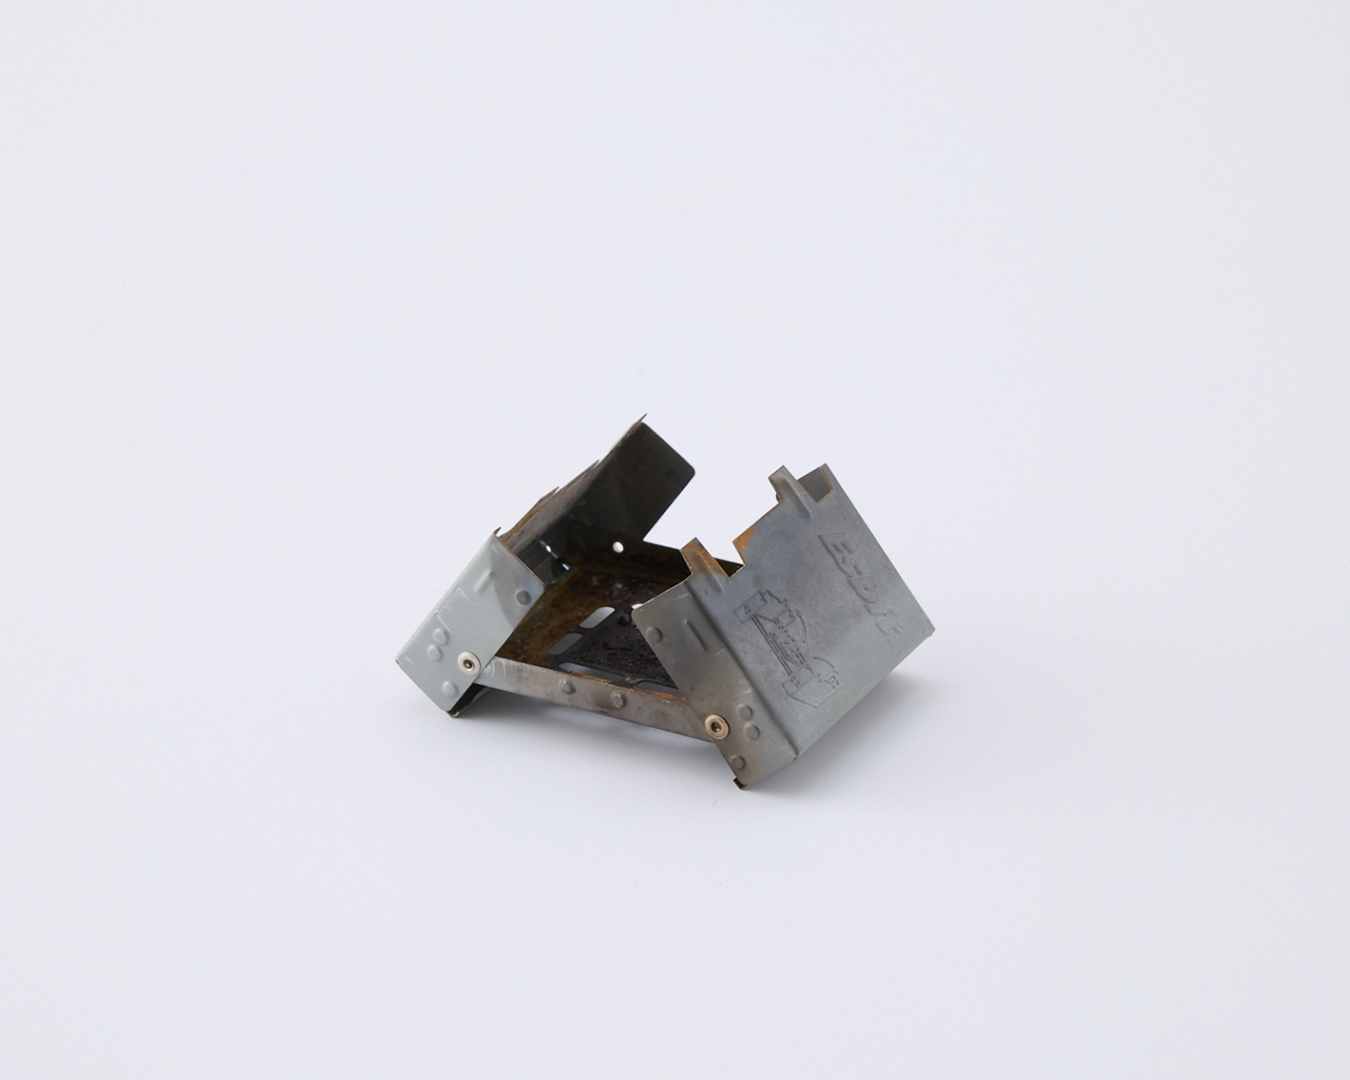
Esbit’s Pocket Stove Standard. Esbit solid-fuel tablets can be stored inside the stove together with their packaging.
I’ve been using solid fuel for more than thirty years, ever since I was a student. I have cooked rice and made ramen with it.
But what really shocked me was FireLite’s three-legged Titanium Wing Stove. It looked like an insect. I first spotted it on the Backpacking Light website, which was started in the early 2000s by Ryan Jordan, one of the leading figures in ultralight hiking. (The website featured gear reviews, hiking reports, and an active discussion forum, and also produced its own original products.)
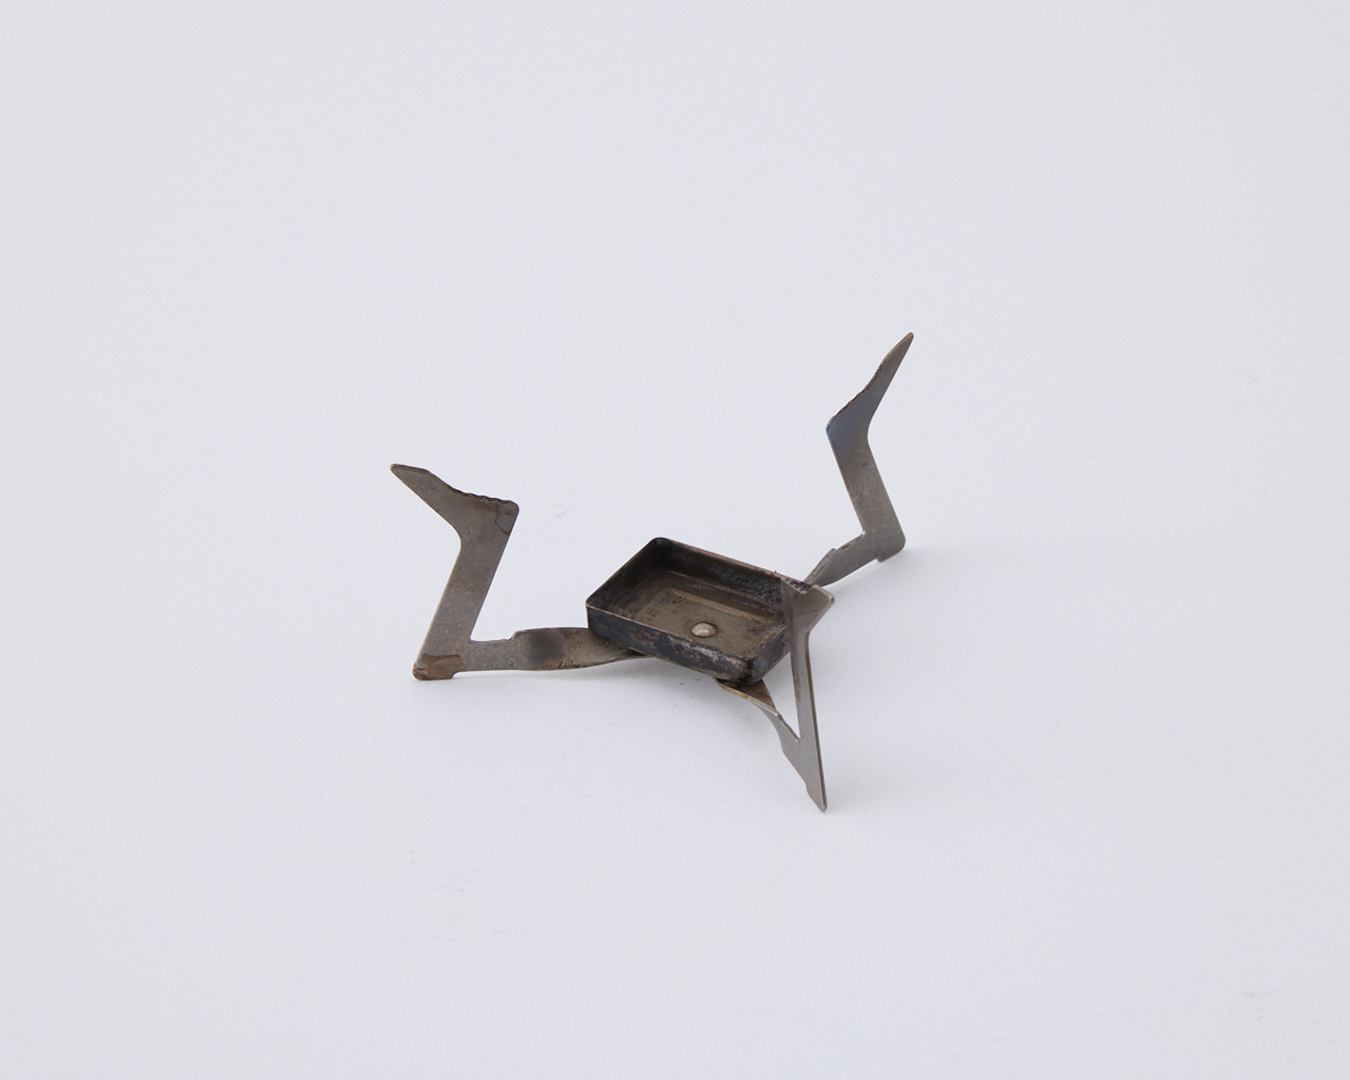
FireLite’s Titanium Wing Stove weighs just 13 grams.
Today, Esbit sells a foldable titanium stove that’s identical to Firelight’s Titanium Wing Stove and is even manufactured at the same factory.
For me, the solid-fuel stove is a potent symbol of ultralight hiking. Of course, there are things you could criticize. You might wonder: What happens if the riveted joints loosen and come apart? Or: Since it’s easy for a small pot to tip over, do you have to place your cookware on the stand carefully?
I took the foldable solid-fuel stove and a Snow Peak Titanium Single Mug 450 when I walked the 340-kilometer (211-mile) John Muir Trail (JMT), and it was enough. The experience taught me how to figure out what’s enough. In the past, I’d used gasoline and other stoves. It wasn’t until I used my foldable solid-fuel stove that I understood that I’d found what I needed.
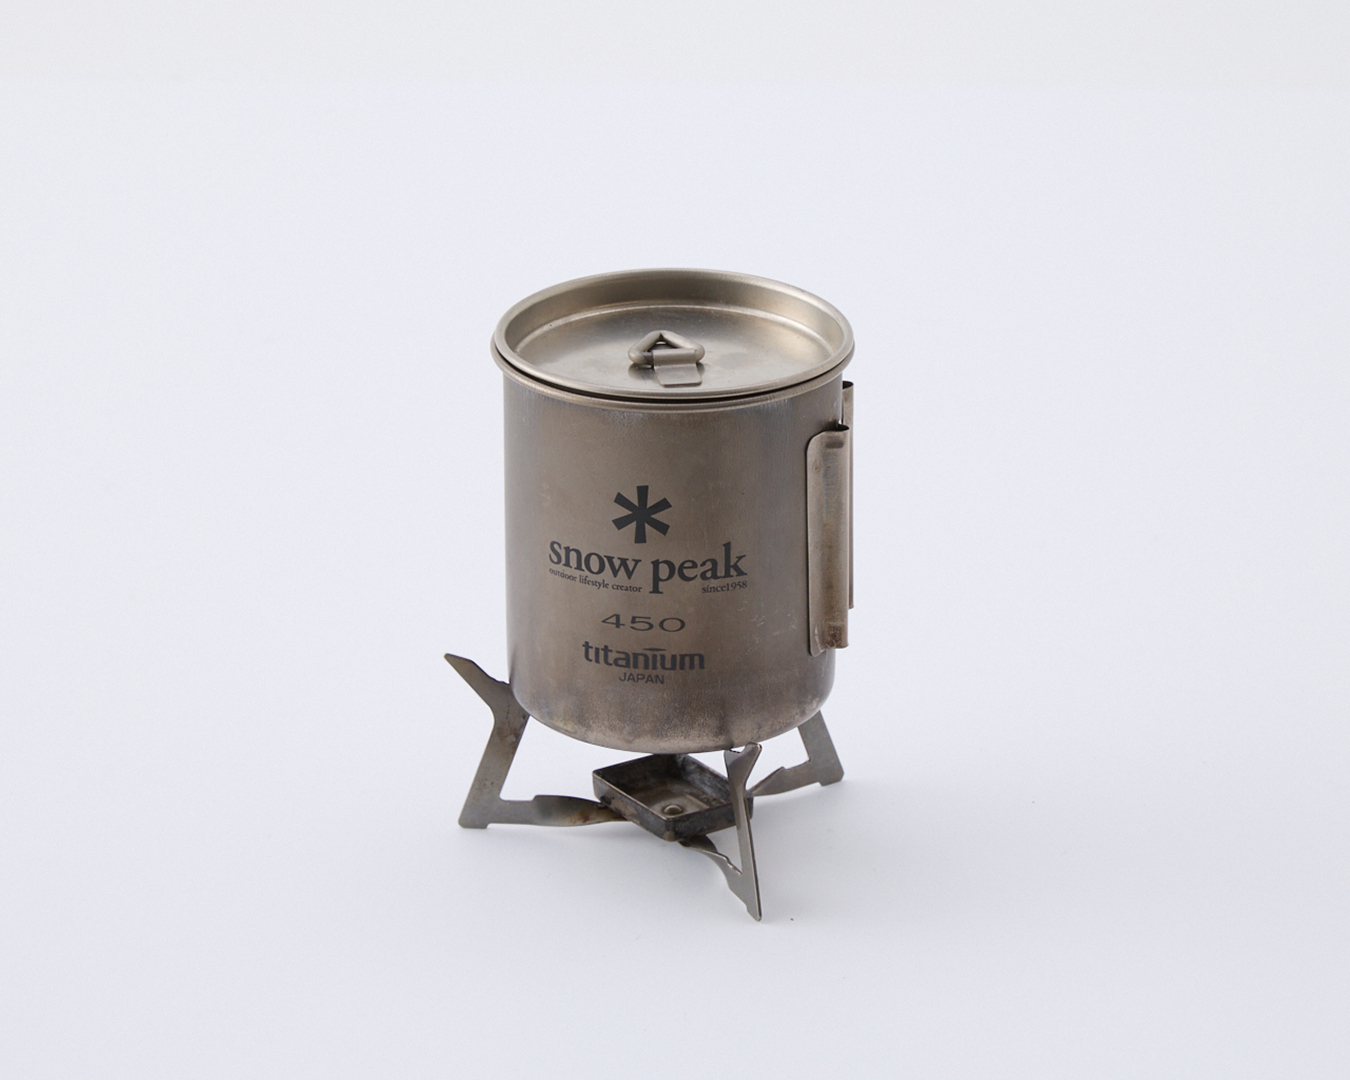
Tomoyoshi Tsuchiya’s JMT cooking setup. At a time when compact lightweight cookware was still uncommon, Snow Peak’s 450 cc titanium mug was an iconic ultralight item. To save weight, Tsuchiya removed the handle and customized it with a lid.
A solid-fuel stove is nothing more than a platform for holding a burning fuel tablet. In that sense, almost anything will do. You could even flip over the lid of a wide metal can and use that as your stove.
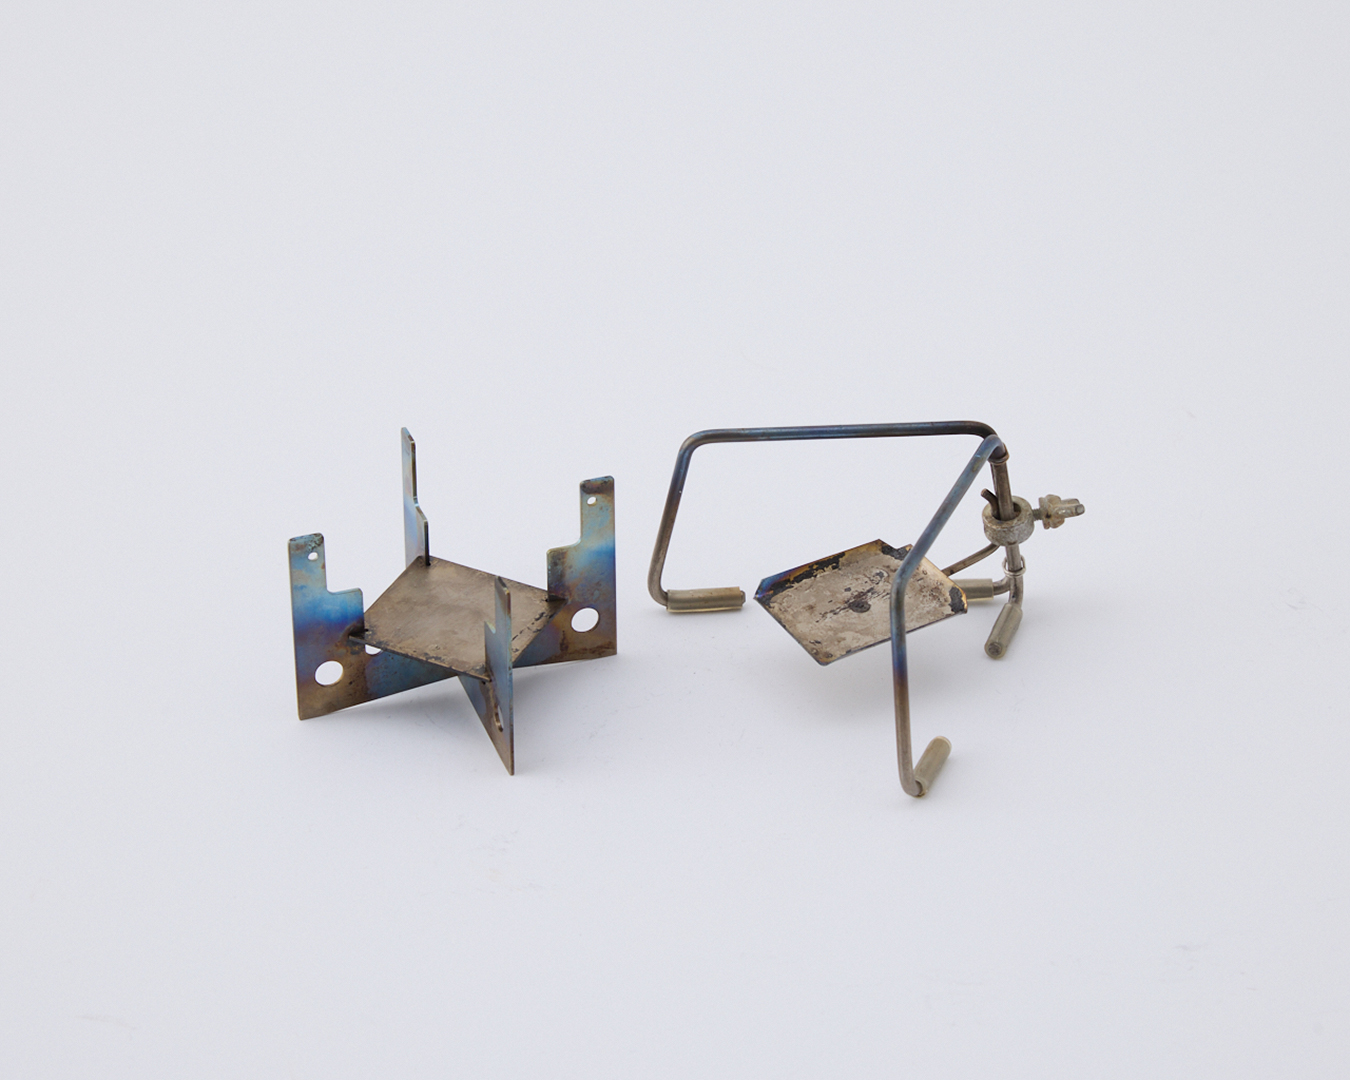
Models that combine a solid-fuel platform and pot support. The Highland Designs Quattro Stove (L) and T’s Stove Ti Solid Fuel Stove (R).
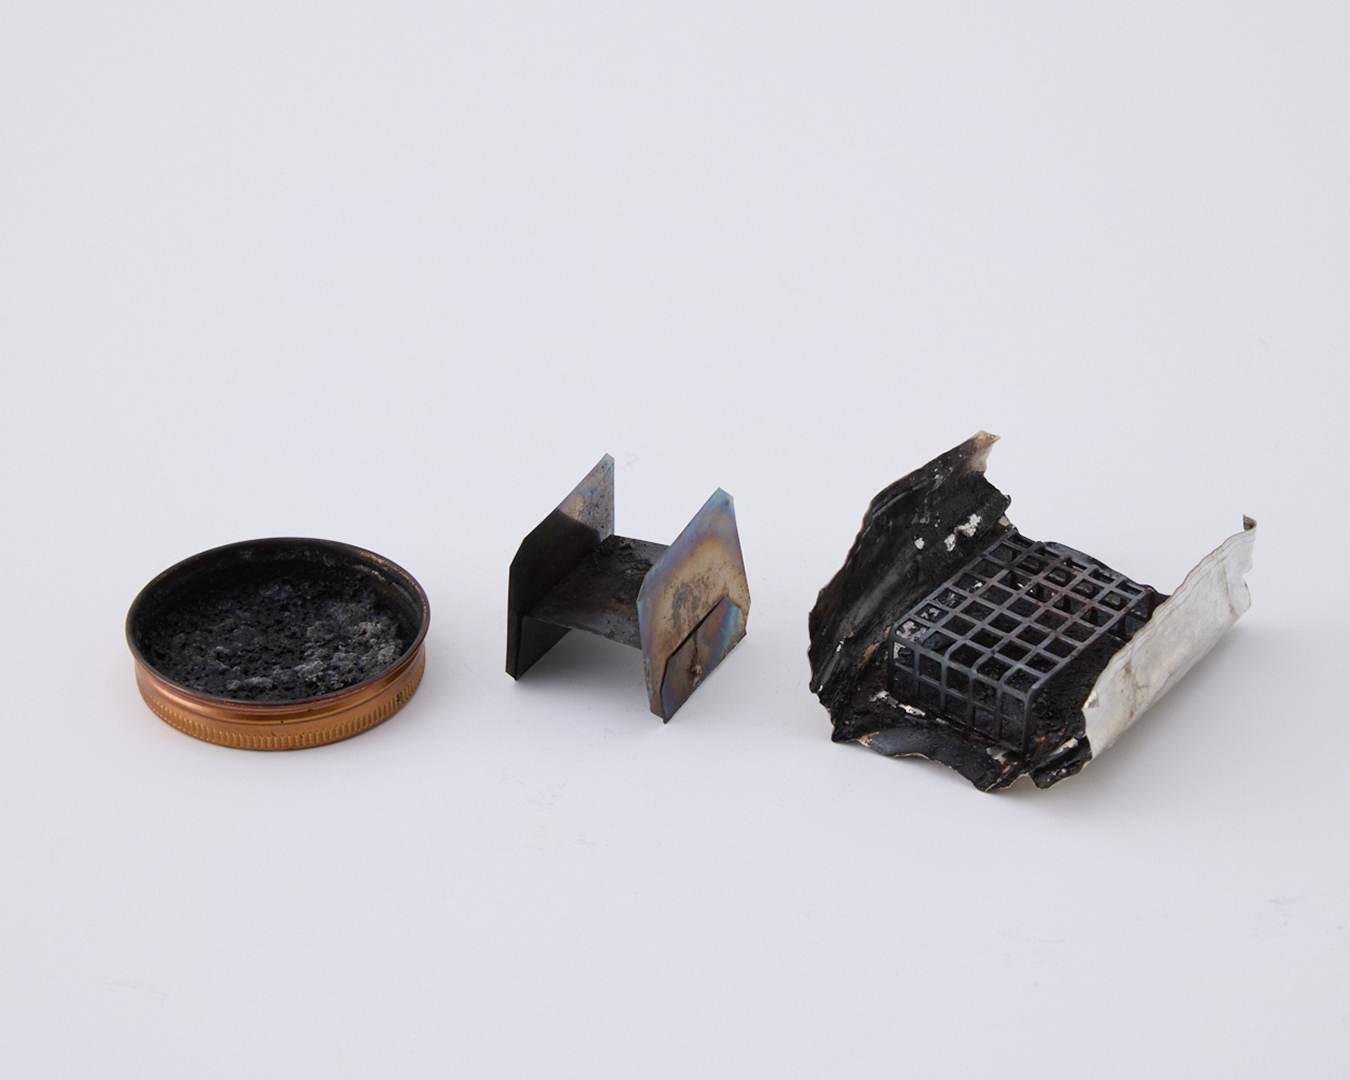
Makeshift stoves: The lid of a can (L), the Gram Cracker ultralight titanium foil platform that’s included with the Caldera Cone (C) and the Caldera Cone’s solid-fuel platform paired with heavy-duty aluminum foil.
Solid fuel types and traits
In the past, you had to choose solid fuels from U.S. military surplus tablets, Swiss Meta and Esbit. Now there’s also FireDragon. Though they’re all categorized as solid fuels, the main chemical in each one differs.
Swiss Meta is made from metaldehyde. Esbit uses hexamethylenetetramine. Meanwhile, FireDragon is solidified alcohol.
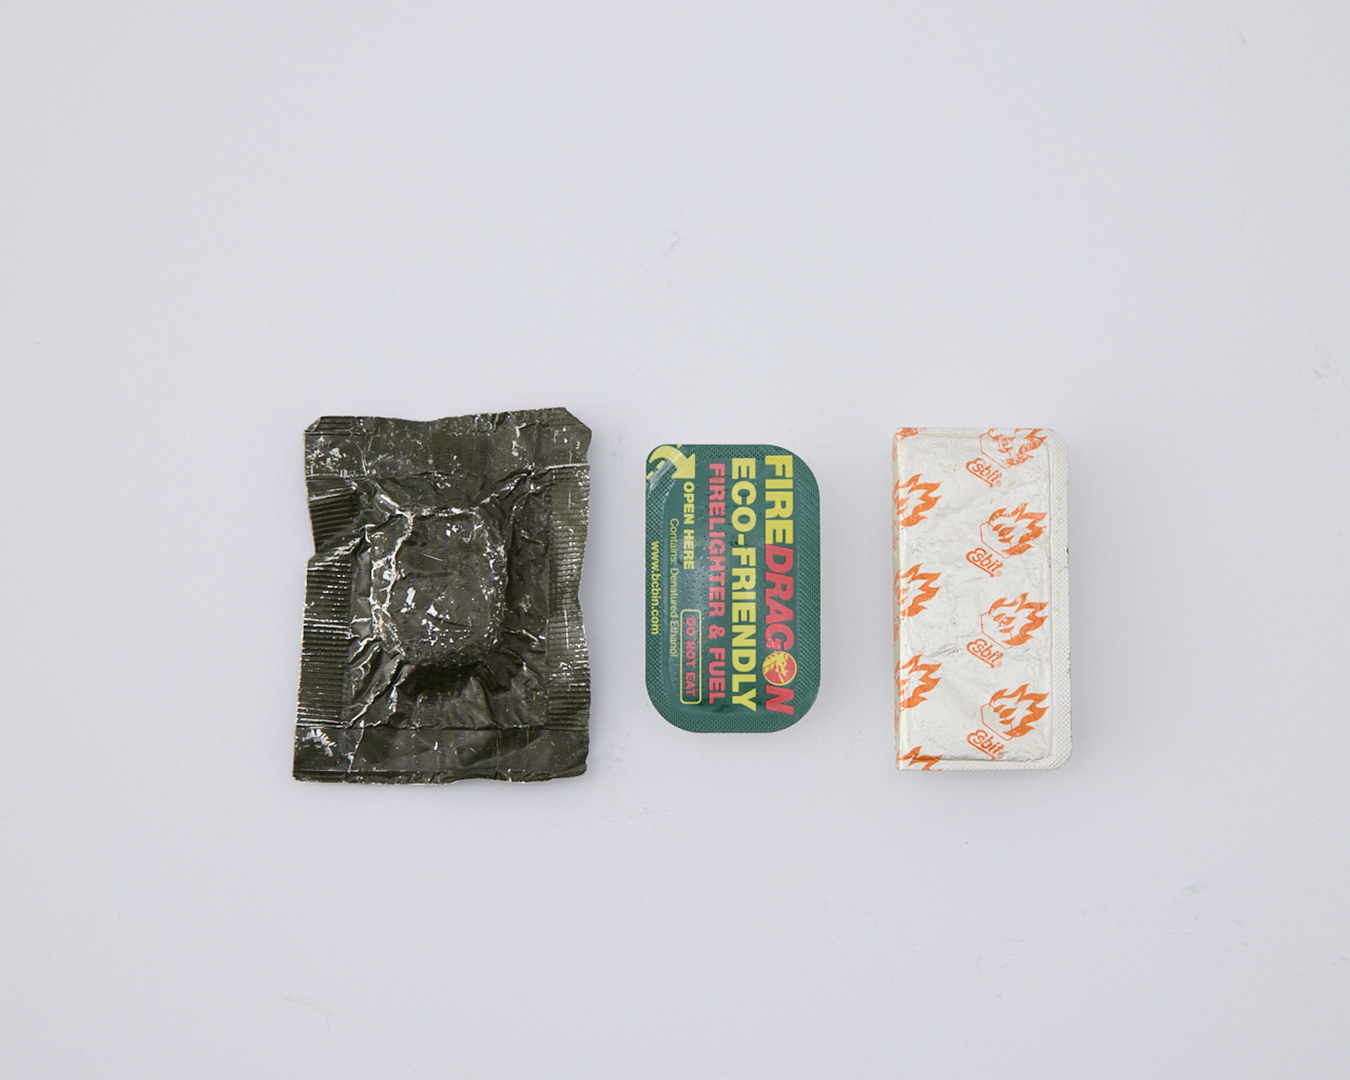
Major types of solid fuel: U.S. military surplus fuel (L), FireDragon (C) and Esbit (R).
Alcohol stoves don’t produce soot. FireDragon’s solid fuel burns cleanly but will gradually evaporate if it isn’t stored in an airtight container. After removing it from its packaging, you’ll need to carry it in a sealed container. (Partially used fuel is even trickier to keep.) You can keep each tablet in its individual wrapper, but you’ll end up carrying the throwaway packaging.
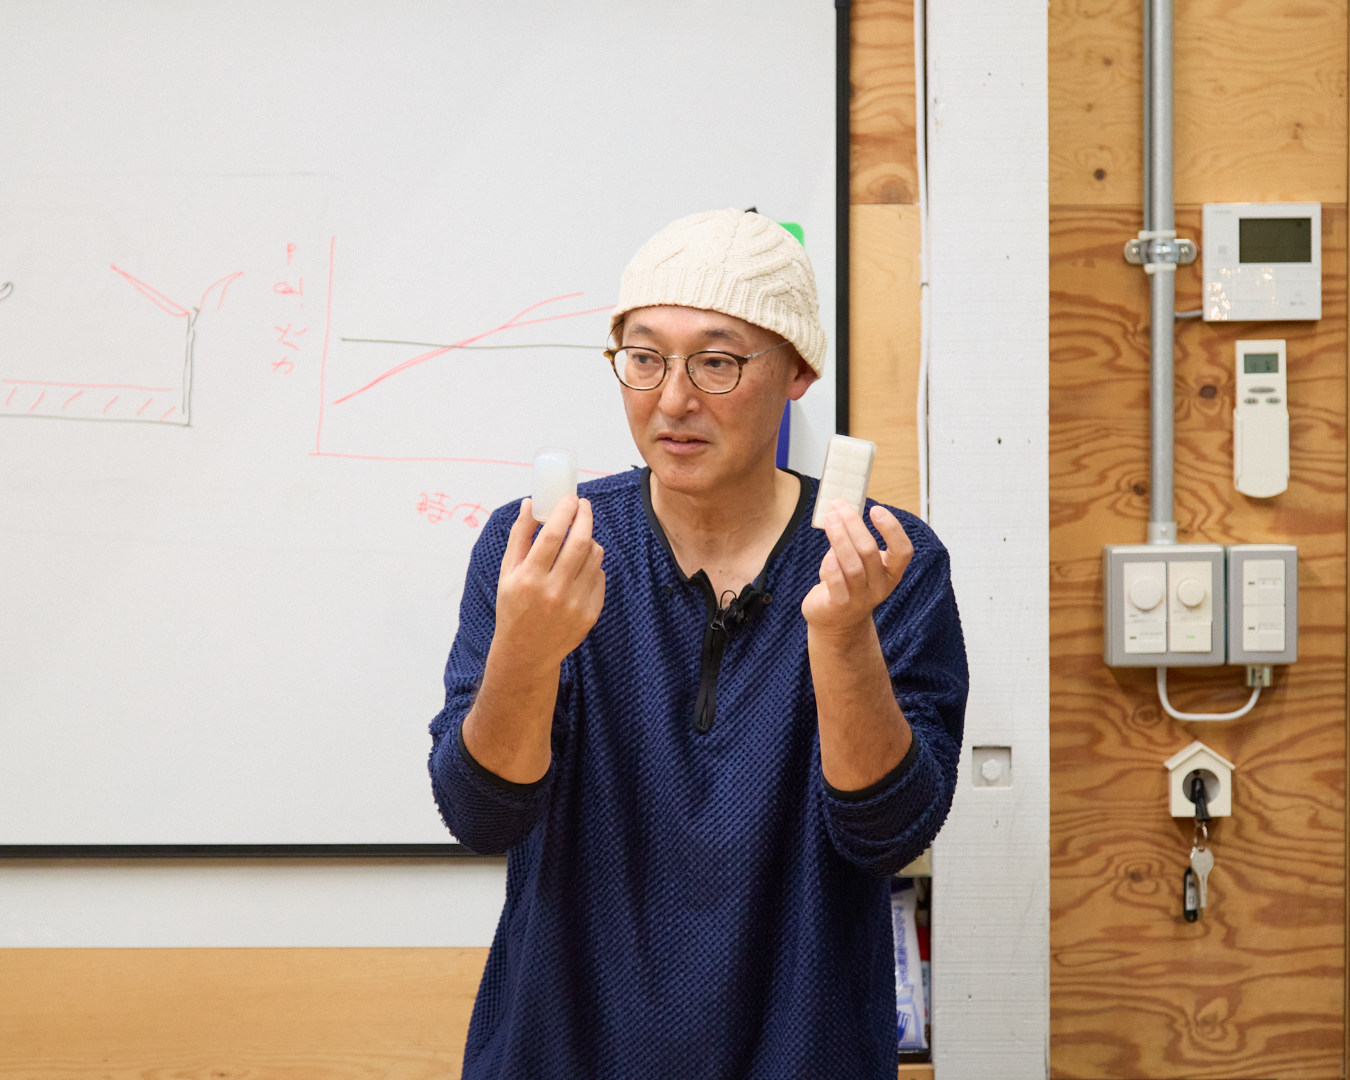
Esbit is easy to carry, even after taking it out of the packaging. It produces more heat by weight than FireDragon. But it has a drawback: Once it burns, it leaves behind soot.
On a day hike or overnight trip and you’re carrying a solid-fuel stove, any of these fuels will work well.
For me, if I’m traveling for three nights or longer, I take the Esbit fuel because of its higher heat output per gram and because the fuel itself is lighter, smaller and easier to manage.
On extended trips through remote areas ー stream climbing or coastal trekking, for instance ー where I rely on campfires for cooking and staying warm, I take the FireDragon fuel. Its advantage is that it ignites immediately, even in strong winds.
Pot supports, windscreens and combustion efficiency
For our final topic, let’s look at pot-support height and windscreen height. Sanpo’s Fun Lite Gear produces a system called the 3W Windscreen that combines a wire pot support with a titanium windscreen.
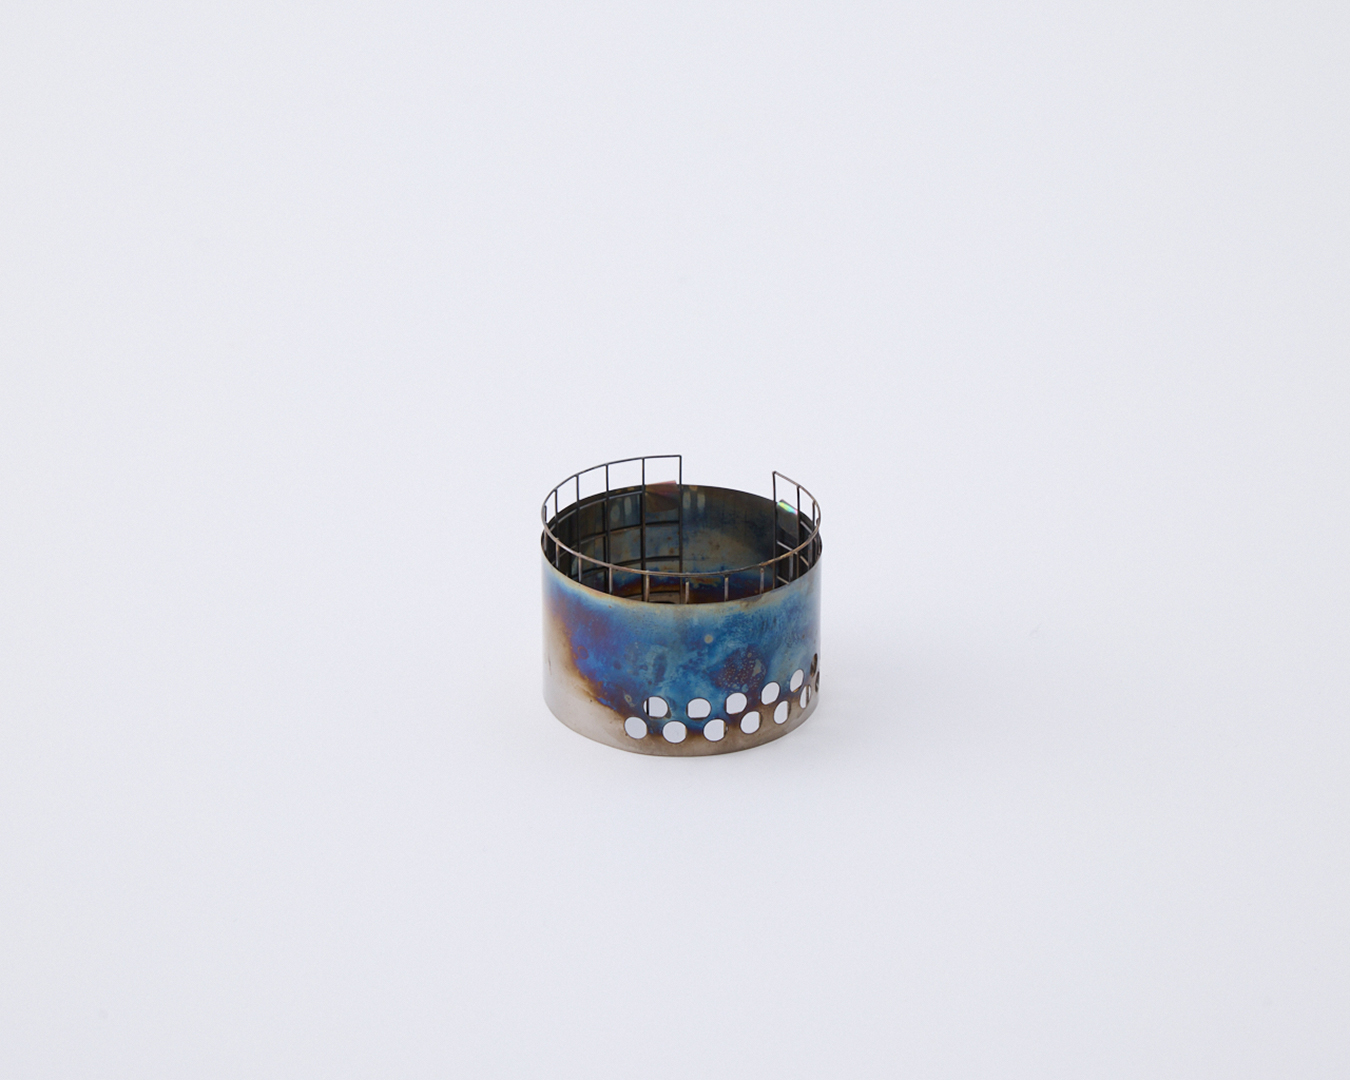
Sanpo’s Fun Lite Gear 3W Windscreen is available in two heights, 7 cm and 5 cm.
There are two versions with different heights: 7 centimeters and 5 centimeters.
If you’re using an alcohol stove, you’ll need the taller 7-centimeter windscreen. The 5-centimeter windscreen only goes up to the burner surface, resulting in poor combustion efficiency.
Alcohol stoves differ from one another, but most commercial and homemade models have their burner jets positioned at roughly the same height.
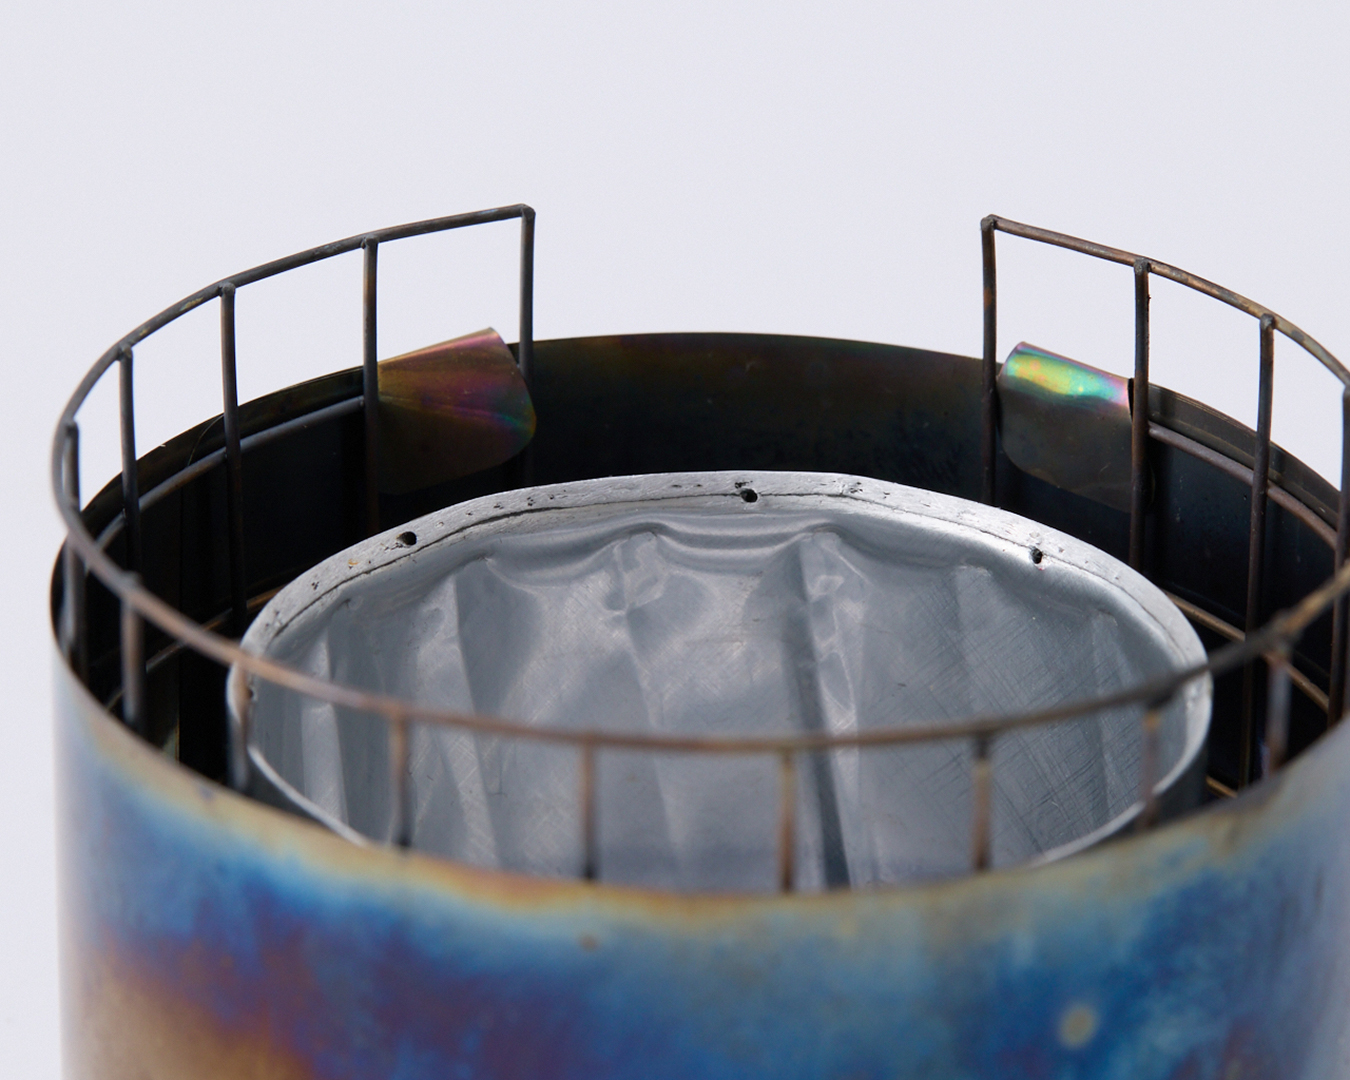
When the 5 cm version is paired with a typical alcohol stove, there is little difference in height between the burner surface and the top of the windscreen. The result: poor combustion efficiency.
By comparison, in solid-fuel stoves, the fuel sits lower. That means the flame will also be lower than that of an alcohol stove. The height of the flame is an important consideration: Your cookware should be at the hottest part ー the tip ー of the flame.
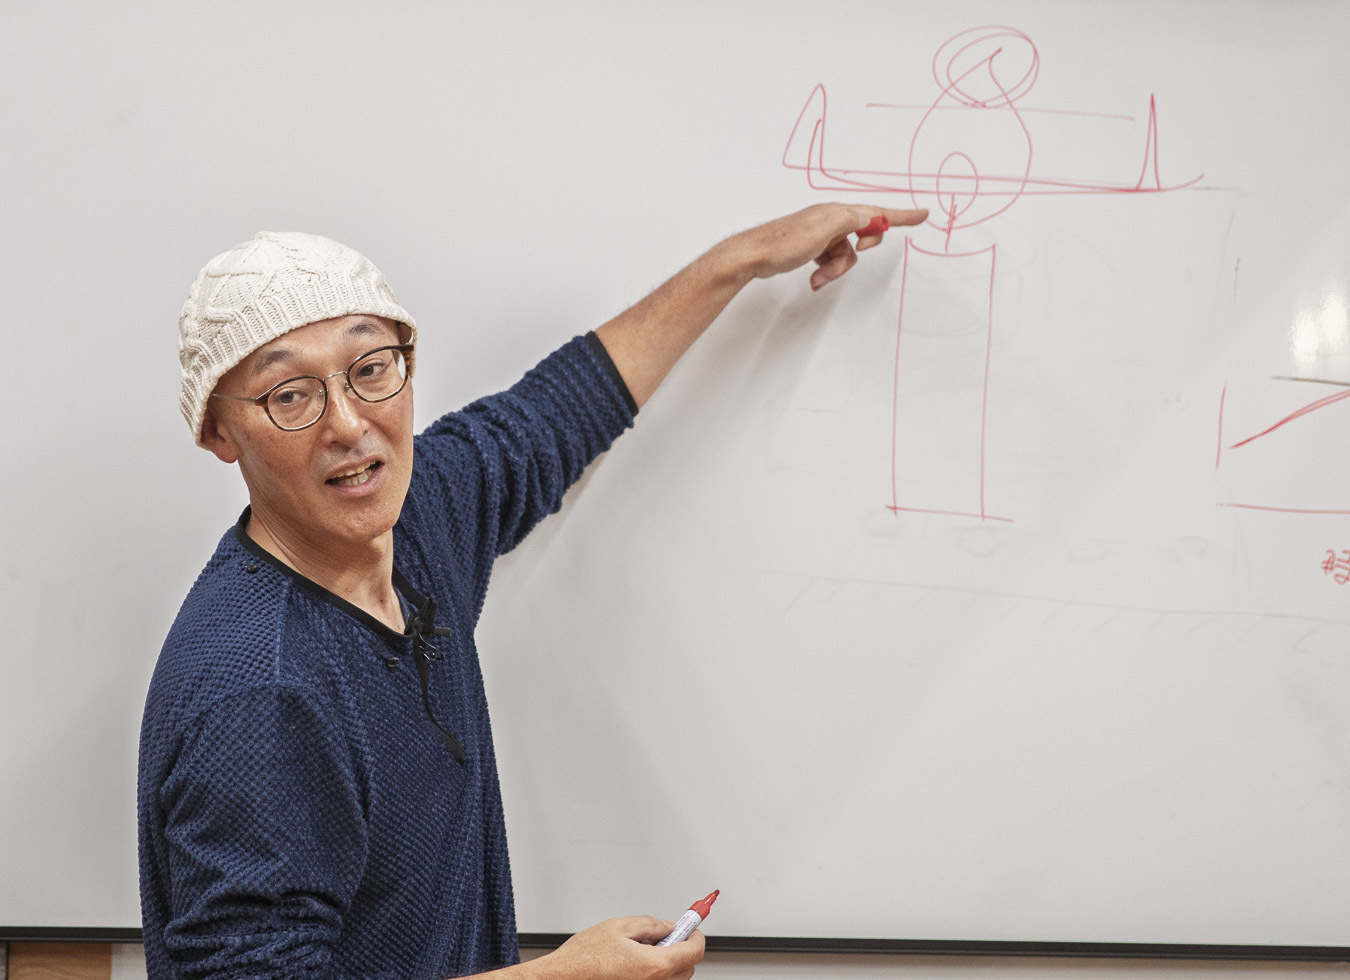
The type of fuel shouldn’t be the only consideration. You should also be meticulous about the height difference between your stove and pot support. Using a low pot support with an alcohol stove will leave your pot sitting in the lower part of the flame. Heated at a lower combustion efficiency, water will take longer to boil.
You’ll have a similar problem with a solid-fuel stove, if the pot support is too high and the tip of the flame can’t reach the bottom of the pot.
You also need to think carefully about the height of the windscreen. The photo below shows my usual setup: can-lid solid-fuel stove, 3W Windscreen (small), Snow Peak Titanium Single Mug 450. It works but my windscreen is hardly perfect.
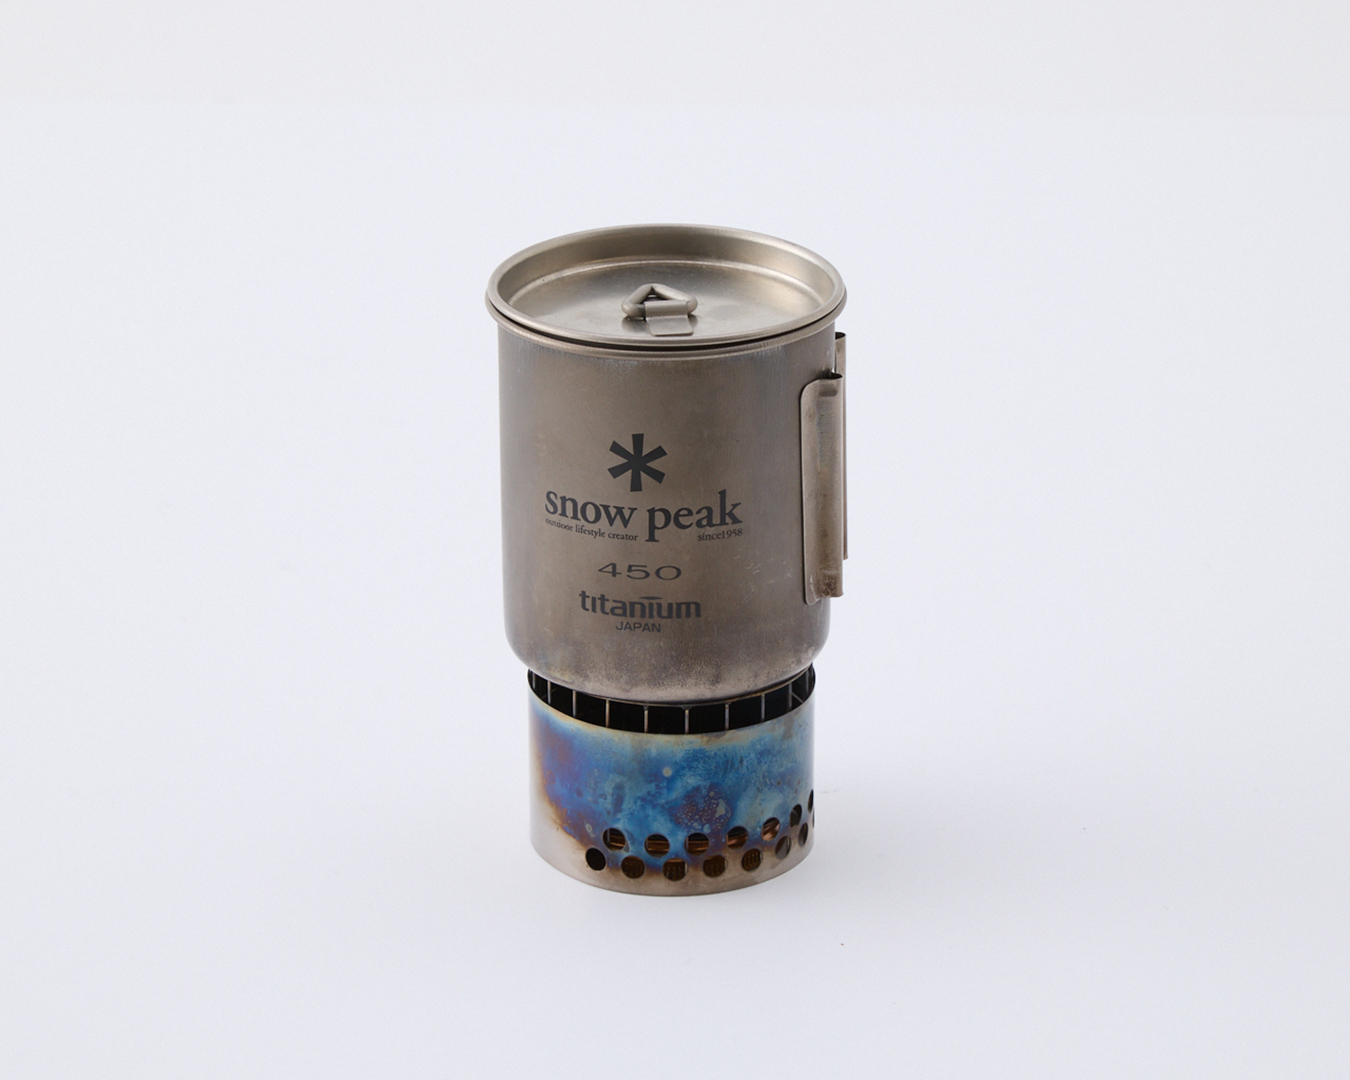
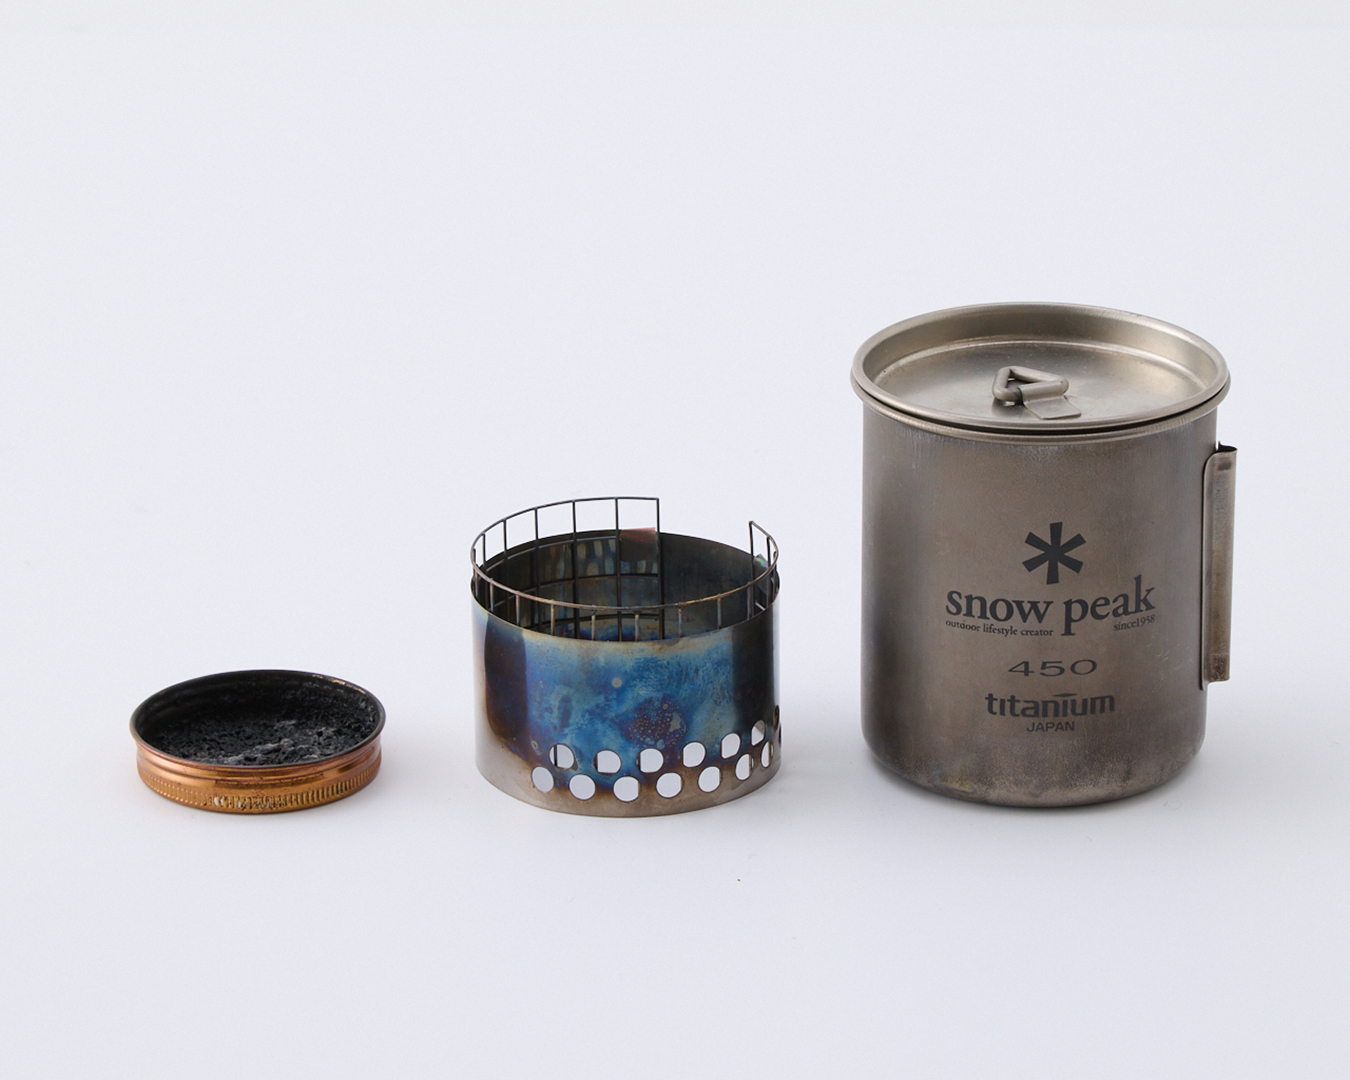
Tomoyoshi Tsuchiya’s typical stove setup: can-lid solid-fuel stove, 3W Windscreen (small) and Snow Peak Titanium Single Mug 450.
The windscreen should completely enclose the cookware and stove, the way the Caldera Cone does. This isn’t only to prevent the flame from blowing out. It also maximizes the heat that’s transferred to the pot. A windscreen improves thermal efficiency.
In places where restocking fuel isn’t possible (polar and high-elevation journeys), the windscreen helps to limit wasting precious fuel. Even powerful gasoline stoves work best with windscreens.
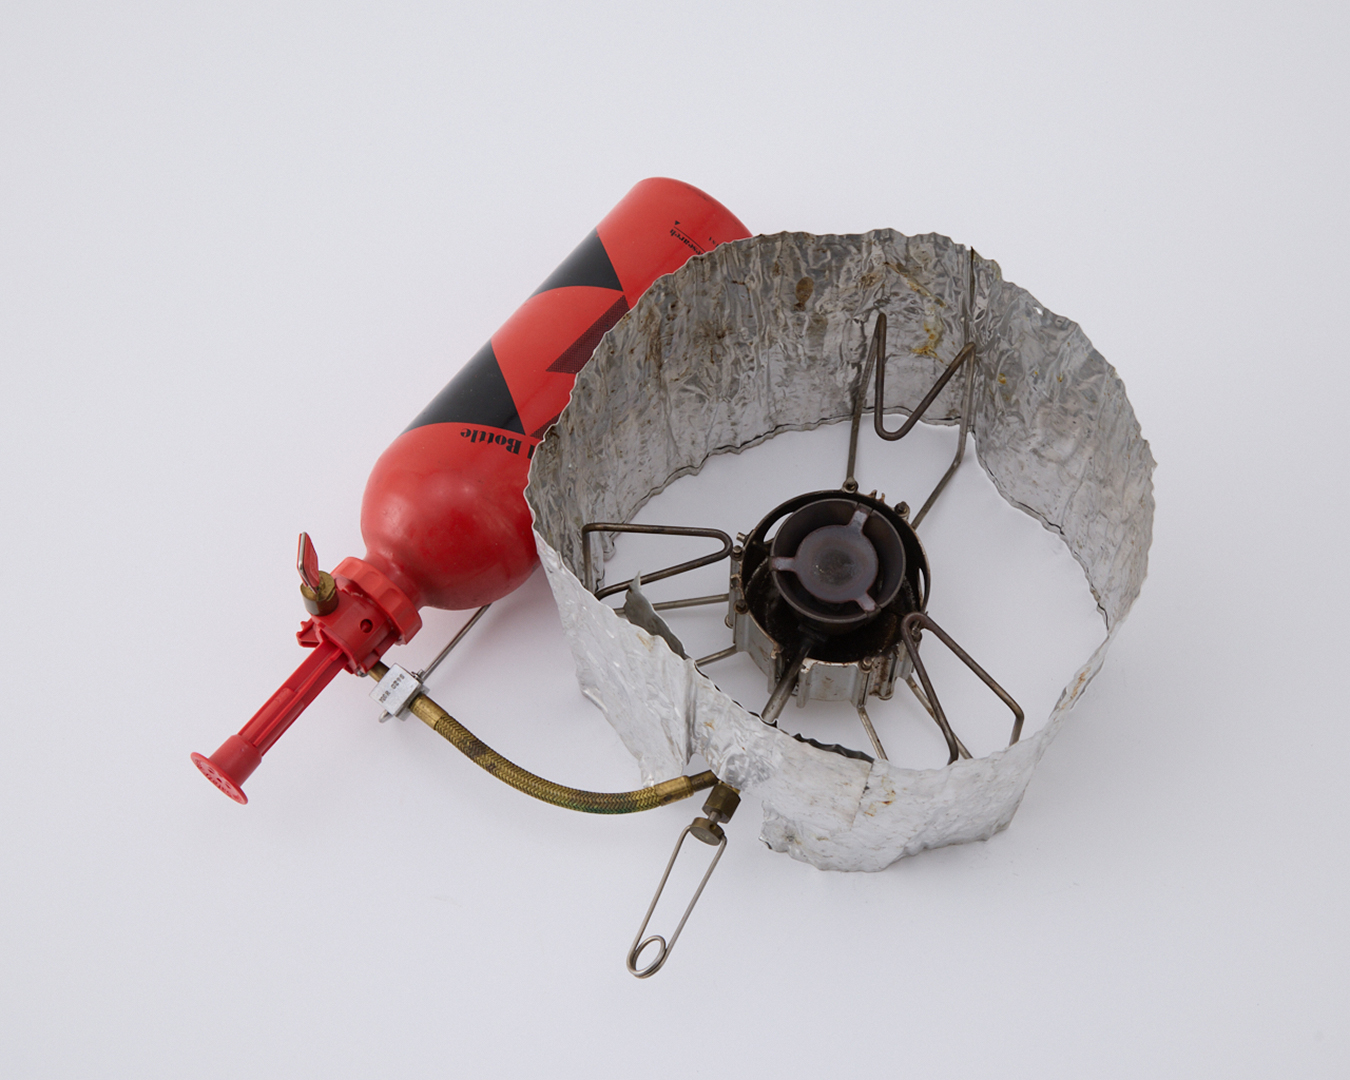
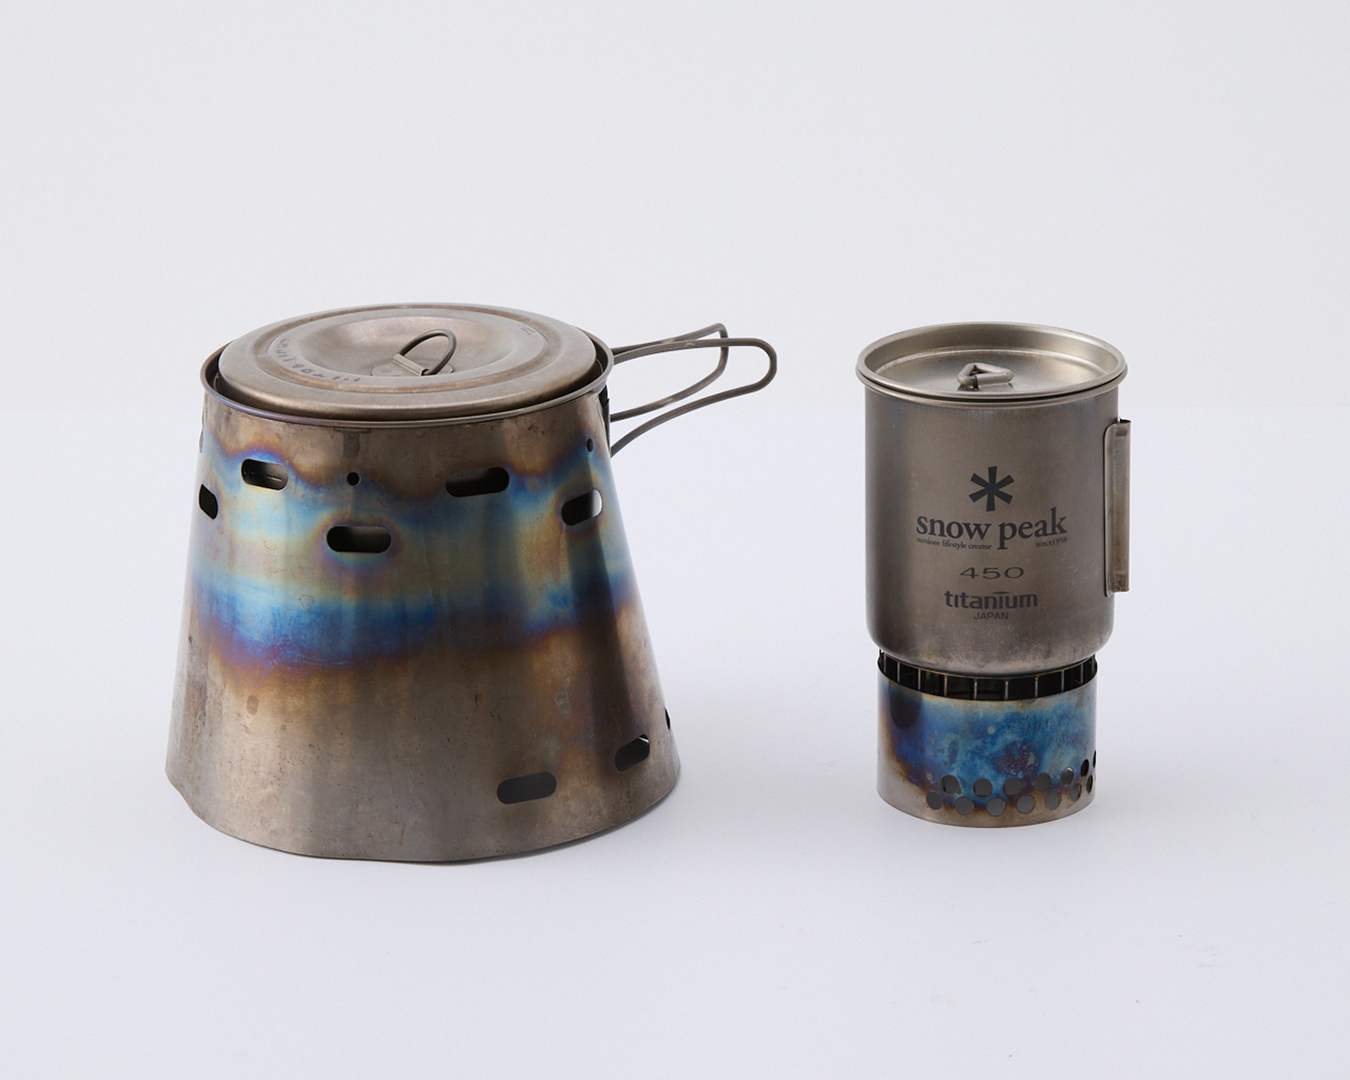
When it comes to combustion efficiency, the windscreen on the left has the advantage.
The setup on the right isn’t bad. It’s lighter, easier to nest inside your cookware and more compact for packing. But because the windscreen doesn’t enclose the pot, it’s only suitable under certain conditions.
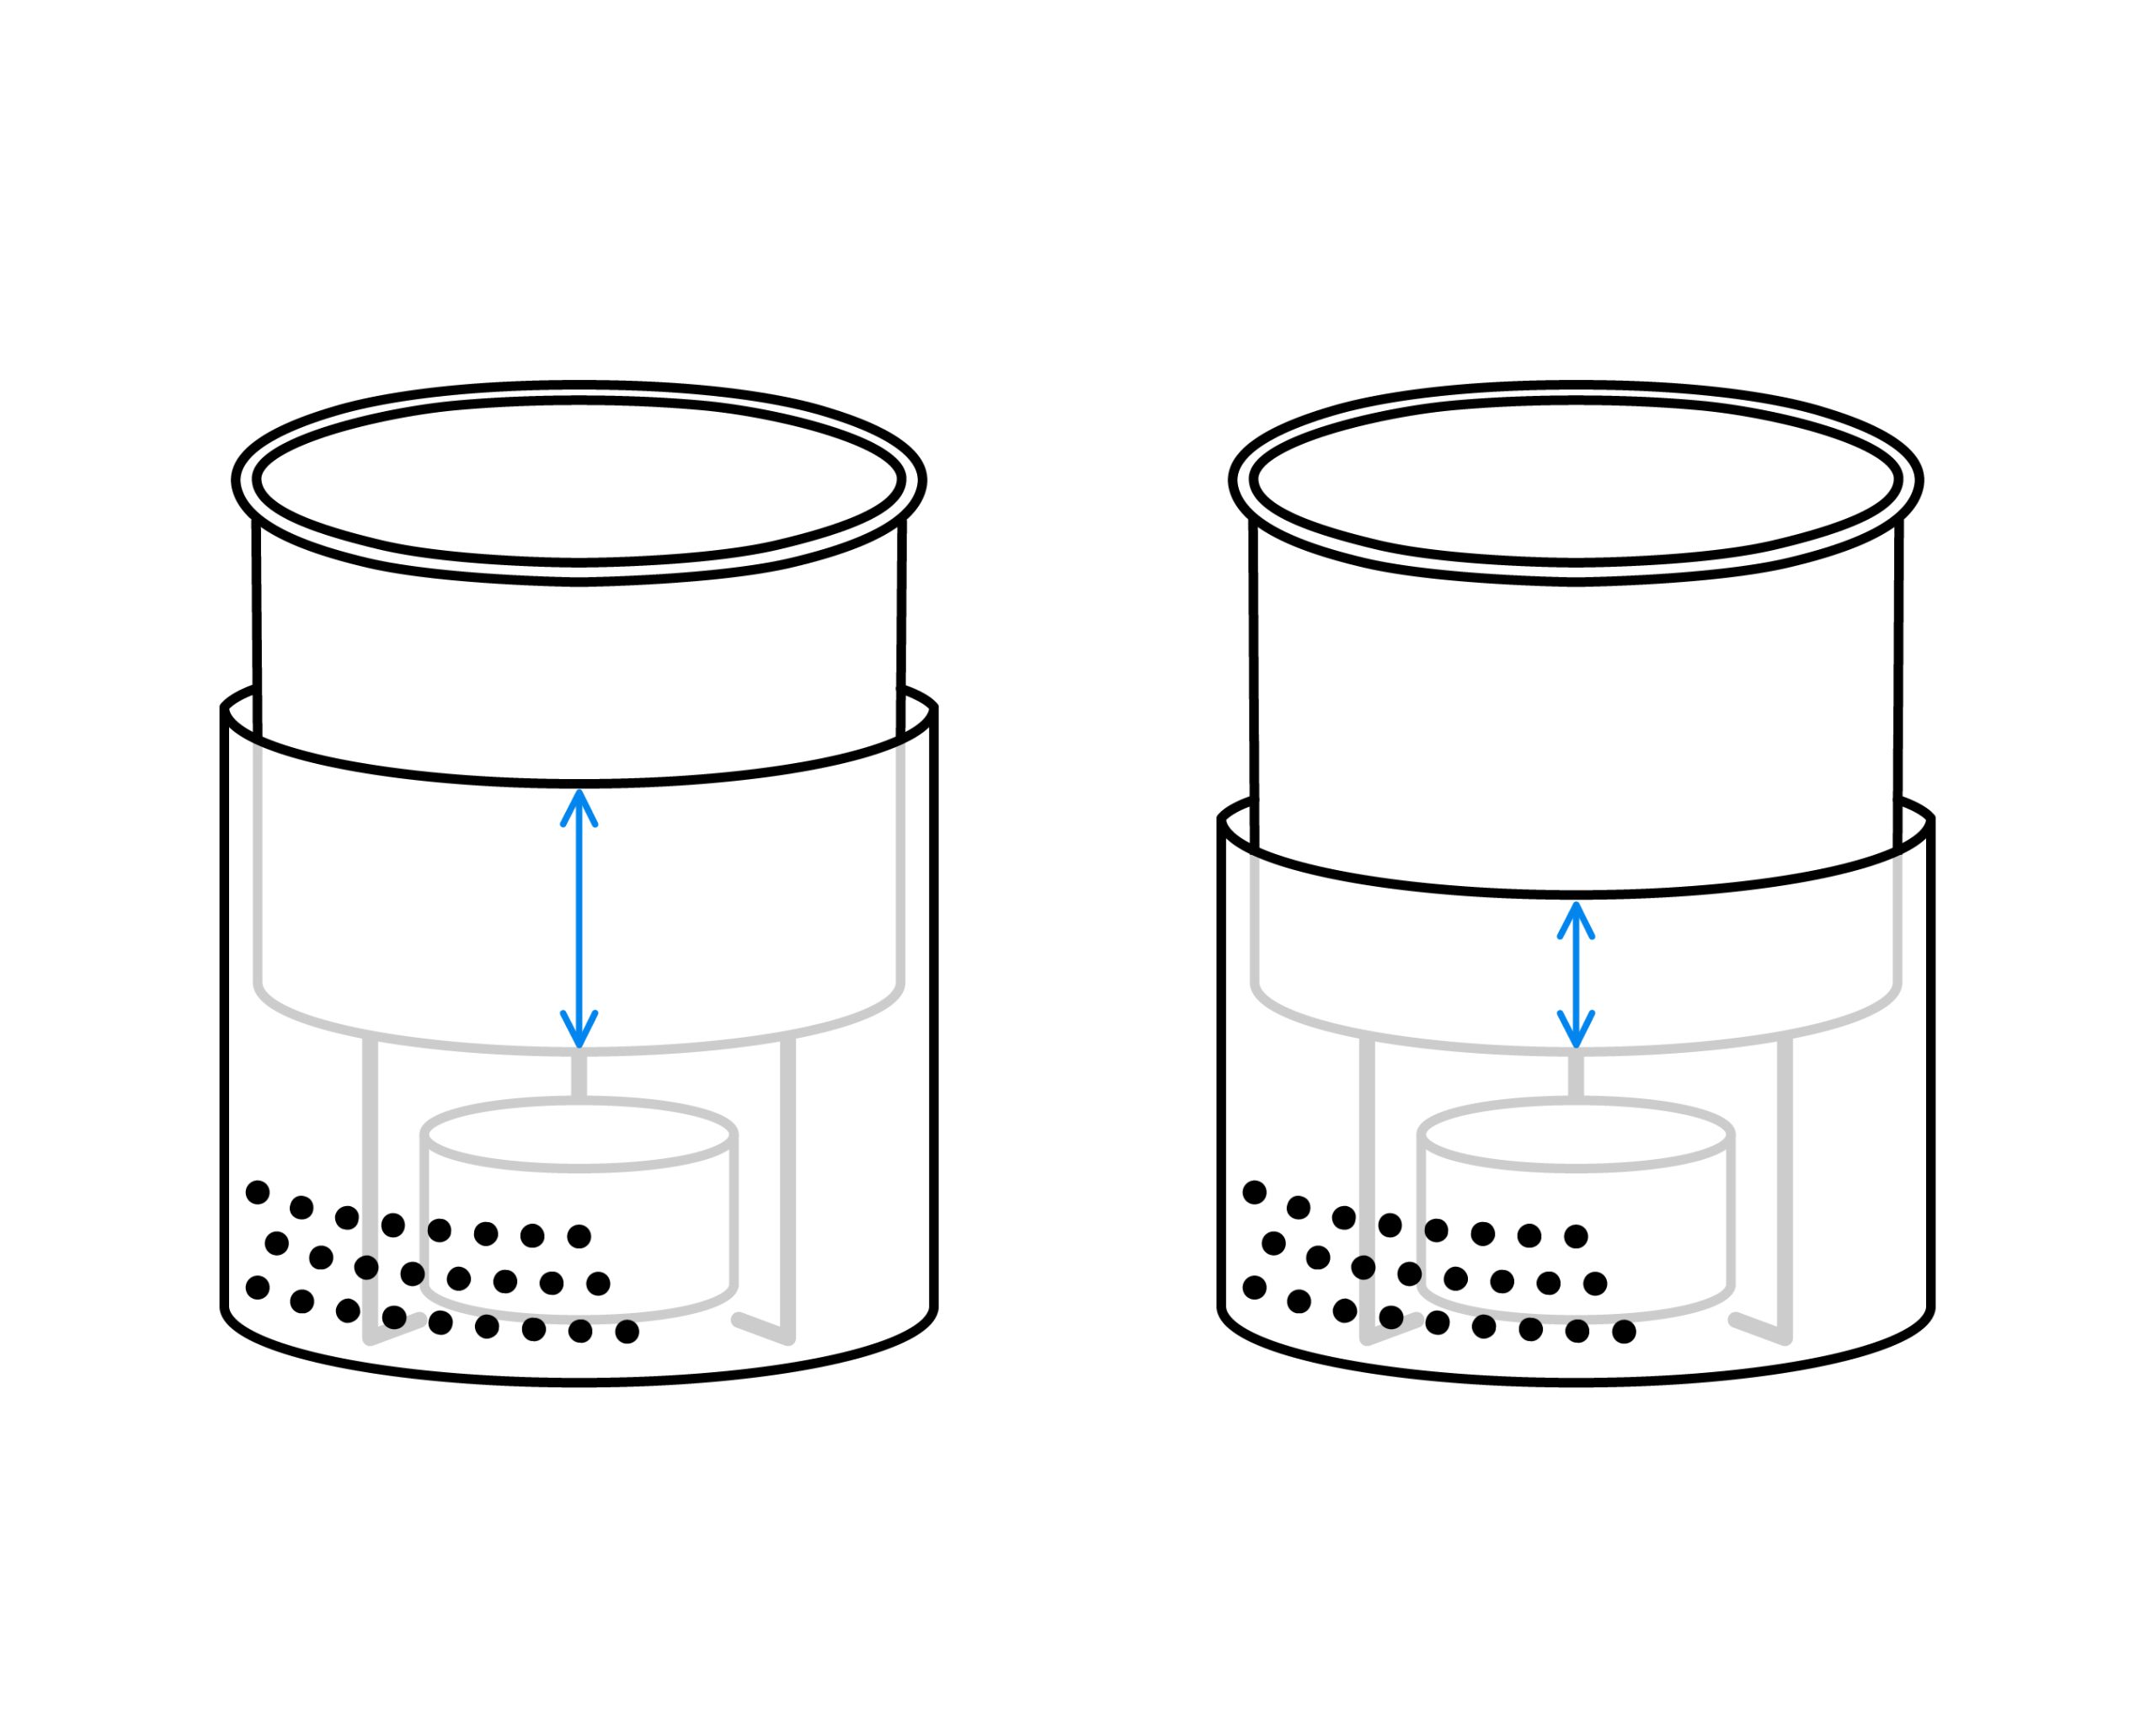
The more a windscreen encloses the pot, the higher the combustion efficiency of the stove.
If you’re making your own windscreen, remember that the portion of the pot that it covers is a critical consideration. Between the two examples shown above, the taller windscreen (on the left) is the better choice. Notice how the shorter windscreen (on the right) only covers the lower third of the pot.
To improve combustion efficiency, you need to make the windscreen fit closely to the sides of the pot so heat doesn’t escape ー but not too tight that it cuts off the airflow needed for combustion. You’ll need to leave just enough space to allow both air intake and exhaust.
At this point you might be wondering: Is the Caldera Cone my best option?
Remember, the Caldera Cone is optimized for a single piece of cookware. It lacks versatility. Having a shorter windscreen will allow you to store it neatly inside your pot.
Besides the 3W Windscreen, Sanpo’s Fun Lite Gear also produces conventional windscreens. Depending on the situation, the 3W Windscreen might be a reasonable choice, but you still will need a properly sized, full-height windscreen.
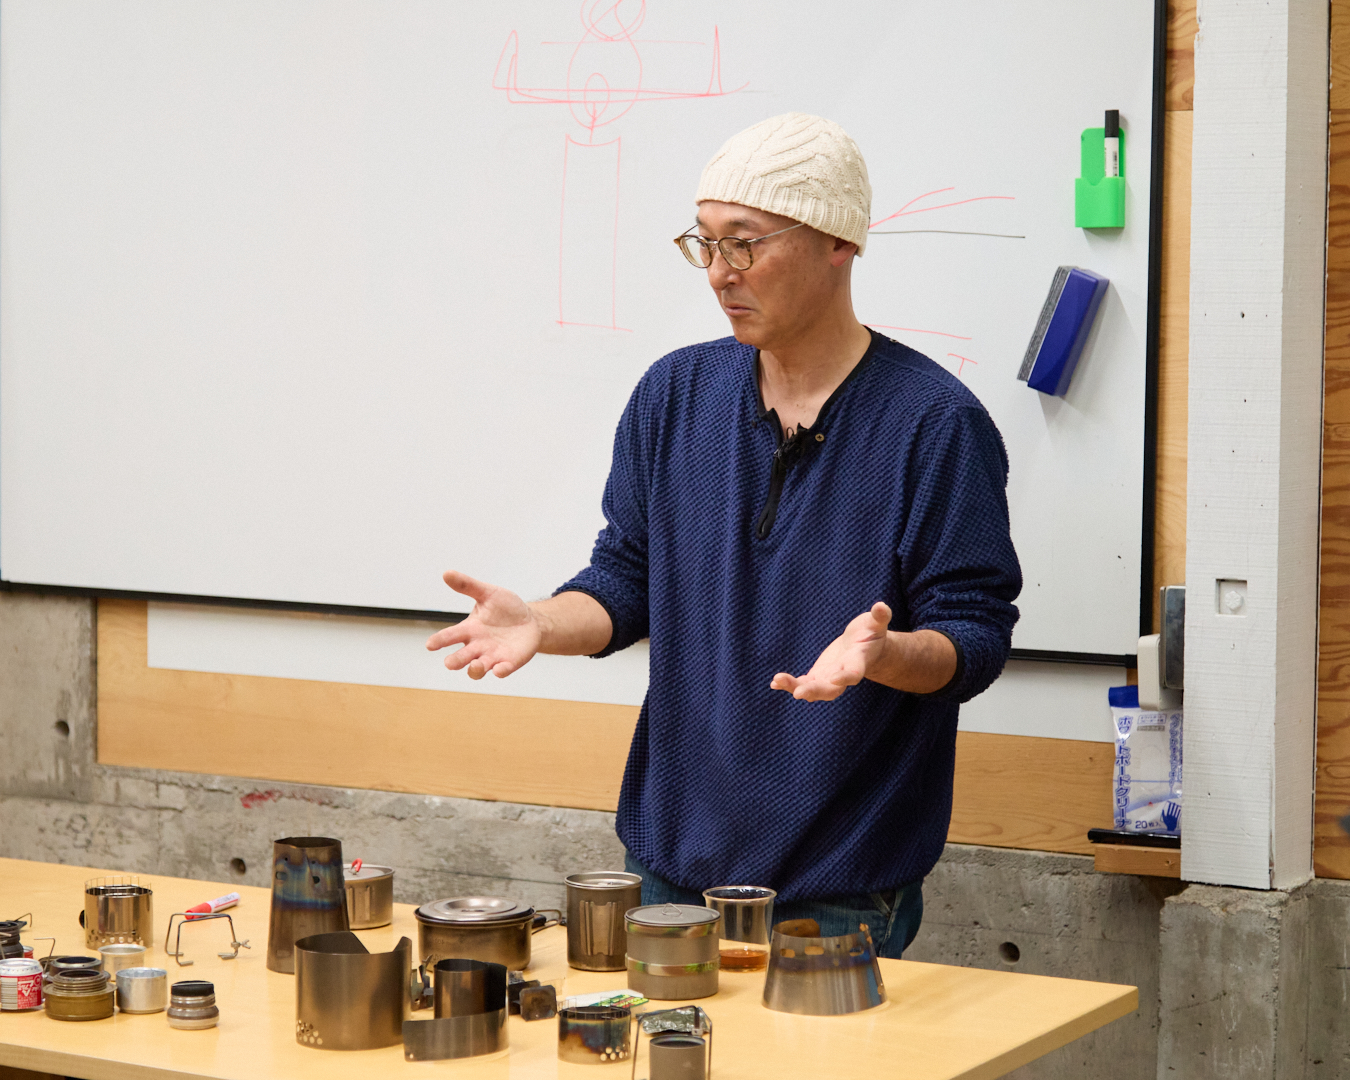
There is no such thing as the ideal setup. Here’s one way of thinking about it. Manufacturers make the gear that they want to use, but hikers need to figure out a setup that works best for them. Retailers like me exist to help bridge the gap. Preferences differ. You need to arrive at your own.
Choosing cookware: what and how much will you eat?
One final thought about cookware.
I hiked the John Muir Trail carrying nothing more than a mug for a reason: I only needed to boil water. I carried all of my ramen in Ziplock bags. If you want to cook ramen in your pot, you might need a flat 600 ml pot. That’s what Justin Richter, a renowned Triple Crown hiker nicknamed “Trauma” who was sponsored by Granite Gear, carried even in winter. He thought of it as the best minimalist setup.
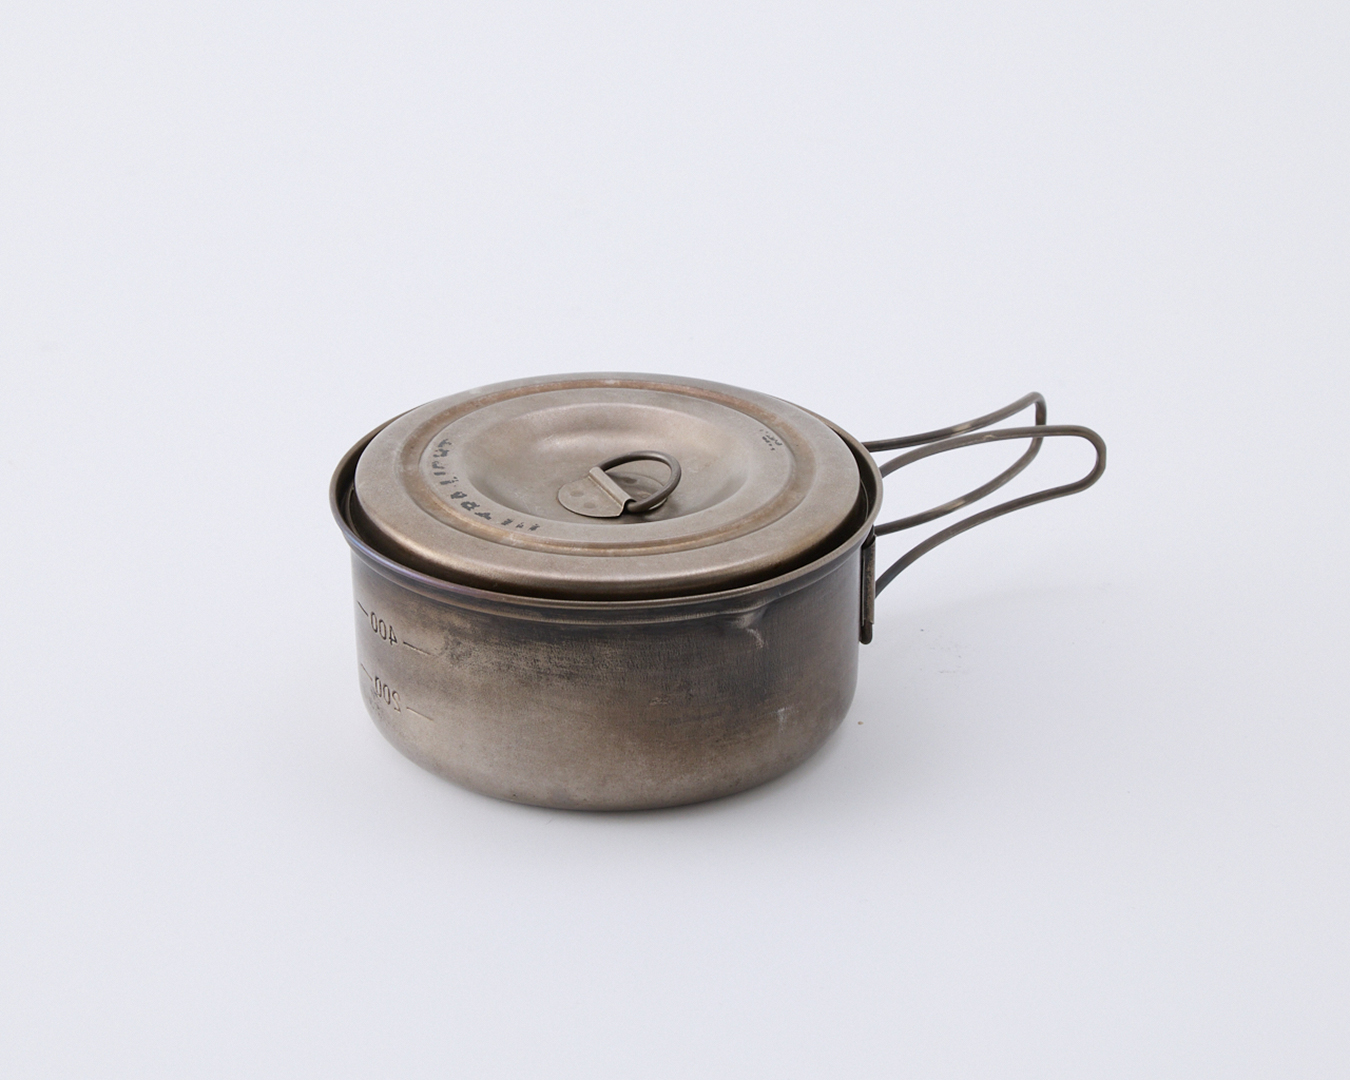
Evernew’s Titanium UL Pot 600.
On the other hand, a former manager at Hiker’s Depot took along a 900 ml pot when he hiked the Pacific Crest Trail. He needed a bigger pot because he wanted to eat two packs of ramen at a time.
What cookware you choose depends on what and how much you want to eat on the trail. In this respect, every hiker is different.
For a trip with two other Hiker’s Depot staffers to Shiretoko, in Hokkaido, I carried one gas canister stove and one large frying pan. It was just right for cooking rice, baking bread, making pancakes and stir-frying. We reduced our weight by using Ziplock containers as our bowls. That’s what we chose to do, but another party might opt for a very different setup.
The more you know what you want to do and what you consider a good enough solution, the broader options you have to choose from. That’s what I tell Hiker’s Depot customers while recommending gear that I personally believe in and use for my own trips.
Any questions?
ーThere are so many different kinds of stoves and cookware that beginners can get overwhelmed. What do you ask customers and how do you decide what to recommend?
If someone already has a fair amount of experience, I ask about their background and can zero in on the specific niche they’re looking for.
For someone who’s just getting started, I recommend what would be considered standard gear. That goes for the alcohol stove and pot support and windscreen. They have to start somewhere. Over time, they will find themselves questioning the setup. Could I make this alcohol stove even smaller? What would happen if I got rid of the pot support altogether?
Let’s say you go with a side-burner alcohol stove, which doesn’t require a separate pot support. You might try pairing it with a small pot, but the flame comes out wider than the bottom of the pot. Switching to a wider pot isn’t a great option either because it would make the setup unstable.
But by starting off with a standard alcohol stove and pot support, you discover these relationships for yourself.
It’s no different with windscreens. If the opening is too narrow, you’ll smell strange odors from incomplete combustion; too wide and the heat escapes, making the windscreen pointless. At some point, you discover that enclosing the bottom of the pot helps water boil more quickly.
These are insights that you gain through experience. Specialized gear that evolved from standard products is great for hikers with specific needs but they aren’t for everyone and can be tricky to use for those without the experience.
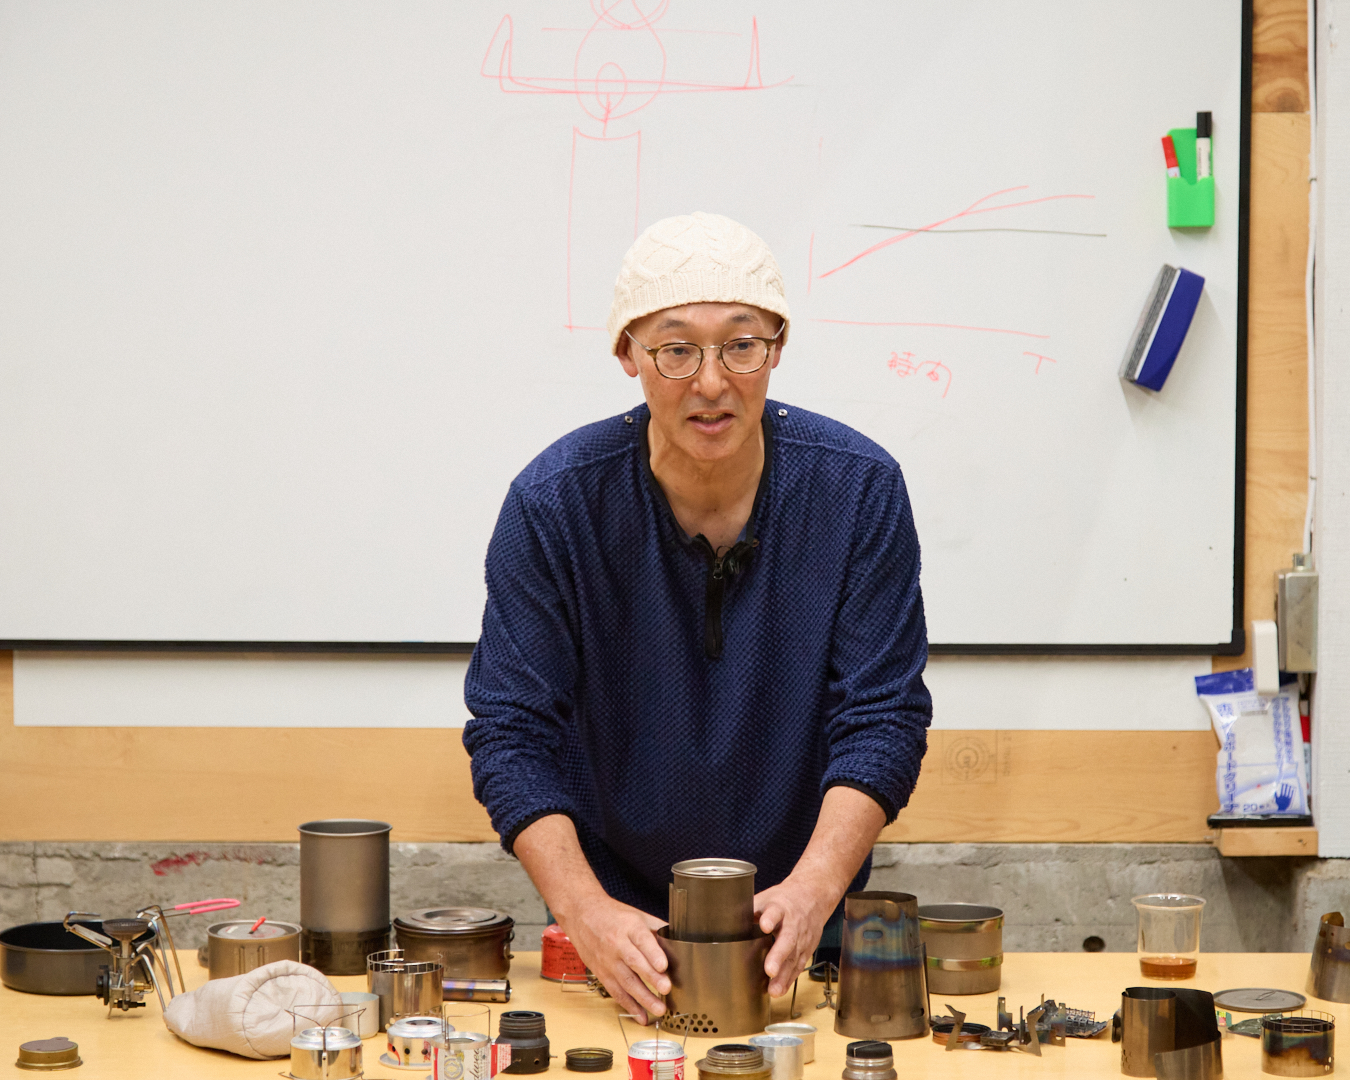
Tomoyoshi Tsuchiya is the owner of Hiker’s Depot in Tokyo, author of Ultralight Hiking (2011) and a pioneer of ultralight hiking in Japan. He spoke with Yamatomichi’s staff at the Yamatomichi Laboratory In Kamakura, Kanagawa prefecture.
If you start off using an integrated windscreen-and-pot-supports setup, you might conclude that the windscreen doesn’t work well. But if you started off with a standard setup, you’ll grasp what the limitations of this kind of windscreen are.
Think of ultralight hiking’s standard products as being the most basic level of literacy. Once you have that foundation, you can build on it, experimenting with specialized gear, developing your own ideas and figuring out how to make the best use of niche designs.
In the US, alcohol stoves have fallen out of favor among hikers due to concerns about wildfires. In Japan, small outdoor gear makers (garage brands) seem more interested in selling backpacks and pouches. Globally, the trend is toward refining existing products or developing backpacks, pouches and other items from textiles and patterns, rather than inventing new gear. As a result, there are fewer brands working on new kinds of alcohol stoves or solid-fuel stoves.
The trend makes sense. Alcohol stoves are less stable and require more effort than gas stoves. Unless you love using alcohol stoves, you’re bound to give up on them. Even so, if you’re willing to accept the extra hassle, alcohol stoves are an incredibly lightweight option.
Using specialized gear and realizing that it can be just the solution you’re seeking ー that it’s good enough ー is never a wasted effort for hikers. I strongly encourage everyone to try these stoves and experiment with different combinations ー or even make your own!
Thank you.

Series: UL Hiking University