


Pertex®︎21RS-PC 137g/㎡
TS White
Technoforce®︎ Steel 98g/㎡
3D Mesh 194g/m²
50D PC Coated Ripstop Nylon 69g/㎡
Size 45cm 570g
Size 48cm 572g
Size 51cm 574g
Size 54cm 610g
Size 57cm 612g
TS White
Size 45cm 554g
Size 48cm 556g
Size 51cm 558g
Size 54cm 590g
Size 57cm 592g
122g (Size S)
130g (Size M)
137g (Size L)
- Introduction
- Framed Backpack for Long Hikes
- Product story
- For longer hikes
- Product story 2
- Designing with depth
- 2025 Updates
- Form and function
- X-frame for matural movement
- Adjustable load control
- Highly expandable
- Anatomy of ONE
- How to attach the hip belt
- Packing tips
- Material
- Pertex®︎07RS-PC
- Pertex®21RS-PC
- Technoforce® Steel
- ECOPAK EPX200
- Size guide
- How to measure your torso
- Notes before use
- Fabric water resistance
- DEET
- Instructions
- Carbon rod warranty
- Care instructions
- Care instructions for Technoforce® Steel
- Repair
- Replacement parts
Introduction
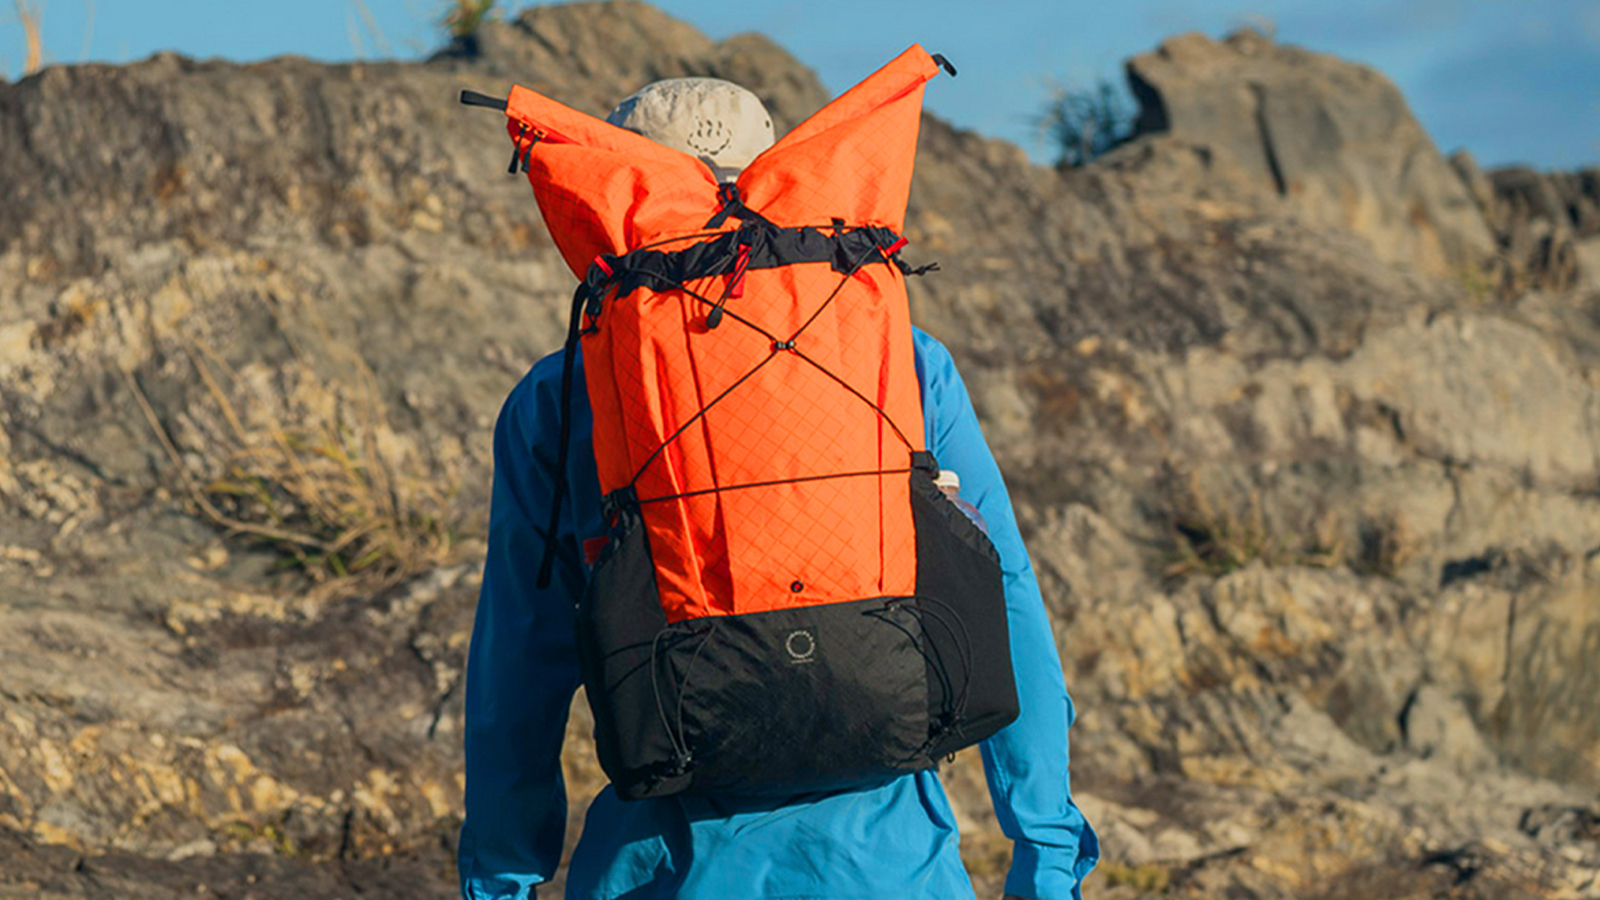
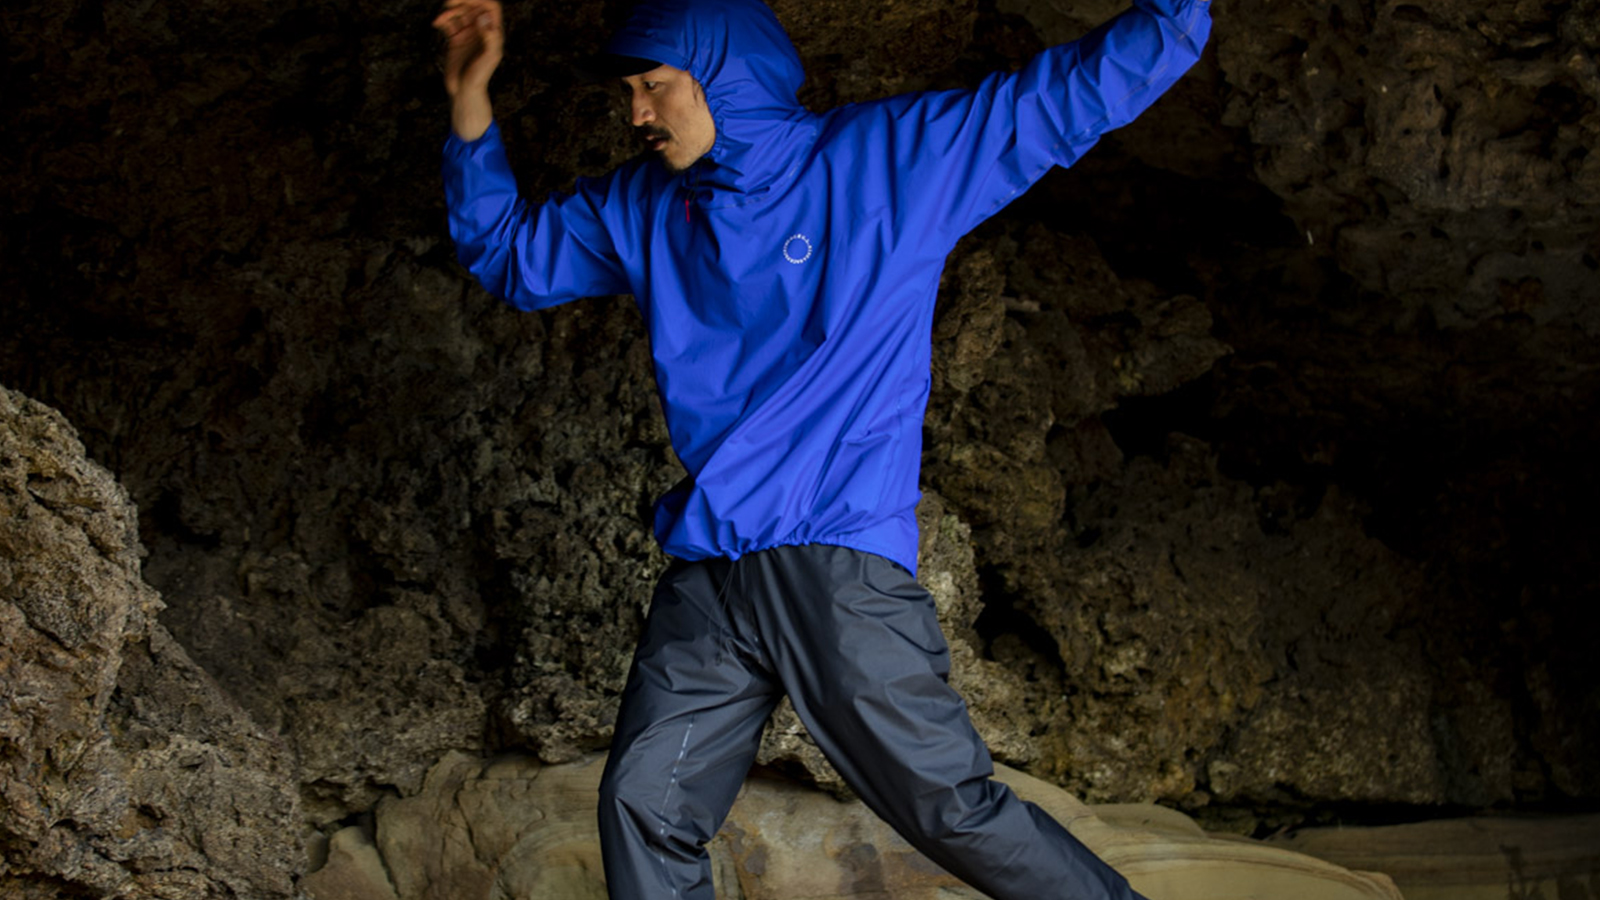
Framed Backpack for Long Hikes
Designed for the rugged, ever-changing terrain of Japan—where hikers face rocky ridgelines, steep climbs, ladders, and chains—this ultralight frame pack adapts to your every move with a flexible, X-shaped carbon frame that delivers exceptional comfort and responsiveness, even under heavy loads.
Crafted with our exclusive Pertex®-co-developed fabric, this pack blends supple 70D and tough 210D fibers exactly where they’re needed. For high-stress zones like pockets, we use Technoforce® Steel—an ultra-durable 100% UHMWPE fabric that shrugs off abrasion without adding weight.
With five back lengths and four hipbelt sizes, you can dial in a custom fit. Fine-tune load distribution for stability on long treks and technical terrain—this is our flagship pack, built for serious distance.
*Learn more about our Pertex® collaboration in our news article.
Product story
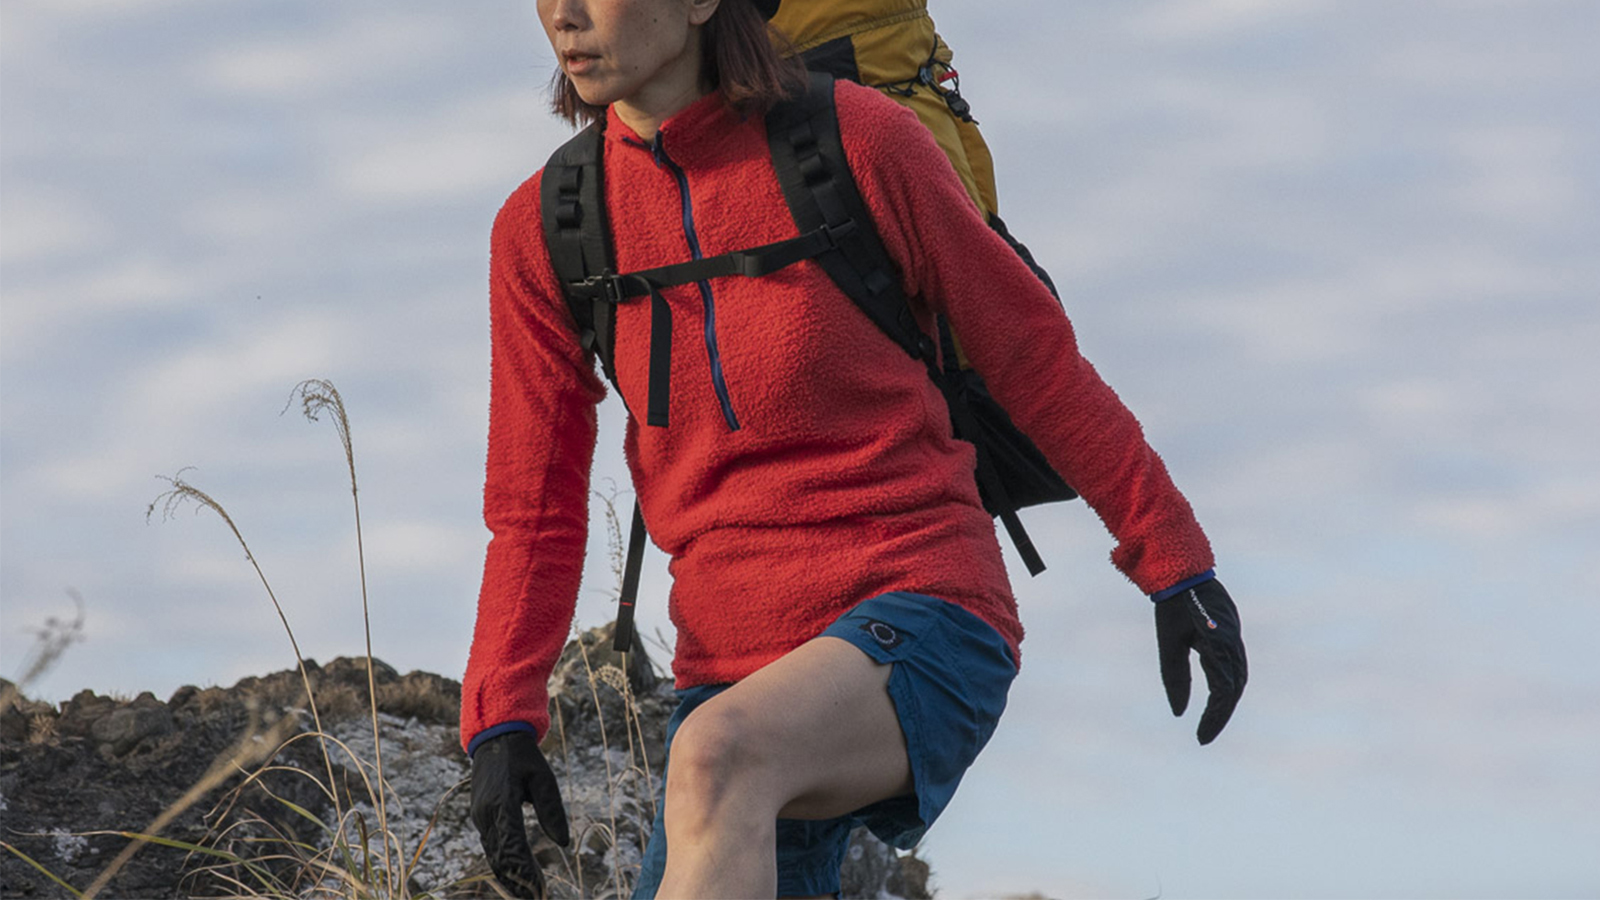
For longer hikes
Do we really love hiking? Are we fully prepared to start up our own business?
In order to find the answer to these questions, my wife and I hiked the John Muir Trail in Virginia, the USA in 2010. Consequently, we realized that we loved hiking so much and decided to quit our jobs and start Yamatomichi. We also realized that Japanese trails are quite different from the ones in North America.

Photo by Akira Natsume, JMT, 2013
The John Muir Trail is very well maintained, but unlike in Japan, rocky sections, ridges with chains, or steep uphill sections are rare. This means that in North America, a backpack is less likely to get scratched by rocks or branches that make holes, even when made from ultra-thin fabric. Also, the items in mesh pockets were unlikely to drop out accidentally on these gentle trails. And since the weather in North America is dry with little rainfall, you are less troubled by sweat even when a closed-cell foam pad directly touches your back or the pack’s back panel is not made from some kind of mesh material.
At the time, I realized that the ultralight hiking gear I was using back then was designed specifically for the American climate, environment, and trail conditions.
When my wife and I were about to start Yamatomichi, no ultralight backpack taking into consideration the conditions of the Japanese trails existed.
Even if the ultralight movement originated on the Californian trails, I realized that I did not have to just copy what was happening in the US, but I could use the ultralight theory and match with the conditions of the Japanese mountains to create a unique backpack made specifically for ultralight hiking here in Japan.
As we started Yamatomichi as a very small brand, we were super flexible and I decided that the ONE backpack should be a made-to-order, semi custom-made item that no other mass-production maker could match.
That’s why after ordering, still, our customers need to wait for several months before receiving the finished pack. But I firmly believe that each hiker will find the wait worthwhile and excited to become the owner of his or her unique one-of-a-kind backpack.
It’s been years since we released ONE but it is still one of our core products. There have been many small modifications and upgrades and the robustness and overall durability of the pack have improved since our first version.
So for anyone setting out on a longer hike with a need to carry a somewhat substantial amount of gear, ONE is still the backpack I recommend. (2017)
Product story 2
Designing with depth
To create a more thoughtful, collaborative approach to fabric development, we turned to Pertex with an idea: what if we made a fabric specifically for backpacks?
Meeting Pertex for the first time
By the time I had become obsessed with hiking and before founding Yamatomichi, Pertex was already well-known as a go-to brand for lightweight, high-performance fabrics in technical outdoor gear. Our first real encounter came around the time we started Yamatomichi, when my wife and I visited a Pertex trade show.
We didn’t know that attendance was by appointment only. Completely unaware, the two of us just showed up without a reservation.
The staff seemed a bit surprised to see us at first—but rather than turning us away, they listened with genuine curiosity. Mr. Taka, the representative we spoke with, admitted later that we were the first people ever to show up unannounced. But he found our story interesting and gave us his full attention. He still laughs about it to this day.
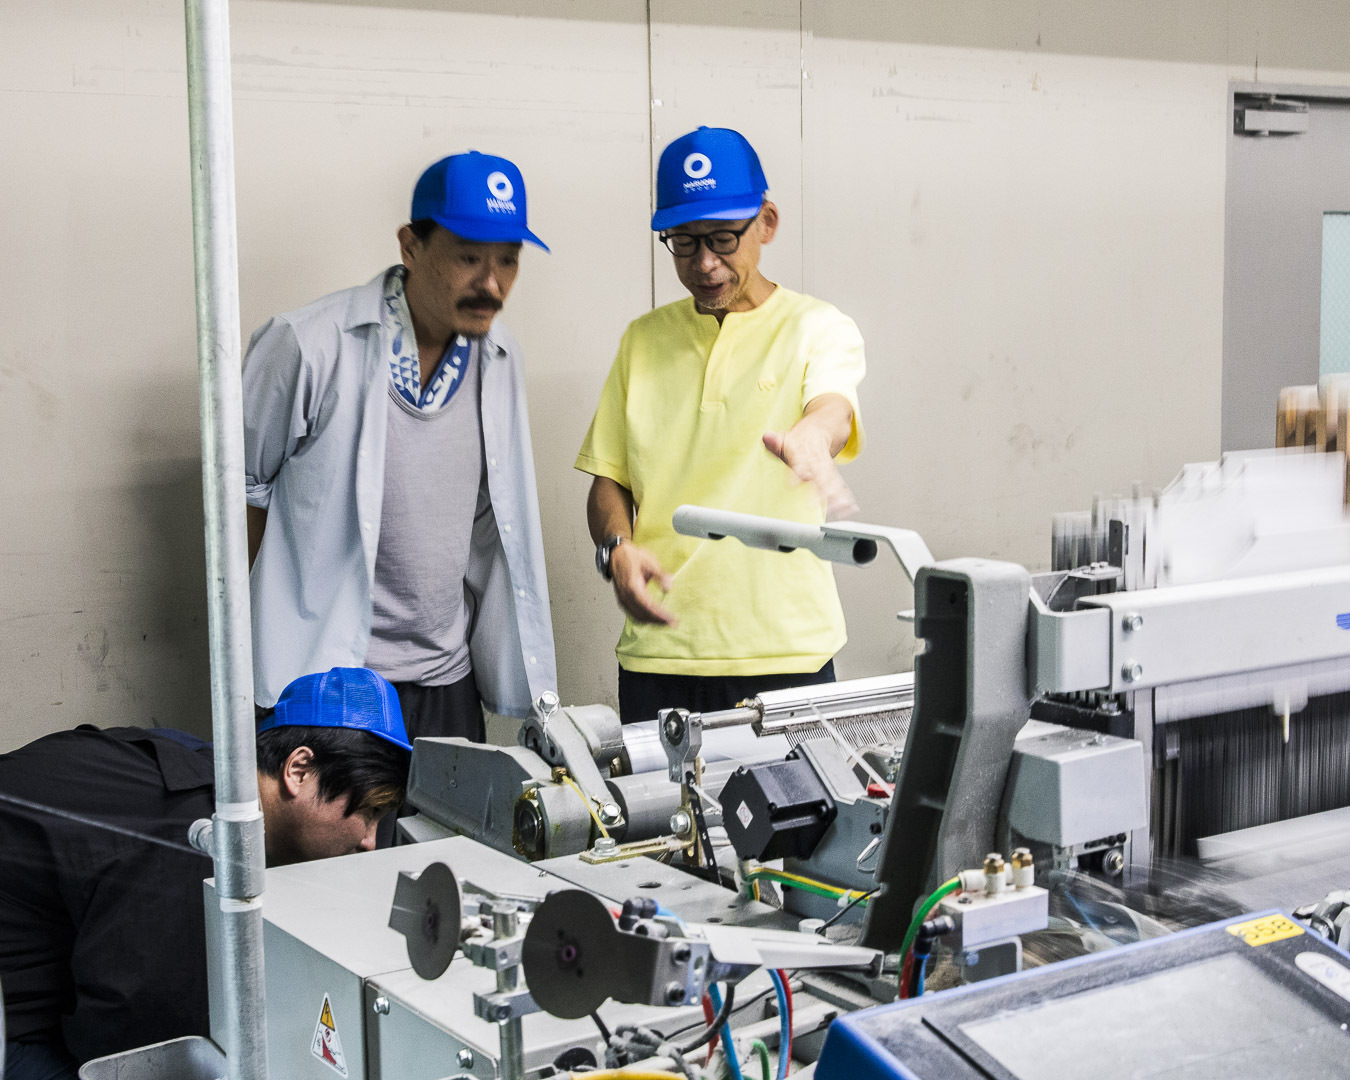
Right: Mr. Taka from Pertex. Left and center: Yamatomichi product team members Hirono and Nakagawa (photo taken during a factory visit).
We started by using existing Pertex fabrics, but things changed when we asked them to help develop a fabric for our DW 5-Pocket Pants. Taslan nylon, the fabric we were using at the time for our 5-Pocket Pants, lacked stretch and had a tendency to stick to the skin when sweaty. To solve that, Pertex created a custom fabric just for us.
Since then, we’ve worked with them to develop a range of original materials focused on lightness and function. Today, nearly every Pertex fabric used in Yamatomichi products is designed specifically for us.
An idea worth weaving
At a Pertex trade show one year, while browsing their latest lightweight fabrics for apparel, we were once again struck by the depth and precision of their high-strength materials. That moment sparked a new idea—if Pertex were to develop a fabric for backpacks, it could lead to something truly unique.
A first for Pertex
Thanks to the trust built over years of collaboration, Pertex agreed to take on the challenge. It was a first for them—developing a fabric specifically for backpacks marked a completely new direction beyond their established lines like Shield or Quantum.
One of the most memorable decisions in the process was their choice to use nylon 6 instead of the typically stronger nylon 66. This allowed for a different balance of strength, texture, and weight. Additionally, by dyeing all components at the same factory, they achieved a consistent color tone across different fabric types—bringing visual unity to the final product.
The result is a fabric that goes beyond technical performance. It offers a refined handfeel and tonal richness that gives each backpack a distinct, elevated finish.
Through this collaboration with Pertex, we’re continuing to explore new and meaningful ways to approach design and materials.
2025 Updates
- We added L-shaped stitching to the firm hipbelt so it wraps around your hips better and fits more comfortably.
- The new design lets you tighten the belt in two places—top and bottom—for a more secure and natural fit that’s easier to adjust.
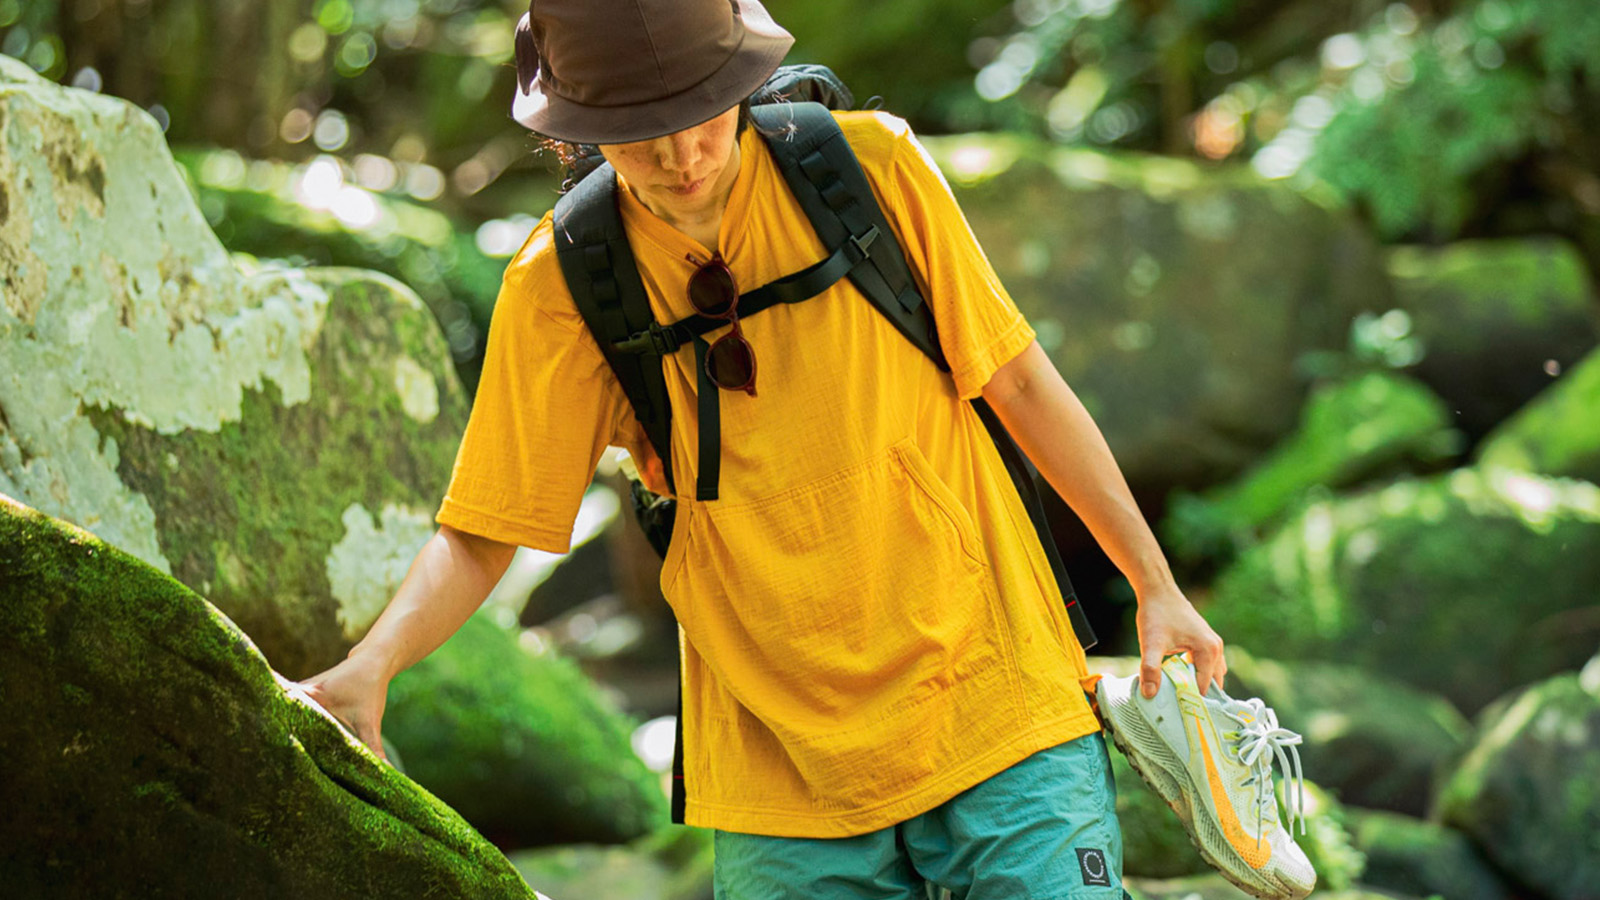
Form and function
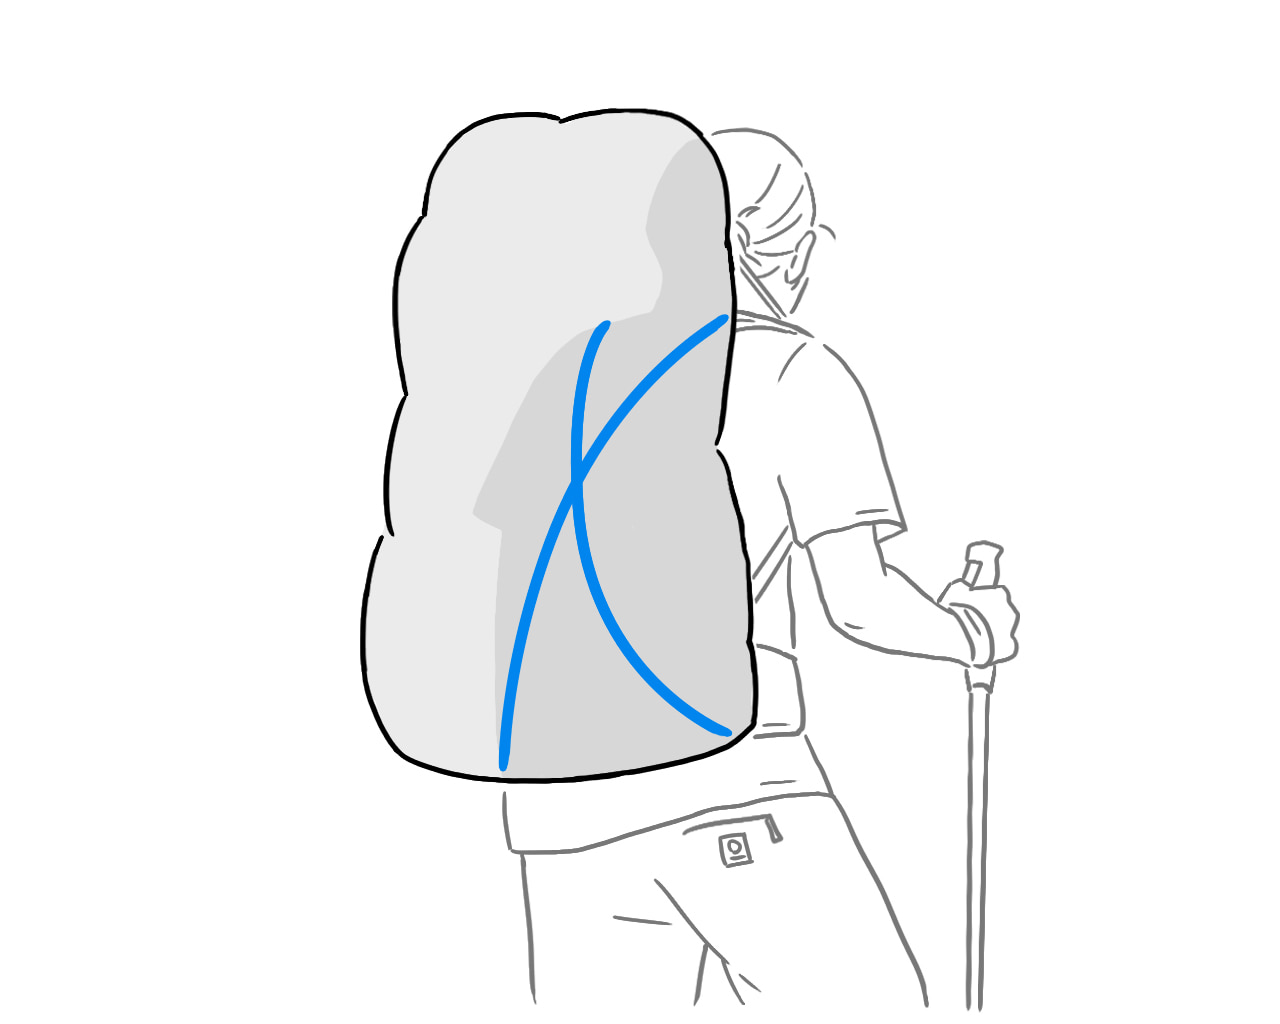
X-frame for matural movement
A special X-shaped carbon frame sits inside the pack, wrapping comfortably around your torso and moving naturally with your body.
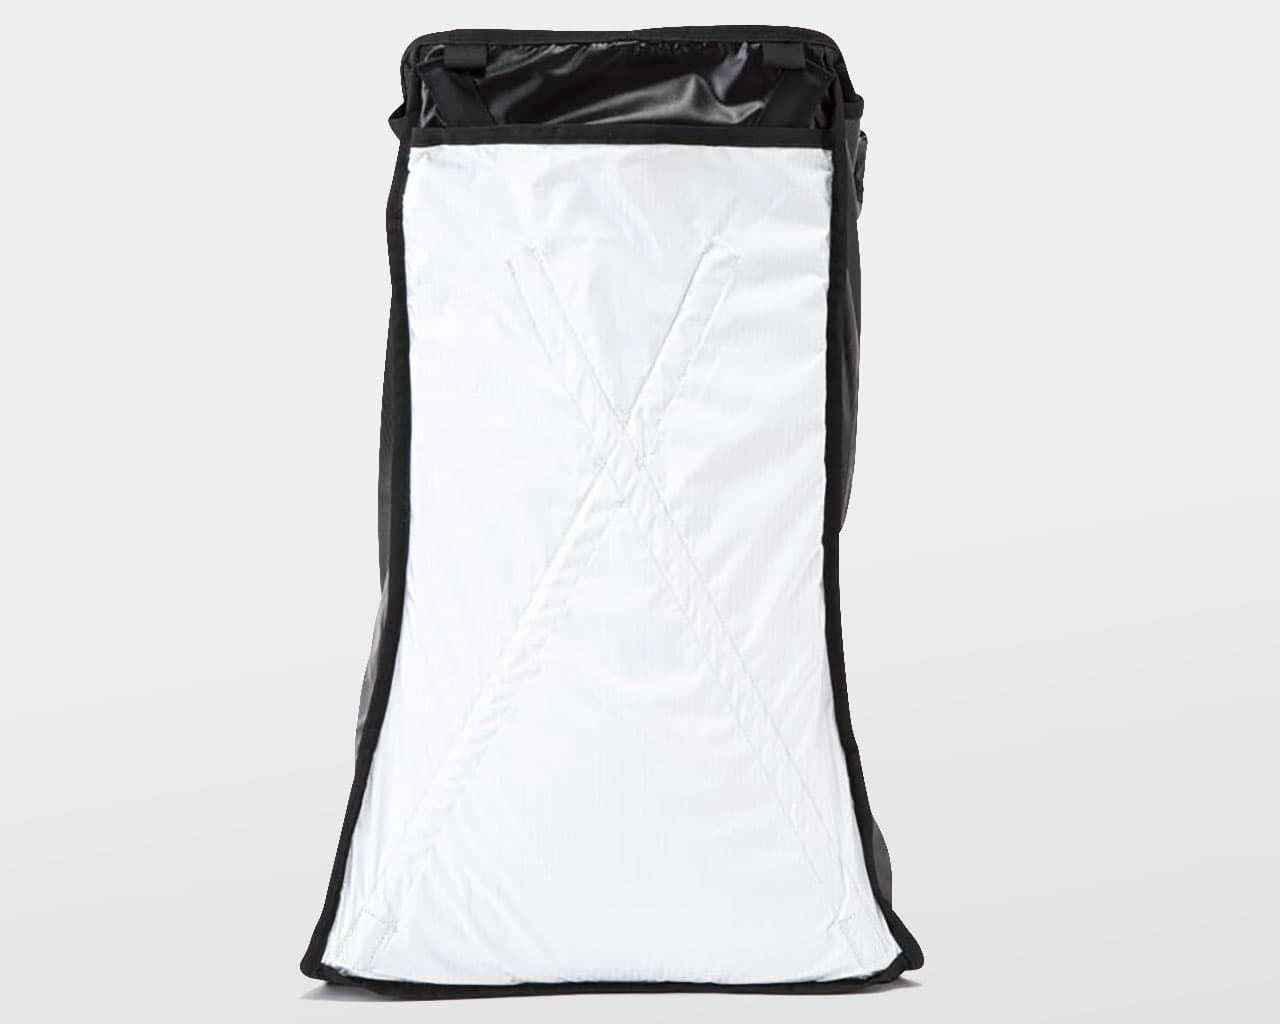
The carbon rods are installed inside the back pocket. Carbon fiber is prone to fraying. Wear gloves when inserting and removing to avoid injury.
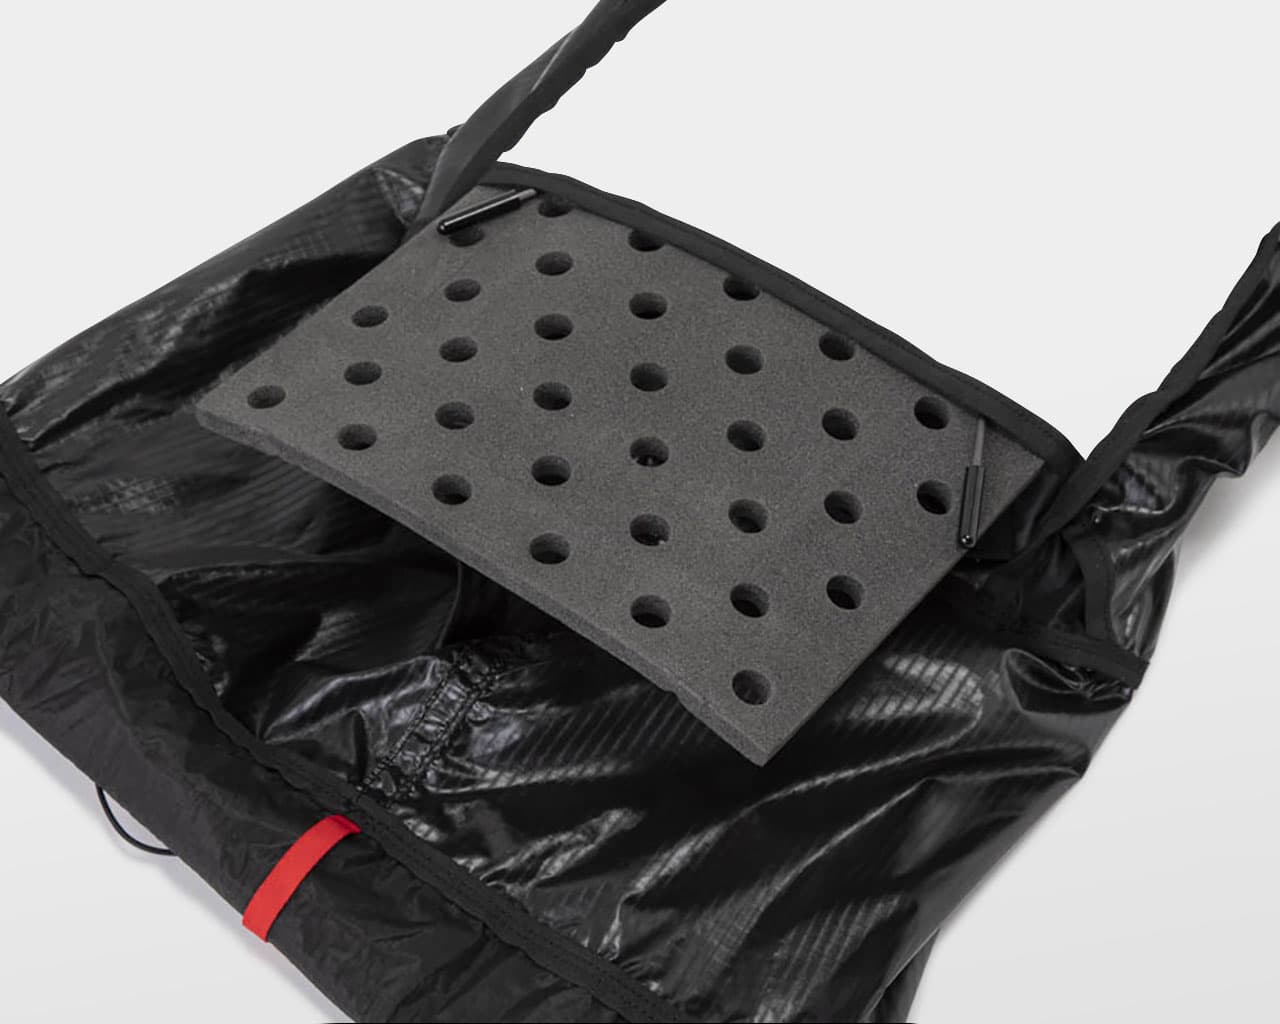
The perforated pad is installed in the pocket. When sweat causes odor, remove the rods, take the pad out and wash it in cold water.
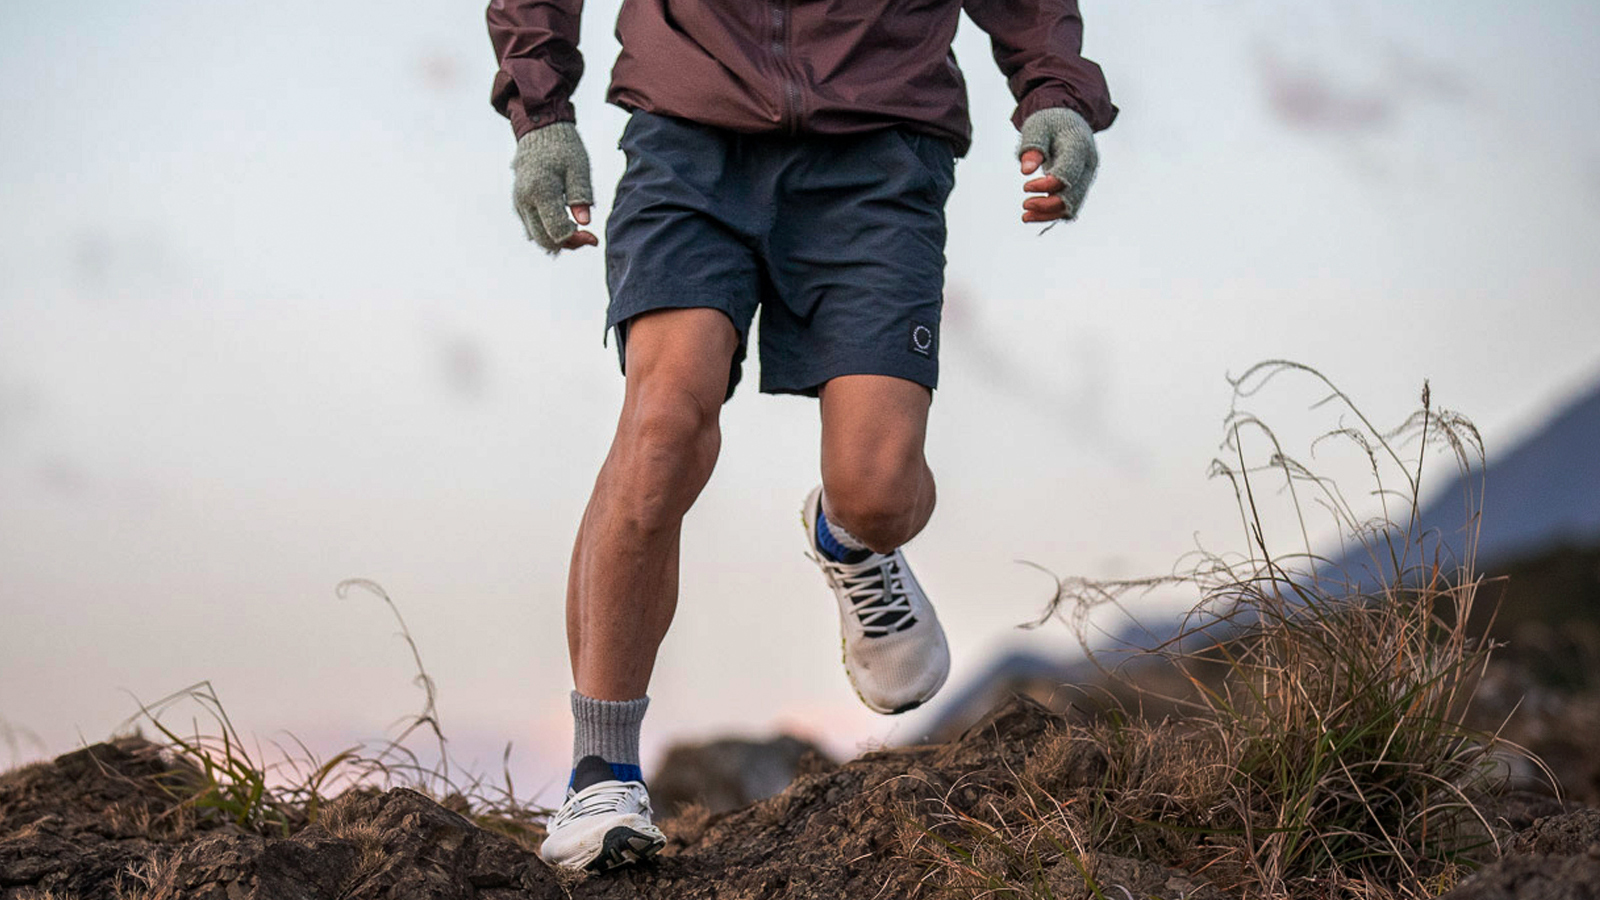
Adjustable load control
Unlike typical high-volume backpacks that shift most of the weight to your hips, the ONE features an X-shaped carbon frame, waist stabilizers, and shoulder lifters that let you fine-tune how the load is distributed. Whether you prefer the weight on your waist or higher on your back, you can adjust for the most comfortable balance that suits your body and hiking style.
*This feature is made possible by the highly flexible carbon frame. However, please note that the frame is not built for heavy loads—we recommend a comfortable maximum load of 11 kg.
Upper torso load distribution
On steep climbs or rugged terrain, shifting the load to your upper torso helps free up your lower body for better mobility and comfort. Here’s how to adjust the pack:
- Loosen the waist stabilizer straps.
- Tighten the shoulder straps to bring the pack closer to your body.
- Tighten the shoulder load lifters.
Waist Load distribution
When your upper body starts to feel fatigued, shift the load to your waist to reduce strain and keep going comfortably. This setup is also ideal for walking on flat terrain.
- Slightly loosen the shoulder straps.
- Tighten the waist stabilizer straps to bring the carbon frame snugly against your waist.
- Tighten the shoulder load lifters to keep the pack close to your back — but avoid over-tightening.
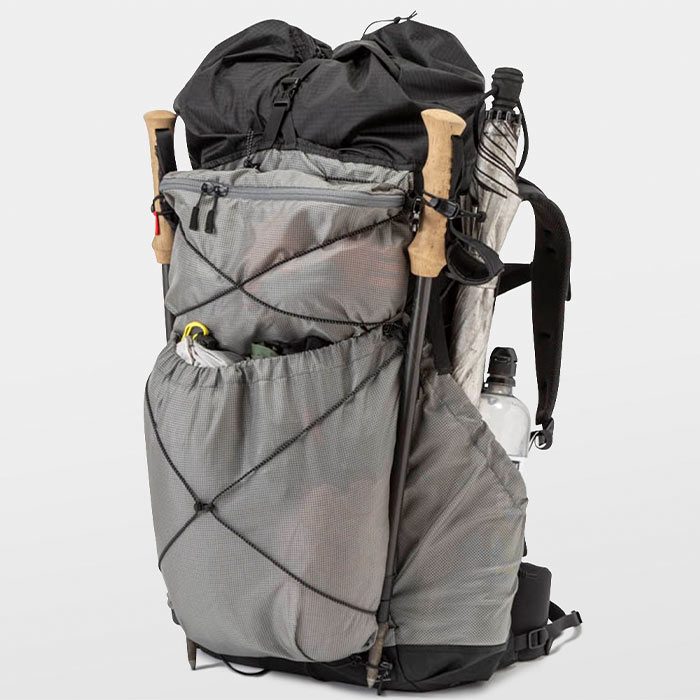
Highly expandable
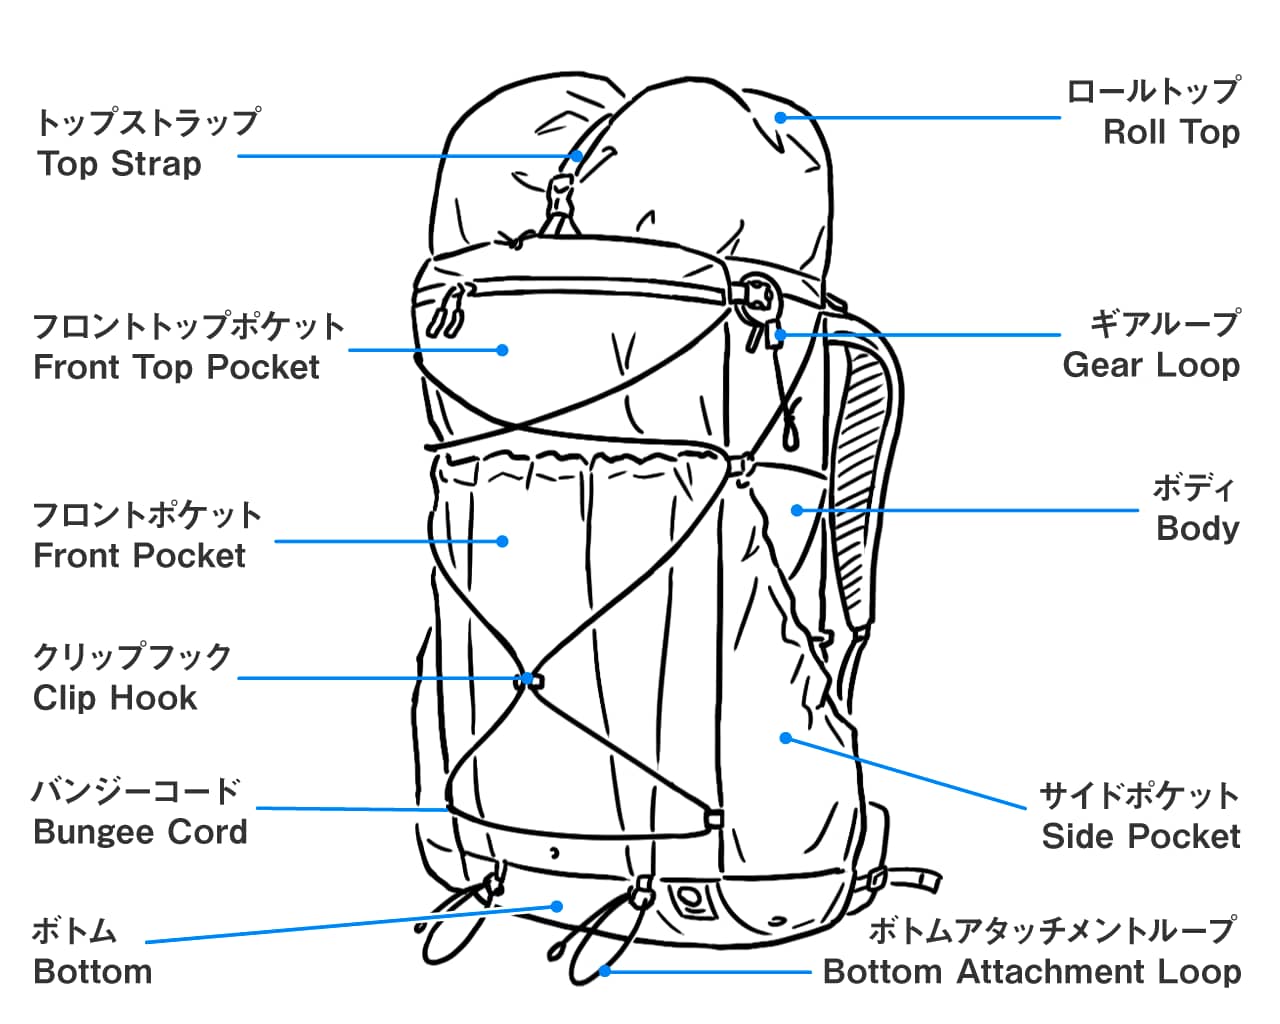
The ONE is built for multi-day hikes, with plenty of options to carry extra gear. Use the top strap, bungee cords, and bottom attachment loops to expand your load—perfect for when you need to pack a little more.
Anatomy of ONE

Close: Grip the red tab and pull the drawstring tight.
Open: Hold both the red tab and the red loop, then pull apart.
Each side pocket has a capacity of about 2 liters. Designed for easy access on the go, the adjustable cord keeps items secure. If reaching is difficult, loosen the shoulder straps to bring the pack lower.
The front bungee cord can be unclipped in a single action.
A light sleeping pad can be attached to the bottom attachment loops. It can also be fixed vertically where branches are dense for easy walking.
The gear loops and bottom attachment loops can hold trekking poles without obstructing the use of the front and side pockets.
To fix an ice ax, slide the shaft into the bottom attachment loop and rotate it so the spike faces upwards, then fix the shaft with the gear loop.
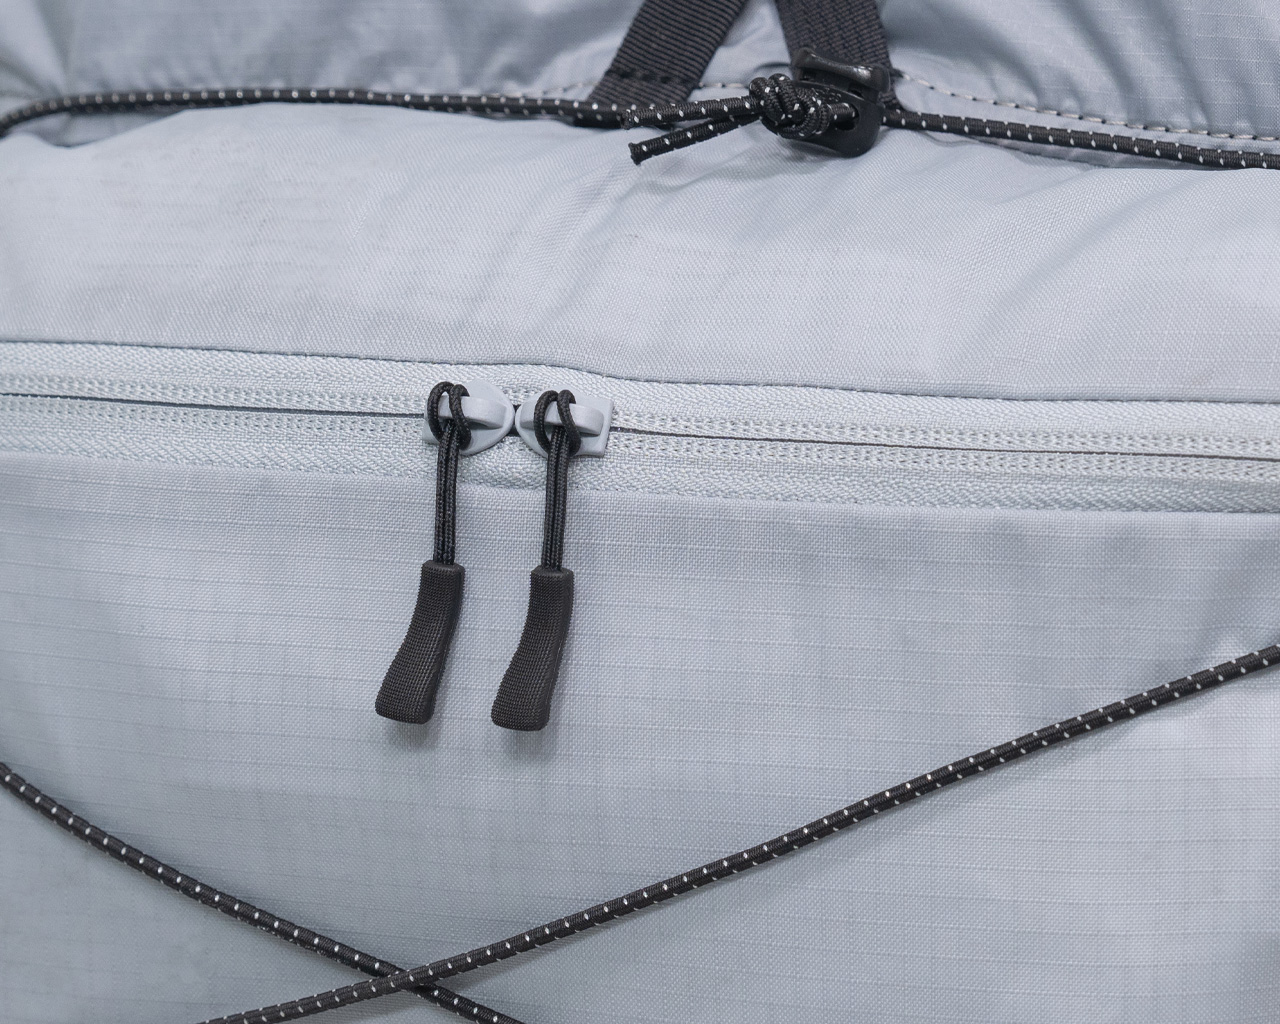
YKK #5 coil zipper moves smoother and more durable than the water repellent zipper.
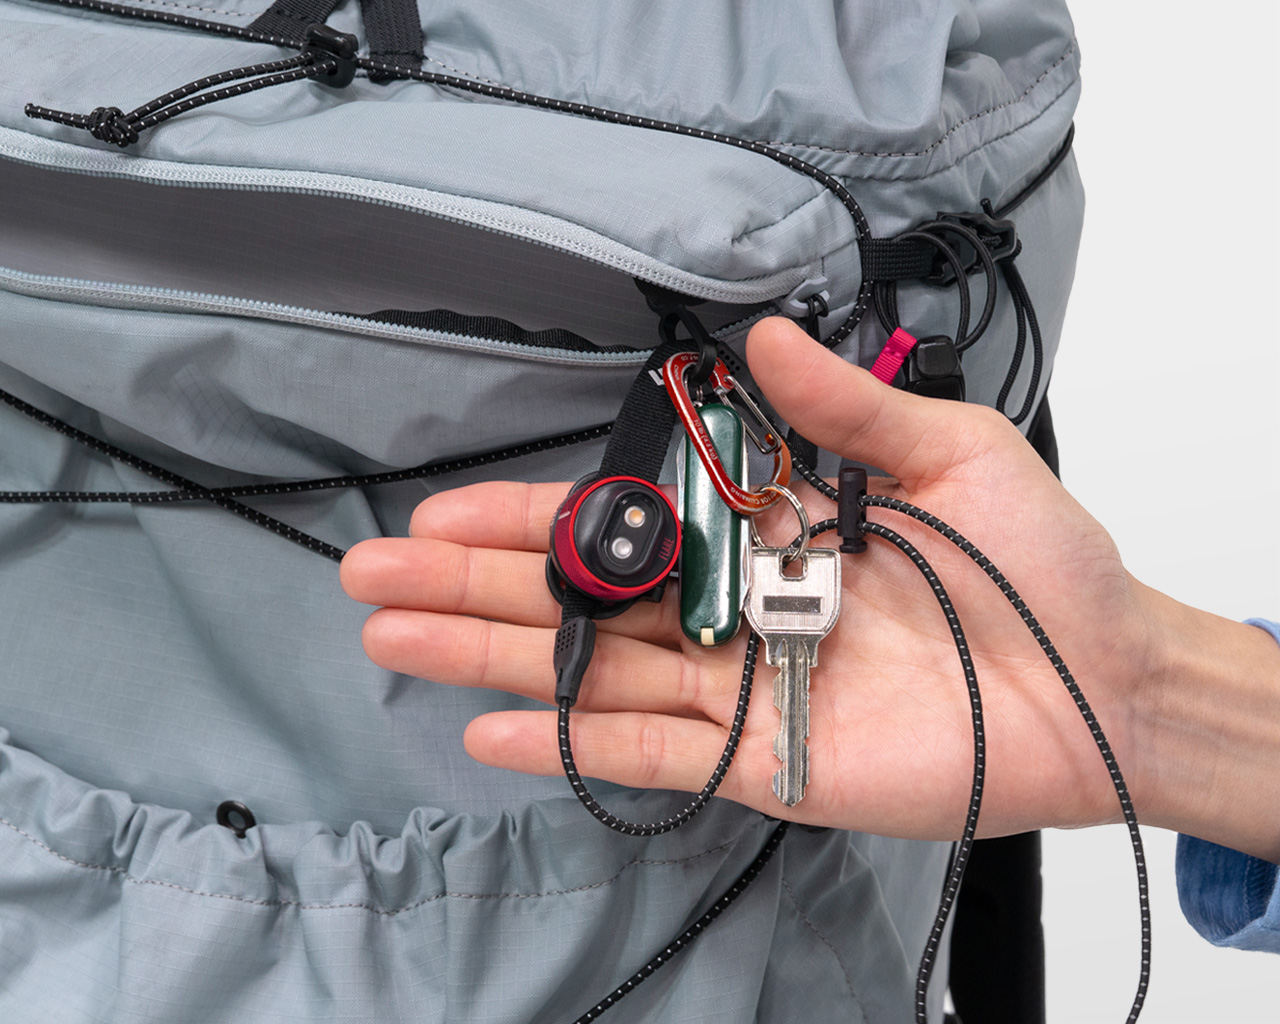
The front pocket has a key hook, where the headlight and multi-tool can be attached.
After packing everything, draw the compression cords on both sides to keep the items closer to your back, increasing the stability.
The sternum strap can be easily opened/closed with a single hand when your other hand is busy.
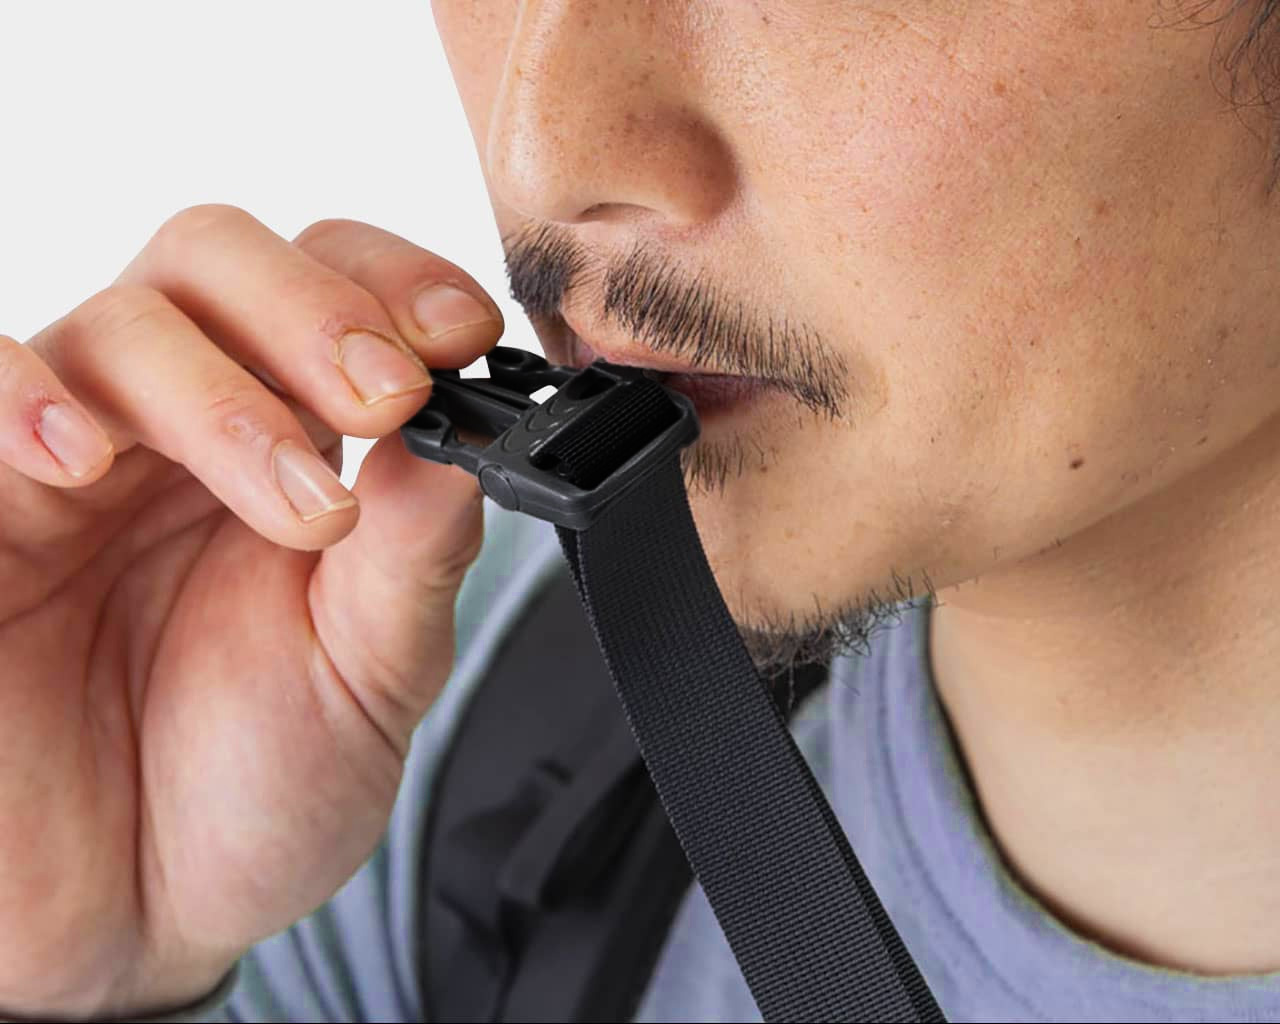
A small emergency whistle is incorporated in the buckle.
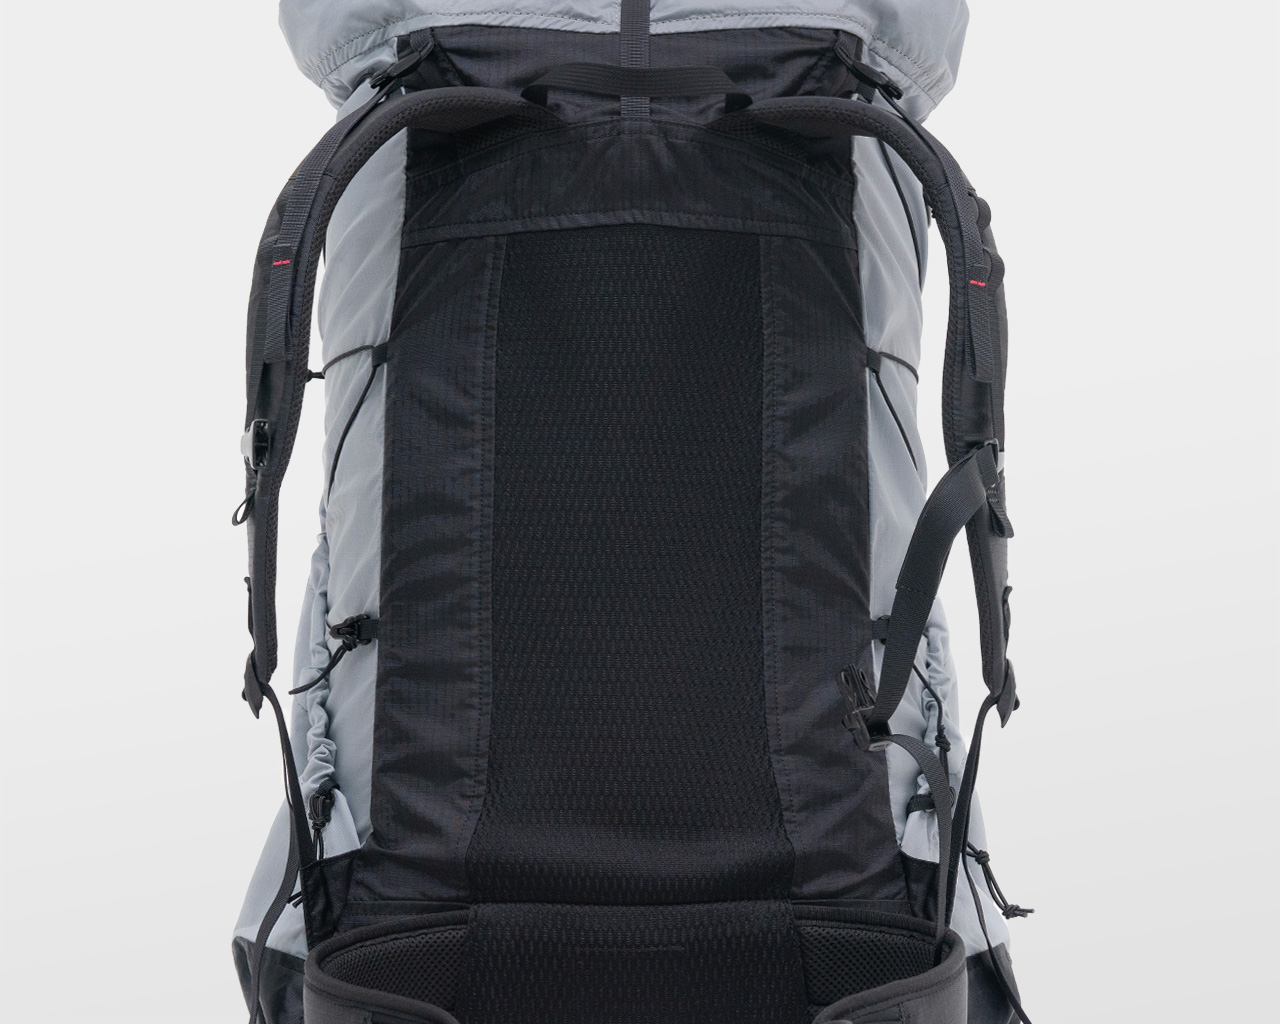
The back uses a mesh material for better grip and stability.
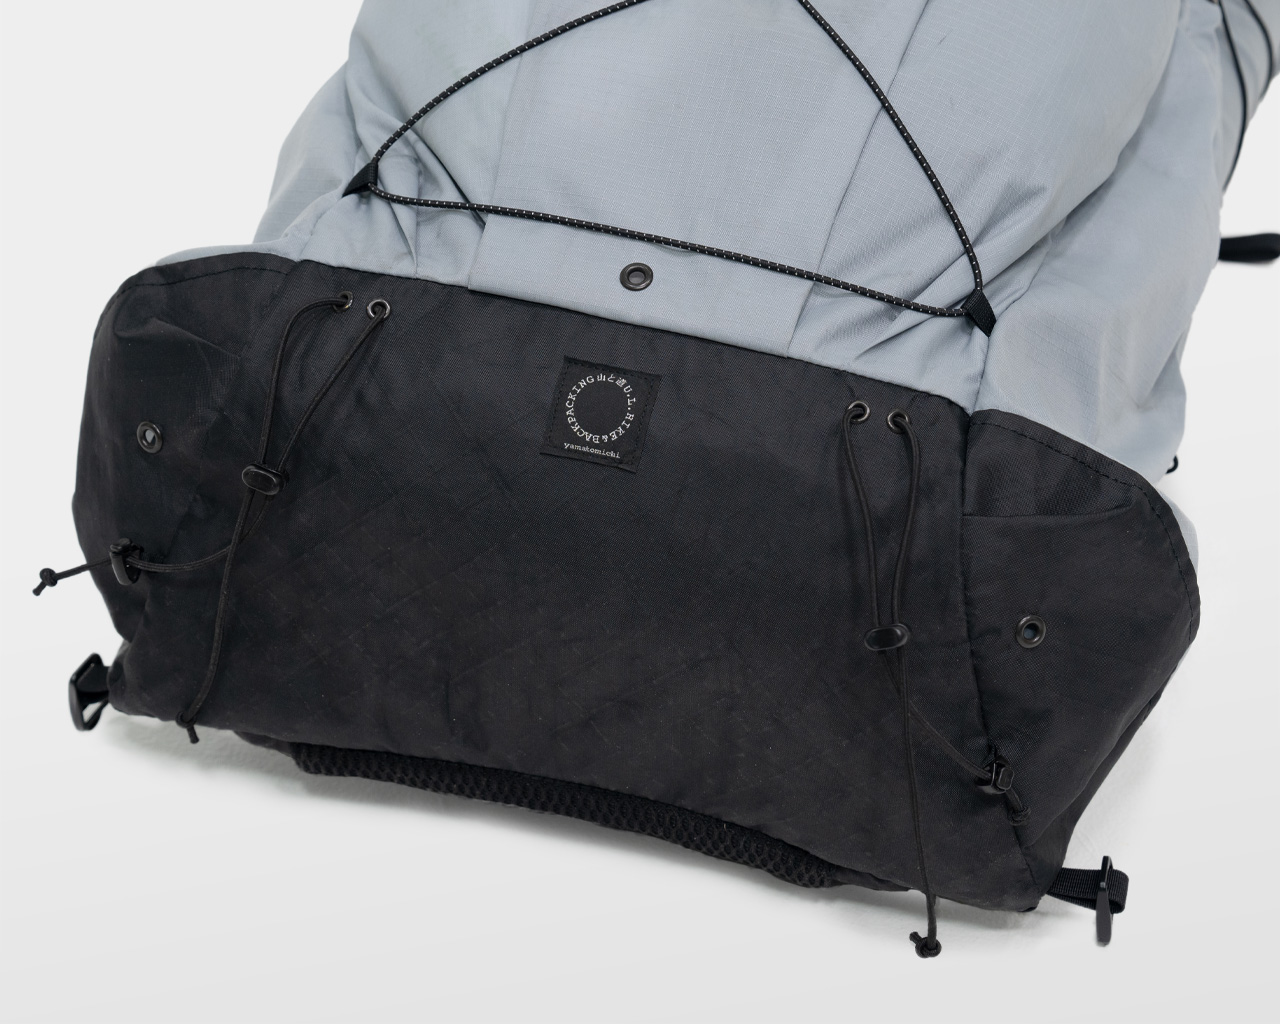
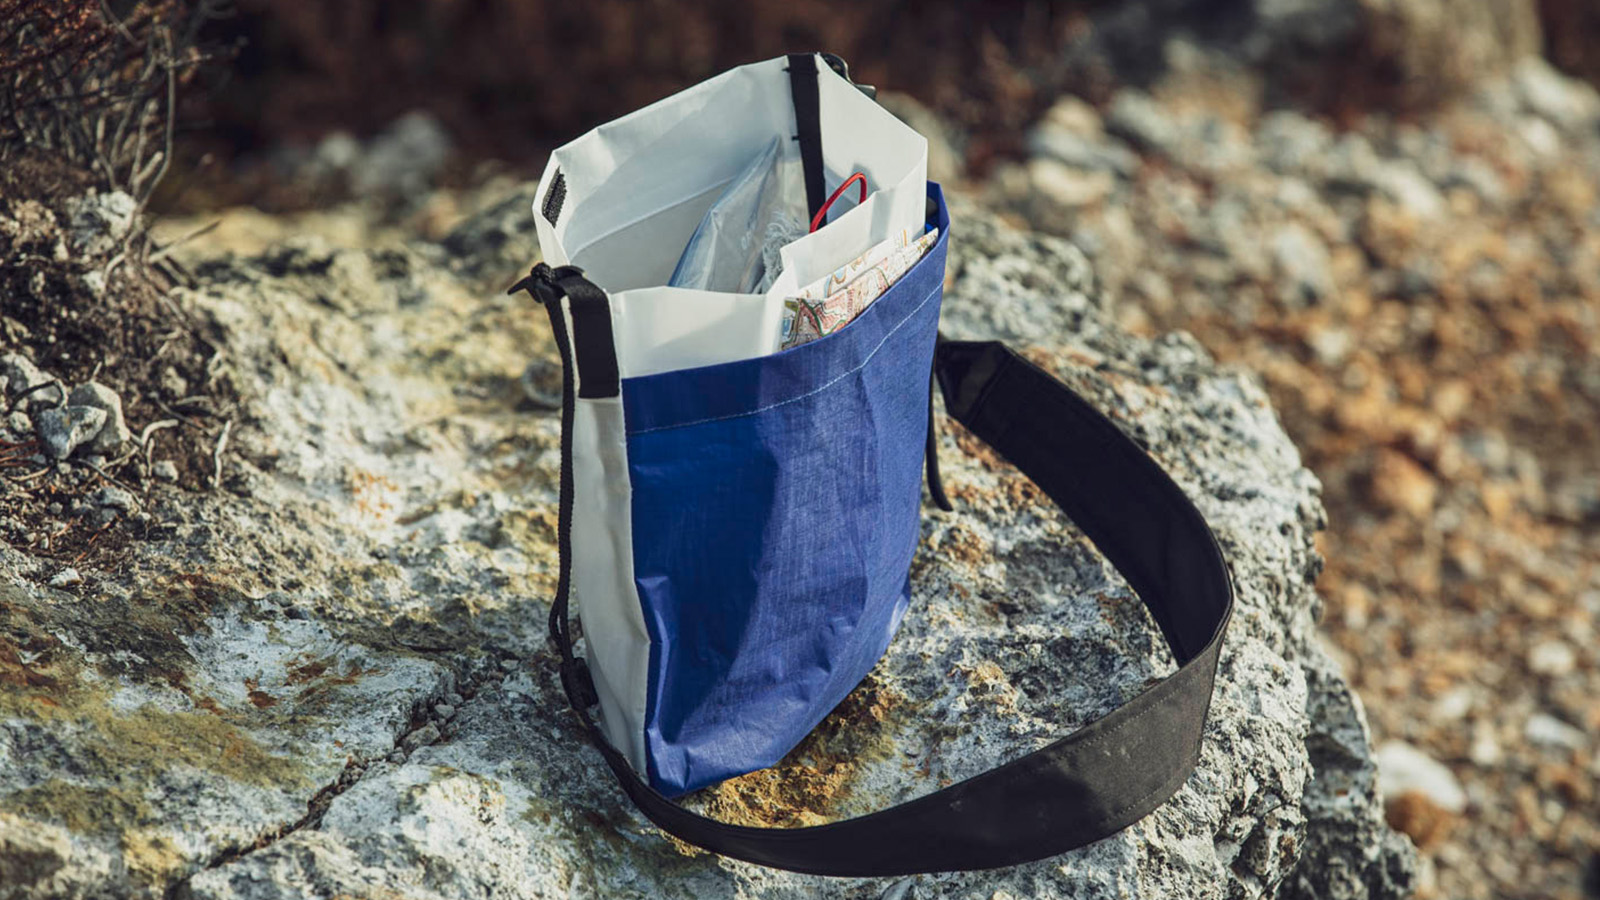
The bottom section of the product uses ECOPAK, a highly waterproof material.
How to attach the hip belt
- Make sure the hipbelt is facing the right way.
- Thread the hipbelt through the attachment point on the pack.
- Press the Velcro fasteners on the hipbelt and pack body together.
- Thread the hip stabilizer strap through the adjuster.
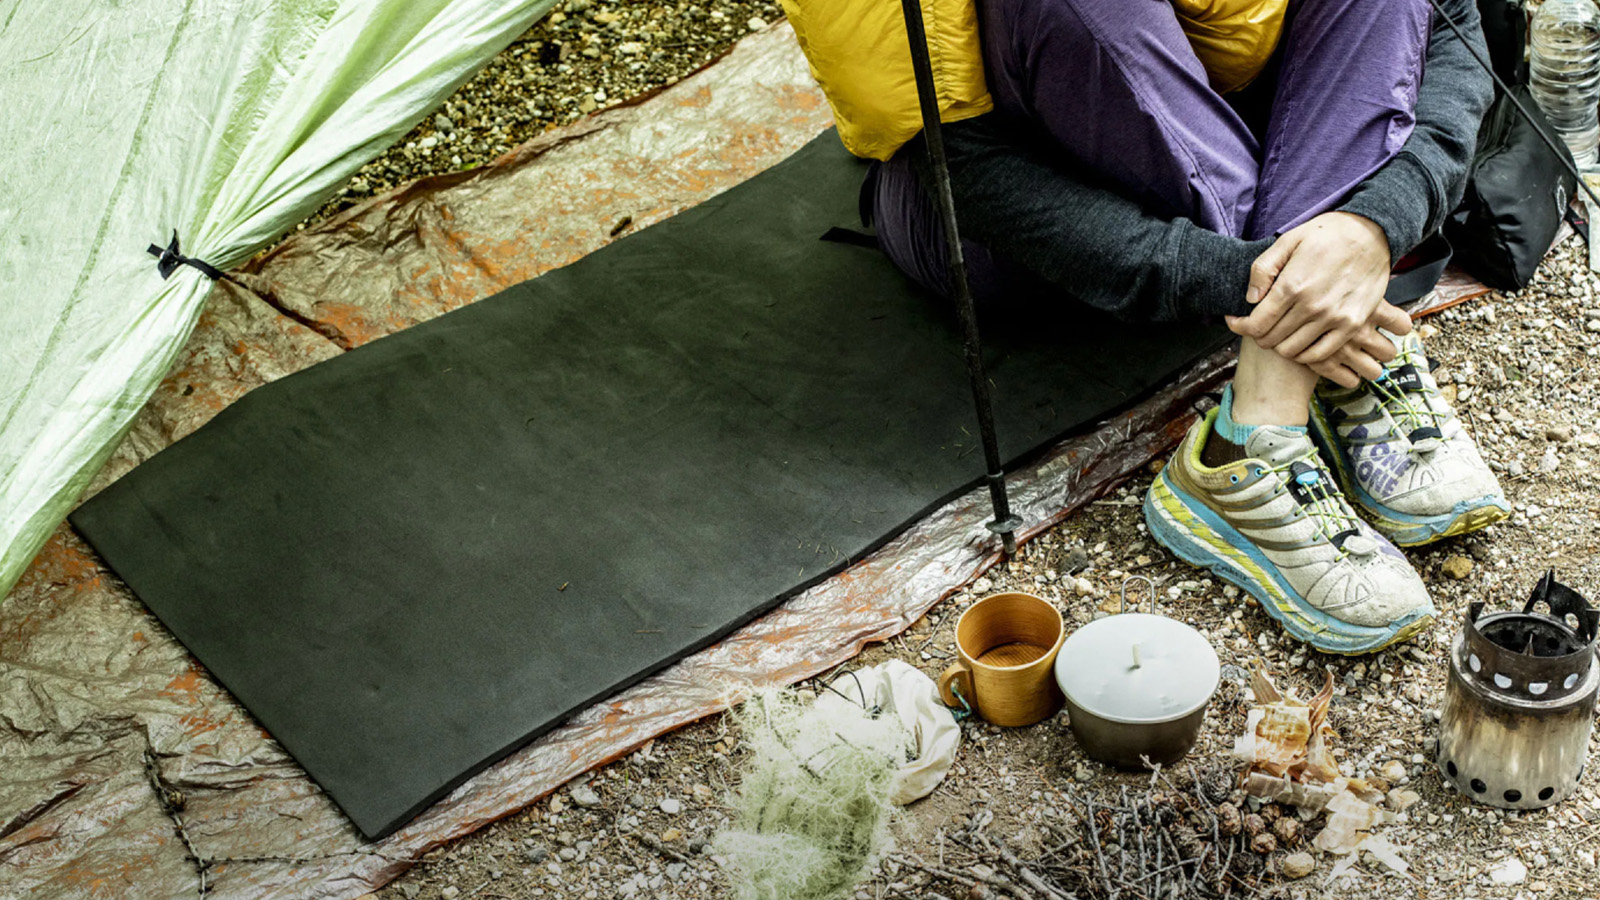
Packing tips
In the below section, we will show you a packing example in the no-snow season from one of our good friends.
The best way to pack the ONE depends on each hiker. It depends on when, where, why, and how long you hike. Below is just one example of how you could pack the ONE.
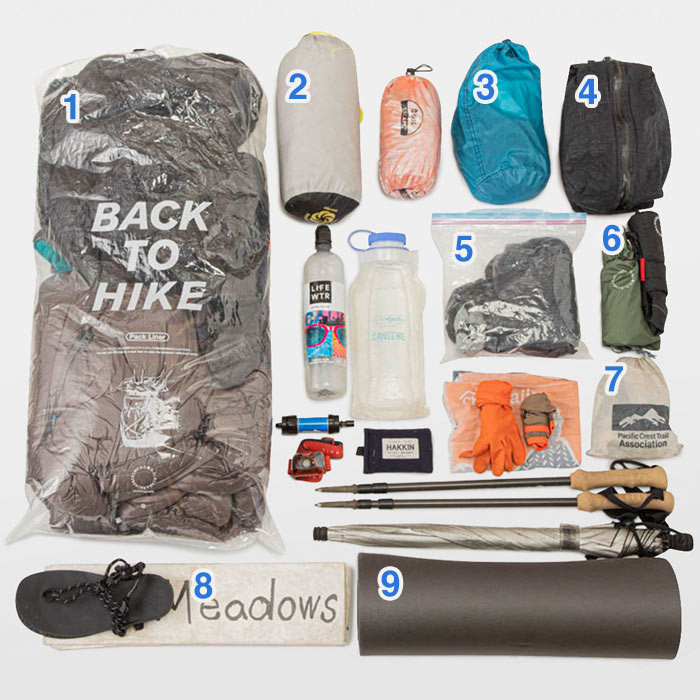
Step 1. Organize the items according to the purpose and use Ziplocs for items that must be kept dry as follows:
1. Sleeping bag, down jacket 2. Tent 3. Change of clothes 4. Cookers, cutleries 5. Items needed when you are on the move 6. Rain jackets 7. Emergency kit, toiletries 8. Ground sheet 9. Sleeping pad
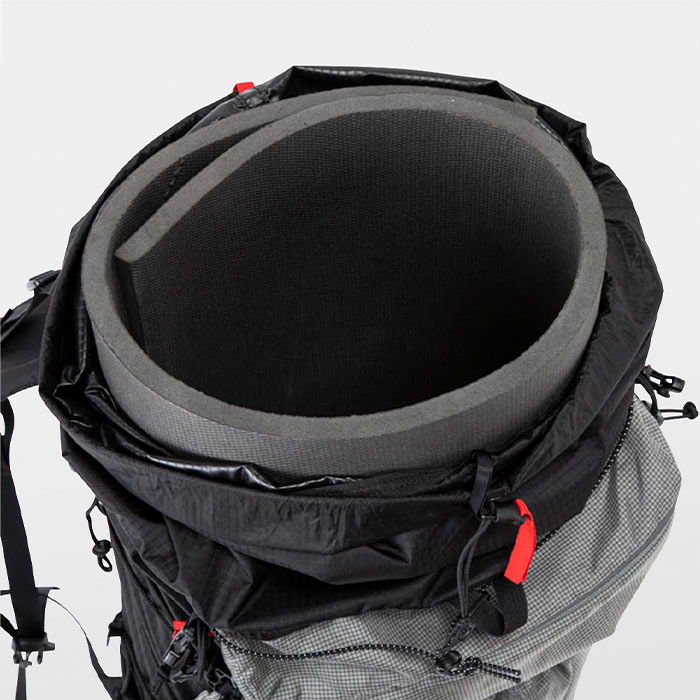
Step 2. Roll up the sleeping pad (the photo shows our UL Pad 15, size S) and place it inside the backpack. The ONE is a framed backpack, but the rolled pad inside stabilizes the whole structure even more, enhancing the comfort when you carry it.
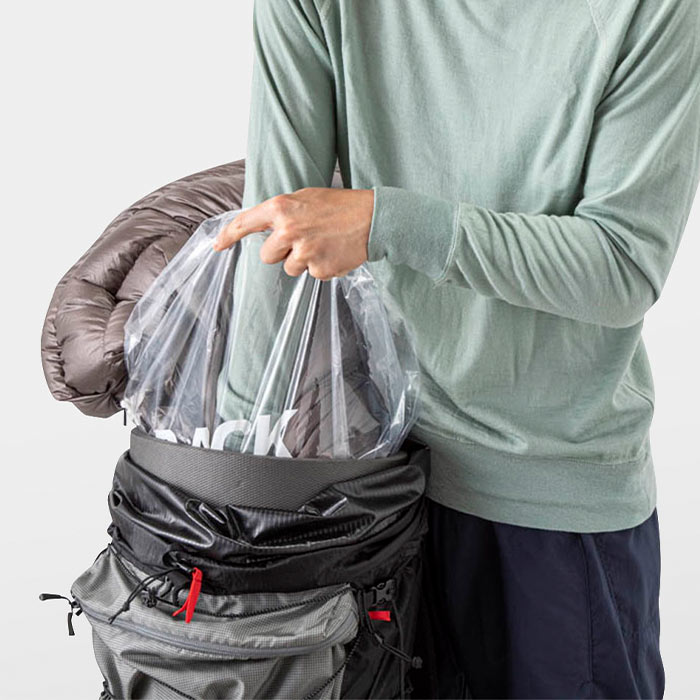
Step 3. Place the pack liner in the backpack and pack something that must not be wet. The sleeping bag should be packed directly in the pack liner*, without its stuff sack.
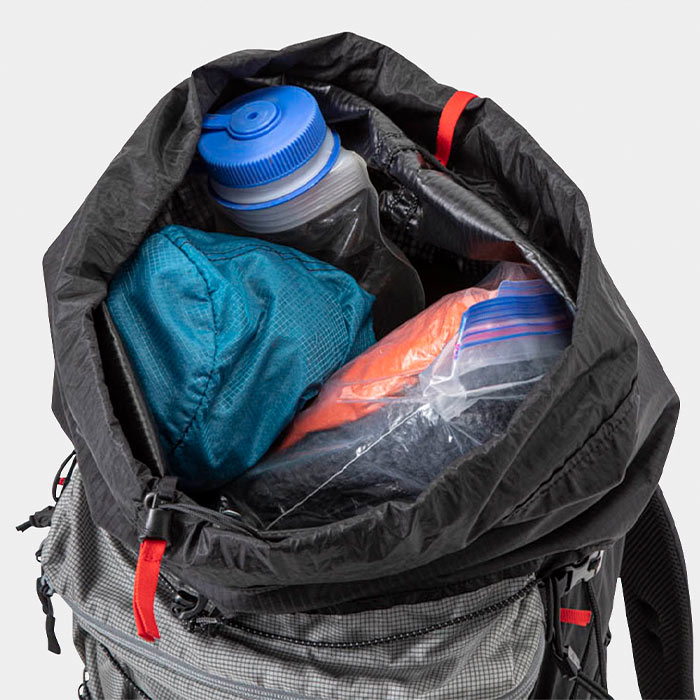
Step 4. Fold the opening of the pack liner several times and close it. Pack something you need when you are on the move on top of the closed pack liner. Place hard items away from your back for better comfort.
Step 5. Pack large items such as a tent in the front pocket.
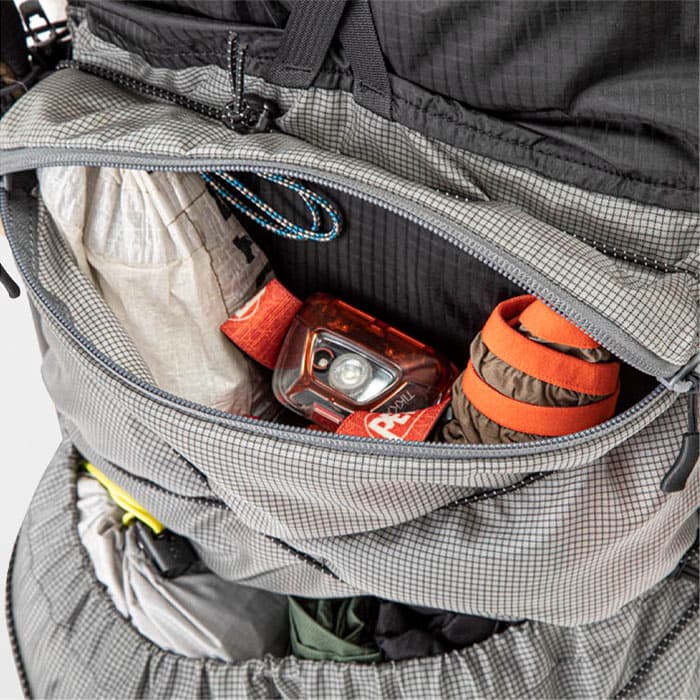
Step 6. In the front top pocket, pack items that must be within easy reach when you are hiking including the head light and emergency kit.
Step 1. Organize the items according to the purpose and use Ziplocs for items that must be kept dry as follows:
1. Sleeping bag, down jacket 2. Tent 3. Change of clothes 4. Cookers, cutleries 5. Items needed when you are on the move 6. Rain jackets 7. Emergency kit, toiletries 8. Ground sheet 9. Sleeping pad
Step 2. Roll up the sleeping pad (the photo shows our UL Pad 15, size S) and place it inside the backpack. The ONE is a framed backpack, but the rolled pad inside stabilizes the whole structure even more, enhancing the comfort when you carry it.
Step 3. Place the pack liner in the backpack and pack something that must not be wet. The sleeping bag should be packed directly in the pack liner*, without its stuff sack.
Step 4. Fold the opening of the pack liner several times and close it. Pack something you need when you are on the move on top of the closed pack liner. Place hard items away from your back for better comfort.
Step 5. Pack large items such as a tent in the front pocket.
Step 6. In the front top pocket, pack items that must be within easy reach when you are hiking including the head light and emergency kit.
*For the reasons below, it is recommended to pack a sleeping bag directly, without its stuff sack:
- By packing without the stuff sack, the fill power of the sleeping bag stays fresh.
- The softness of the sleeping bag enhances the comfort around the hip.
- The bottom part becomes softer and makes it easier to access the water bottle in the side pockets.
- The sleeping bag swells and fills the gap inside the pack, thus improving the stability.
- The light sleeping bag is allocated at the lower part, while the heavy items are at the upper part, providing a good load balance and comfort.
Material
Pertex®︎07RS-PC
The main body features a proprietary 70-denier fabric developed in collaboration with Yamatomichi and Pertex. Its optimal weave structure and soft, impact-dispersing design achieve both the lightness essential for an ultralight backpack and strength that surpasses standard nylon. Paired with a durable, hydrolysis-resistant polycarbonate coating, the fabric offers enhanced durability and long-term performance.
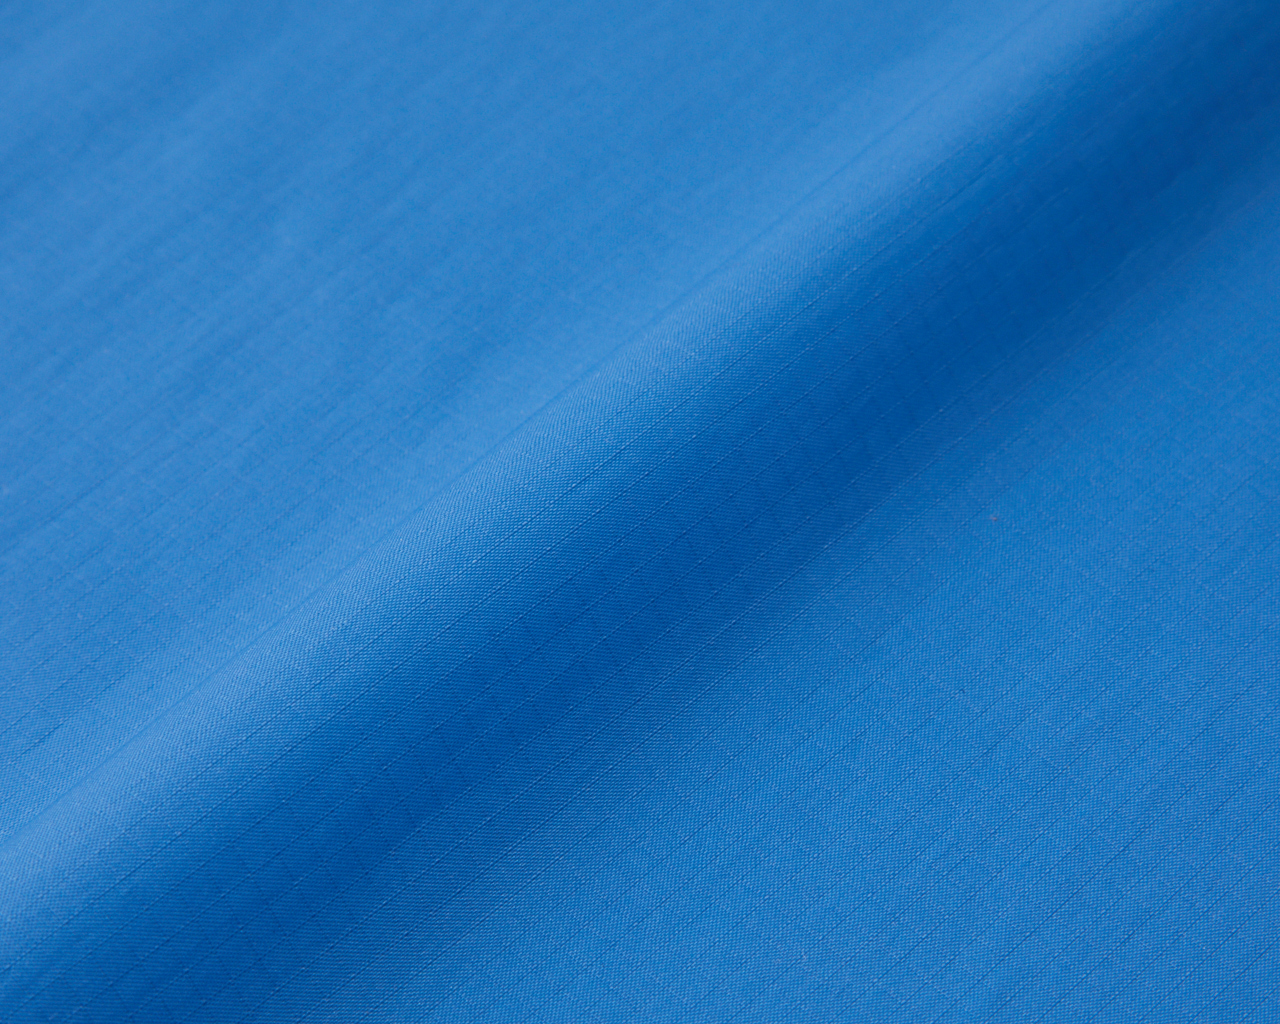
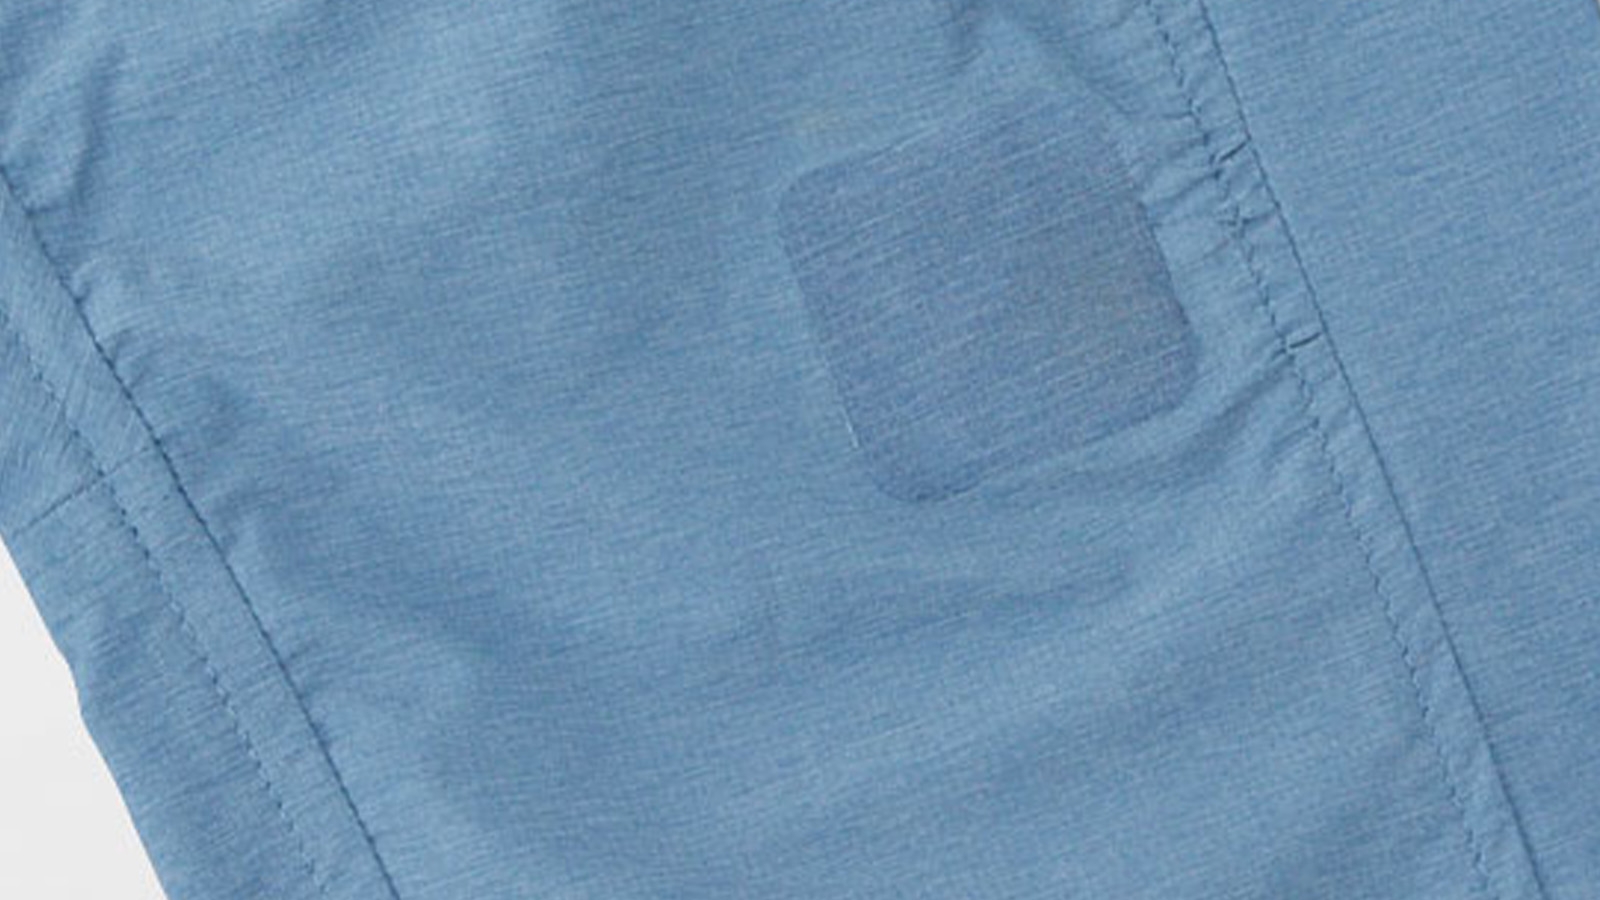
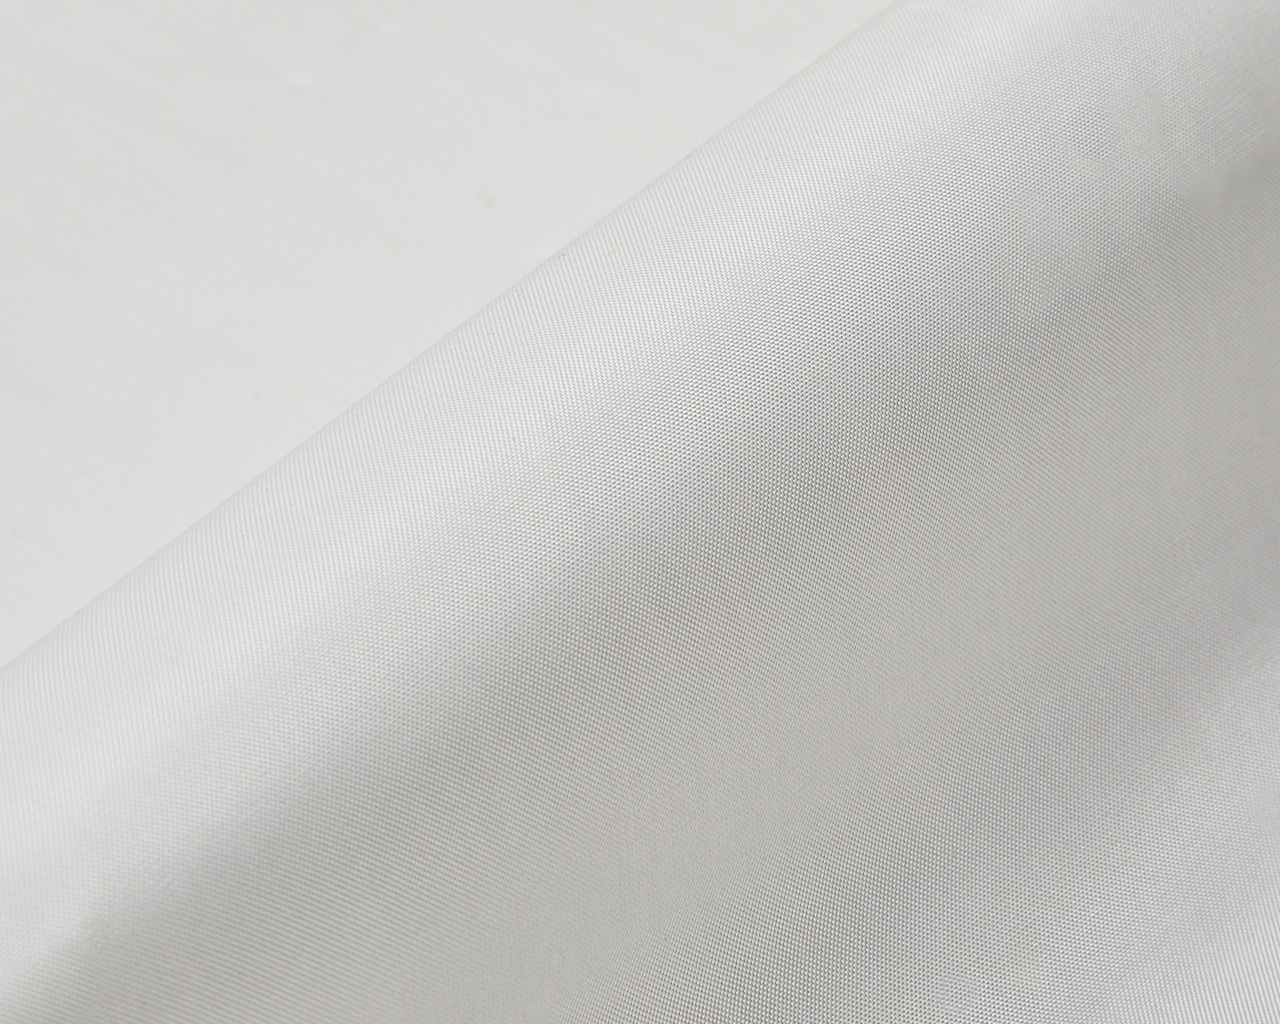
Pertex®21RS-PC
We use a custom 210-denier fabric co-developed by Yamatomichi and UK-based textile brand Pertex. The fabric’s special weave and soft, impact-dispersing design provide both the light weight you expect from an ultralight pack and strength that goes beyond standard nylon. It’s also coated with a hydrolysis-resistant polycarbonate for added durability.
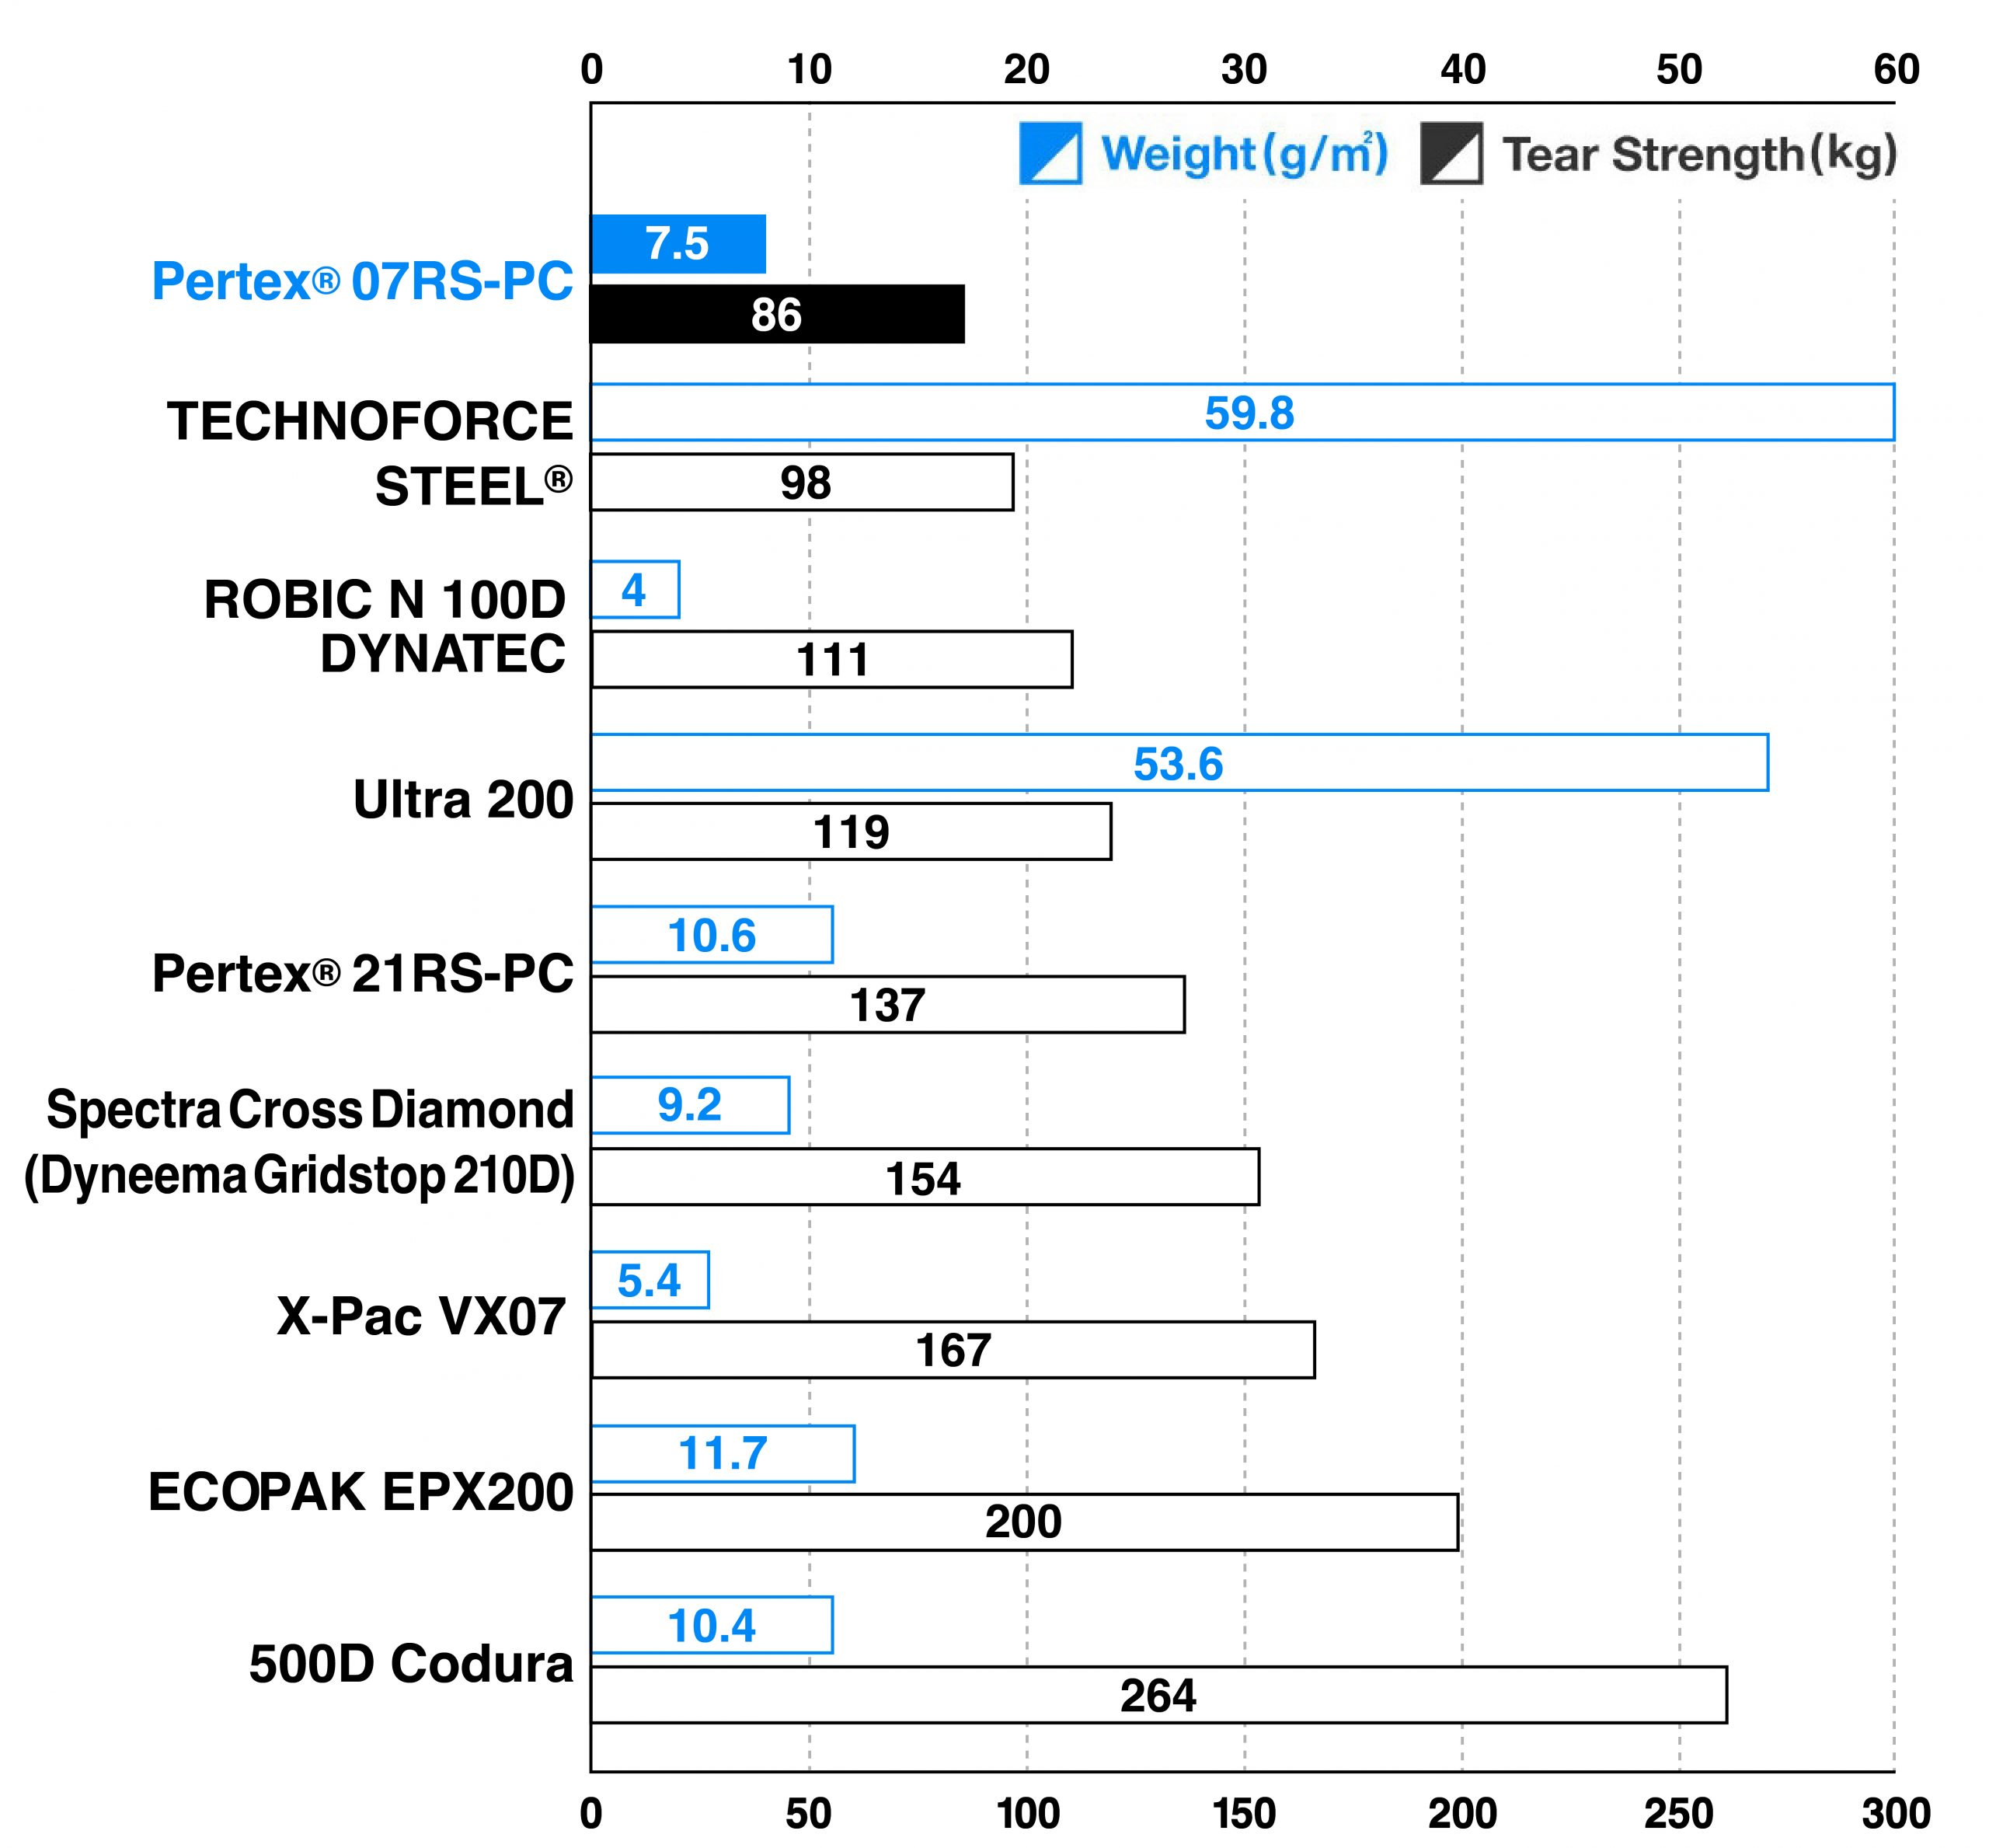
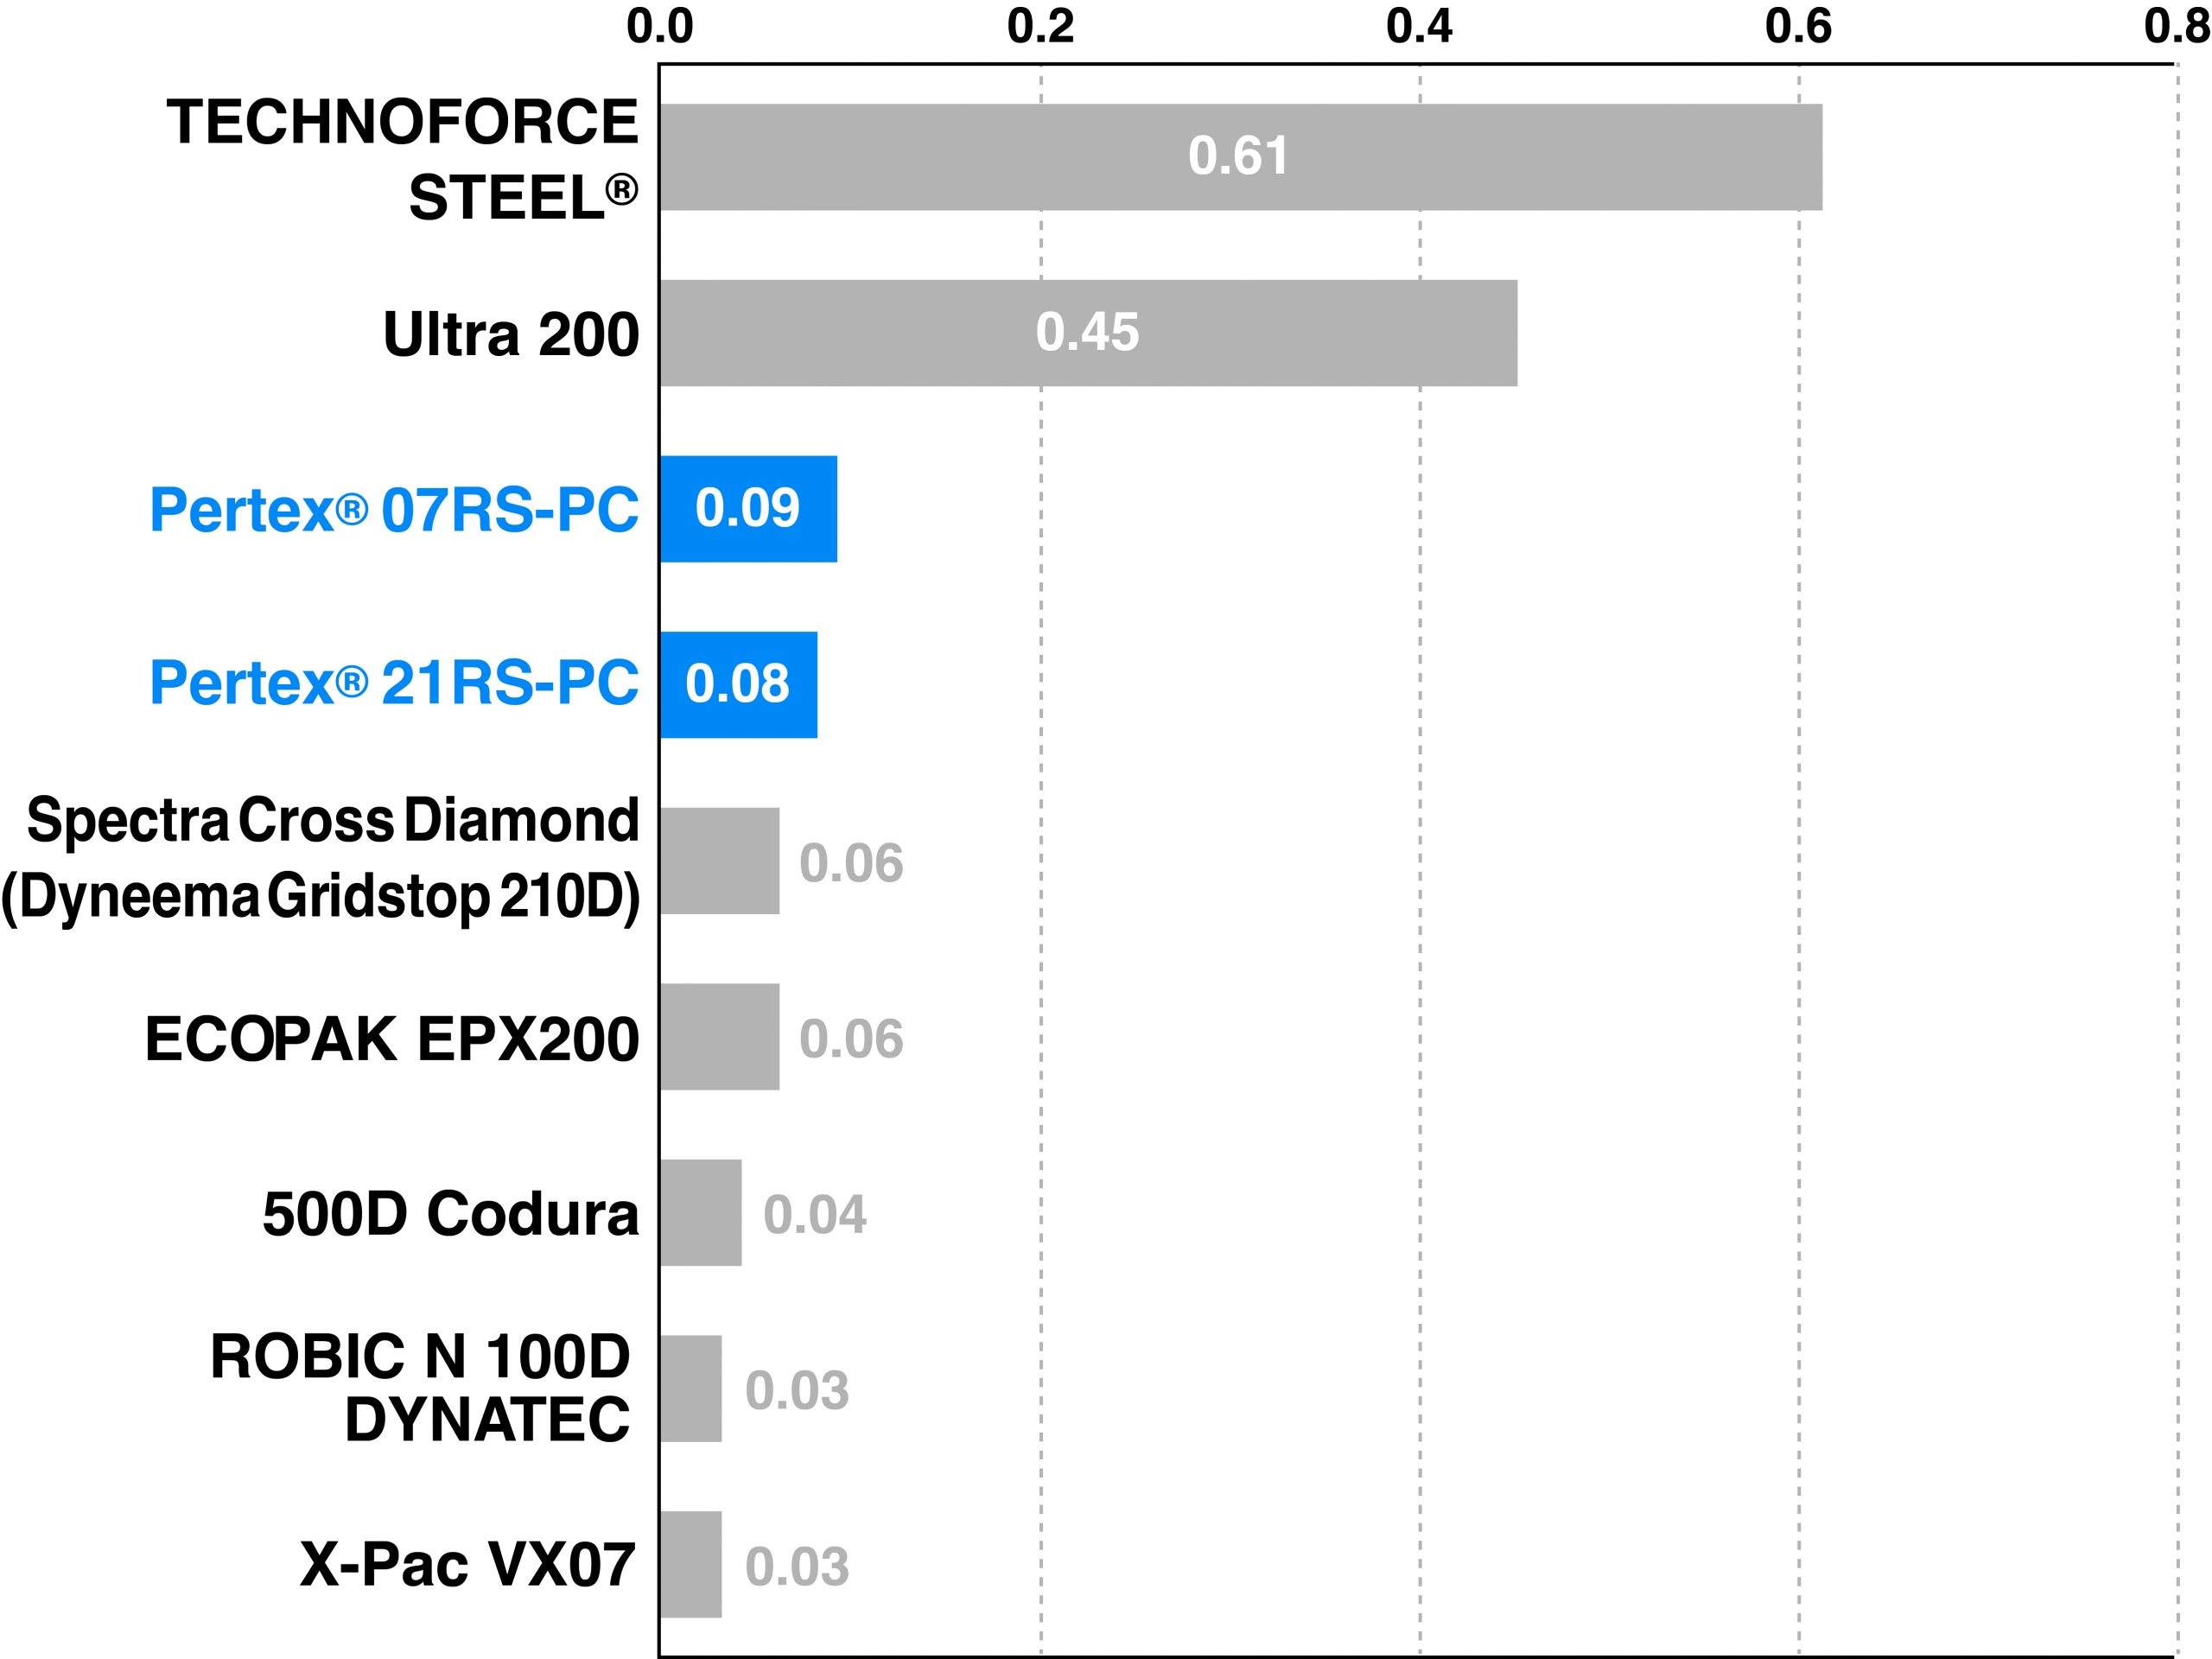
Backpack material comparison
As of 2025, we compared the weight and tear strength of the main fabrics used in our backpacks. Fabric weight refers to the weight per square meter, while tear strength indicates the amount of force required to tear the fabric.
Among these materials, Pertex07RS-PC and Pertex21RS-PC are not as strong as fabrics made from 100% UHMWPE (Ultra High Molecular Weight Polyethylene), such as TECHNO FORCE STEEL or Ultra 200. However, compared to other fabrics made from 100% nylon, they offer an excellent balance of lightness and strength.
Fabric strength relative to weight (kg per g/㎡)
To highlight the relationship between weight and durability, the materials are ordered by tear strength per gram of fabric.
Why Nylon 6—and Its unique performance
Pertex has worked primarily with nylon 6 since its founding, building a deep understanding of the material’s characteristics. While they do use nylon 66 when the application demands it, their fabric development is always based on selecting the right material for the intended function.
Nylon 66 is typically known for its high strength and abrasion resistance, but it tends to be stiff and more prone to sudden failure under stress. Nylon 6, by contrast, offers greater flexibility and can stretch slightly under load, allowing it to disperse impact more effectively. For this project, we chose to embrace the natural suppleness of nylon 6 and designed a fabric that is both lightweight and exceptionally strong.
A balanced weave structure for enchanced durability
To take full advantage of nylon 6’s flexibility, we carefully considered the fabric’s weave. While tighter weaves typically yield higher strength, they can also become overly rigid and more prone to tearing under localized stress. Instead, we adopted a slightly looser “open” weave structure that allows the fabric to better absorb and distribute force.
We also used the same denier of nylon 6 yarn for both the vertical and horizontal threads, giving the fabric consistent strength in both directions. This uniformity helps distribute pressure evenly across the surface and prevents stress from concentrating in a single area.
A coating designed to last
Most nylon backpack fabrics use polyurethane (PU) coatings to improve water resistance and durability. But PU is prone to breaking down over time, especially with exposure to moisture and sunlight, often resulting in peeling or stickiness.
To overcome this, we used a polycarbonate coating—a tougher, longer-lasting option also found in car interiors, architectural panels, and industrial protective gear. It’s far more resistant to UV and humidity, making it a great fit for long-term outdoor use. That said, polycarbonate is more difficult to work with and more expensive than PU, which is why it’s still rarely used in textiles.
Technoforce® Steel
The fabric made from 100% ultra-high molecular weight polyethylene (UHPE) is exceptionally lightweight yet strong; light enough to float on water yet theoretically capable of supporting around 20 tons with just a 10 mm diameter. This high-density woven fabric offers world-class tear resistance, tensile strength, and abrasion resistance. Its hydrolysis-resistant PC coating on the back further enhances long-term durability, with “jungle tests” showing no significant changes after 10 years. UHPE does not retain water, preventing the fabric from becoming heavier when wet.
58kg
ECOPAK EPX200
The ECOPAK EPX200 is a multi-layered material consisting of 200 denier polyester and diamond-patterned blue polyester cross ply, combined with 70 denier ripstop on the back. It is made from 100% recycled polyester, offering excellent strength and waterproofing properties.

Size guide
We offer five sizes of torso lengths and four sizes of hip belts. To define the size correctly, we recommend that you try on the product before purchase.
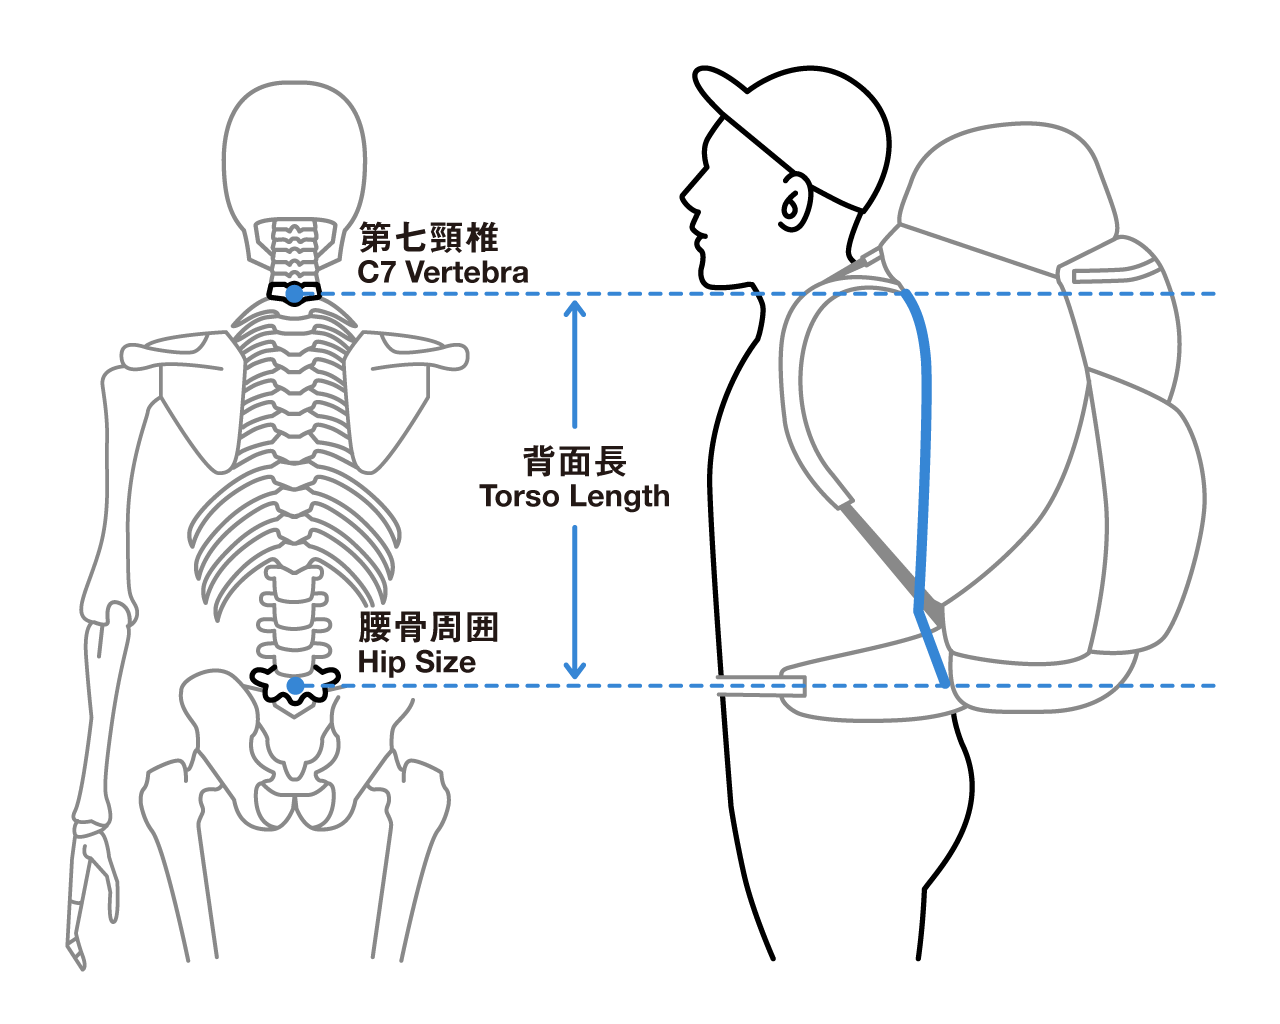
*The torso length refers to the length of the back bone, which we define as the length measured from the C7 vertebra to the hipbone.
| Torso length | ||||
|---|---|---|---|---|
| 45cm | 48cm | 51cm | 54cm | 57cm |
| Hip belt(cm) | |||
|---|---|---|---|
| XS | S | M | L |
| 72-79 | 78-85 | 84-92 | 91-100 |
*The hip belt size is not your waist size. To define the hip belt size correctly, make sure you wrap your tape measure around your hipbone.
If you can’t decide between two sizes of the hip belt, we usually recommend the smaller size so that you can tighten it firmly.
How to measure your torso
Decide your torso length based on the jutting, upper edge of the pelvic bone at each side of your hipbone.
- Find the most prominent part of your hip bone and align the top edge of your pants with it.
- Use your hand to locate the bony bump at the base of your neck (the seventh cervical vertebra, C7).
- Tilt your head slightly forward, then measure the distance from the C7 vertebra to the top edge of your pants using a tape measure.
- The length from the top edge of your pants to the C7 vertebra is your torso length.
Size chart
Unit:cm
| Torso Length | 45 | 48 | 51 | 54 | 57 |
|---|---|---|---|---|---|
| Height | 150-160 | 158-170 | 168-175 | 173-180 | 178-190 |
*The above should only be used as a rough guide. Please note that torso length may vary depending on your body shape. Wrap your tape measure around your hipbone. Your hip belt size cannot be determined by your weight and height.
Notes before use
Fabric water resistance
While the fabric used is highly water-resistant, the backpack is not waterproof. We recommend using a waterproof pack liner or a rain cover.
DEET
Insect repellents containing DEET can degrade the coating of the fabric components, so please do not let them come into contact with this product.
Instructions
Carbon rod warranty
If the X-shaped carbon rod frame located in the back panel is damaged, we offer a free replacement within one year of purchase.
Please contact us through our support form and include your order number.
Care instructions
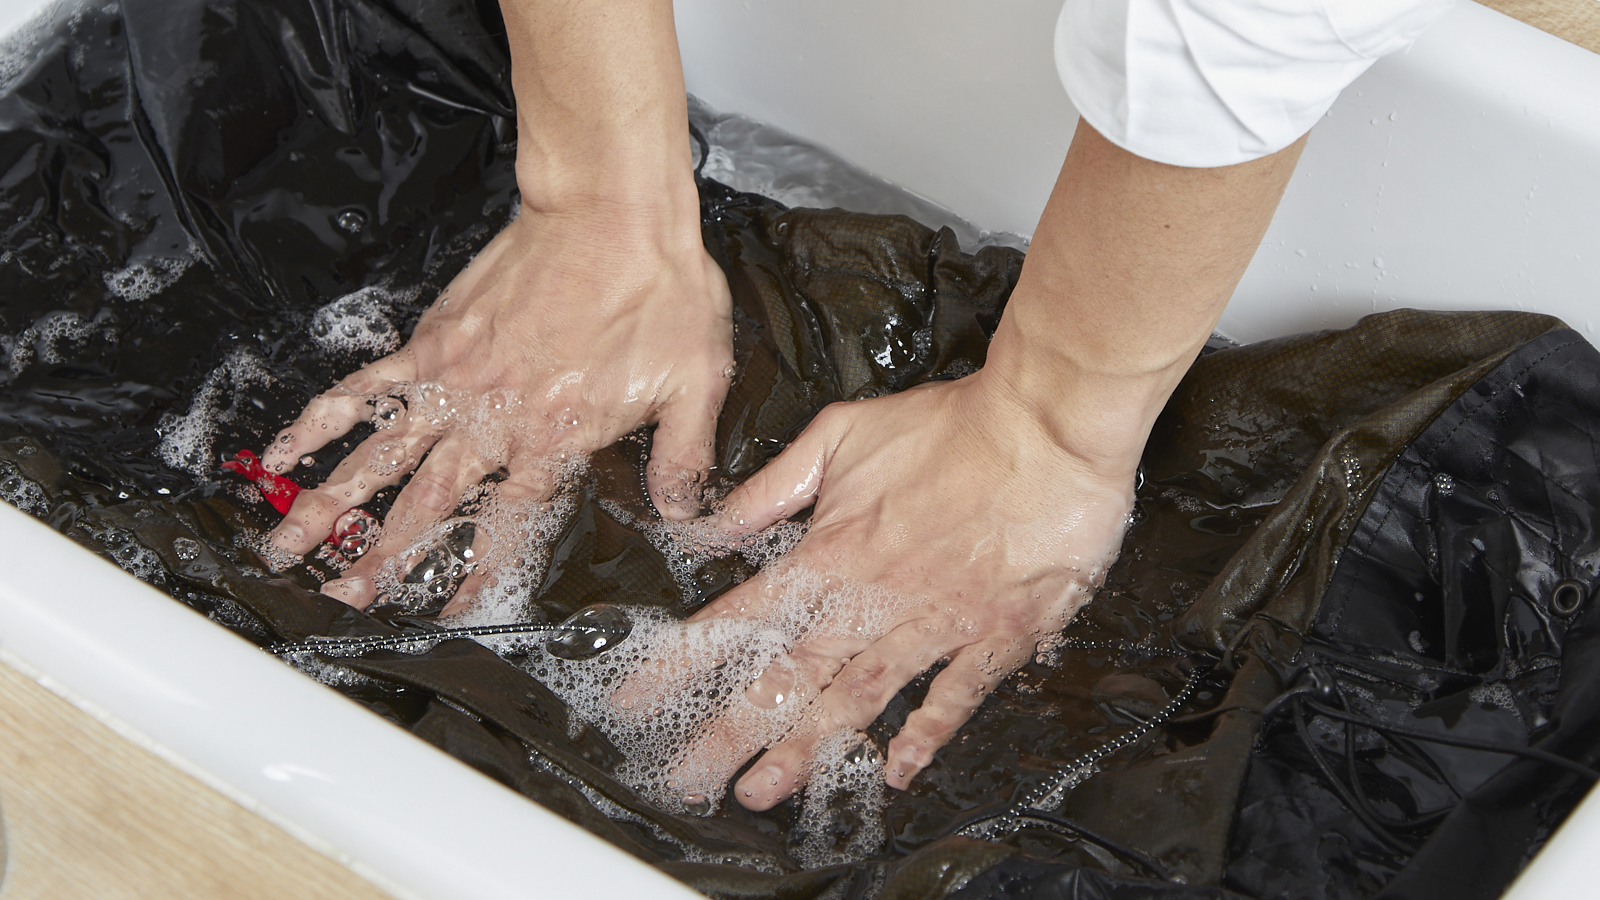
- Hand-wash only. Do not machine wash.
- Submerge the product in lukewarm water with a correct amount of neutral detergent, and hand-wash it.
- Do not bleach. Do not use fabric softener.
- Remove any optional parts such as pads before washing.
- Wash off any noticeable stains or smudges with a washing brush or soft sponge.
- Rinse well so that no detergent remains.
- Drain the backpack with the mouth down. Keep dry in a shade.
- Store in a dark, well-ventilated place.
- Do not iron.
- Hand-wash the pad gently, rinse well and keep dry in a shade.
Care instructions page
For detailed tips on how to wash, store, and take care of your gear, visit our Care Instructions page.
How to wash our backpacks
Care instructions for Technoforce® Steel
Technoforce® Steel with hydrophobic properties is naturally a stain-resistant fabric, but due to its white color, dirt becomes noticeable. Here are care methods for three common types of stains.
The longer a stain remains, the harder it is to remove. Clean as soon as possible to keep clean.
Dirt stains
- Spot Cleaning
Gently scrub the stain using laundry detergent and a laundry brush or toothbrush.
*Note: Small particles of sand that have entered the gaps in the fabric may remain.* - Rinsing
Rinse the cleaned area with lukewarm water. Make sure to rinse thoroughly with running water to remove all detergent. - Drying
Hang to dry completely in a well-ventilated, shaded area.
Food stains
- Spot cleaning
Use dishwashing detergent that is effective against grease stains, and gently scrub the stain with a laundry brush or toothbrush. For stubborn grease stains that cannot be removed with dishwashing detergent, apply make-up remover to get the grease to lift, then gently scrub using laundry detergent.
*Note: Stubborn grease stains with strong pigments, such as curry, may leave a slight residue.* - Rinsing
Rinse the cleaned area with lukewarm water. Make sure to rinse thoroughly with running water to remove all detergent. - Drying
Hang to dry completely in a well-ventilated, shaded area.
Oil stains (eg: bicycle chain oil)
- Spot cleaning
Apply make-up remover to lift the grease and dirt, then scrub gently with a laundry brush or toothbrush using laundry detergent.
*Note: Small particles of sand that have entered the gaps in the fabric may remain.* - Rinsing
Rinse the spot-cleaned area with lukewarm water. Make sure to rinse thoroughly with running water to remove all detergent. - Drying
Hang to dry completely in a well-ventilated, shaded area.
Payment
- We only accept payment by credit card. We currently do not accept payment via bank transfer from overseas accounts.
- We accept the following Credit Cards: Visa, Master, American Express, and JCB.
- To download your receipt, please click the link included in the Dispatch Notice, which we will send by email as soon as the items are dispatched.
- Bank transfer is only availble for those that own a Japanese bank account.
Delivery
- Order Confirmation will be sent after the order.
- The items will be dispatched within 3 days after the payment is confirmed.
- The dispatch notice will be sent by email as soon as the items are dispatched.
- The delivery may be delayed by unforeseeable reasons such as natural disasters and other logistics issues. We appreciate your patience and understanding.
- We cannot ship multiple orders in one package due to how our delivery system is currently set up.
- We will ship to regions in North America, Oceania, and Europe (excluding Russia) via DHL. For regions in Asia, the Middle East, Central and South America, Africa, and Russia, we use EMS (International Express Mail Service) for shipping.
- Shipping fees and delivery times vary depending on the shipping destination as well as the size and weight of the items.
Size exchange
- Overseas customers who need to change the size of their order, should note that the time needed for shipping will vary greatly depending on your country of residence.
- We only accept exchanges when the item is unused (except for fitting).
- If you wish to exchange the size of the item, please contact us within seven days of receiving your order.
- Exchanges can only be made for the same color in a different size.
- If the size you wish is out of stock, we will suggest a different color.
- If the product is out of stock, we may simply have to ship the item back to you.
- All shipping costs to be carried by the customer.
- We will only send the exchanged item to you, upon receipt of return shipping cost via PayPal.
- Please be aware that some countries charge customs duties depending on the price of the item.
- We are unable to answer any questions on local customs. Please contact your local customs bureau.
Repair
We accept repairs for all of our Yamatomichi products. For inquiries on repair services including patching the holes, repairing with extra components, or fixing the items damaged over time, please feel free to contact us from the “Repair” section of the SUPPORT page.
Repair Tape
- For temporary repair, please keep the repair tape in your emergency kit.
- The repair tape should be patched up on both the front and back sides of the fabric. The tape must be larger than the damaged or torn part of the fabric.
- If you round the edges of the patch, it will last longer.
Repair diary
We’ve featured a repair example of the ONE backpack in our Repair Team Report.
For details, please see: Repair Diary #3 Overhalling the ONE backpack.
Replacement parts
No worries if you lose or damage any included belts or straps—we also offer replacement parts for sale.
 Hip Belt for ONETW$ NaN116gRESTOCK ALERT
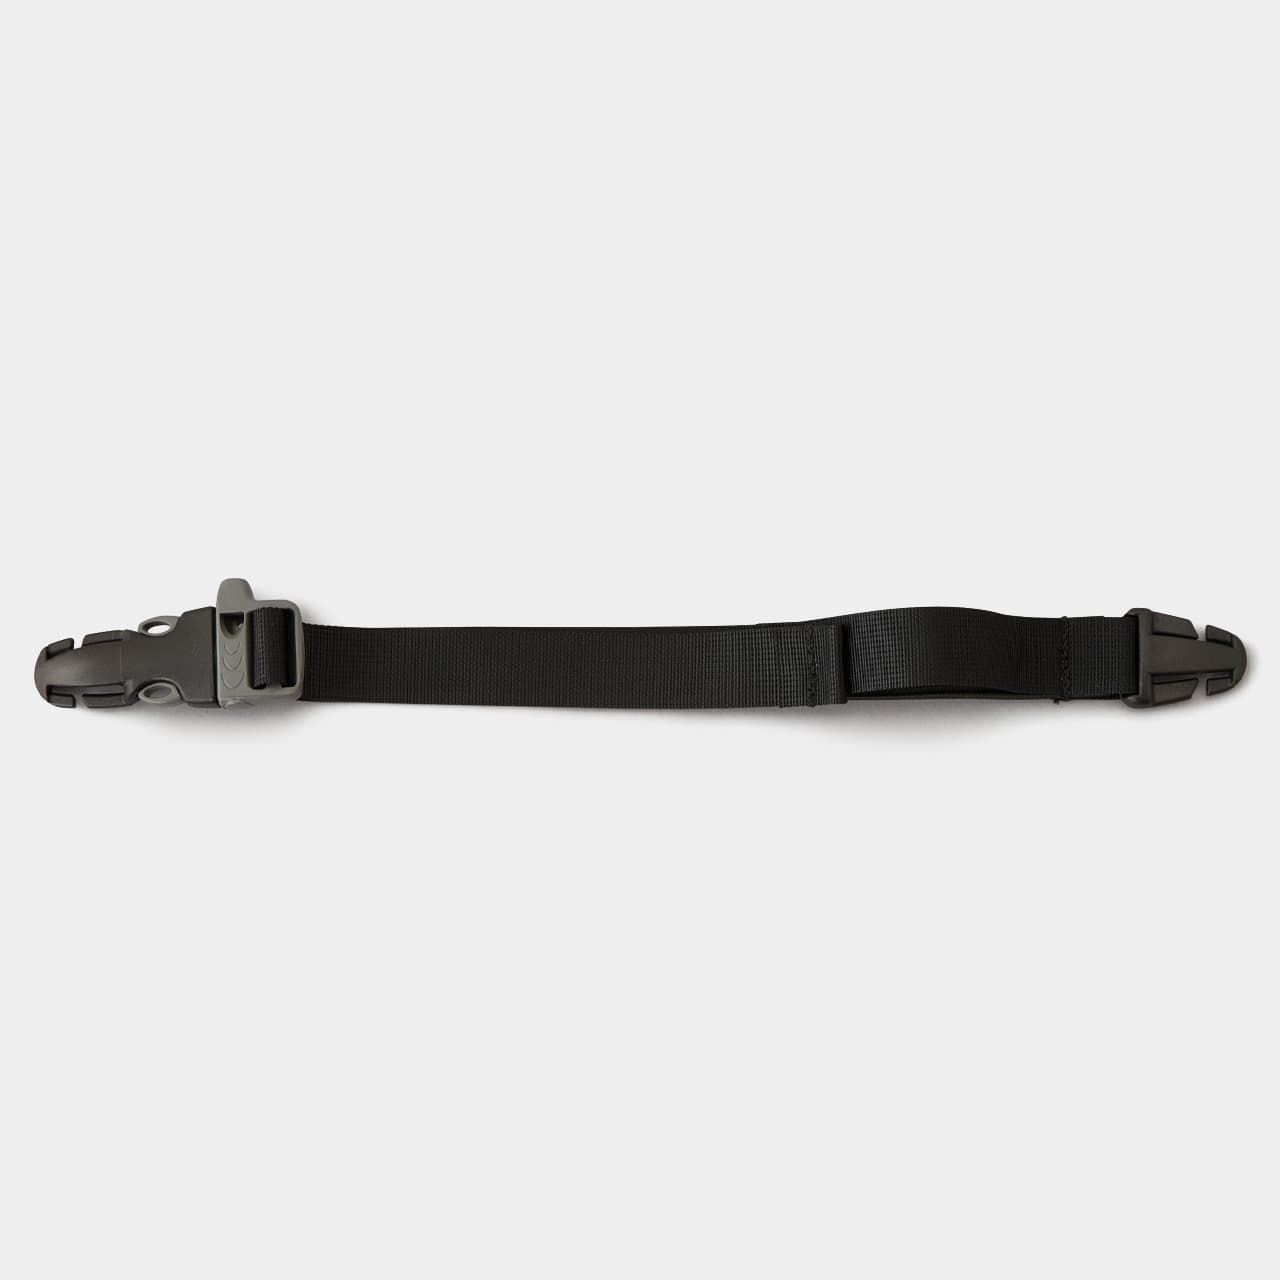 Sternum StrapTW$ NaN21gRESTOCK ALERT
 Carbon Rod for ONETW$ NaN8gRESTOCK ALERT